• Hey there Guest!
    If you enjoy BCF and find our forum a useful resource, if you appreciate not having ads pop up all over the place and you want to ensure we can stay online - Please consider supporting with an "optional" low-cost annual subscription.
    **Upgrade Now**
    (PS: Subscribers don't see this UGLY banner)
Tips
Tips

Correct wheels, studs and lug nuts?

F1LOCO

Senior Member
Offline
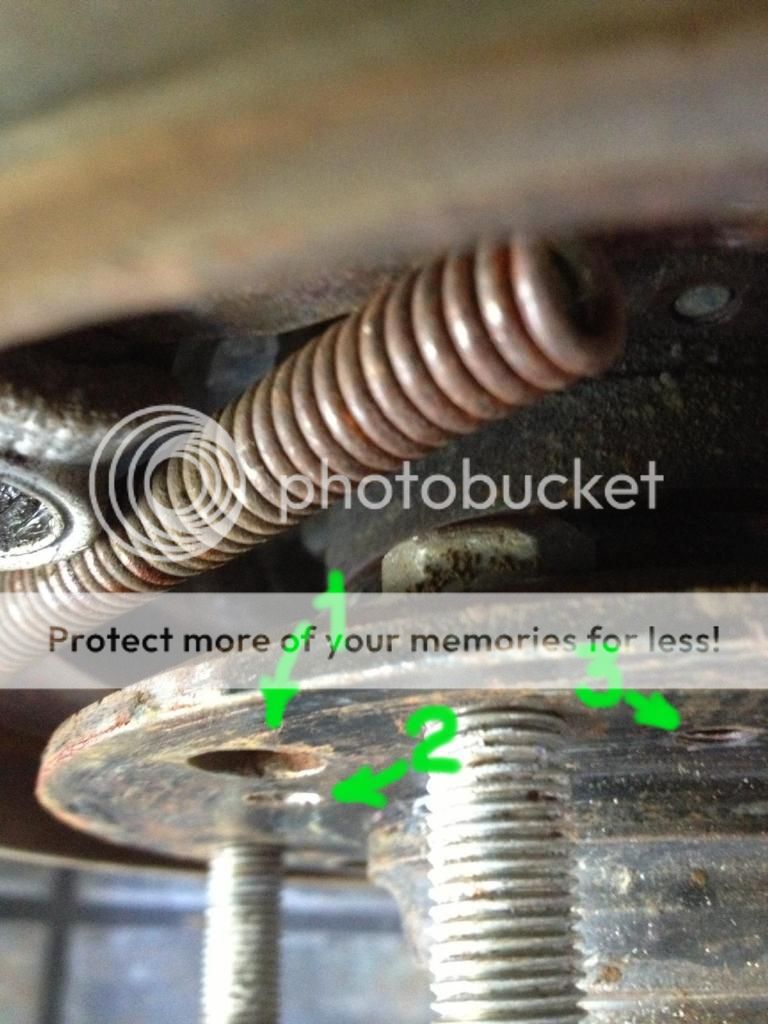
So I finally had a chance to get under the car to grease up the front end and hopefully solve some of the noise. When I removed the wheels, I discovered the lug bolts had been replaced with non-OE correct ones, literally with the hexagon heads JBWELDED into place, and the nuts had additional concentric spacers to presumably fill the void from incorrect nuts and lugs. Oh yea, and there is a spacer behind the wheel rim? Is this normal, as the car was supposed to have "period restored minilites." What size lug bolts do I need and what size lug nuts should I be using to keep them firmly to the hub. Don't want to drive it much until I get this nightmare sorted.

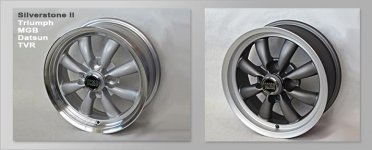
I also tried to ID the wheels but couldn't find any cast stampings in them at all? Does this sound correct for '60 Minilites?

Wheel_zpseaeeb2fe.jpg
 

TR3driver

Great Pumpkin - R.I.P
Offline
Nope, none of that sounds 'right'. The original Minilites mounted directly onto the stock 7/16-20 studs, with special lug nuts that came with the wheels.

I don't know that they would have what you need, but I was able to find lug nuts for me old AR alloy wheels at Summit: https://goo.gl/yVk1g
 
OP
F

F1LOCO

Senior Member
Offline
Thanks. I think they were rigged for the car which isn't real reassuring. Thinking about just buying the correct studs, wire wheel adapters and going from there.
 

70herald

Luke Skywalker
Country flag
Online
It would be helpful if you posted a picture of the lug bolts which were JB welded in place. but it sounds like normal bolts were glued in instead of the proper pull in bolts?

There seems to be two issues which need to be checked.
1. is there damage to the hubs as a result of this bodge? you will have to take the glued in bolts to find out.
2. Why were the spacers needed? Is it trying to center the wheel or are the needed to correct the wheel offset (it looks like those minilites might hit the brakes without the spacers???

I would guess that previous owner may have gotten those wheels and then discovered that they interfere somewhere, so they added spacers, but then the normal lugs weren't long enough so they incompetently used longer bolts from the hardware store.

If this is the reason for the spacers then what you need is to get proper studs of the correct length and you are ready to go.

Just one more thought, CHECK THE HUBS to make sure that whoever did this didn't damage them.

Finally DO NOT DRIVE THE CAR WITH UNACCEPTABLE STUDS! THIS IS EXTREMELY DANGEROUS!
 
Offline
Those wheels are American Racing Silverstones, GC360 actually makes a new modern version of this wheel, the Silverstone II, I'm a dealer for the new Silverstone IIs.
 

Attachments

  • 29902.jpg
    29902.jpg
    30.1 KB · Views: 214
OP
F

F1LOCO

Senior Member
Offline
Nice. Finally an ID.

I did find a stamp in the rear wheel in the back INAS, 15x6, 1x2

So, what the heck do I need stud wise, nut wise to make these fit or are they incorrect for my TR4? Are these vintage or newbies?
 
OP
F

F1LOCO

Senior Member
Offline
UPDATE - took the rear offs and found a stamp in the rear rim INAS 15x6 1x2...

Here is what I found hub/bolt wise in the rear:

Rear1_zpscb06c08b.jpg


rear2_zps95bde2fb.jpg


Is this correct for the rear, or shortcuts once again??

At least we may have found out the correct rims - Now to figure out what bolts/nuts to get...and of course hope no damage to the hubs...
 
OP
F

F1LOCO

Senior Member
Offline
OK, from what I've found, I need 16 correct original studs, and now need to figure out correct nut/washer sizing for these babies and I can move onto the bigger things, like the front suspension...any guidance much appreciated.
 

Geo Hahn

Yoda
Country flag
Offline
Interesting -- looks like a bolt threaded through from behind on that rear hub -- the originals thread in from the outside and are swaged/peened on the backside to secure them.

Those bolts look longer than the original studs so you will need to work out just what length studs you need there for the wheels, spacers (if any) and clearance.
 
OP
F

F1LOCO

Senior Member
Offline
No spacers on the rear, only on the fronts...

Didn't know if I can get away with stock bolts on front with the 1/4" spacer? Looks like a tight fit on the upper ball joint, so probably the reason for the 1/4" up front.
 
OP
F

F1LOCO

Senior Member
Offline
Hap - just for giggles, what would new rims run with proper offsets that would work with stock OEM bolts/studs? From looking at another '64 I found on the net, and gauging by the width of the lip, I'd say mine are not made for the TR4 and the reason for the 1/4" spacer up front?
 

BobbyD

Jedi Knight
Offline
F1LOCO said:
No spacers on the rear, only on the fronts...

Didn't know if I can get away with stock bolts on front with the 1/4" spacer? Looks like a tight fit on the upper ball joint, so probably the reason for the 1/4" up front.

I had to use spacers on the front with my Moss "Mini-Lites" as the upper control arm would hit the rim lip at full lock under certain conditions. But not needed with my new VTO LeMans wheels. If you end up needing a spacer on the front, there are minimal acceptable stud threads that need to be engaged. I had no problem meeting that spec with the stock TR6 front studs. A quick Google found this:

C<span style="font-style: italic">heck the lug nut thread engagement. Every stud must be long enough to thread into the lug nut a legnth at least equal to the stud diameter. For example, a 1/2" thread diameter must thread into the lug nut at least 1/2". </span>
 

TR4nut

Yoda
Country flag
Offline
Front studs on the 6 and the 4 are the same. Rears are very different though - the 4 studs thread in.
 

JerryVV

Jedi Warrior
Country flag
Offline
Man, you have a mess on your hands, those rear studs, bolts whatever they are may not even be the correct material for wheel studs. They look like hardware store bolts and who ever did that may have ruined the flanges such that you can't install the correct parts.

My experience with the old mini-lites was that they required a special wheel nut that centered in a hole in the wheel. They did not have a taper like the newer wheel nut have now or like standard solid wheels require.

If I were you I'd get some good used front hubs and some good used rear axles and start over with known good OE parts. Sorry for the bad news but glad you caught it before you had a real failure and got hurt or hurt someone else.
 

Geo Hahn

Yoda
Country flag
Offline
F1LOCO said:
The rears look like the pic above then? They may actually be correct?

Alas, no. Whatever they are, they are not correct.

The correct rear studs have shoulders and are peened on the backside.

As for the photos you post -- there seem to be some extra holes. Could #1 be a hole for the original stud (are there 3 more like it?). Could #2 & 3 be the original screw-hole and its replacement (are there 2 more like them?).

Rear1_zpscb06c08b.jpg


If so that might be good since if the PO drilled and tapped new holes for his 'fix' you may still have the original holes to work with.
 
OP
F

F1LOCO

Senior Member
Offline
HOLD THE PRESS...someone knowledgeable said I don't have American Racing Silverstone's. Apparently the finish is too smooth and the holes are beveled, and not flat. Back to the salt mines....
 
OP
F

F1LOCO

Senior Member
Offline
3 you see is actually the small screw locking the drum in place. But yes, there are 4 other holes offset from the existing screws.

I think I read, though, to replace the studs is PITA on the rear? It only gets better.

Thought about converting back to OEM wire wheels, but I hear that is not fail safe either.

Geo Hahn said:
F1LOCO said:
The rears look like the pic above then? They may actually be correct?

Alas, no. Whatever they are, they are not correct.

The correct rear studs have shoulders and are peened on the backside.

As for the photos you post -- there seem to be some extra holes. Could #1 be a hole for the original stud (are there 3 more like it?). Could #2 & 3 be the original screw-hole and its replacement (are there 2 more like them?).

Rear1_zpscb06c08b.jpg


If so that might be good since if the PO drilled and tapped new holes for his 'fix' you may still have the original holes to work with.
 
Similar threads
Thread starter Title Forum Replies Date
V MGB Stock Alloy Wheels from Other Cars That Fit 4 114.3 and 14" with correct offset? MG 10
Brian_James Correct color for Bugeye disk wheels?? Spridgets 7
angelfj1 AR Wheels - finally the correct "patina" Triumph 10
Jim_Gruber Correct Transmission Oil for Datsun 210 5-speed Spridgets 1
Y TR2/3/3A I cannot get my TR3 in correct timing. Triumph 7
G D would anybody be able to tell the correct way to static time a essex v6 I have tried and failed cheers garth TVR 14
W Correct Tie Rod Ends Spridgets 0
Healey Nut Cross Rod Correct Length Austin Healey 14
S TR2/3/3A problems getting the engine to run correct Triumph 21
B Which is the correct door knob for a 59 bugeye? Spridgets 3
S TR2/3/3A Correct Starter Triumph 4
steveg TR6 Spec needed for correct ride height Triumph 28
P TR6 TR6 fuel pump question - glass bowl pump correct? Triumph 8
Paulus TR6 Bumper Bars - what is the correct terminology Triumph 3
red57 What is correct wire harness outer wrap Austin Healey 17
dklawson GT6 GT6 Mk1 Oil Filter - Correct Part Numbers Triumph 2
S TR2/3/3A correct spire nut Triumph 4
J TR2/3/3A TR3A Throttle shaft bushing retainer plates, Correct color? Triumph 2
K Correct side screen nut for early 58 BN4 Austin Healey 14
drooartz The correct tool does make it easier [fill steering rack] Spridgets 4
I Correct orientation of the fan blades. Austin Healey 13
G Wanted Triumph TR4 [63] Period correct radio Triumph Classifieds 2
K Correct key head shape. Austin Healey 1
Gliderman8 TR6 Correct LED flasher relay Triumph 6
K TR2/3/3A Correct oil level for differential? Triumph 5
Jim_Gruber What is the correct Radiator Cap for a 948 with a Downflow Radiator Spridgets 4
BN6_2197 Correct run of the Choke Cable of BN6 Austin Healey 7
jfarris TR2/3/3A Which speedo is correct for a 1956 TR3? Triumph 8
L GT6 correct finish Triumph 5
Jim_Gruber What is the correct tool for removing brake lines from a BE Master Cylinder Spridgets 10
B MGA Correct wheel paint? MG 2
Gerald_Gordon TR4/4A Inconspicuous or period-correct backup light for TR4 Triumph 8
simon1966 Correct Jack for a 54 100? Austin Healey 5
C Need to order correct size Austin Healey 4
Joe Schlosser correct Dash board color Austin Healey 6
R TR2/3/3A Correct Thermostat? Triumph 7
simon1966 Correct horns for a 54 100 Austin Healey 5
B TR6 Title with correct VIN Triumph 8
BN6_2197 Question on correct oil temperature Austin Healey 15
G Correct spark plug ends - early BJ7 Austin Healey 1
BN6_2197 Correct adjustment of front axle of BN6 Austin Healey 14
S T-Series which way is correct MG 6
K TR2/3/3A Correct position for flasher bracket? Triumph 7
T GT6 These sills have been replaced, correct? Triumph 7
R Correct Brake Caliper colour Austin Healey 9
bighealeysource Source for correct washer for overdrive drain plug Austin Healey 6
C Correct mounting of exhaust on my 100-6? Austin Healey 9
Got_All_4 TR2/3/3A Throttle shaft assemble does this look correct Triumph 5
Rut TR4/4A Correct grill? Triumph 6
F MGB Correct steering wheel - 1974 MG 2

Similar threads

Top