• The Roadster Factory Recovery Fund - Friends, as you may have heard, The Roadster Factory, a respected British Car Parts business in PA, suffered a total loss in a fire on Christmas Day. Read about it, discuss or ask questions >> HERE. The Triumph Register of America is sponsoring a fund raiser to help TRF get back on their feet. If you can help, vist >> their GoFundMe page.
  • Hey there Guest!
    If you enjoy BCF and find our forum a useful resource, if you appreciate not having ads pop up all over the place and you want to ensure we can stay online - Please consider supporting with an "optional" low-cost annual subscription.
    **Upgrade Now**
    (PS: Subscribers don't see this UGLY banner)
Tips
Tips

Installing a New Top on a 1955 BN-1

TodE

Jedi Hopeful
Offline
I saw Dave Russell's great link to "Installing a new top on my BJ8". Is there information on installing a new top on a BN-1? Also my old top is just stapled to the wood front piece? When you read correct restoration books it states "tacked"? Without pictures its hard to guess at what is correct. What kind of tacks (copper, furniture, brass?) If somebody has good pictures or a good tread for correct restoration or if thay could take some close uppictures of their car it would be very helpful.

Tod Emeigh
tod6@juno.com
(302) 542-2788
 

zblu

Jedi Knight
Country flag
Offline
Hi TodE,
Can get some pics off mine in a few days, one thing I should have done was probably fix a piece of flat bar to the wood under the fabric so as to stop it flexing and lifting off the windscreen at speed /bcforum/images/%%GRAEMLIN_URL%%/frown.gif
 

Dave Russell

Yoda - R.I.P
Gold
Offline
Hi Tod,
See if this helps. since the tacks don't show, I think standard upholstery tacks of the proper length would work ok.

https://www.britishcarforum.com/bcforum/u...4279#Post374279

You may need to draw a couple of pics to see the assembly sequence. Especially the front corners. The original tops had triangular metal stiffeners embedded in the front corner flaps.
D
 

roscoe

Jedi Knight
Silver
Country flag
Offline
Tod,
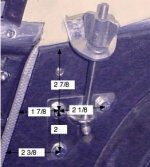
I just did the top on my BN-2. The -1 and the -2 were the same. Although I think they used plain steel tacks originally, I used regular Arrow staple gun staples, 5/16ths of an inch, and fabricated a new front wood bow out of oak. I think staples are just as effective if done properly, and easier than using tacks. I looked at all the photos I could find of how the front was done and you see differences that are fairly major, even looking at early photos. I ended up by wraping the front edge of the fabric over the top of the wood and slitting it where the screws were and then feeding it under the wood. I could then pull it snug and tack it (I used glue) to the back side of the bow so I could undo the side latches and tighten the countersunk screws to make the whole wood bow into a clamp for the front edge. I then made a weather strip from extra top material that has a stiffener sewn into it that is stapled across the front of the bow to cover up the chrome frame. The "Hide-em" strip is then stapled on to cover up the edge of the weather strip and all the staples. My original top was only stapled to the forward side of the wood, and not wrapped around. The above only gets done after you have set the metal stffener into the hold downs on the rear shroud, and set the proper spacing of the rear metal bow. When all this was done I took some duckbilled vice grips covered with tape, and pulled the sides snug, marked where the Tenax fasteners were, and installed the metal grommets in the top. I'm sorry I havn't posted photos. I was planning to do that, but haven't done it yet. I just used some closed cell foam weather strip glued on over the countersunk screws to seal the windscreen frame to the top frame. This was my first top job and I'm happy with how it came out. It was definately one of those jobs where at the start you get to the point of saying "this will never fit, I'm gonna have to send it back, they must have cut it too small". Hope this helps.
 

mjobrien

Jedi Trainee
Country flag
Offline
To keep this in the same thread, does anyone have the dimensions for the side monting holes for a BN1.

These are the bolt locations on the frame sides. I forgot to transfer them when al the welding was going on....
 

Dave Russell

Yoda - R.I.P
Gold
Offline
I only have a pic with the hardtop J bolt anchors, but the soft top mounts use the same holes. Note the dimensions are from the bottom of the alum. cockpit surround & from the back edge of the aluminum door trim plate at the positions shown. Pic attached.
D
 

Attachments

  • 9500.jpg
    9500.jpg
    32.6 KB · Views: 161

zblu

Jedi Knight
Country flag
Offline
rather than using the original vinyl material which shrank/stretched depending on the weather and for reasons on longetivety I used the same fabric as used on SAAB's and BMW convertibles, costs much more, isnt original etc, but I consider this to a part that is a consumable rather than an essential as regards originality/concourse
 
Similar threads
Thread starter Title Forum Replies Date
J Stress Reliever while installing new top on BJ8-smashing the Christmas lights Austin Healey 5
V General TR Need help with installing glass and new seal into my surrey top. Triumph 2
S Installing New Top Spridgets 28
I Help on installing side curtains and rag top on Bugeye please Spridgets 4
A Serious help needed !!!! BJ7 Installing a new soft top Austin Healey 9
BJ8Healeys Installing Robbins canvas top on a BJ8 Austin Healey 12
John250 TR5/TR250 installing new top on a TR250 Triumph 9
M Installing soft top Spridgets 7
Brinkerhoff Installing a BJ 7 top Austin Healey 17
R installing new top Spridgets 1
bighealeysource Help with installing new top on 100-4 BN1 Austin Healey 4
D Any advice on installing new soft top? MG 20
bighealeysource Installing a new top on my BJ8 Austin Healey 2
bighealeysource installing BJ8 top Austin Healey 3
D Installing a New Soft Top Spridgets 11
6 Installing Convertible top boot Austin Healey 6
D Installing a New Top Spridgets 33
6 Installing a BJ8 Convertible Top Austin Healey 9
N installing a new top MG 9
T installing a soft top on a Healy 100-4... Austin Healey 1
J Installing Adapter Hubs for Wire Wheels on a Bugeye Austin Healey 5
S Installing a Radiator Fan Austin Healey 9
G Installing New Rocker Shaft Assembly Austin Healey 3
W Need advice on installing new side curtain glass Spridgets 1
Bayless Help please installing bonnet release cable Spridgets 8
M TR6 Installing Retrosound? Triumph 4
S TR2/3/3A Installing the distributor pedestal. Triumph 3
K TR2/3/3A Question about installing the steering wheel control head? Triumph 1
A TR6 Installing differential and transmission Triumph 10
Z Installing Toe Board Panels Austin Healey 1
K TR2/3/3A Installing Brake Caliper pistons into the bore? Triumph 21
CJ Burton MGB-GT Installing Seat Covers for 1962 - 1967 MGB GT MG 0
A Early 1967 AH Sprite - installing steering column and new directional switch? Spridgets 0
B Installing cam bearings 1275, can I do it? Spridgets 1
bighealeysource Installing stainless steel brake hose on BN2 Austin Healey 5
steveg TR6 Installing stock trailing arm bushings on the car - is it possible? Triumph 2
steveg TR6 Installing adjustable trailing arm brackets Triumph 7
T Installing Garmin GPS in a BJ7 Austin Healey 19
F Installing AC in my 1960 Healey Austin Healey 14
S TR2/3/3A technique for installing a door Triumph 5
R TR2/3/3A Installing wiring harness in steering column Triumph 59
R TR2/3/3A Installing gas tank Triumph 6
C Installing rubber grommets in firewall? Austin Healey 6
S TR2/3/3A installing a fuse in the red tail lights Triumph 4
S TR2/3/3A installing the wiring harness Triumph 8
R Installing Sprite Luggage Rack Spridgets 9
Lukens TR2/3/3A Installing a throttle. Triumph 2
J Powertune booster for a bj8 , trouble installing Austin Healey 2
B TR2/3/3A Installing dzus fastners in bonnet Triumph 8
D Prepping Floors Before Installing Interior Restoration & Tools 6

Similar threads

Top