 Hey there Guest!
 Hey - did you know if you click on the title of a thread it will take you to the first unread post since you last visited that thread?
 but were afraid to ask:
  STOP!! Never post your email address in open forums. Bots can "harvest" your email! If you must share your email use a Private Message or use the
  smilie in place of the real @
 Pretty Please - add it to our Events forum(s) and add to the calendar! >>
mrv8q
Luke Skywalker
Offline
One of the "easy" things I wanted to do on the '74 TR6 was replace the rear gearbox mounts... they were pretty cruddy, and I wanted to change them before installing the new plastic gearbox cover(s). I used TRF mounts, w/ no surprises, although I wished TRF supplied 4 new nuts w/ the new mounts...
All in all, not too horrible a job. The Bentley says to remove the exhaust pipes; there was no way I was going to do that! Here's a pic of the gearbox brace out of the car:
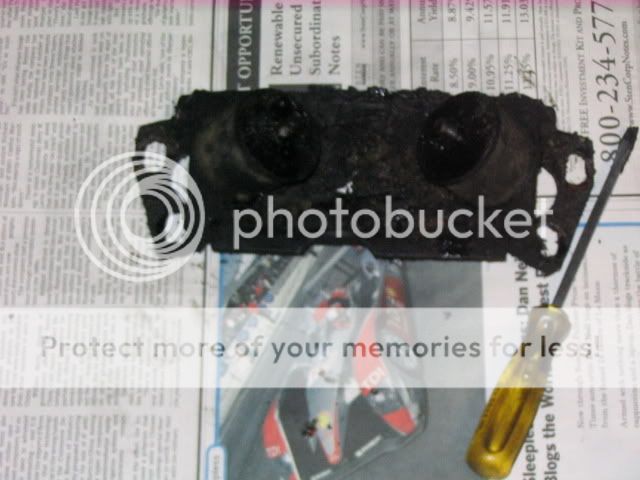
A pretty sad state, lots of accumulated grease.
This is a job one person can do, but with a lot of back and forth under the car. The hardest part was placing and keeping a stubby 9/16 on top of the gearbox brace, and removing the 4 nuts from underneath.
I found it impossible to remove just the rubber mounts; I needed to remove the whole brace. I removed the top "half" first, and then the hard part, the "lower" half.
Surprising to me, the the "bottom" half is actually two pieces bolted together; I imagine easier to initially assemble.... that's how I did it.
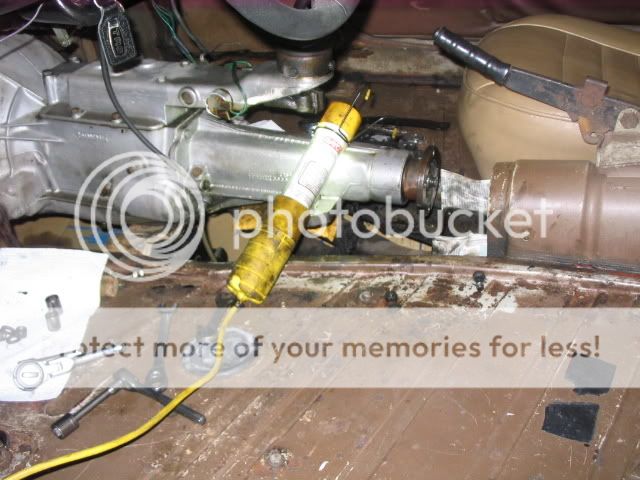
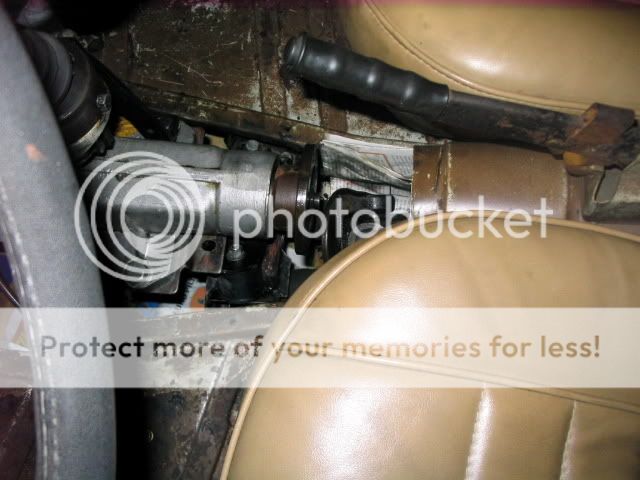
The next two shots are of the completed job:
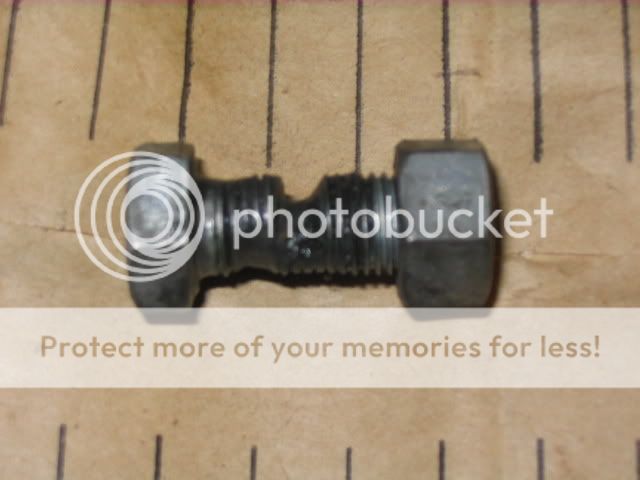
Here's a sad bolt: the one not missing from the bottom half. This side was on the passenger side of the brace, "barely" hanging on to a tab that helps hold the exhaust pipes.
Tomorrow I'll install 4 new Nylocs for the driveshaft u-joint, change the gear oil, and mark off one more small thing done. Next, the carbs, especially the leaky rear one...
I found this a satisfying mechanical job; just figuring out how it was assembled, and then tackling it. What was most helpful was having lots of stubby and regular sized wrenches and Gearwrenches.....
All in all, not too horrible a job. The Bentley says to remove the exhaust pipes; there was no way I was going to do that! Here's a pic of the gearbox brace out of the car:
A pretty sad state, lots of accumulated grease.
This is a job one person can do, but with a lot of back and forth under the car. The hardest part was placing and keeping a stubby 9/16 on top of the gearbox brace, and removing the 4 nuts from underneath.
I found it impossible to remove just the rubber mounts; I needed to remove the whole brace. I removed the top "half" first, and then the hard part, the "lower" half.
Surprising to me, the the "bottom" half is actually two pieces bolted together; I imagine easier to initially assemble.... that's how I did it.
The next two shots are of the completed job:
Here's a sad bolt: the one not missing from the bottom half. This side was on the passenger side of the brace, "barely" hanging on to a tab that helps hold the exhaust pipes.
Tomorrow I'll install 4 new Nylocs for the driveshaft u-joint, change the gear oil, and mark off one more small thing done. Next, the carbs, especially the leaky rear one...
I found this a satisfying mechanical job; just figuring out how it was assembled, and then tackling it. What was most helpful was having lots of stubby and regular sized wrenches and Gearwrenches.....

 A friendly reminder - be careful what links you click on here. If a link is posted by someone you don't know, or the URL looks fishy, DON'T CLICK. Spammers sometimes post links that lead to sites that can infect your computer, so be mindful what you click.