• Hey there Guest!
    If you enjoy BCF and find our forum a useful resource, if you appreciate not having ads pop up all over the place and you want to ensure we can stay online - Please consider supporting with an "optional" low-cost annual subscription.
    **Upgrade Now**
    (PS: Subscribers don't see this UGLY banner)
Tips
Tips

front spring install

RestoreThemAll

Jedi Warrior
Country flag
Offline
Good day folks.

I know that I've seen this discussed but can't seem to find the thread.

We're to the point on the front suspension of installing the springs. The BMC shop manual suggests using two 4 inch long 3/8" fine thread, hardened bolt to draw up the bottom spring plate and compress the spring. That doesn't seem like fun.
It there a better/easier way?
Is 4" long enough?
Threaded rod would be too soft, right?

I should mention that the car is on a rotisserie. No engine or trans. installed.

Thanks in advance for input.
Dale
 

John Turney

Yoda
Silver
Country flag
Offline
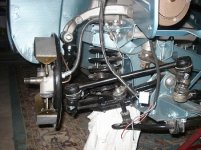
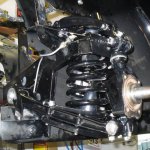
I used four threaded rods, about 6" - 7" long. Make sure the nuts at the top are locked in place. I recall that I used coupling nuts because they are longer and have more thread engagement. I also lubed them.
 

stevebn2bj7

Jedi Warrior
Offline
I used 5/16 carriage bolts. Fine thread would take way too long. They were bent up afterwards and were recycled but it got the job done. Have used this method three times with no problems. One thing you may need to do is put a thin piece of steel or something like it on the frame rail where the spring pan will move up. Otherwise you will scratch the paint on the frame.
 
Country flag
Offline
I use a 6-7" rods of 'allthread'--coarse thread is fine and as long as you use at least 3 rods (4 is better) they won't bend--with flatwashers and nuts at both ends. It takes a lot of nut-turning, so I use an air ratchet with a deep socket to pull the nuts up evenly, top and bottom, until the coil pan bolts will reach.

Don't forget to install the swaybar brackets.
 

Richard Dickinson

Jedi Trainee
Offline
I have done this with two threaded rods on opposite corners. If you have an air ratchet you can jam two nuts on the top and use a socket to turn the rod. Also use a large nut under the regular nut on the bottom as a spacer, this makes it easier to get a wrench on the nut. If you don't have an air ratchet a gear wrench makes it go a lot faster.
 
OP
R

RestoreThemAll

Jedi Warrior
Country flag
Offline
Thanks guys. This is exactly what I needed. I didn't know that threaded rod comes in hard metal. The manager at the hardware store sold me a length that has the same hardness as number 8 bolts.

Nice documentation on your web site Rich. Great pics!

I have several air tools but no air ratchet. I'm just trying to figure out how to convince the wife that I need one to fix the washing machine, and that the washer is actually broken. :smile:

I do have ratchet wrenches and a strong you son. That should work for now.

Dale
 
Country flag
Offline
John Turney said:
I used four threaded rods, about 6" - 7" long. Make sure the nuts at the top are locked in place. I recall that I used coupling nuts because they are longer and have more thread engagement. I also lubed them.
EVERYTHING John says!

All thread coupling nuts just make it easier to repeatedly land a wrench on the flats and the grease on the threads will help to keep from galling them.

If you can get B9 (hardened) all-thread rod, fine, but I've been using the run of the mill (soft) stuff for years and it does the job (with greased threads).

IMG_2394.jpg


IMG_2395.jpg


IMG_2397.jpg


IMG_2399.jpg


IMG_2400.jpg
 
OP
R

RestoreThemAll

Jedi Warrior
Country flag
Offline
Very nice Randy. It couldn't be made more clear.
BTW how's florida? The son that I mentioned above lives west of Orlando. He's been helping to restore his buddies Corvettes for the last several years. Very helpful around a Healey restore.
Thanks!
Dale
 

healeyblue

Jedi Warrior
Gold
Country flag
Offline
I just did this too. I used a little different approach. I first used a spring compressor on the springs off the car on the shop floor. Once they were compressed a good bit I wound safety wire around a bunch of the spring coils in a few places and tied them off. I then released the spring compressor. This left the spring compressed and I then lifted it in place and started assembly. I was still missing about 1/2 an inch for the stock bolts to grab so I used a couple C-clamps to compress it the rest of the way. Once all bolted up I just cut the safety wire and pulled it out. In this picture you can still see the wire tied around the coils prior to me cutting them out.
 

Attachments

  • 29162.jpg
    29162.jpg
    95.9 KB · Views: 302

Keoke

Great Pumpkin
Country flag
Offline
richberman said:
Threaded rod and nuts seems safer and easier to me.
rich

:iagree:---Keoke
 

elrey

Darth Vader
Country flag
Offline
:iagree: Safety is paramount... I use 4 greased fine threaded rods about 7 inches long to install the springs. I use two of them diagonally to release the springs initially. At times I have used just two to draw the springs back up until I can add the stock bolts but have found that four is better. Piece of cake. Be sure to keep these rods, washers and nuts together in your kit for reuse later. They are valued tools. :cheers:
 

bighealeysource

Luke Skywalker
Bronze
Country flag
Offline
Hey Rich,
Beautiful restoration you have going on ! Please post more pics when you get them so we can see the continued progress. Also love the videos of taking the Healey out sans body for a drive. Remember doing that with my BN6 after going through a similar process and how excited I was to have it moving under its own power.
Regards,
Mike
 
OP
R

RestoreThemAll

Jedi Warrior
Country flag
Offline
I'm not building a trailer queen, however I have powder coated most of the suspension parts. I do have a spring compresser and before I realized that it wasn't going to work on this car I was very worried that it would mess up the pretty powder coating. Laugh if you like but I was even considering putting something under the spring between the spring and the spring plate to protect the powder coating. Has anyone gone to that extent?

Dale
 
Country flag
Offline
healeyblue said:
I just did this too. I used a little different approach. I first used a spring compressor on the springs off the car on the shop floor. Once they were compressed a good bit I wound safety wire around a bunch of the spring coils in a few places and tied them off. I then released the spring compressor. This left the spring compressed and I then lifted it in place and started assembly. I was still missing about 1/2 an inch for the stock bolts to grab so I used a couple C-clamps to compress it the rest of the way. Once all bolted up I just cut the safety wire and pulled it out. In this picture you can still see the wire tied around the coils prior to me cutting them out.
Healeyblue, we really need to get together and talk; when I started the restoration on my car in 1986 (living in Breaux Bridge at the time) there were seven (7) Healeys in Lafayette, and six (6) were Ice Blue (the original color of my car)! There's a good chance that I either worked on or knew a previous owner of your car, assuming it was from the local area.

Just for old-time's sake, these <span style="font-style: italic">handbrake turn</span> shots were taken at Acadiana Mall, back when the <span style="font-weight: bold">Blue Law</span> was still in effect:

handbraketurn.jpg


handbraketurn2.jpg

Okay, back to your originally scheduled thread...
 
Country flag
Offline
RestoreThemAll said:
Very nice Randy. It couldn't be made more clear.
BTW how's florida? The son that I mentioned above lives west of Orlando. He's been helping to restore his buddies Corvettes for the last several years. Very helpful around a Healey restore.
Thanks!
Dale
Dale, we are absolutely loving it! Perhaps me more so than my wife (she commutes about 18 minutes each way, but within limited traffic load) while I stay "here" and work all day. The upside is, like today, I'm here for deliveries and service work still being done on the place.

I should change "my location" to Paradise (if I haven't already done so...) :wink:
 
Country flag
Offline
HealeyRick said:
Randy,

You never cease to amaze me with your collection of pictures for every purpose. You really should consider publishing your own workshop manual. I can see it now:

"Which manual do you use, factory, Bentley or Haynes?"

"Not me, I use the Randy manual!"
LOL! :cheers: :angel:
 
OP
R

RestoreThemAll

Jedi Warrior
Country flag
Offline
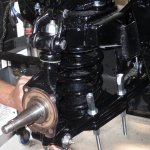
Front spring installed! It was so easy that I kept thinking I must be doing something wrong.

Thanks all.
Now on to brakes and bearings.

Then rear end is ready to install also.

"How hard can it be?"

Dale
 

Attachments

  • 29183.jpg
    29183.jpg
    76.4 KB · Views: 166
  • 29184.jpg
    29184.jpg
    70.9 KB · Views: 162
Similar threads
Thread starter Title Forum Replies Date
P MGB 1974 MGB front spring length. MG 0
pkmh Front Spring Removal For BJ8 Austin Healey 8
S TR2/3/3A Front coil spring recommendation? Triumph 7
KVH TR4/4A Front Coil Spring Packing Piece Triumph 12
A Wanted Front Bumper Brackets/Spring bar assembly for 100-6 Austin Healey Classifieds 0
C BN1 Front Spring Advice Austin Healey 0
B TR2/3/3A Rear Spring front attachment bolt Triumph 23
KVH TR4/4A Front Coil Spring Spacers Triumph 1
B TR2/3/3A Front spring removal Triumph 4
bugedd Front spring isolators Spridgets 1
C TR4/4A SuperPro Front Spring Packing Triumph 7
sqbsprite TR6 Do the TR3-6 front spring pans interchange? Triumph 6
K TR2/3/3A Rear spring again....front pin "D" washer? Triumph 7
K TR2/3/3A Leaf Spring height and front spring pin removal again? Triumph 1
PAUL161 General MG Front Coil Spring Comparison MGB verses a MG TF MG 4
sim Rebuilding Front Suspension 58 sprite spring question Spridgets 6
T TR2/3/3A Rear spring front pin removal Triumph 28
J Rear spring front pin stuck Austin Healey 8
J TR2/3/3A Removing front spring pans? Triumph 6
M Jaguar LH front door hinge spring Jaguar 6
DornTRoriginal TR2/3/3A Rear Suspension Front Spring Attachment Pin Problem Triumph 5
H front spring installation Austin Healey 21
JBBgt6 GT6 TRiumph GT6 Front Suspension [Spring Pan] Triumph 2
K TR2/3/3A TR3 Rear Leaf Spring Front Pin Removal Triumph 17
B Wedge TR8 sagging front spring preference? Triumph 5
T MGA Height of stock front spring on MGA MG 2
M Healey 100-4 Front Spring Stiffness Austin Healey 2
Foghat73 MGB Spring compressor for MGB front suspension MG 45
T Powder coat or paint front spring pads and arms? MG 37
G Choosing the correct front coil spring Spridgets 54
N TR6 TR6 Front Spring Height?? Triumph 3
Atrus Leaf Spring Front Bushing question Spridgets 6
Z BN1 Front Spring Dimensions Austin Healey 7
J front spring size - help! Triumph 6
S building front spring compressor Triumph 24
M Removal of Front Leaf Spring Bushing Triumph 3
G Front Spring I.D needed. MG 2
R TR4/4A TR4A Front Coil Spring Replacement Triumph 8
JPSmit Front Spring Question Spridgets 7
JPeter TR2/3/3A TR3 Rear Spring - front pivot - removal Triumph 18
S front/rear coil spring diamaters. Triumph 4
Darwin Front spring height? Triumph 3
ChrisS Front spring hanger Spridgets 0
IanF Spitfire Spitfire front spring questions... Triumph 13
C front spring change Austin Healey 2
77MidgetMkIV front suspension rebuild [spring refit specificall MG 9
B Spitfire Spit Mk1 Front spring rate/value. Triumph 7
bighly help-extracting [front] leaf spring pins Austin Healey 5
56HealeyDan 100-4 Front Crankshaft Seal Austin Healey 2
AngliaGT 1997 Miata - Anyone Have a Picture on How to Mount the Front License Plate Bracket? Other Cars 12

Similar threads

Top