• Hey there Guest!
    If you enjoy BCF and find our forum a useful resource, if you appreciate not having ads pop up all over the place and you want to ensure we can stay online - Please consider supporting with an "optional" low-cost annual subscription.
    **Upgrade Now**
    (PS: Subscribers don't see this UGLY banner)
Tips
Tips

removing front apron

AnkwizTR3a

Freshman Member
Offline
Good Morning Everyone! Hope all is well! Well this past weekend I decided to remove apron on my TR3a to remove the radiator, I have discovered that the water pump, housing, thermostat have been badly corroded. So removing Radiator to have serviced. While removing radiator I have notice that the flange the apron attaches to is torn up, holes are bigger than original diameter, some areas of rust - does anyone have a solution or suggestion on how to re-install apron with these bad flanges - should I re-weld sheet metal or is there any adapters to re-install apron?
 

Britishautobody

Jedi Hopeful
Offline
Without a pic it is hard to say, the captive nuts always spin or break on the TR3's from rust/age. Also the bolts rust and while trying to turn them ,it wipes out already weak metal. My guess is the flanges will have to be rebuilt with new metal and probably weld in new captive nut holders. My best guess is the fenders and the nose will have to come off. Most of these cars are 50 yrs+ old and ready for some over haulin.
 
OP
A

AnkwizTR3a

Freshman Member
Offline
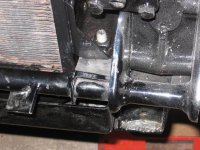
Good Morning, Well I have removed the front apron, wow the radiator was quite difficult to remove, the 2 lower screws are in a hard spot. I am going to upload some pics hopefully by the end of the week. Hope all is well
 

emmett1010

Jedi Hopeful
Country flag
Offline
Many people cut a notch in the top of those bolts so that u can use a screwdriver for most of the way, then tighten the bottom with a wrench.
Emmett
 

mrv8q

Luke Skywalker
Country flag
Offline
Now's a good time to check the motor mounts, as well as silentblocs, among other things...
 

Don Elliott

Obi Wan
Offline
This shows the slot mentioned above. Cut the slot with a hack saw while the bolt is in your vice on the bench. Use a hefty screwdriver from the top - then finish tightening the bolt from the bottom with a wrench.
 

Attachments

  • 20389.jpg
    20389.jpg
    60.7 KB · Views: 214

M_Pied_Lourd

Darth Vader
Country flag
Offline
On mine, my piece has been modified with cutouts for access to the bottom bolt head, plus the oil lines for my oil cooler are routed out under the rad and through the radiator protection piece.

Cheers,
M. Pied Lourd
 

TR3driver

Great Pumpkin - R.I.P
Offline
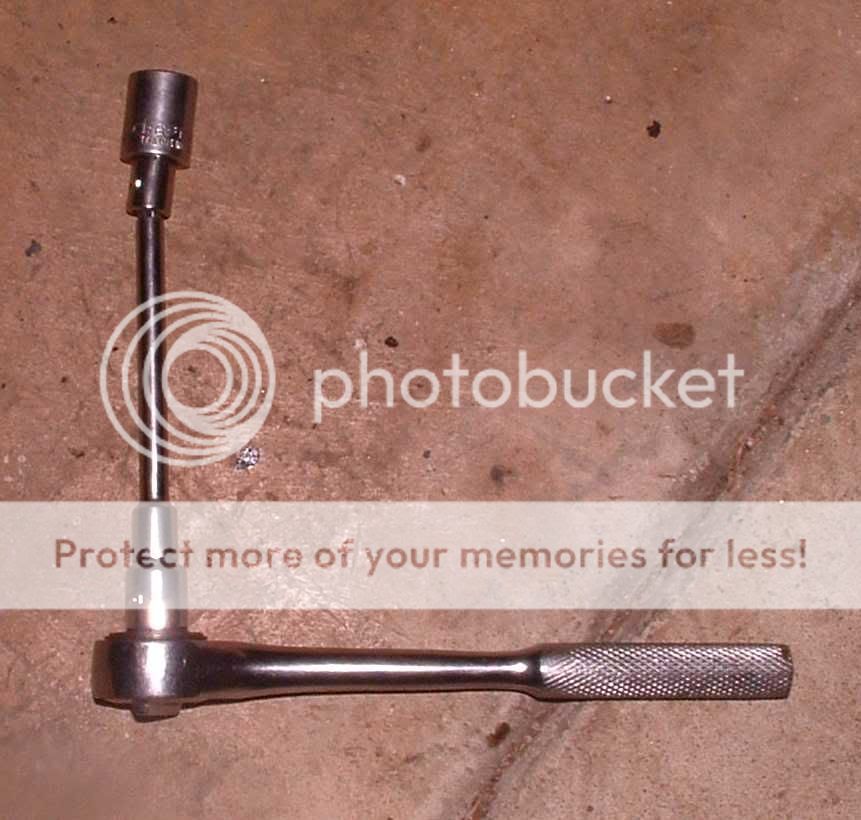
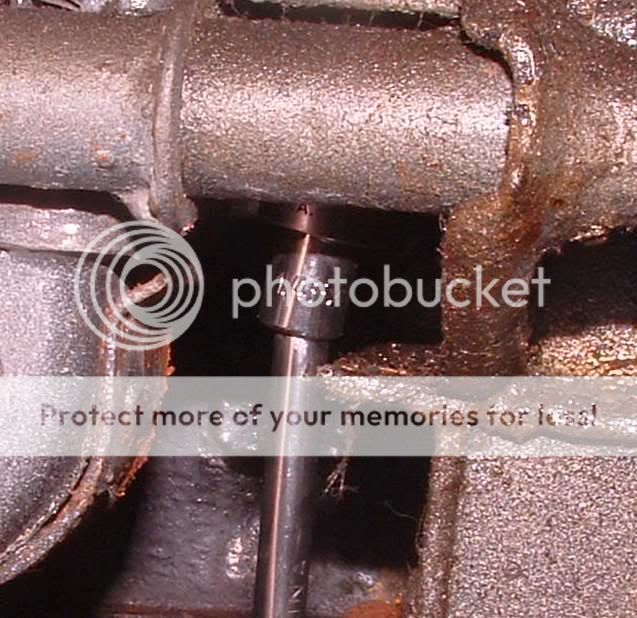
Silly me, I just found a tool that fits.

DSCF0006_crop.jpg


DSCF0007_crop.jpg
 
OP
A

AnkwizTR3a

Freshman Member
Offline
thanks for the tips everyone - cutting the notch in top of bolt surely made it a bit easier. I now have everything back together, Starter is working well, generator is new (neg earth), new lucas coil, water pump, housing and thermostat. My carbs came back from sucarbs.com - (great help from Chester there). I have fuel going to the carbs, good battery - NO SPARK. I have switched it to neg ground from pos. I watched the Moss Motors video re: polarizing the generator - did that - I think successfully. Does anyone have a detailed information regarding the wiring to the coil to the distributor. I question the condenser and point - so I bought new ones tonight - Have not installed yet. I am so close to getting it started - it no turns over much easier since I have replaced water pump/pulley. Should I go back to the pos earthing system or is too late since I polarized the generator - Obviously I need some help here - anything would be greatly appreciated. CHRIS
 

TR3driver

Great Pumpkin - R.I.P
Offline
Don't worry about the polarity; it won't keep the engine from starting. In theory the connections to the coil should be swapped, but the difference between "right" and "backwards" is too small to notice. You'll get spark either way.

Likewise, generator polarization is not the problem here (the engine will run with no generator at all, until the battery runs down).

But to answer your question, for negative ground, the "-" or "SW" terminal of the coil should be connected to the distributor (different coils have different markings). The "+" or "CB" terminal should connect to the white wire from the harness.

See the other thread for more troubleshooting suggestions.
 
Similar threads
Thread starter Title Forum Replies Date
B TR2/3/3A Removing front trunnion Triumph 15
B TR2/3/3A Removing front lower wishbone confusion Triumph 3
KVH TR4/4A Removing Front Transmission Seal Triumph 1
Jim_Gruber Steering Rack Question / Removing a stubborn Front Shock Bolt - Progress on Bugsy II Spridgets 11
Jim_Gruber Issue with removing front drums and spindles on BE- Need advice Spridgets 5
catfood Removing front hub Austin Healey 6
drooartz MGB-GT Question - removing front bearings MG 2
S Problem removing front wheel bearing retaining nut Austin Healey 9
Jim_Gruber Removing front wheel bearings from hub Spridgets 6
J TR2/3/3A Removing front spring pans? Triumph 6
T Question on removing drivers front lower wishbone Triumph 7
B TR2/3/3A Tr3 removing front wings Triumph 8
deadair TR2/3/3A TR3A -- Removing front brake pistons Triumph 19
G Advice needed in removing front left fender. Triumph 2
T TR4/4A Removing TR4a front rotors Triumph 5
Number_6 TR2/3/3A Removing front fenders on a TR3 Triumph 20
J Removing front bonnet - MKII Austin Healey? Austin Healey 4
bighealeysource Removing front shocks on a 100 -4 Austin Healey 12
kennypinkerton removing front crossmember... MG 13
N Removing Front fender MG 4
DanZ_BT7 removing the front discs Austin Healey 4
T Removing front fenders & hood Triumph 10
HAN8L1965 Removing Front Springs 65 Sprite Spridgets 1
J Removing top fulcrum pin on front suspension. Austin Healey 2
A Spitfire Removing cap over front hub on Spit Triumph 2
L Removing Master Cylinder Without Paint Damage Austin Healey 27
D Removing the steering wheel hub Spridgets 12
J General MG Thoughts on removing a stubborn 2-ear spinner MG 5
K TR2/3/3A Removing scratches and scrapes fro the wind wings that screw to the windshield? Triumph 9
Gatheringtree TR2/3/3A Removing the headlamp bezel rim Triumph 2
R TR6 Removing the charcoal cannister considerations Triumph 7
S TR2/3/3A Removing a stuck oil drain plug Triumph 13
K TR2/3/3A Removing TR3 windshield stanchions Triumph 4
KVH General Tech Removing Piston Wrist Pin Triumph 2
C Removing AH Sprite Mk 1 windscreen washer pump Restoration & Tools 2
M Need help removing the pinion assembly from a late 1275 steering rack Spridgets 7
jfarris TR2/3/3A Removing choke cable from dash insert Triumph 3
doakley Spitfire Removing facia Triumph 2
7 Wedge Removing sunroof frame Triumph 5
D Removing the last rust from pitted steel Restoration & Tools 11
D Removing Old Radio Austin Healey 4
S Removing Overdrive Shaft Lever Pin Austin Healey 7
L TR2/3/3A Any trick to removing TR3 doors? Triumph 12
M TR2/3/3A Removing Wires From Stator Tube Triumph 7
BN6_2197 Removing connecting link between shock absorber and rear axle Austin Healey 4
T TR2/3/3A Requesting help on removing TR3A steering column and box Triumph 21
longbridgehealey Removing BN4 Bonnet Austin Healey 9
C Removing the Healey "Flash"? Austin Healey 11
Gliderman8 TR6 Removing Left Rear brake line... help! Triumph 9
maxwedge5281 Removing Complete Rear End From BN6 Austin Healey 5

Similar threads

Top