• The Roadster Factory Recovery Fund - Friends, as you may have heard, The Roadster Factory, a respected British Car Parts business in PA, suffered a total loss in a fire on Christmas Day. Read about it, discuss or ask questions >> HERE. The Triumph Register of America is sponsoring a fund raiser to help TRF get back on their feet. If you can help, vist >> their GoFundMe page.
  • Hey there Guest!
    If you enjoy BCF and find our forum a useful resource, if you appreciate not having ads pop up all over the place and you want to ensure we can stay online - Please consider supporting with an "optional" low-cost annual subscription.
    **Upgrade Now**
    (PS: Subscribers don't see this UGLY banner)
Tips
Tips

pictures of front disk conversion?

richberman

Jedi Warrior
Offline
Does anyone have pictures of how the front disk brake conversion plates mount? I'm using the AHSpares kit.
thanks in advance.
rich
 

AH100M

Jedi Trainee
Offline
I assume you mean for a BN1 or BN2. I don't have pics but here's a Q&A I had with AH spares which may be of help:

Mr Schmidt,

Thankyou for your enquiry.
I will type the answers to your questions just below each question.

>
> ----- Original Message -----
> From: "Schmidt, William" <SCHMIDT@Telephonics.com>
> To: <sales@bighealey.co.uk>
> Sent: Tuesday, June 21, 2005 2:50 AM
> Subject: Help needed with BN1 disc brake conversion
>
>
> I received the disc brake conversion kit today and I'm very pleased
> with
the
> quality and completeness of the parts. However, I was disappointed
> that
no
> instructions, or even a drawing was included. Therefore, I need to
> get
the
> following questions answered. I'm going to ask some obvious
> questions,
just
> so I have all the information I need. When appropriate I'm going to
> refer to your photo of the kit. on page 42 of your 2003 catalogue.
>
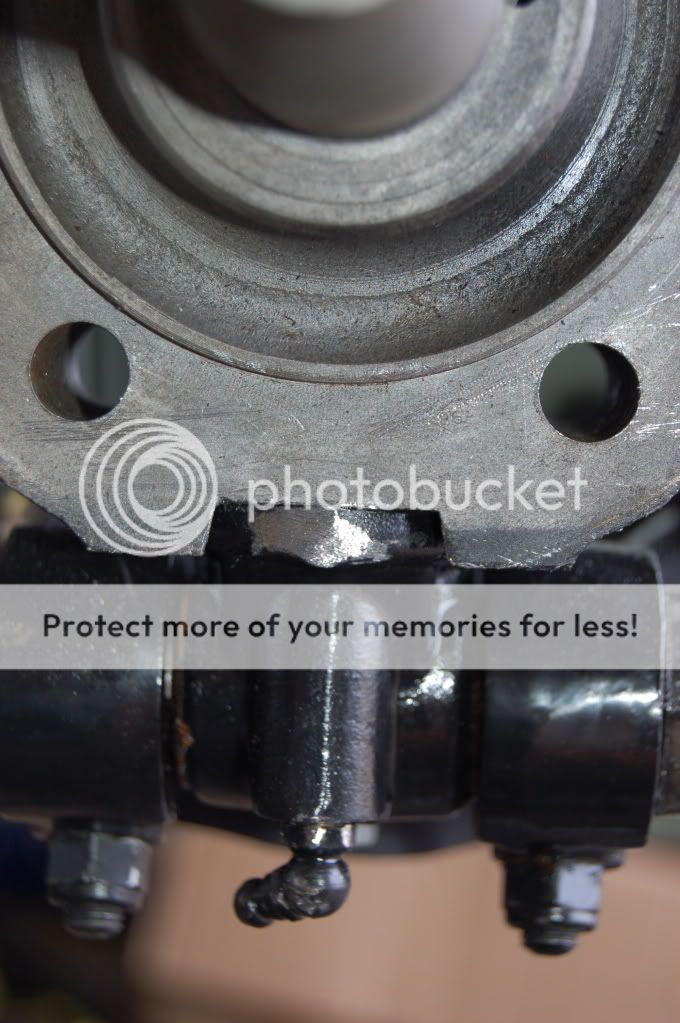
> 1) I assume the caliper brackets are mounted so that the caliper is
towards
> the rear of the car. In other words, in the 3 o'clock position on the
left
> side and the nine o'clock position on the right side when facing the hub.

Correct. Caliper to the rear of the car.
>
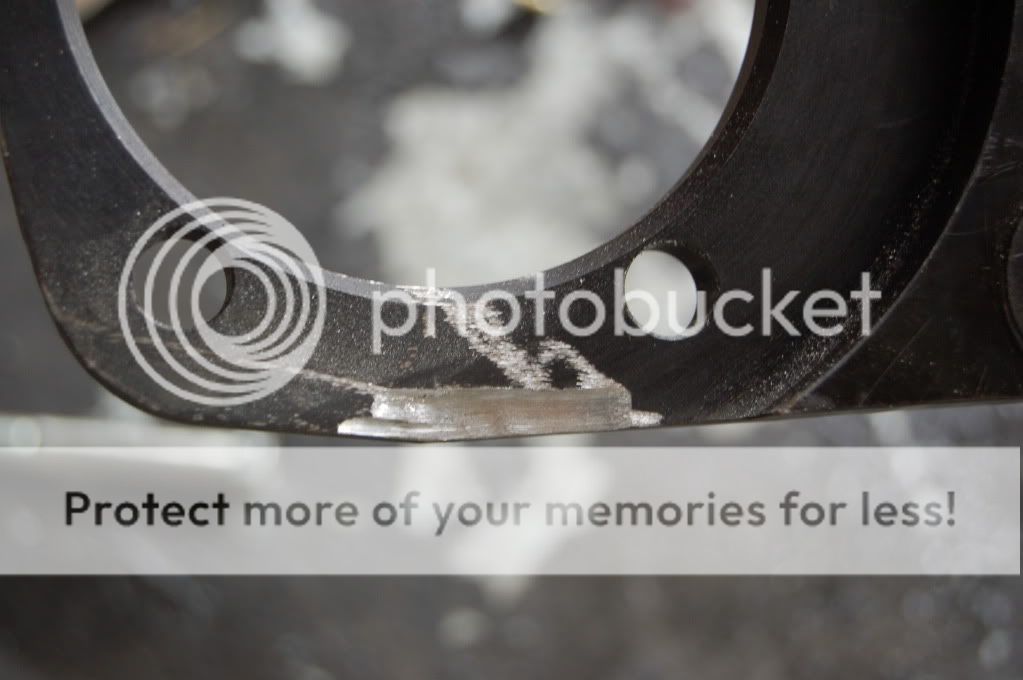
> 2) Should the recessed face of the bracket (the side visible in the
photo)
> face inwards or outwards when mounting the bracket to the stub axle
("swivel
> axle")?

The recess should face inwards when mounted to the stub axle.
>
> 3) Should I use split washers under the heads of the bracket-to-axle
> mounting bolts? Will that cause the bolt heads to interfere with the hub?
> Or should I just use lock-tite?

Yes, you can use washers or lock-tite, it doesn't matter.
>
> 4) How are the wheel bearings adjusted? Should I follow the
> procedure
for
> early BN2 hubs like on page E/2 of the shop manual and adjust the
> float using the axle nut? Or do I need a distance piece and shims
> like later cars? This would be a problem because it doesn't look like
> the distance pieces from my BN1 hubs would work and I have no shims.

The distance pieces from the BN1 hubs should be re usable, then all you need is some shims which I can post to you, we do these in 0.003", 0.005", 0.010"
and 0.030" sizes.
Let me know if you need any of these and I can post them out.
>
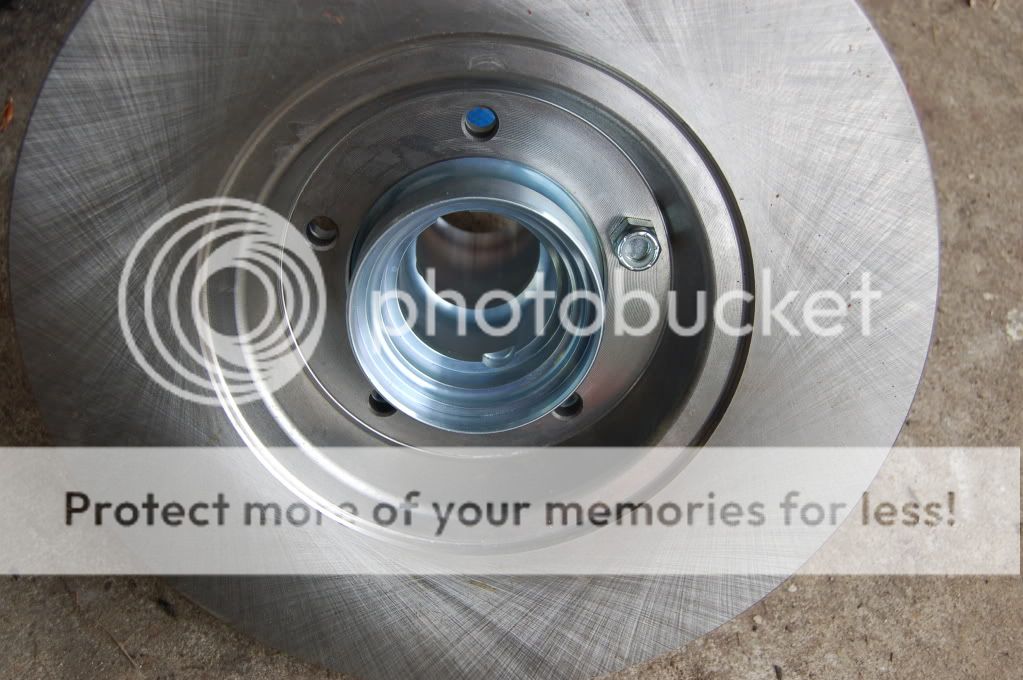
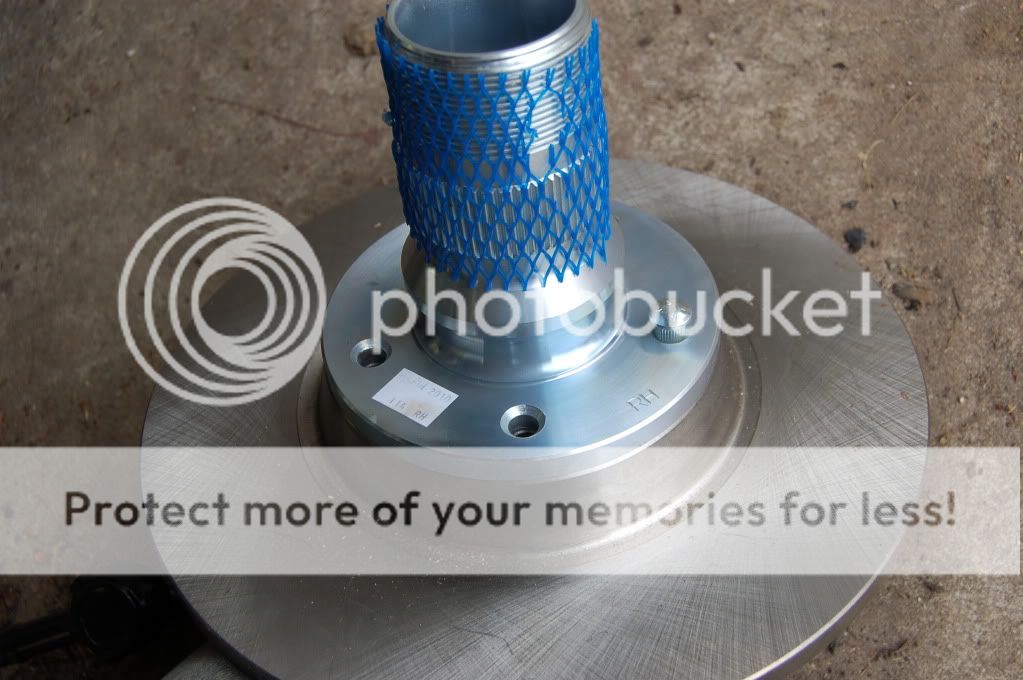
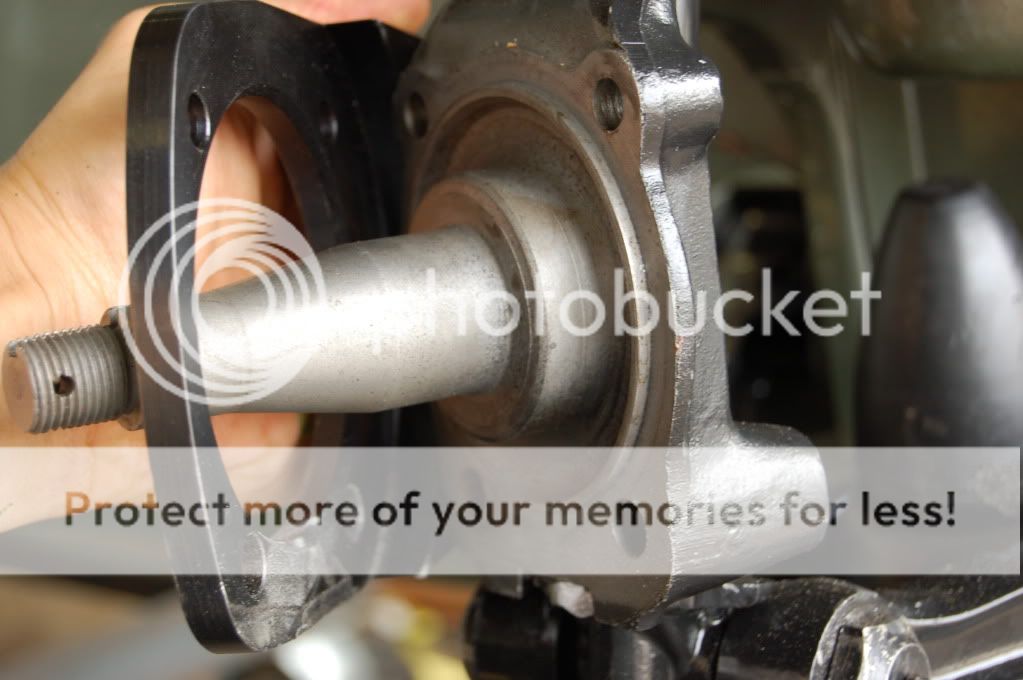
> 5) It looks like the disc gets mounted to the rear face of the new
> hubs
(in
> other words, the inner part of the hub goes through the hole in the
> disc from the outside, the splined end doesn't go through the hole in
> the
disc,
> inside to outside). This is hard to say in words but if you would
> pick up the hub in the picture by the splined end and drop the other
> (plain) end
of
> it right through the disc, the way they're facing in the picture, that
would
> be correct, right?

Correct, inner part of the hub through the disc from the outside


Does it matter which way the bolts holding the hub to
> the disc go? Heads in our outward facing?

It doesn't matter which way the bolts go through.

And I assume that the easiest
> way to do the whole sequence is:
>
> 1. Mount caliper bracket to car
> 2. Install wheel bearings and seal
> 3. Mount disc to hub
> 4. Mount disc/hub assy to axle, adjust bearing
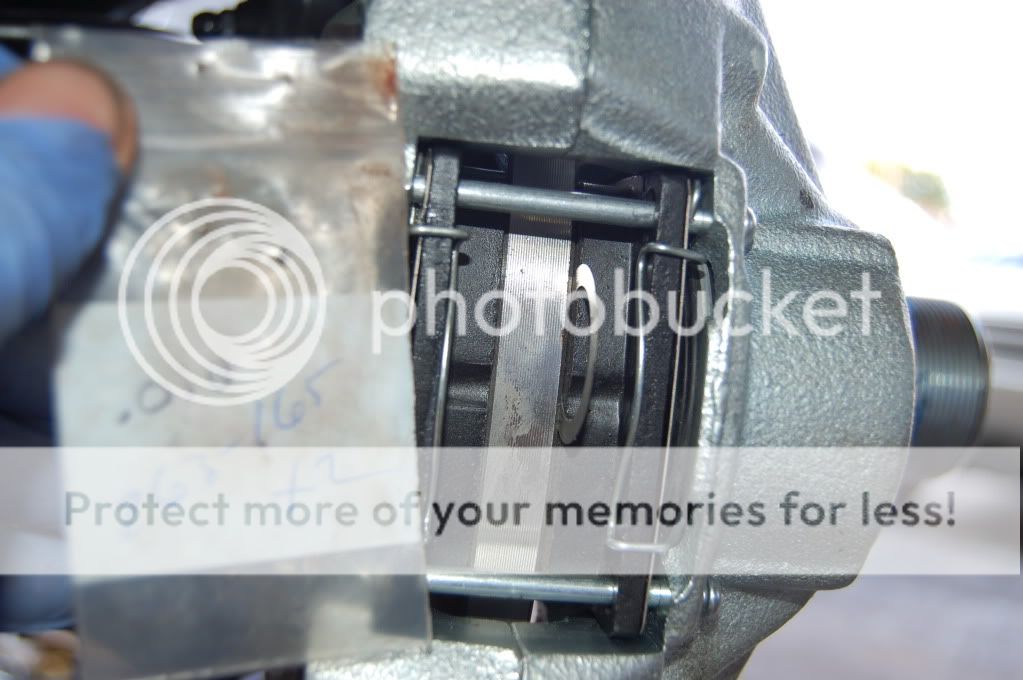
> 5. Install brake pads, bench bleed calipers
> 6. Mount calipers, connect hoses, bleed system.

Sounds good.
>
> 6) Last but not least, what's the 3rd hose for??!!

Rear axle flexi hose, so there is a matched braided hose set on the car.
>
> Thanks for your help.
>
> Regards,
> Bill Schmidt
 
OP
richberman

richberman

Jedi Warrior
Offline
Bill,
Thanks for posting that Q&A. It was extremely helpful. My only 2 questions are:
Do you have a picture of the way the brackets mount to the axle stub, or a scan of the photo from the 2003 catalog as I don't have any paper catalog, just the online version and it's not clear to me which side is the "recessed face".
and 2) is there a way of determining which caliper is "right" and which is "left"?
regards,
rich
 

AH100M

Jedi Trainee
Offline
I haven't had the chance to set up the stuff to post pictures yet. On your first question, the bracket that holds the caliper to the upright with the four bolts has a machined/recessed face. That's the side that faces (is in contact with) the upright.

The calipers mount to the brackets such that the brake line connection is at the top.

If you do a trial assembly I think you'll see how it fits together.

Go to this link - the recessed face is up. https://www.ahspares.co.uk/products/productdetail.aspx?GUID=caa761d7-b5af-47f1-a5fc-a00a4e023d52
 
OP
richberman

richberman

Jedi Warrior
Offline
Thanks Bill,
I think that explains it all. The long bolts in the picture are used for the lower two holes in the bracket, which hold the steering arms? And the upper holes use the original bolts? Is that correct?
rich
 

AH100M

Jedi Trainee
Offline
Correct.

Oh, in the email thread between me and AH Spares - I asked a question about which way a bolt goes in - head in or head out? He said it makes no difference. Turns out it does. I don't remember the particulars but I think it's obvious when you actually do it.
 
Country flag
Offline
AH100M said:
Correct.

Oh, in the email thread between me and AH Spares - I asked a question about which way a bolt goes in - head in or head out? He said it makes no difference. Turns out it does. I don't remember the particulars but I think it's obvious when you actually do it.
For both the rotors/hubs & mounting brackets: insert the bolts from the outside of the car towards the inside (the nuts are on the inside; or perhaps they're the one inserting the bolts... :wink: ).
 
OP
richberman

richberman

Jedi Warrior
Offline
Randy Forbes said:
AH100M said:
Correct.

Oh, in the email thread between me and AH Spares - I asked a question about which way a bolt goes in - head in or head out? He said it makes no difference. Turns out it does. I don't remember the particulars but I think it's obvious when you actually do it.
For both the rotors/hubs & mounting brackets: insert the bolts from the outside of the car towards the inside (the nuts are on the inside; or perhaps they're the one inserting the bolts... :wink: ).

Randy,
Thanks for confirming that I am in fact the nut for even getting in to this project. I was thinking it before but now it's confirmed! :wink:
rich
 
OP
richberman

richberman

Jedi Warrior
Offline
Bill,
I finally had a chance to trial fit my disk conversion and have a few questions.
1) It appears that the back of the caliper bracket binds against the outside of the kingpin. Did you have this issue. I could either grind the kingpin on the outside edge of the lower swivel or the back side of the caliper bracket. Thoughts?
2)The lower long bolts fit through the lower holes in the bracket and the steering arms, but the nyloc nuts are 3/8" and the bolts appear to be 7/16....whaat.
that's my update.
Once I get the rest of the front suspension together, then I'll test fit the calipers and hub parts.
thanks,
rich
 

AH100M

Jedi Trainee
Offline
1) I don't recall having this issue. I'm out of town at the moment - I'll check when I get back home on Thursday.
2) I had no mis-match in hardware.
 
OP
richberman

richberman

Jedi Warrior
Offline
Randy Forbes said:
AH100M said:
Correct.

Oh, in the email thread between me and AH Spares - I asked a question about which way a bolt goes in - head in or head out? He said it makes no difference. Turns out it does. I don't remember the particulars but I think it's obvious when you actually do it.
For both the rotors/hubs & mounting brackets: insert the bolts from the outside of the car towards the inside (the nuts are on the inside; or perhaps they're the one inserting the bolts... :wink: ).

Randy,
Why are your nuts on the outside here?

IMG_2636.jpg


Should it be like this?...with the stud hammer to place?

DSC_0131.jpg


DSC_0130.jpg
 
OP
richberman

richberman

Jedi Warrior
Offline
I ended up grinding out the back of the caliper bracket and just a bit on the lower trunion. Now it's smooth as glass.

See pics.

DSC_0118.jpg

Binding spot flattened.

DSC_0119.jpg
Ground out bracket.

DSC_0120.jpg

Trial fitting.

Repainted before assembly.


GregW

Yoda
Platinum
Country flag
Offline
richberman said:
Randy,
Why are your nuts on the outside here?
It looks to me like the bolt orientation is model specific. BJ8s have the bolt head on the inside (mine is like Randy's photo) and earlier cars have the head in the hub. If you look at the Moss brake pages for the different models, you'll see the bolt is different. Both in orientation and part number.
 

Jerry

Darth Vader
Gold
Country flag
Offline
I did not have to do any grinding for my BN4, but I did put about 4 washers in to center the caliper on the rotor. The brakes work great. An amazing difference to drum brakes.
Jerry
BN4
BJ8
 

John Turney

Yoda
Silver
Country flag
Offline
Jerry said:
I did not have to do any grinding for my BN4, but I did put about 4 washers in to center the caliper on the rotor. The brakes work great. An amazing difference to drum brakes.
Jerry
BN4
BJ8

No grinding on my BN4 either and mine work great too. (Mine are the Denis Welch version.)
 
OP
richberman

richberman

Jedi Warrior
Offline
Ok,
I've got the calipers on the rotors now, but as you can see below, the rotor touches on one pad, which stops the rotor from turning. Do I need washers to center the calipers or are they self centering once everything is set up?
DSC_01352.jpg
 

Patrick67BJ8

Obi Wan
Silver
Country flag
Offline
richberman said:
Ok,
I've got the calipers on the rotors now, but as you can see below, the rotor touches on one pad, which stops the rotor from turning. Do I need washers to center the calipers or are they self centering once everything is set up?
DSC_01352.jpg
I think your correct about the self-centering. One thing to check is the rotor to be sure it is not warped or wobbling(correct bearing adjustment).
Patrick
 

TimK

Jedi Knight
Silver
Country flag
Offline
If you cannot retract the pad that is rubbing, it will not fix itself. You will have to shim the rotor if it is the inside pad or the caliper if it is the outside pad. Also the brake hose in my BN7 goes through the top of the bracket not the bottom as you have it. I don't know if your system is different, but I'd check the routing of the steel brake lines.
 
OP
richberman

richberman

Jedi Warrior
Offline
Patrick,
No warp on the rotor, just one brake pad touching the rotor with a slight gap (0.010-0.20) on the other pad. I could shim the caliper to even it if I had thin enough washers....
rich
 
OP
richberman

richberman

Jedi Warrior
Offline
Tim,
Luckily it's the inside pad rubbing so I can shim the caliper. What kind of 0.010" washers can I find? Do you have pictures of your brake hose routing? I have not run my solid lines yet and that little bracket in unsecured to my chassis.
thanks,
rich
 
Similar threads
Thread starter Title Forum Replies Date
K TR2/3/3A Front brake hub removal to access Vertical Link bolts(screws) Attached pictures. Triumph 1
T TR2/3/3A Pictures of my TR3 with over riders on front Triumph 14
J One of you guys had great pictures of front apron Triumph 20
richberman Pictures of BN4 front shroud/chassis joint Austin Healey 5
2wrench TR6 Pictures of TR6 dash refinished front + back Triumph 22
bighly Pictures of soft top front rail seal in and out Austin Healey 0
F BJ8 Exhaust Hanger Pictures Wanted Austin Healey 9
Basil Admin Note Posting Pictures on BCF MG Classifieds 0
B Brake Line Pictures Austin Healey 1
LAW75 Engine Pictures Austin Healey 33
Hamish Racing TR2/3/3A Pictures through a corner. Triumph 7
steveg TR6 Hood release pictures needed Triumph 22
A Disc Brake pictures Austin Healey 1
HealeyRick Disoriented Pictures FORUM Navigation Questions 11
Cutrog1 Attaching pictures while editing FORUM Navigation Questions 7
trrdster2000 Spitfire Added a few pictures to my Photo Album of the Spit6. Triumph 0
2 TR2/3/3A Non OD speedometer cable routing diagram/pictures. Triumph 7
T General TR Request pictures of TR3B & TR4 electric temperature gauges Triumph 15
Jim_Gruber Pictures of Clutch Slave Plumbing with Gerard's Kit Spridgets 4
T Trouble inserting pictures to post FORUM Navigation Questions 2
V Last few months in the UK Pictures TVR 5
D looking for pictures / info 62 BT7 Austin Healey 5
T TR2/3/3A Clutch and oil line Pictures requested Triumph 9
J pictures of a 3000 on a rotisserie ?? Austin Healey 5
K TR2/3/3A Auxillary dash switch pictures? Triumph 14
M Off Topic TRA National event pictures Triumph 6
T TR2/3/3A Before and after lever shock absorber pictures Triumph 12
V TVR Vixen S2 New Pictures TVR 1
J TR2/3/3A 1957 rear seat carpet pictures Triumph 7
B Longbridge 100-6 Throttle Linkage Pictures - Any Out There? Austin Healey 27
gbtr6 TR6 Need pictures of heater hose routing Triumph 0
T TR2/3/3A Requesting some Pictures for metal work Triumph 9
Basil TR2/3/3A Karls59tr pictures Triumph 9
B Rear seat backrest pictures Austin Healey 6
T TR4/4A Anyone have pictures handy of TR4a with TR6 steel rims? Triumph 13
S General TR British Car Show Pictures - Is there Interest in Posting? Triumph 7
Tinkerman TR2/3/3A Pictures needed Triumph 4
boxofparts TR2/3/3A Pictures of my own Garage Find TR3 Triumph 10
7 unable to upload pictures - Java problem? FORUM Navigation Questions 7
RickB General Tech Need pictures showing how to connect choke on HIF carbs. MG 2
Randy Forbes Randy's Healey pictures links... Austin Healey 7
Basil Posting pictures on BCF Triumph Classifieds 0
Basil Posting pictures on BCF Spridgets Classified 0
Basil Posting pictures on BCF Jaguar Classifieds 0
Basil Posting pictures on BCF Other British Classifieds 0
Basil Posting pictures on BCF Austin Healey Classifieds 4
M TR2/3/3A TR3 progress pictures Triumph 26
T Any pictures of Rx7 E-brake cables? Spridgets 6
D Pictures of Trailer hitch install on a BJ8 Austin Healey 0
drambuie Adding a backup fuel pump Anyone have pictures? Austin Healey 6

Similar threads

Top