• The Roadster Factory Recovery Fund - Friends, as you may have heard, The Roadster Factory, a respected British Car Parts business in PA, suffered a total loss in a fire on Christmas Day. Read about it, discuss or ask questions >> HERE. The Triumph Register of America is sponsoring a fund raiser to help TRF get back on their feet. If you can help, vist >> their GoFundMe page.
  • Hey there Guest!
    If you enjoy BCF and find our forum a useful resource, if you appreciate not having ads pop up all over the place and you want to ensure we can stay online - Please consider supporting with an "optional" low-cost annual subscription.
    **Upgrade Now**
    (PS: Subscribers don't see this UGLY banner)
Tips
Tips

TR2/3/3A Back to TR3 Sidescreens

OP
CJD

CJD

Yoda
Country flag
Online
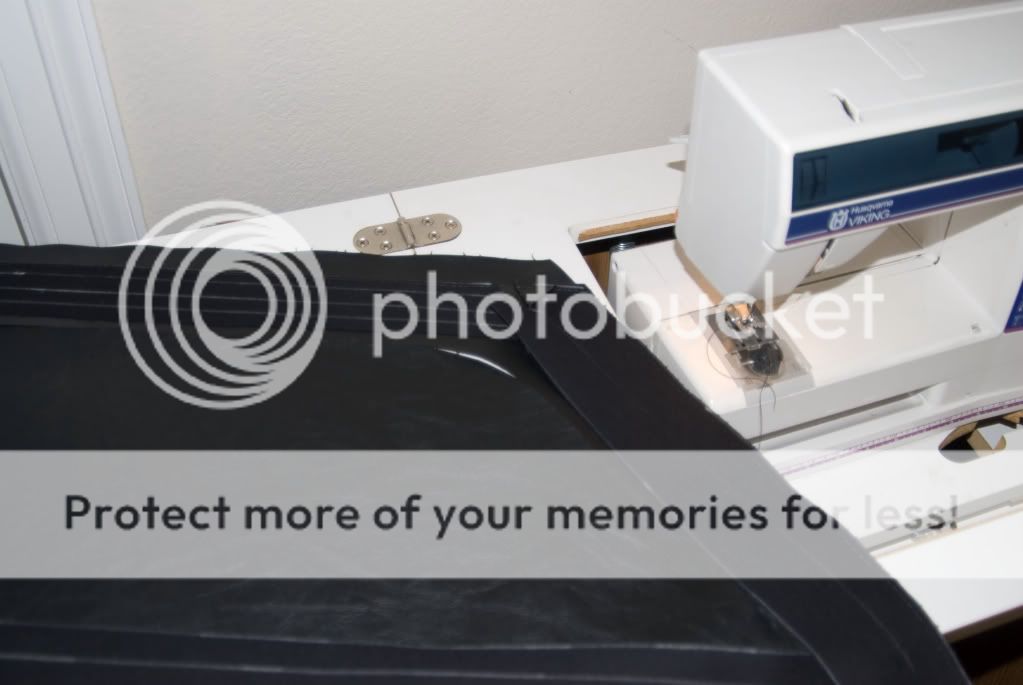
Thanks Jesus. I'll check to see if one of the Schlegal channels fits and let you know.

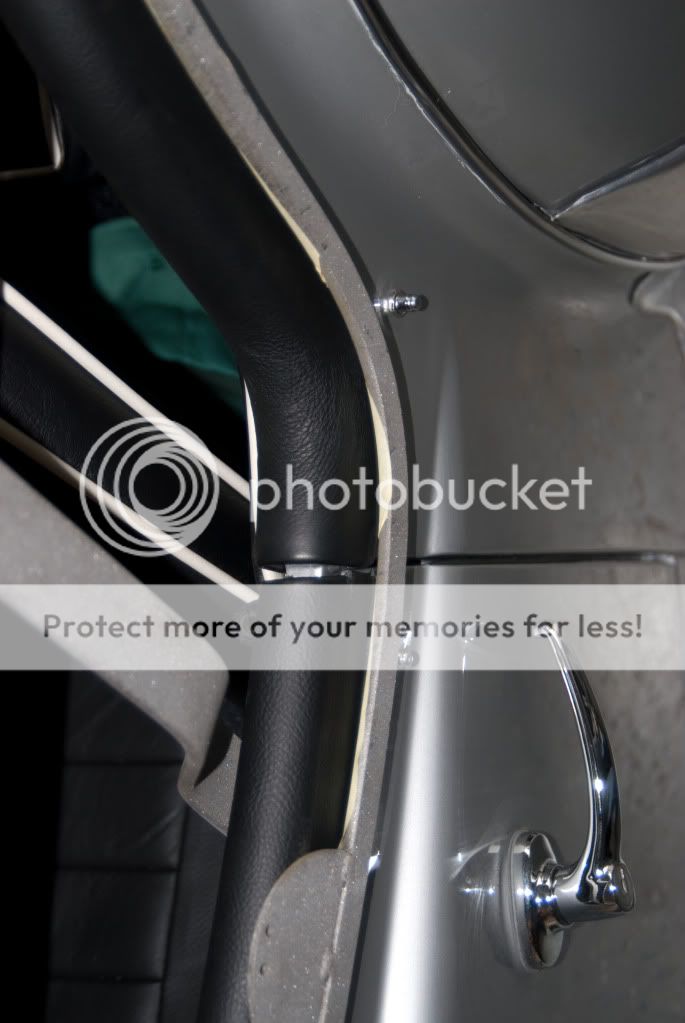
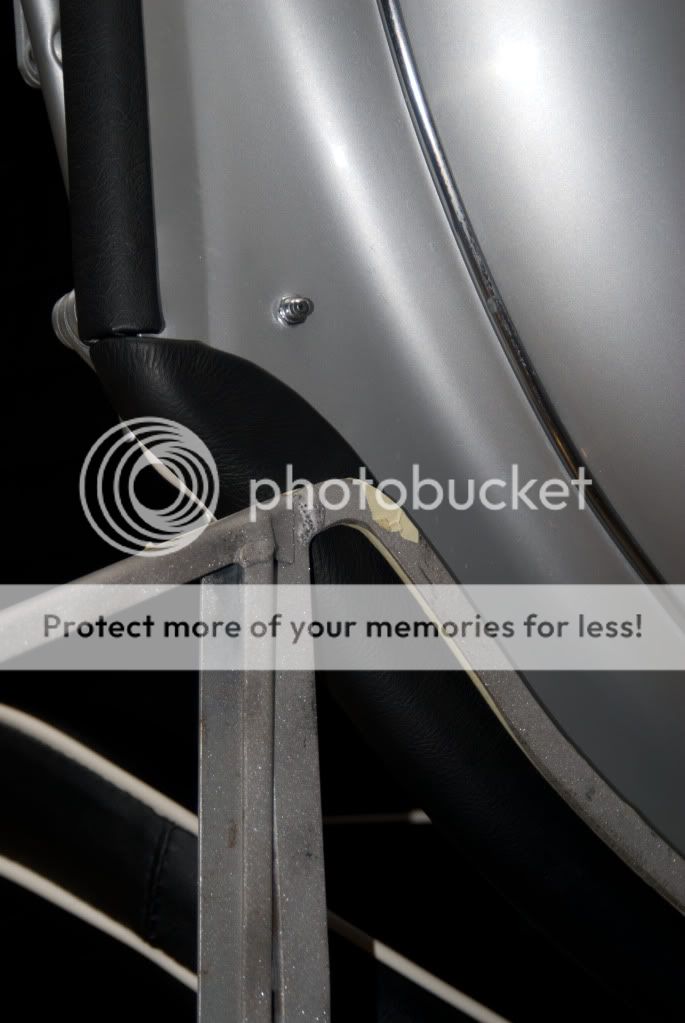
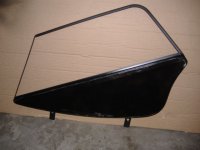
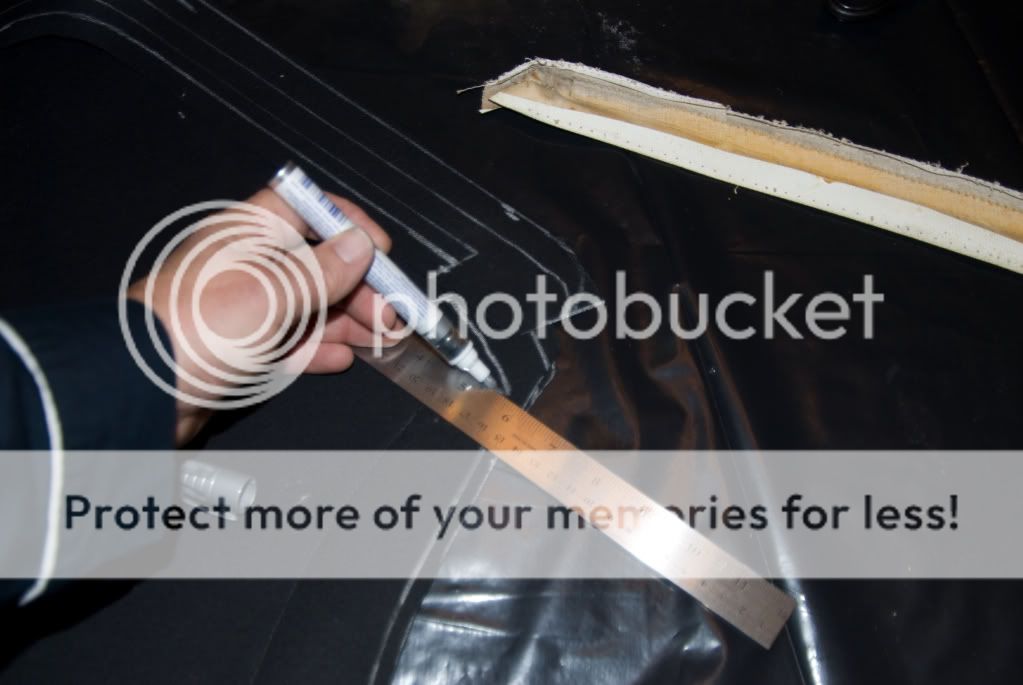
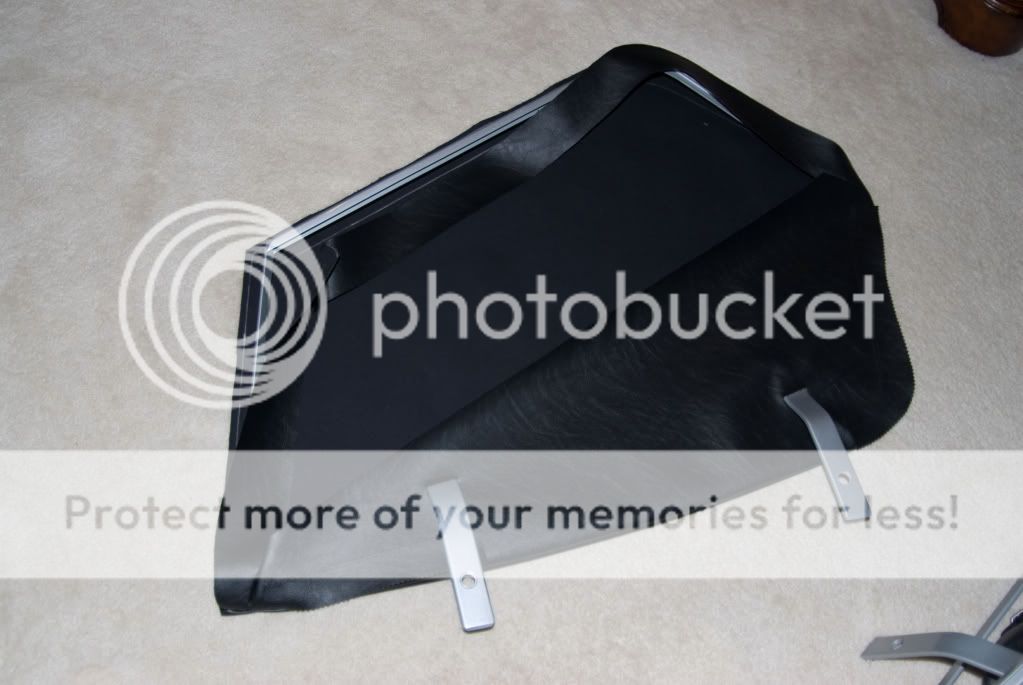
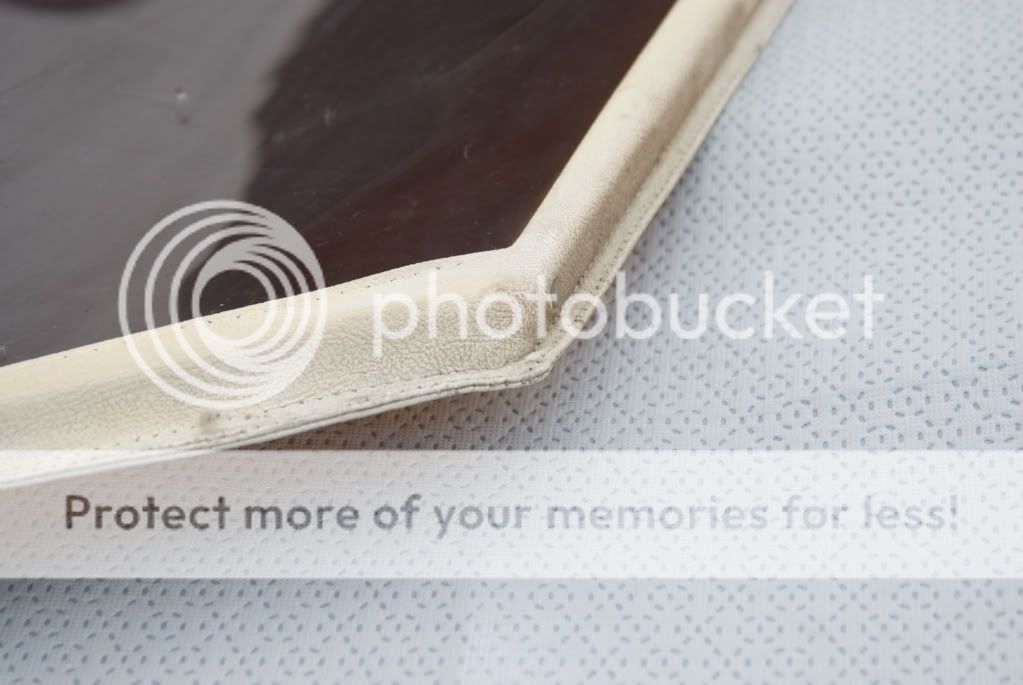
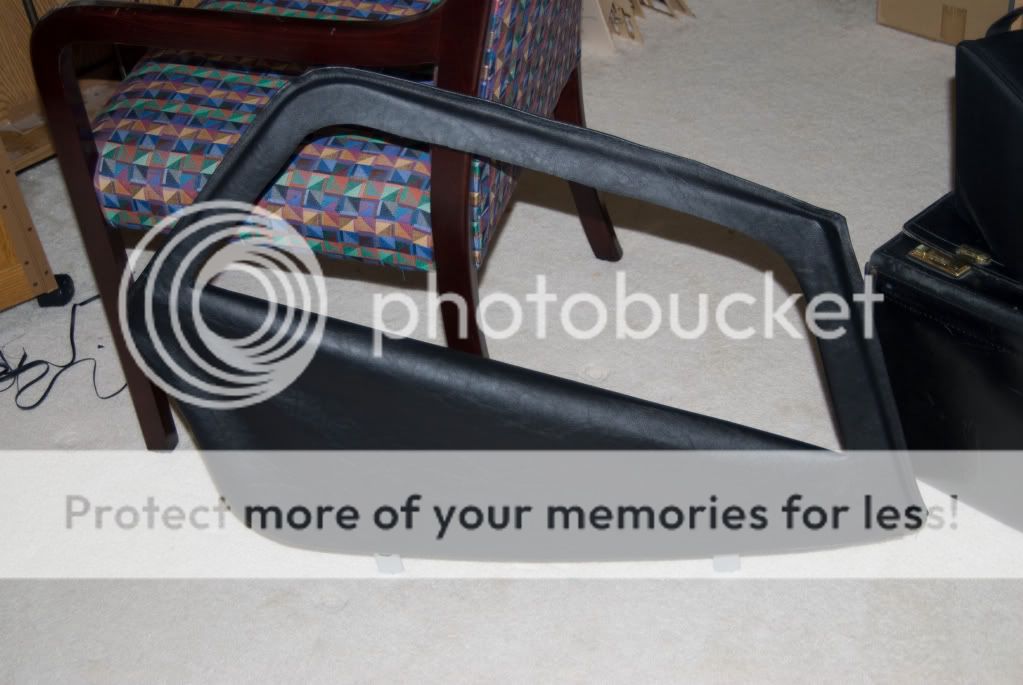
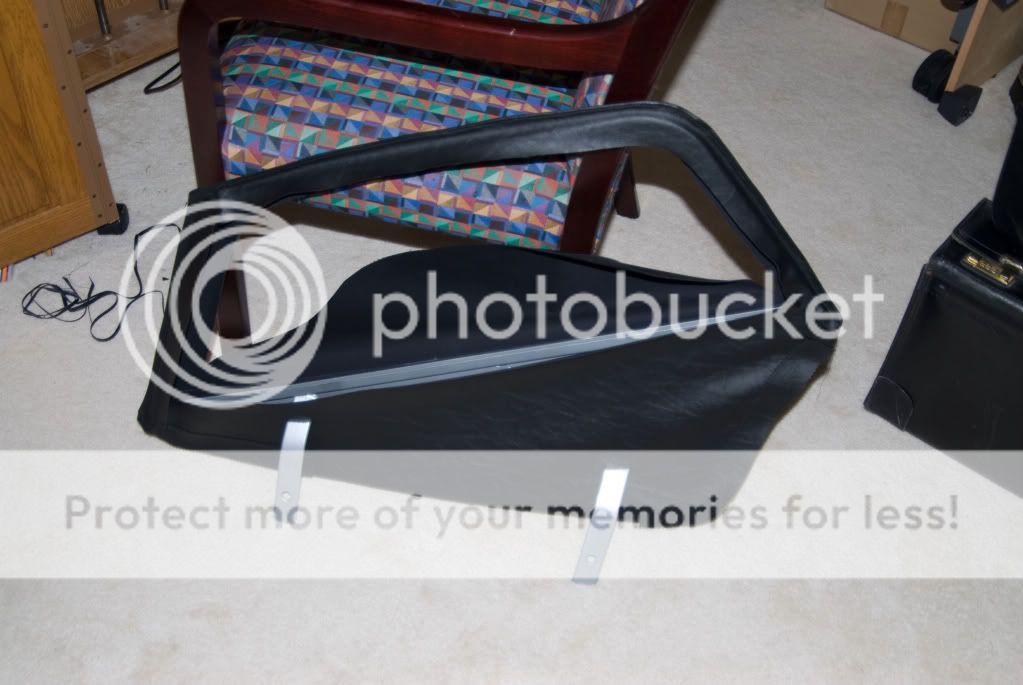
The plastic reinforcement looks like it was glued to the rear, or inside, or the front arch. A way to visualize it is that the front arch pinches the reinforcement against the windscreen support when the door is closed.

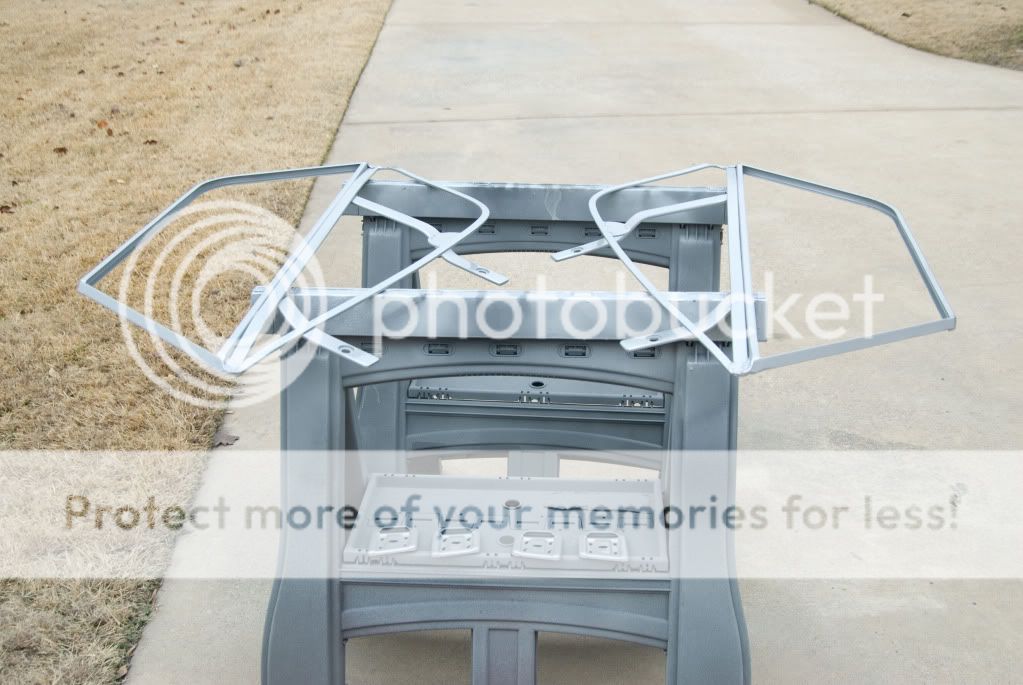
That's a great question Bob! It looks like I'll have around $250 invested in the rebuild, compared to $629+shipping to send them off. I'll let you know the final at the end of the job, and whether I think it's worth the effort!?!

John
 

Jesus

Senior Member
Country flag
Offline
I have been looking carefully at the original covers I pulled from the frames (unfortunately not carefully and in bad condition) and here are some evidences:

- The interior side of the cover is made of two pieces, one is the “bag” for the lower side, and the other is the wrapping for the window arch.

- The shape of the wrapping seems to have a “jockey-stick” shape (made up by one long straight portion and one curved). The curved portion fits the rear curved window arc. To match the shape of the front corner of the window arch, the straight portion of the wrapping is folded on itself and stitched. I assume that this is done to optimize the use of vinyl.

- The outer side is in one piece (probably for appearance and to avoid water ingress through the seams).

I thought that the usual way of covering the frames implied to sew the outer edge in the arch with the cover over the frame, but this is not necessary. Some vendors (John Skinner) sell the cover already finished, except the stitching over the front cobex window. Their instructions sheet explains how to do the whole job.

Sorry for my English limitations in describing the details.

JesĂşs

PS: Regarding the cost and savings of the whole job, there is an intermediate option, that probably optimizes the cost/effort: buying the covers already sewn and continue from there. But then the fun is dramatically reduced.
 
OP
CJD

CJD

Yoda
Country flag
Online
Aaaww...wish I had seen the "already sewn" option. Now I am pretty committed...

After the sand blasting, I test fit the frames on the car. this was quite a bit harder than I had imagined. They have to be bent quite a bit to get the pressure and spacing correct where the frame meets the door, rear quarter panel, and the windscreen brace. Here are a few of the shots.

_DSC7613.jpg

This is the general view.

_DSC7617.jpg

The windscreen brace fit. I set it so it has a good couple pounds of pressure when the door is closed, so it doesn't flap in the breeze.

_DSC7615.jpg

This lower brace was the most difficult to get right. Note I used tape to keep from harming the paint and leather as I worked. It took several trials and removals to beat on the anvil till I was happy.

_DSC7614.jpg

And the rear at the quarter panel.

The final part of the fit was to re-weld the right screen where the front of the arch had cracked off from the channel section. That was a 5 minute job...then clean out the garage for painting again!
 
OP
CJD

CJD

Yoda
Country flag
Online
Once happy with the fit, I took them out to spray. First coat was a grey epoxy primer...color chosen in case the top coat chipped, it would not be too obvious.

Since the frames were originally a silver/grey color, I decided to just make them body color, so the primer is topped with PPG DBC silver and 2002 Clear coat. All coats were kept thin, as the screens will be handled a lot, and thick paint chips a lot easier.

_DSC7621.jpg


Now I have to be vary twiet...so the Mrs. doesn't catch me using her good sewing machine!
 

Jesus

Senior Member
Country flag
Offline
John,

Thanks again for posting so much information.

Having done this job, I highly recommend fitting the frames on the car with the top-hood erected. You should ensure that the window arch fits under the flap provided in each sides of the hood.

JesĂşs
 

Jesus

Senior Member
Country flag
Offline
As a probable improvement to the original sidescreens structure, I have added an aluminum sheet to the lower brace. This layout should give more stiffness to the vinyl skin, and avoid the danger of punching it un- or intentionally. The aluminum sheet is 1 mm thick and is glued to the frame with a structural cement.

Do you see any downside in this modification?

JesĂşs
 

Attachments

  • 27555.jpg
    27555.jpg
    32.4 KB · Views: 379
OP
CJD

CJD

Yoda
Country flag
Online
Neat idea! It looks like you are right where I am...ready to cover.

I've been busy at work (hate it when that gets in my way!?), but should start cutting and sewing by this weekend. I have everything lined up except the channel. I've decided I can temporarily use the old channel if I have to till TRF gets it in. I can't get a confirmation on any of the other sources.

Your frames came out great!

John
 

apbos

Jedi Knight
Country flag
Offline
Keep up the good work guys. This will be a later project for my own car. I figure if I can sew the seats, I can do this.

Paul
 

Jesus

Senior Member
Country flag
Offline
John,

Here is another source for the window channel (in UK):

www.holden.co.uk

Search for “glazing channel” or "channel".

The convenient channel should be about 14 mm wide and closest to 10 mm high, and flexible, at least for the window arch portion.

Jesus
 
OP
CJD

CJD

Yoda
Country flag
Online
I'm back on the job!

Jesus, thanks again for the channel link. They were very nice and are sending a package of samples to choose from. If one works out I will be sure to let you know. These guys had heard of the TR3, unlike some of the British shops I have been asking!?!

So, to start things off, I unrolled the vinyl on the floor with the fabric side up, laid the frames on that, and then traced the shape of the frames onto the vinyl. Of note, it only takes 1-1/2 yard of the vinyl to cut the entire set of patterns out. Here is what it takes:

2 large patterns for the entire outer cover.
2 short patterns for the inside, that only go up to the lower channel
2 rear and upper channel patterns
2 front frame patterns
4 little splash flaps
2 snap straps

Since the fabric was black, a normal pen or pencil would not work to trace, so I had to use a silver "paint" pen. I first traced the exact shape, inside and out of the frame, and then added a border to allow room for sewing.
 
OP
CJD

CJD

Yoda
Country flag
Online
Sorry, I picked a thumb above

fe587344.jpg


The first stitching is to sew the splash flaps onto the lower inner covers. These are cut out using my Wife's pinking shears, which make that cool zig-zag edge on the original flaps.

26d13dc0.jpg


After practice on scrap, I decided the stitches best for this are 4.5mm spacing with the tension as tight as you can get it. Most materials will pucker with high tension, but this vinyl is too tough to pucker ever. The thread is upholstery thread from Hobby Lobby...very strong thread.
 
OP
CJD

CJD

Yoda
Country flag
Online
Now it was time to pull the old covering out of the trash. I used the old covers to mark the angles and locations for the seams to sew the 3 pieces together for the inner cover. These are not terribly critical, as long as the seams line up with the corners of the window channels.

9f869179.jpg


17a1cf73.jpg


Then I used the old covers to mark the slits for the mounting arms.

ecf0ad83.jpg
 
OP
CJD

CJD

Yoda
Country flag
Online
Now it's back to the sewing machine. Step one was to sew the 3 inside cover pieces together along the lines marked above. I used the tracings on the outside cover to line everything up properly. In other words, the one piece outside cover makes a pattern to line up the inside cover parts.

5f94ff2e.jpg


Now it was time to start making the cover into a bag. I placed the inside and outside covers together, vinyl to vinyl, and stitched a single line along the line traced around the lower frame. At this point the stitching is only along the bottom, not the upper channel.

620bd48c.jpg

Here the "bag" is turned right side out for the first trial fit. one bag fit perfect...the other had a loose place, so, I just ran an extra line of stitching to take in that area...no stitches removed, just added an extra. Once happy, I trimmed the extra material to within 1/8" of the stitches.
 
OP
CJD

CJD

Yoda
Country flag
Online
Now I was faced with the channel. This is tricky for several reasons. First, there is the weater lip.

af6cc384.jpg


The bag comes back off the frame at this point. To make the weather lip, you have to measure the material exactly 1/2" larger than the frame size. You then have to make 3 successive lines of stitches.

1). With the material inside out (vinyl to vinyl) the first stitch is made 1/8" from the edge of the material.

2). The material is turned right side out, so now the first stitch is hidden. The second stitch is once again run 1/8" from the edge of the material.

3). The final stitch is now run a hair farther than 1/4" from the edge of the material.

That completes the stitching for the cover!
 
OP
CJD

CJD

Yoda
Country flag
Online
This picture shows the inner cover channel area laying on the outer cover. You will notice that the outer cover is 1/2" taller than the inner. This is because the outer cover wraps around the top of the frame to the inside edge.

3482a011.jpg


The problem here is that you cannot sew a larger piece of material (the outer cover) to a smaller piece ( the inner cover) without puckering the larger. It just won't work! I was totally stumped. After studying the stitches on the original covers for a couple days, trying to solve the conundrum, it finally occurred to me. Vinyl stretches!

The solution is to stitch the channel to the size of the inside (smaller) cover, and trim the excess off the larger outer cover. That's what I did. The corners were then heated with a heat gun to stretch the outer cover around the top of the channel.

a78817ce.jpg

And here's how it turned out.
 
OP
CJD

CJD

Yoda
Country flag
Online
So here is where I am. The covers fit great and were a lot easier to sew than I thought they would be. Next, the material needs to be glued to the outside of the channels. Then it's time to find new fuzzy channels...hopefully that sample package arrives soon!

The notable part is that the covers can be entirely stitched off the frames...and with the Wife's machine...(whisper, please)! The only stitch that will require an industrial machine will be the one that goes thru the forward window.


6c68aebf.jpg


7a7de579.jpg


More to come later....

John
 

apbos

Jedi Knight
Country flag
Offline
:thumbsup: Great Job!

Paul
 
Similar threads
Thread starter Title Forum Replies Date
mctriumph For Sale front apron 57 Tr3 Triumph Classifieds 0
Rick_Thompson TR2/3/3A TR3 rack and pinion kit problem... Triumph 17
S TR2/3/3A differential hubs early tr3 and tr2 Triumph 22
S TR2/3/3A Tr2 and early tr3 differential. Triumph 10
71TR6 TR2/3/3A TR3 WIper Wheel box Triumph 2
RonC General TR TR3 Shifter on TR6 Triumph 8
jfarris TR2/3/3A Modern Temporary Donut Spare for a TR3 Triumph 1
G TR2/3/3A What color is my car? TR3 1958 Triumph 16
S TR2/3/3A Rebuilding a tr3 transmission and second gear, Triumph 57
mctriumph For Sale Odd bit for Tr3 and early 3A Triumph Classifieds 0
S TR2/3/3A turn a tr3 non-full syncro transmission into a full syncro Triumph 3
Y TR2/3/3A I cannot get my TR3 in correct timing. Triumph 7
mctriumph TR2/3/3A Safety mods every Tr3 should get Triumph 12
Editor_Reid TR2/3/3A Whitewall Tires for TR3 Triumph 11
curdy TR2/3/3A TR3 Stalling Issues Triumph 8
S TR2/3/3A Anyone cut out the spare tire compartment on a tr3? Triumph 4
S TR2/3/3A put a differential back into a tr3. Triumph 2
S TR2/3/3A tr3 breather pipe Triumph 2
2 For Sale 1957 Triumph TR3 Small Mouth Triumph Classifieds 0
Jim_Stevens TR6 Barn find of TR6 and many TR3 parts Triumph 9
J For Sale 1958 TR3 Partout Triumph Classifieds 12
R For Sale TR3 Dash Triumph Classifieds 0
D TR2/3/3A Thread and size for tr3 fuel tank vapor line fitting Triumph 0
S TR2/3/3A Aluminum door capping for tr3 Triumph 12
tinman58 TR2/3/3A TR3 at Mammoth Lakes Triumph 4
G TR2/3/3A TR3 starter disassembly rebuild early M428G bomb Triumph 6
luke44 TR2/3/3A Calling all Wiring experts TR3 Overdrive Wiring ver A or ver B or are they the same? Triumph 8
A TR2/3/3A VERY wobbly TR3 - help needed!!!! Triumph 53
vpanza TR2/3/3A EARLY TR3 hubs for wire wheel????? Triumph 5
vpanza Wanted TR3 FRONT backplates needed Triumph Classifieds 2
mctriumph For Sale Cluster gears Tr3 Triumph Classifieds 0
T TR2/3/3A TR3 pistons and liners Triumph 14
jfarris Wanted TR3 Luggage Rack Turnbuckles Triumph Classifieds 0
K TR2/3/3A Further question re TR3 red ignition light. Triumph 1
G For Sale 1960 TR3 A Triumph Classifieds 0
S TR2/3/3A Tr3 pics. Triumph 8
P TR2/3/3A TR3 Clutch Bleeding Problem Triumph 10
Joel Lester TR2/3/3A Finished my TR3! Thanks to you guys... check it out! Triumph 22
Bocaray TR2/3/3A TR3 Wheel Lug Nuts Size? Triumph 2
jfarris For Sale TR3 Stock Fan used (1956) Triumph Classifieds 0
jfarris For Sale TR3 Rear Sway Bar Triumph Classifieds 0
jfarris For Sale TR3 Speedometer SOLD Triumph Classifieds 3
S TR2/3/3A My tr3 was stuck in reverse after a short drive Triumph 3
G For Sale NEW PHOTOS: Triumph TR3 Chassis Frame + Front Suspension, Fits TR2,TR3,TR3A,TR3B Triumph Classifieds 1
luke44 TR2/3/3A TR3 not engaging 2nd gear Triumph 24
R TR2/3/3A TR3 Wiper motor Triumph 10
H For Sale TR3 RHD tonneau cover nee Triumph Classifieds 0
J TR2/3/3A TR3 Soft top speed limit? Triumph 9
5 TR2/3/3A TR3 fender patch panel question Triumph 10
2 For Sale Dr. Doolin Spring Compressor for TR3 Triumph Classifieds 0

Similar threads

Top