• The Roadster Factory Recovery Fund - Friends, as you may have heard, The Roadster Factory, a respected British Car Parts business in PA, suffered a total loss in a fire on Christmas Day. Read about it, discuss or ask questions >> HERE. The Triumph Register of America is sponsoring a fund raiser to help TRF get back on their feet. If you can help, vist >> their GoFundMe page.
  • Hey there Guest!
    If you enjoy BCF and find our forum a useful resource, if you appreciate not having ads pop up all over the place and you want to ensure we can stay online - Please consider supporting with an "optional" low-cost annual subscription.
    **Upgrade Now**
    (PS: Subscribers don't see this UGLY banner)
Tips
Tips

TR2/3/3A TR3 windshield assembly sequence

griff

Senior Member
Offline
Ok, I have a re-chromed windshield frame and stanchions along with new glass, and new TRF install rubber etc. Question is what is the proper assembly sequence (I don't want to get a large portion done to find I should have already done x.

Do I install glass into the two piece frame then attach to stanchions, then to car?

Or, Do I mount stanchions the attached the assembled windshield and frame?


I am also concerned about the two sliding "attachment bars" on the inside of WS frame. When how are they installed (assuming I can find the second one, it seems to be hiding from me).

Advice or tips greatly appreciated.

thanks,

Griff
 

TR3driver

Great Pumpkin - R.I.P
Offline
The glass goes into the top 3/4 of the frame first, with the thin rubber/fabric between it and the frame. As I recall, you then put the two little angle pieces into the bottom rail, and install the rail onto the glass, then the 4 screws for the angle pieces.

Add the rubber top & bottom, then attach the stanchions & tenon plates. Be sure you get the right screws in the right holes, some of the screws are very slightly longer and can break the glass if they are put in the wrong hole.

Now you can add the two little curved plates that hold the bottom rubber seal to the stanchions; then mount the whole mess to the car.

It's a lot easier if you remember to install the rearview mirror and little bracket before installing the windshield.
 

vivdownunder

Jedi Warrior
Offline
And watch the slight curvature on the glass.....right way around or it usually breaks.

Often it is really hard to get the glass into the frame using the rubber sealer. Slippery dish detergent or talc powder can help. Or black windscreen silicone/sikaflex is an option, but messy if you aren't careful. If you go that way, let it dry then trim around the glass with a sharp blade. Sikaflex is harder to get off.

And check the fit of the glass to the frame before starting, as I've had to grind bottom corners of the glass, which were found to be slightly oversize.

Also check that the threads are OK in the frame for the fine screws that hold the staunchions to the frame. They need to grip properly, as there is a lot of pressure on a windscreen at speed.

Don't forget the tenon plate that goes between the staunchions and the glass frame. (sidescreens butt against this). Originally there was a thin rubber gasket between the tenon plate and the glass frame that isn't shown in parts manuals. This helps waterproof the windscreen. It's often left out, which leaves the staunchion screws too long, so they hit and break the glass.

You can make these from a strip or sheet of thin rubber...about 1/16" is OK.

Do this job when calm of mind, and only if you feel you are dextrous enough, as it's a stinker.

Viv.
 

TR4nut

Yoda
Country flag
Offline
Excellent question and feedback here, I have my windshield surround at the chromers and will be attempting a rebuild as well when it gets finished. I am concerned about the windshield gasket material - I bought some from TRF and it is a rubber roll which looks good but may be a little thick - would probably work great for the shim Viv mentions though. Anyone know if there is a supplier for the clothlike material that was in there originally (at least mine looked like cloth).
 

Tinkerman

Darth Vader
Offline
I echo Randy, this will go into my BCF Tips file. I will be on that project soon.

Thanks, Tinkerman
 

Mkutz

Jedi Hopeful
Country flag
Offline
I recently did this project myself -- for this one, do a dry fit (without the glazing) of the glass in the two part frame to make sure the curves are good and that the lower L-brackets are lining up with the holes in the frame -- Also, make sure the two little steel bars on the sides of the upper frame half are installed and the holes are freshly tapped. Attach the stantions to figure how much play you have with the screws--if you feel tension and you know its not being caused by crud in the hole threads, then you're likely hitting the glass and the screw is too long. Keep in mind, your're going to loose a little bit of play when screwing it together because of of the width of the glazing, or at least that's what I was thinking I was putting mine together.

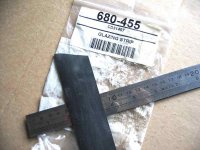
When installing the window glazing, I just taped it to each side of the windshield to hold it in place. The thickness of the glazing was fine, and I used the same TRF product. The big mistake I make was to use WD-40 as a lubricant -- DON"T DO THIS!! It began to dissolve the rubber glazing into a sticky tar like substance. What ever you use-sample the end of the strip to make sure you won't have any snafus like this one.
 

Don Elliott

Obi Wan
Offline
I installed my new glass as per the sequence of steps listed by Randall. But I used several layers of sticky black electric tape all around the glass instead of a rubber seal. It worked but the tape stretched too thin in some places and this let the rain in. So I took it all out again.

I wrote about his some time ago on this forum. I then used a roll of rubber tape that was exactly the right thickness that came from Moss. It worked fine.

BTW, if you change the pegs at the top of the chromed window frame, compare the length of the stud ends on the new ones to the ones you took out. The repros are made for an MG-TD and the stud is longer. If you use these repro studs, you will break your new glass windshield. Cut the studs back to the correct length if required.
 

Attachments

  • 19061.jpg
    19061.jpg
    36 KB · Views: 633
OP
G

griff

Senior Member
Offline
Some great instruction and tips. As soon as I find the second of the two steel bars, I will re-thread and start assembling the windscreen.

I will also take the advice to install the rear viw mirror first as well. Of course that delays me slightly because I have to replace the glass in it.

Thanks to all for such thorough rsponses.

Griff
 

martx-5

Yoda
Country flag
Offline
griff said:
... As soon as I find the second of the two steel bars, I will re-thread and start assembling the windscreen.


Griff

What are you re-threading?? IIRC, the threads on the windscreen are NOT standard threads, they are BA (British Association).

I've run into a mess of BA threads on the TR3. The two sizes I've come across are 2BA and 4BA.

Info on BA threads
 

Twosheds

Darth Vader
Offline
I wondered about that, too.

I think he means that he will start a new "thread" on BCF.
 
Similar threads
Thread starter Title Forum Replies Date
luke44 TR2/3/3A TR3 Windshield Rebuild and Assembly - Step by Step Triumph 20
K TR2/3/3A Removing TR3 windshield stanchions Triumph 4
K TR2/3/3A The Harley Davidson side mirror that mounts to the TR3 windshield stanchion? Triumph 11
N TR2/3/3A TR3 windshield Triumph 2
N TR3 Windshield FORUM Navigation Questions 0
Lbp TR2/3/3A Question about TR3 Rubber Windshield Seal Triumph 9
Tinkerman TR2/3/3A Windshield glazing TR3 A 1960 Triumph 7
D TR2/3/3A tr3 windshield Tenax fasteners Triumph 2
luke44 TR2/3/3A TR3 Windshield Stanchion Short Screws Long Screws Triumph 2
6 TR2/3/3A TR3 windscreen/windshield glass Triumph 5
M TR2/3/3A My own TR3 windshield question? Triumph 5
J TR2/3/3A TR3 windshield angle and body shims Triumph 11
O TR2/3/3A TR3 Turn Signal Retrofit / Windshield Screws? Triumph 7
O TR2/3/3A TR3 Windshield to Scuttle Mounting Triumph 1
S TR2/3/3A windshield wipers tr3 Triumph 1
T TR2/3/3A TR3 Windshield washer pump Triumph 14
B TR2/3/3A TR3 Windshield Wiper Tubing Triumph 5
Marvin Gruber TR4/4A Windshield motors TR3 & TR4 Triumph 2
AngliaGT TR2/3/3A New Windshield for TR2,TR3 $150 Triumph 2
S TR2/3/3A windshield post 60k tr3 Triumph 10
O TR2/3/3A TR3 Windshield Glass Replacement Triumph 2
mountainman TR2/3/3A TR3 Windshield Center Support Triumph 1
G TR2/3/3A TR3 windshield corner finishers Triumph 4
O TR2/3/3A TR3 Windshield Replacement Triumph 4
G TR2/3/3A TR3 Windshield size question Triumph 2
G TR2/3/3A TR3 windshield isntall Triumph 11
B TR2/3/3A TR3 Windshield-[screen]? Holder on'r thingy remove Triumph 6
mrv8q TR2/3/3A TR3 Windshield Stanchion Q Triumph 6
D TR2/3/3A TR3 post 60000 windshield stanchion guide plates Triumph 5
M TR2/3/3A TR3 Windshield Frame Triumph 2
bmurphy7369 TR2/3/3A TR3 Windshield Stanchion Guide Plates? Triumph 22
G TR2/3/3A TR3 windshield disassembly Triumph 3
mctriumph For Sale front apron 57 Tr3 Triumph Classifieds 0
Rick_Thompson TR2/3/3A TR3 rack and pinion kit problem... Triumph 17
S TR2/3/3A differential hubs early tr3 and tr2 Triumph 22
S TR2/3/3A Tr2 and early tr3 differential. Triumph 10
71TR6 TR2/3/3A TR3 WIper Wheel box Triumph 2
RonC General TR TR3 Shifter on TR6 Triumph 8
jfarris TR2/3/3A Modern Temporary Donut Spare for a TR3 Triumph 1
G TR2/3/3A What color is my car? TR3 1958 Triumph 16
S TR2/3/3A Rebuilding a tr3 transmission and second gear, Triumph 57
mctriumph For Sale Odd bit for Tr3 and early 3A Triumph Classifieds 0
S TR2/3/3A turn a tr3 non-full syncro transmission into a full syncro Triumph 3
Y TR2/3/3A I cannot get my TR3 in correct timing. Triumph 7
mctriumph TR2/3/3A Safety mods every Tr3 should get Triumph 12
Editor_Reid TR2/3/3A Whitewall Tires for TR3 Triumph 11
curdy TR2/3/3A TR3 Stalling Issues Triumph 8
S TR2/3/3A Anyone cut out the spare tire compartment on a tr3? Triumph 4
S TR2/3/3A put a differential back into a tr3. Triumph 2
S TR2/3/3A tr3 breather pipe Triumph 2

Similar threads

Top