• The Roadster Factory Recovery Fund - Friends, as you may have heard, The Roadster Factory, a respected British Car Parts business in PA, suffered a total loss in a fire on Christmas Day. Read about it, discuss or ask questions >> HERE. The Triumph Register of America is sponsoring a fund raiser to help TRF get back on their feet. If you can help, vist >> their GoFundMe page.
  • Hey there Guest!
    If you enjoy BCF and find our forum a useful resource, if you appreciate not having ads pop up all over the place and you want to ensure we can stay online - Please consider supporting with an "optional" low-cost annual subscription.
    **Upgrade Now**
    (PS: Subscribers don't see this UGLY banner)
Tips
Tips

MGB Replacing heater cables...

Joe Reed

Jedi Warrior
Country flag
Offline
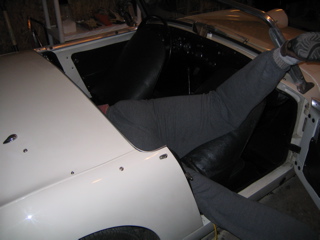
I've needed to replace both heater cables for years but keep putting it off since I rarely use the heater. But....even though my car is just a driver quality car, it still bugs me to have something on it that doesn't work properly. I've got new cables...and I need to get this done before I get any older!

I know the one that operates the blend door is a pain, but doable. I've already had the pleasure of connecting it to the blend door. This time I may remove the seat to get under there. What am I facing when it comes to the one to the heater valve? Will I need to cut the car in half with a sawsall?

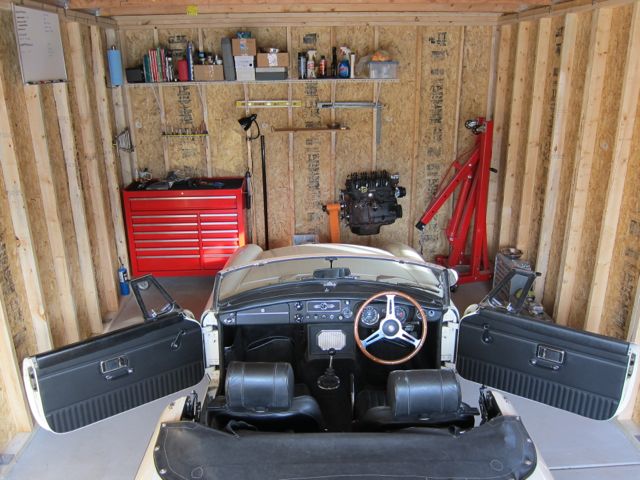
I know some have converted to an electrically operated heater valve...and the cable wouldn't be needed...but I don't want to go that route. Although my car is far from original, I would like to keep this system original. In fact, I intend to reinstall the original heater valve to replace the Porsche 944 unit I put in several years ago. The original is no beauty, but I'm just not happy with the looks of the plastic Porsche valve. It just looks out of place...
 

NC Mike

Senior Member
Offline
If I recall correctly, the cable for the valve in my 74.5 passes through a grommet in the firewall, and has a relatively straight run from control to valve. But then, the controls are dash mounted, on each side of the steering column.

I think yours are in the center console, yes? I'd be tempted to remove the control from the console, disconnect the cable from the valve, and if the cable moves "freely," then I'd connect the new cable to the old cable, and pull the new cable into place using the old cable as a fish tape of sorts.

Just my 2 cents.
 
OP
Joe Reed

Joe Reed

Jedi Warrior
Country flag
Offline
That's sort of my plan. That's the only way I can think of to get it through both of the firewall bulkheads...
 

PAUL161

Great Pumpkin
Silver
Country flag
Offline
Replacing the heater valve cable is pretty easy, replacing the vent door cable is, well, just imagine your doing brain surgery, in the dark, wearing ski gloves laying partially on your back and your legs straight up in the air. Allow 5 to 10 Minutes to get into that position and your good to go. Piece of cake :encouragement: . :devilgrin: PJ
 

Rut

Obi Wan
Country flag
Offline
Replacing the heater valve cable is pretty easy, replacing the vent door cable is, well, just imagine your doing brain surgery, in the dark, wearing ski gloves laying partially on your back and your legs straight up in the air. Allow 5 to 10 Minutes to get into that position and your good to go. Piece of cake :encouragement: . :devilgrin: PJ

Paul,
You make it sound too easy! Don't forget removing the seat and the arthritis...
Rut
 

PAUL161

Great Pumpkin
Silver
Country flag
Offline
Paul,
You make it sound too easy! Don't forget removing the seat and the arthritis...
Rut

Oh, I forgot about those two issues, very important! :jester:
 
OP
Joe Reed

Joe Reed

Jedi Warrior
Country flag
Offline
The hardest part of replacing that cable is getting back OUT of the car once you're done!
 

JPSmit

Moderator
Staff member
Silver
Country flag
Offline
The hardest part of replacing that cable is getting back OUT of the car once you're done!

Amen to that! As I read this, I suddenly realized the reason for those various "bury me in my car" stories you hear - nothing to with the car I suspect, just easier all around if they died that way! :D
 

drooartz

Moderator
Staff member
Gold
Country flag
Offline
The hardest part of replacing that cable is getting back OUT of the car once you're done!

I know what that feels like. This is on a Bugeye, but very similar problem:

wiring.jpg
 

DrEntropy

Great Pumpkin
Platinum
Country flag
Offline
:lol: A twelve-year-old with high mechanical skills and triple jointed wrists is helpful... but they're rare and expensive to rent. :devilgrin:
 
OP
Joe Reed

Joe Reed

Jedi Warrior
Country flag
Offline
I suppose I could put it on a lift and cut out the floor pan so I could attach the cable standing up.....if I had a lift :(
 

DrEntropy

Great Pumpkin
Platinum
Country flag
Offline
Just bite th' bullet an' contort yerself into the footwell... after the seat is out. A set of really loong-nose pliers is helpful as well.
 
OP
Joe Reed

Joe Reed

Jedi Warrior
Country flag
Offline
I had a few minutes for some alone time in the garage tonight, so I decided to get started on this project. Removed the horizontal console section, then the vertical section with the radio and heater controls. Removed the radio, the old heater cables and the various wiring (lights, cig lighter, etc.). Now I've got it on the bench, cleaned up and the might-as-well phase has started.

I've often thought about deleting the radio and installing a blanking plate (I never use the radio), but that presents a couple of problems I don't want to deal with now - removing the antenna on the d/s wing...and the fact that the door cards have speaker holes. The former would be a PITA to remove and patch. The latter would mean new door cards - and expense I don't want. So....I'll stick with the radio for now.

Next up is the volt meter. That would be the voltmeter I picked up several years ago and never got around to installing. I removed the cig lighter (I don't smoke) and the voltmeter is a perfect fit for that center depression - or it will be once I make a bigger hole. I don't see any reason I can use the existing power feed for the cig lighter to connect the volt meter since it's a switched circuit. I may also install a 12v power outlet somewhere (maybe on the p/s of the console) in case I need it to power a phone charger or my Garmin.

Gotta get some new light bulbs as well...

It doesn't appear that running the new cables is that difficult, so I should be able to get this little project done in my spare time this week....unless I find something else to change while I'm in there....or if it spring yard work interferes...
 
OP
Joe Reed

Joe Reed

Jedi Warrior
Country flag
Offline
Well...that was an interesting find! While I had the radio and all pulled out I decided it was a good time to replace the old, bent antenna. While extracting the old one out of the top of the wing, I found that something was tied to the bottom of it with a string. I soon discovered the bottom half of an old antenna tied to the new one! I suppose a PO couldn't figure out how to get the old one out - so he just left it in there! :rolleyes2:
 

Mickey Richaud

Moderator
Staff member
Gold
Country flag
Offline

drooartz

Moderator
Staff member
Gold
Country flag
Offline
It doesn't appear that running the new cables is that difficult, so I should be able to get this little project done in my spare time this week....unless I find something else to change while I'm in there....or if it spring yard work interferes...

That's the biggest danger with any little project -- the while-I'm-in-theres! Pulled the radiator on my previous bugeye just to get it cleaned out, and 3 years later the full mechanical restoration was done. :grin:

I did the door panels on my previous MGB for a similar reason (speaker holes, and they were the wrong panels). Was an expense, but it really cleaned up the interior. I put a mirror where the radio antenna was.

mgbpanels3.jpg
 
OP
Joe Reed

Joe Reed

Jedi Warrior
Country flag
Offline
Still don't have the heater control cables installed, but I did get the voltmeter installed in the console. I was a bit concerned about cutting a perfectly round 2" hole in the recess in the console where the cig lighter used to live. I didn't want to butcher the hole....and I certainly didn't want to crack the console. I have a 2" hole saw but the large hole where the cig lighter was means there is no place for the pilot drill to start - and trying to cut it without the pilot will let the saw walk around and make a mess of the job.

Here's how I did it (and it actually worked out very well!). I cut a piece of scrap wood to fit behind that recess, and attached it with a couple of screws just outside the original hole. That gives the pilot drill a place to play...and gives extra support to the plastic so it remains flat and doesn't crack. It could probably be cut with a hand drill, but I used my bench top drill press. That made it easier to hold...and easier to control the cut.

Came out perfect! :smile:

Also got a new radio antenna installed and the wire fished into the cockpit.

Not too bad considering I worked 9.5 hours today. Maybe tomorrow I can actually get started on those cables....after work :(
 

drooartz

Moderator
Staff member
Gold
Country flag
Offline
Well done. Would love to see a pic of that volt meter install.

Always a bummer about these dern day jobs -- they cut into our time to work on our cars! Of course, without one it cuts into our ability to pay for them. :grin:
 
OP
Joe Reed

Joe Reed

Jedi Warrior
Country flag
Offline
I'll take a pic tomorrow. I *finally* got the cable attached to the blend door!!!! My method was to lay on my right side far enough under the dash to see into the heater vent hole, grab the cable with some long needle nose pliers, and hold the cable stop in place with a long screwdriver - while wearing one of those LED headlights. Wearing glasses with bifocals doesn't exactly help. I painted a white line across the cable stop with Liquid Paper (I keep it in the garage to highlight timing marks) so I wouldn't lose track of which way the hole in the cable stop was oriented. Still it was a struggle. I was within a couple of minutes of giving up for the night when all of a sudden....WAIT.....I think it's in!!! And it was! I'm done for the night....

I feel like one of those doctors who do surgery through a tiny incision - except that don't have to do it laying in a tight tunnel in the dark...

On that cable I actually left the original cable sheath in place and ran the new wire through it since I couldn't figure out how to get the sheath disconnected from the end at the blend door. Still, it move nice and smooth - so I'm happy with it.

The other cable is already attached to the control in the console. As I put the console back in place, I'll feed that cable into the engine bay, install a new grommet, and connect the cable to the heater valve. Should be a piece of cake compared to this afternoon!
 
Similar threads
Thread starter Title Forum Replies Date
N Replacing Heater Blower Austin Healey 7
S TR2/3/3A Pinion tail bearing replacing Triumph 12
B Replacing the Handbrake Cable Austin Healey 8
drooartz Replacing Bugeye windshield rubber Spridgets 6
K TR2/3/3A Replacing engine and gearbox mounts? Triumph 8
TR3Acustodian TR2/3/3A Replacing "H" front badge Triumph 11
K TR2/3/3A Replacing water pump pulley.....memory refresh. Triumph 7
I Replacing Windscreen Wiper Wheel Boxes Austin Healey 0
S MGB 1978, replacing the clutch. MG 3
PAUL161 T-Series Replacing Transmission MG 3
S TR2/3/3A Replacing the cam shaft Triumph 27
fpstude TR4/4A Replacing Rear Flexible Brake Hoses on TR4A w/ IRS Triumph 11
J TR4/4A Replacing springs Triumph 7
Got_All_4 TR5/TR250 Need guidance for replacing steering column bushings Triumph 11
L Replacing veneer on wood dashboard Restoration & Tools 14
D TR6 Replacing Horn insert in steering column Triumph 11
69MGC MGC Replacing an Outer Wheel Well panel MG 3
maxwedge5281 Replacing Factory Hardtop Rear Window Austin Healey 24
BN6_2197 Replacing gearbox switch of the overdrive system Austin Healey 10
TomMull replacing walnut veneeron the dash Lotus 17
R TR2/3/3A Replacing rear springs Triumph 51
Jer refresh my foggy memory - replacing clutch in my 67 Midget Spridgets 1
RAC68 Clutch Still Slipping after replacing 30W-Non-Det. for Red Line Austin Healey 52
T Replacing O/D switch with a clock Austin Healey 4
simon1966 Replacing the witches nose in-situ. BN1 Austin Healey 14
KVH TR4/4A Replacing Front Windshield Gasket Triumph 5
Michael Oritt Replacing timing chain tensioner and more Austin Healey 24
Rut Replacing rocker assembly Spridgets 1
T TR4/4A Replacing rear pinion seal - remove driveshaft? Triumph 21
J Replacing BJ7 Dash - Detailed Photos/Schematics Austin Healey 3
M Replacing front shocks, torque setting? Spridgets 2
T TR4/4A Replacing in situ oils sealing gearbox and rear axle Triumph 18
55modified TR2/3/3A warning indicator bulbs need replacing where and what to buy? Triumph 4
Jim_Gruber Replacing Wheel Studs Spridgets 10
P Replacing the crankshaft damper [harmonic balancer] Austin Healey 15
K TR4/4A Replacing a broken 4A turn signal switch indicator? Triumph 2
55modified Replacing rear spring eye bushings on a BN1. How difficult? Austin Healey 8
Michael Oritt Replacing Cold Air Box with Velocity Stacks Austin Healey 10
Rhodyspit75 Replacing boot floor need bracing? Spridgets 2
RickB MGB 1980 MGB No rear brakes after replacing MC & booster MG 5
Popeye TR4/4A Steering bushing: replacing rubber with poly, do I snug to 1/8" gap or...? Triumph 3
Jim_Gruber Replacing Spridget Coolant Spridgets 21
TimK Old brake hoses need replacing, if you need proof look here... Austin Healey 1
KVH TR4/4A Replacing the Real Axle Tube Seal Triumph 17
KVH General TR Short Wheel Studs for Wire Wheels--Replacing Triumph 17
GTP1960 TR2/3/3A Question on replacing brake lines & converting to Dot 5 Triumph 9
tomshobby replacing water pump Spridgets 1
D TR2/3/3A Patching, versus replacing floors? Triumph 15
T Replacing the crank pulley/damper Austin Healey 4
M TR4/4A Replacing the hood/bonnet onto the body Triumph 11

Similar threads

Top