• Hey there Guest!
    If you enjoy BCF and find our forum a useful resource, if you appreciate not having ads pop up all over the place and you want to ensure we can stay online - Please consider supporting with an "optional" low-cost annual subscription.
    **Upgrade Now**
    (PS: Subscribers don't see this UGLY banner)
Tips
Tips

Door skin patch panel question

red57

Jedi Knight
Country flag
Offline
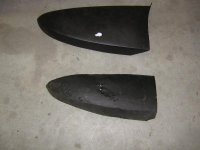
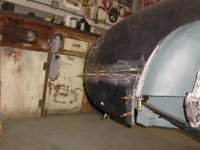
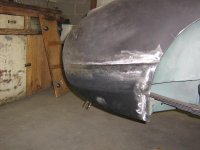
Restoration in progress (only 2 years in) and I'm at the stage now to repair the doors. I got Kilmartin lower door skin patch panels from British Car Specialists. They run almost up to the swage line. In my case the rust is limited to the bottom 3-4" of the door. My questions is: is it better to use the entire replacement panel and cut the old skin up near the swage line, or is it better to just cut off the lower area where the rust is and trim the patch panel down to match. I'm thinking some of you have faced this decision and possibly have some advise/recommendations.
Thanks,
Dave
 

Healey 100

Jedi Warrior
Offline
I have not made that specific repair, but I would definitely cut the patch down to the smallest size possible while still being able to connect it to solid, unrusted metal. I would keep it small because the larger the patch, the more problems you'll have with distortion of the door, oil canning, etc.

Just a comment: While all my repairs have been butt welded, they were made many years ago. Today I would look into epoxy bonded overlapping joints. Many body shops are using this technique and it really cuts down on the distortion you get with a welded repair. The strength of these joints is amazing and the epoxy seals the overlap against water infiltration.
 
OP
red57

red57

Jedi Knight
Country flag
Offline
Thanks Bill, I agree to cut out as little as possible, and have been doing that throughout on the inner stuff. In the case of the doors, at least one of them will have to have the bottom 2-3" cut out the entire length of the door. And in that case the weld length will be the same whether I cut high up or just the bottom. I have been looking at the accessibility from the inside for dolly work after welding and, except for the brace with the wood insert, there is pretty good access. I am unsure if there will be a difference in the distortion. I'm Oxy/Acetylene butt welding so hammer & dolly is possible, but I am lazy and mostly novice at bodywork. I just can't decide if there is an advantage one way or the other. On the other door I may get by with a couple of shorter patches. No matter what I do, I'm sure some bondo will be involved....

Epoxy bonded lap joints seem appealing but also seems too hi-tech for me - I would worry about getting a bad joint and a failure soon.

Thanks,
Dave
 

healeyblue

Jedi Warrior
Gold
Country flag
Offline
If you have to weld the entire length of the door then the closer you get to the swage line the stronger the metal will be because the swage will act to strengthen the metal and prevent it from warping. I strongly advise against gas welding unless you are very proficient at it. Short bursts with a mig will induce less heat and have less chances of warping. And by all means do not braze the panels on. I curse every time I see old braze repairs.
 

Barryp

Senior Member
Country flag
Offline
Hi Dave,

I'm five yrs into my two year project, but the body is ready for paint. I had several patches to do also and I struggled with what method too. The one I that I think worked the best was place the patch over existing panel about 1" larger than is needed so you have some good existing metal to weld to. Tack it every couple of inches then take a thin cut off wheel and cut at a 45 deg angle on the edge of the patch panel. Cut four or five inches push the two pieces together and retack. You can end up with a gapless patch if your careful. I'll try to attach some pics. I played with the oxy and had some good success but the mig seemed to work best on these types of patches and had less distortion on the larger flat panels ie: bottom of the door.

Barry
 

Attachments

  • image.jpg
    image.jpg
    42.7 KB · Views: 87
  • image.jpg
    image.jpg
    52.9 KB · Views: 88
  • image.jpg
    image.jpg
    66.5 KB · Views: 89
  • image.jpg
    image.jpg
    48.5 KB · Views: 87
Country flag
Offline
Barry,

Looks like you used Kilmartin patch panels with the correct wire bead. How did you 'merge' the bead on the panel into the existing bead on the wheel well?

Thanks,
Bob

ps. Nicely done, BTW.
 

Barryp

Senior Member
Country flag
Offline
Hi Bob,

Yes Kilmartin, I took the easy way out and used the original wire on this fender, as it was in good shape however you could onroll the lip on the original and cut the wire a few inches back, but weld the new wire to the existing and roll the lip back over.

Barry
 
OP
red57

red57

Jedi Knight
Country flag
Offline
Thanks, for the responses.

Healeyblue - that is exactly why I asked the question. It seemed to me the swage line might help keep it straighter but wasn't sure. And I will never braze - a PO brazed up old holes in my boot lid from a luggage rack and something (maybe the flux residue?) has screwed up paint twice over the years. I also have an oil pan that someone brazed and it keeps cracking where the brass is - too rigid I think. Anyway, no brass going into this project.

Barryp - that sounds like a good method for having no gaps, I will have to try it. As to the oxy/vs mig debate, the main reason I have been using oxy with no filler is that the panel remains ductile & malleable for hammer & dolly work. The mig wire is so hard it can actually crack when trying to straighten after grinding down to parent metal thickness - trade off = more distortion with gas but workable metal, less distortion with mig but not very workable. I have found on some of the inner sheet metal that the oxy caused a fair amount of distortion but I could work it back to shape. In some cases I used the mig and sure found less distortion - but these were all fairly short welds compared to the door (plus most aren't going to be visible). I've done a lot of research and the oxy method was how they did a lot of custom coachwork in the 30s & 40s and I have seen some beautiful results (not necessarily mine though). Most recommend tacking every 1/2 inch or so and then one continuous weld without filler making a very uniform HAZ the entire length of the weld - on practice sheets it seemed to work well but I'm now ready to tackle the real thing and am a bit nervous about the outcome.

Again, I appreciate all comments.

Dave
 

Barryp

Senior Member
Country flag
Offline
Dave,

Please let me/us know what method you use and what the results are. I really wanted to do old school style repair work on this car and have tried to use oxy/acetylene as much as possible, it's what I grew up with and really enjoy using, but even with a mini torch it can put a fair amount of heat into to the peice if one isn't very careful. And then hammer and dolly and some shrinking is called for. I hate to say it, maybe I just got lazy but the mig method does work pretty good. It does make for a more brittle area, but less plastic filler can be used, I guess that's the trade off. I have a real soft spot for the fabricators that could make, or repair anything with a torch and a coat hanger. I played with tig, oxy and mig on these patch panels and really felt like the mig was cheating, and it pains me to say but it works pretty good. The trick is not laying beads just hundreds of overlapping tacks, so there is no HAZ.

Barry
 

Keoke

Great Pumpkin
Country flag
Offline
I have made that specific repair and I would definitely cut the patch down to the smallest size possible while still being able to connect it to solid, unrusted metal. Keep it patch area small because the larger the patch, the more problems you'll have with warpage- distortion of the door metal, oil canning, etc.

:iagree:-- 
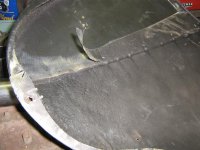
With Bill Sullivan-Additionally if you can find a metal man that knows how to " Hammer Weld " you will get a proper fix.
It does not matter where you cut the panel just so all the rusted area is removed The modern techniques may be good I just have never used them. You know old folks old world techniques--:highly_amused:
 
Country flag
Offline
Technique I've seen used for butt welds on TV shows--haven't done any bodywork in a while myself--is to hammer-and-dolly the tack weld flat while still hot, then use compressed air to cool the weld. Make your tacks as far apart as possible, then interleave the welds, known as 'stitch welding.'
 

Keoke

Great Pumpkin
Country flag
Offline
BOB:
cumulatively this is how the " Hammer Weld " is done mostly only skilled metal men can accomplish this repair.
 
Last edited:
Similar threads
Thread starter Title Forum Replies Date
BoyRacer Door Skin Removal Austin Healey 6
J TR2/3/3A Door Skin Reusable? Triumph 11
fad64b Door Skin Help Please MG 1
beaulieu POR 15 between door skin + door shell expanding Restoration & Tools 6
Jim_Gruber Door Fitting - A-Pillar Skin - Success Spridgets 5
2wrench What tools best suit interior door skin replace? Triumph 8
KLUTZ Door skin questions MG 7
drooartz Spring service of the 4-door Sprite (Morris Minor) Spridgets 6
A 100/6 BN4 Door Lock Austin Healey 15
SpeedyG TR4/4A Door window regulator spring Triumph 5
SpeedyG TR4/4A Interior door handles and escutcheons Triumph 9
AngliaGT Wanted Two inside window handles & Regulator for Driver's Door - '67 GT MG Classifieds 6
AngliaGT MGB-GT WANTED: Driver's Door Regulator + Two (2) interior handles. MG 1
D Older door panel clips Restoration & Tools 4
S TR2/3/3A Aluminum door capping for tr3 Triumph 12
Southwarks TR2/3/3A TR2 door help! Triumph 2
M For Sale 2017 Jaguar F-TYPE Premium 2-Door Convertible for Sale mlbirk@aol.com Jaguar Classifieds 0
R MGB MGB Roadster Door Panel Speakers MG 9
D Top Door rubber and fuzzy seal Spridgets 5
J For Sale Triumph TR3 door, left, for sale Triumph Classifieds 0
Popeye TR4/4A Door seal channel near top of windscreen Triumph 6
fordmstr 73 Midget rocker panel end caps and door handle gaskets advise Spridgets 3
D MGB Older style door pulls MG 0
V Door Seals Austin Healey 8
Bayless Door seal question Spridgets 3
B BJ7/BJ8 Door Check Straps Austin Healey 10
Donald1107 TR2/3/3A Door hinges Triumph 14
algot1901 1950 Prefect E93A-946480 - door bottom rubber Other British Cars 14
D Door Seal Fit Austin Healey 18
D For Sale BT7 interior door cards - new ! Austin Healey Classifieds 0
E 3000 Healey Door Checks Austin Healey 1
A MGB MGB a glove box door MG 10
chicken BJ7 Door Fit Austin Healey 27
Patrick67BJ8 Glazing Door Window Glass in BJ8 Austin Healey 15
F Door Panel Hardware Austin Healey 3
LAW75 Door Latch Adjustment Austin Healey 22
BoyRacer Door Panel Measurements Austin Healey 3
LAW75 BJ8 Door Locks Austin Healey 2
Cappy Occasional Door Malfunction Austin Healey 1
nichola TR6 Door handle and window crank installation Triumph 0
J Door Draught Metal Clips Austin Healey 4
F Interior Door Handle Removal Austin Healey 2
F Wanted wanted new old stock driver side door latch Triumph Classifieds 2
F TR2/3/3A looking for door latch review Triumph 7
Joel Lester TR2/3/3A Looking for helpful hints for door hinge screw removal Triumph 17
M Spitfire 1500 LH Door Triumph Classifieds 0
chicken Healey BJ7 door (i think) Austin Healey Classifieds 0
chicken BJ7 Door Seal Austin Healey 5
chicken Inner Door Seal Trim Position Austin Healey 6
Lotuswins TR4/4A Is this normal? TR4 gap between door and cowl Triumph 10

Similar threads

Top