• Hey there Guest!
    If you enjoy BCF and find our forum a useful resource, if you appreciate not having ads pop up all over the place and you want to ensure we can stay online - Please consider supporting with an "optional" low-cost annual subscription.
    **Upgrade Now**
    (PS: Subscribers don't see this UGLY banner)
Tips
Tips

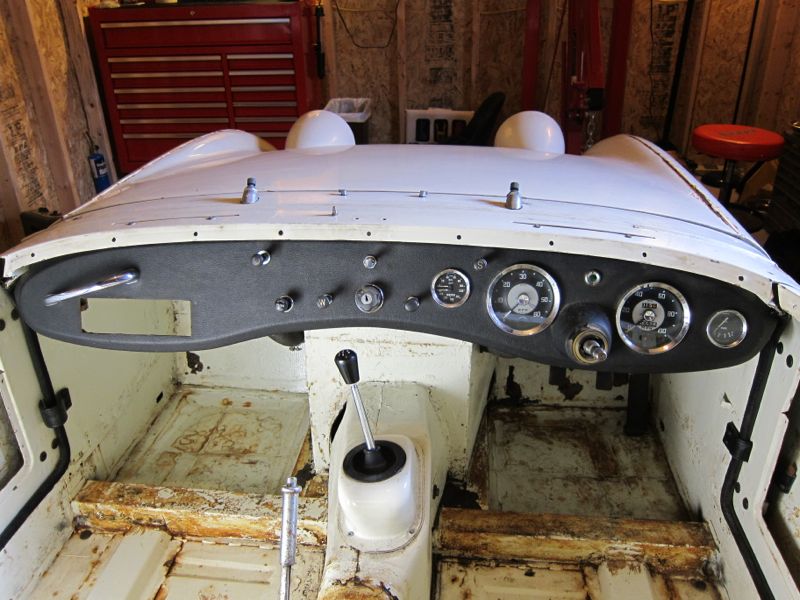
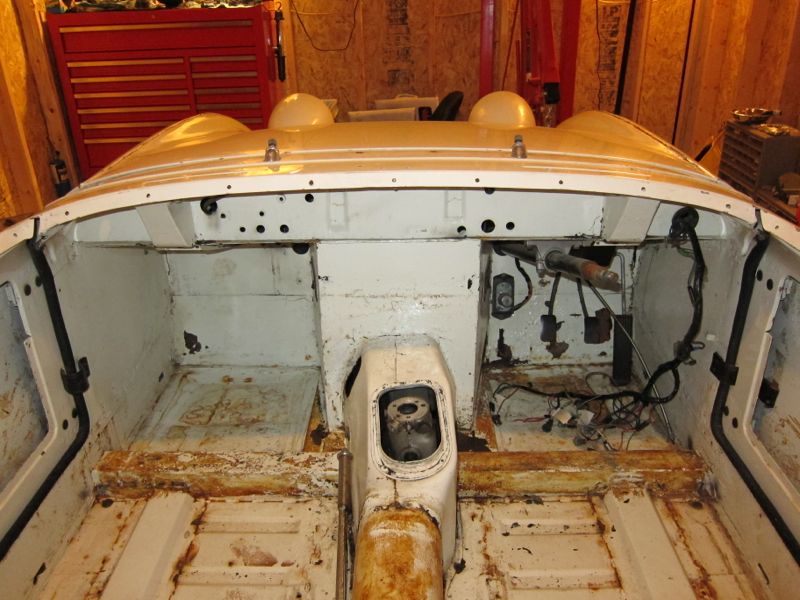
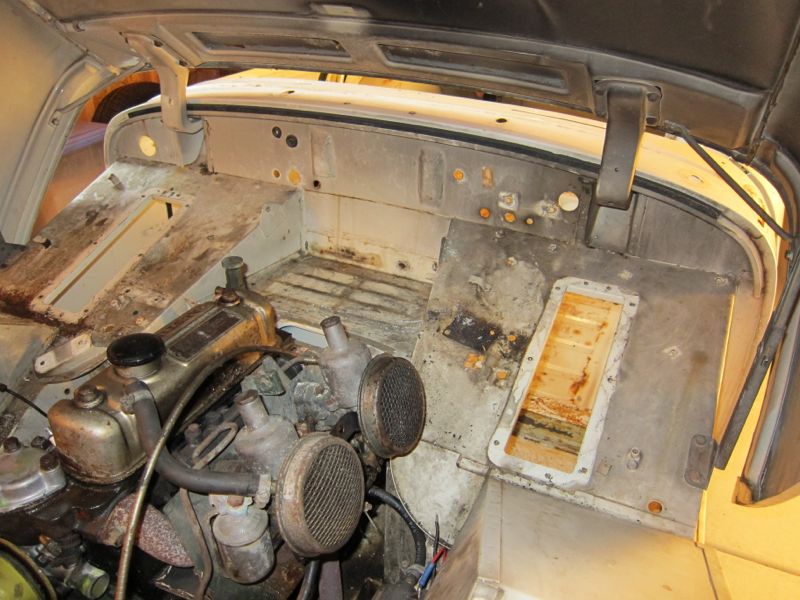
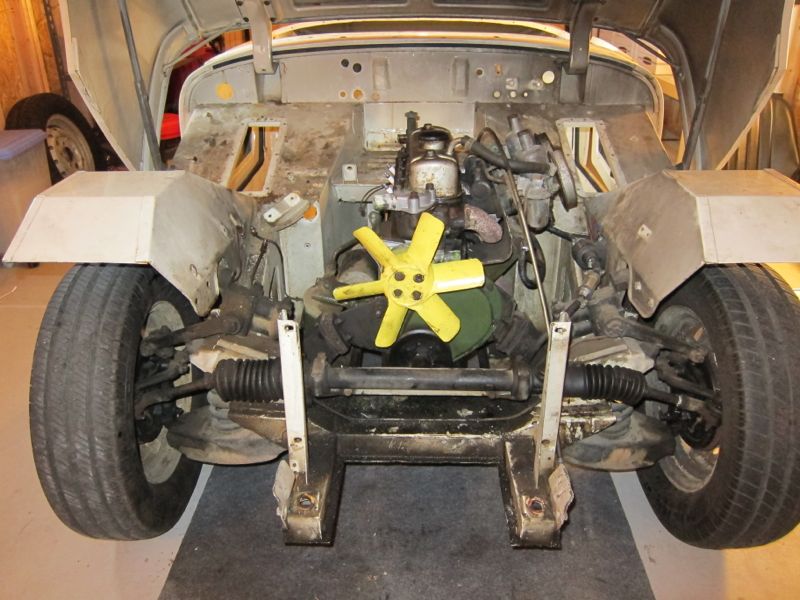
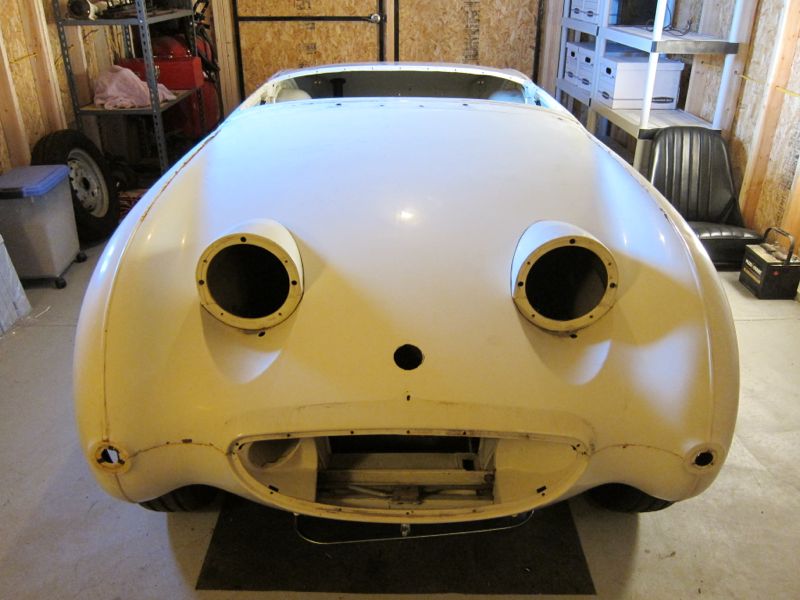
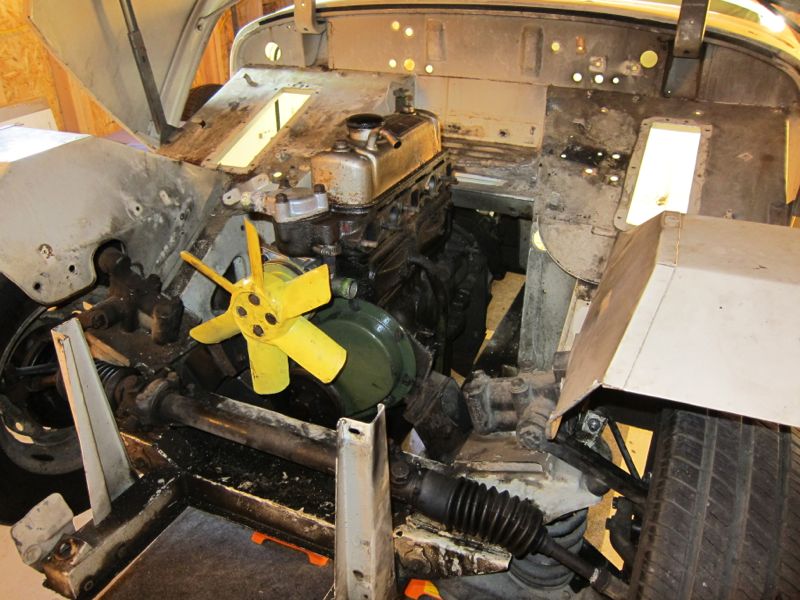
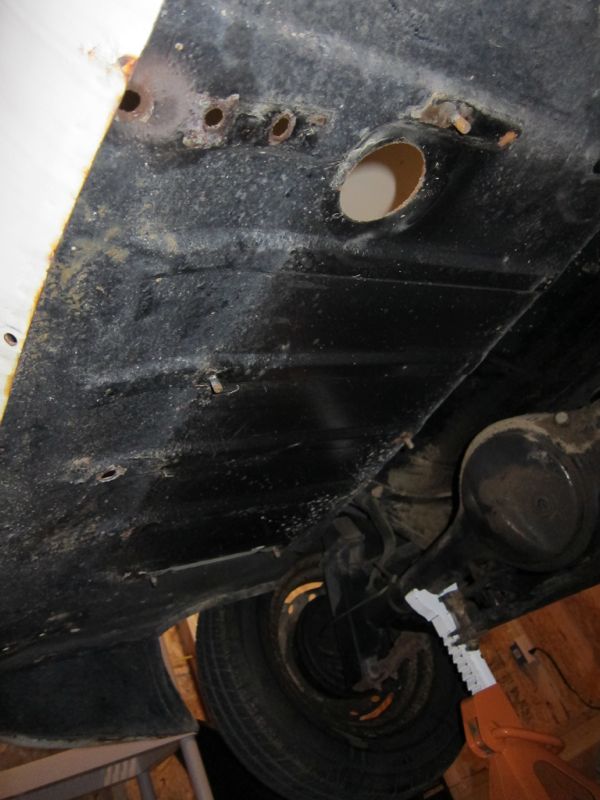
The teardown begins, follow along at home!

nomad

Yoda
Offline
Gerard, its going to be too pretty to drive!!! (underneath mine is protected from rust by the 'automatic British body oiling'):highly_amused:

Kurt.
 

69sprite

Senior Member
Country flag
Offline
Space between the wheels? You guys sure it isn't space between the ears?:cool-new:

Drew, great start... you wanna come help me sort out all the 'leftovers' from the work on my car?
 

SaxMan

Darth Vader
Country flag
Offline
Luckily I love my second job (as a musician) that pays for all of this.../QUOTE]

Me, too! I wish I could drive the Sprite to the gigs but my keyboards won't fit in the car easily.
 
OP
drooartz

drooartz

Moderator
Staff member
Gold
Country flag
Offline
Me, too! I wish I could drive the Sprite to the gigs but my keyboards won't fit in the car easily.

I did a few gigs with my MGB, the guitar and mandolin (and gear) fit okay. The upright bass, not so much. :smile:

I figure I'll be able to do some out of the Sprite as long as I don't need the bass.
 
OP
drooartz

drooartz

Moderator
Staff member
Gold
Country flag
Offline
Drew, great start... you wanna come help me sort out all the 'leftovers' from the work on my car?

Would be glad to help, but it's a bit of a commute. :D
 

BlueMax

Jedi Warrior
Offline
IMHO, I took a different path of protection under my car. Not saying anyone is right or wrong it’s just a matter of observation and choice. The bed liners or undercoatings are great and I use them on my own truck and was very seriously thinking of using it on my car. The two negatives that I didn’t like is one, undercoating is adding more weight to the car and I was someone that was very weight conscious in my total build, extra weight takes more HP to carry. My second issue, undercoating will not give you any indication that you have corrosion issue underneath. As we all have seen when rust begins to start you will see a blister in your paint. With a heavy bed coating or undercoating that is flexible and has a very strong surface area you could literally have a large hole completely rusted and never know it was their. I choose to apply a zinc base epoxy primer, seam sealed, followed buy a polyurethane build primer then paint. I used POR15 in the pocket areas and all up inside the rockers from the front to rear. Drew I think you have a great car to start with!!

View attachment 30220
 

Keith_M

Jedi Knight
Country flag
Offline
Kurt and Gerard,
Thanks for more clearly identifying the problem cavity. My car obviously had a problem there because both the body panel and inner panel have been replaced at some point in the past. The repair looks solid, but I will take your advice and seam seal it carefully as well as put some rust prevention on the inside.
 
Offline
I paint the bottom of the race cars, although it is a high maintenance approach, meaning I had to re-do it every couple of race seasons. The factory undercoating on my 67 GT was still good after 45 years, yes it add weights, but for a car that will be driven, and enjoyed frequently, and not a show, or garage queen, it is a very practical approach. As Alan mentioned undercoating can hide rust, but these cars, these days are used very differently that they were used as new cars, meaning folks these days hardly even drive them in rain, much less snow, so they live very sheltered lives, but still a painted alone bottom, will eventually get the paint road debris blasted off, this one I know from experience, experience defined as, "yes I've mess that up too" :smile:
 
OP
drooartz

drooartz

Moderator
Staff member
Gold
Country flag
Offline
Out with the dash

And the teardown continues. Was able to get the dash out and all the switches and cables disconnected and stowed away. Just a couple things left and the cockpit area will be completely empty. Next up we move to the engine bay and start pulling all that out.

For now I'm leaving the doors (and door seals) in place. Will probably leave them on for the body shop to deal with as they fit things up. They're easy enough to take off later, but this way they'll travel safely.

As always you can see my notes here on Google Drive

IMG_0849.jpg


IMG_0859.jpg
 
OP
drooartz

drooartz

Moderator
Staff member
Gold
Country flag
Offline
A note on tools

I wanted to add a note about the critical tools I'm using during the teardown. I'm trying to be very thoughtful and proactive in my approach, as it may be a couple years before all this goes back together and I know my memory isn't all that great.

First up we have three sizes of baggie (sandwich, quart, gallon), masking tape, Sharpie, notebook. Small bits go in the little bags, and where possible all pieces of a given component are then put into a bigger bag to keep them all together. In the notebook I make any notes about the components as I pull them apart -- these notes get transferred to my Google Doc at the end of the day.

Not shown here is the digital camera, used to take before photos and photos of any issues to be addressed (such as holes in the car to be filled, etc). These photos are stored and referenced in the Google Doc.

Another key tool here is the headlamp. My shop doesn't have the best lighting, so I've got that headlamp on pretty much all the time when I'm working on the car. Light where you look, hands free. Nice.

An additional tool here is the tool box itself (Harbor Freight tool chest). Right now that is the only workbench I have in the shop, and it works as a natural space limiter -- once I've filled that space with removed parts I have to stop and file them away before continuing. This helps keep me from pulling too much off at once and getting bits confused. I've got plans for a real bench next summer, but this smaller space is a plus right now.

tools2.jpg


Next up is the storage. Bought a couple cheap plastic shelves to store everything and a couple dozen bankers boxes. I like bankers boxes as they're cheap and sturdy. On each box I list the contents, and I mark a box with a little "F" in the corner once it's full so I won't keep looking in there for more storage space.

tools1.jpg


I picked this little stool up early in the year and I love it. I'm relatively tall (6'1") so working under the bonnet of a Bugeye is a recipe for back pain for me. The stool is low enough (it's adjustable) so I can sit and work in the engine bay without needing to bend over. Makes a huge difference, and was cheap to buy.

tools3.jpg
 
OP
drooartz

drooartz

Moderator
Staff member
Gold
Country flag
Offline
Progress: wiring, master cylinder, bits and pieces

Made good strides today, started with removing the rest of the wiring harness. After that was the radiator, brackets, horn, master cylinder, blanking plates, steering column, and a few other bits and bobs.

Next task is to train the gas tank and pull that and the fuel lines, along with the driveshaft and parking brake assembly. Once all that is out I should be ready to pull the bonnet, engine and transmission. A few more sessions and I should have a bare tub ready for the body shop. :encouragement:

So far I've got a list of a few holes to fill, but overall the body looks straight and solid. Definitely had some panels replaced at some point in the past, but it all looks pretty solid.

IMG_0877.jpg


IMG_0878.jpg


IMG_0880.jpg
 

SaxMan

Darth Vader
Country flag
Offline
Bottom pic reminds me of a Halloween decoration if all of our Spridgets got together and had a Halloween party. They'd be dunking their heads in 20W-50 and go bobbing for spark plugs.
 
OP
drooartz

drooartz

Moderator
Staff member
Gold
Country flag
Offline
It's a gas!

Dropped the gas tank today -- not a particularly hard job, but it is best before you dive into a full-on restoration to have that nice last drive and run the tank as empty as possible. As I was originally intending to just store the car I made sure to fill the tank all the way up. Luckily my tank had a drain plug. One roasting pan, a few coffee filters, and some patience and I had a drained tank.

Pulled the rest of the hydraulic and fuel lines (all will be replaced) and also removed the exhaust and carbs. Engine is almost ready to come out, just need to drain fluids, pull the drive shaft, and pull the bonnet (and find some friends to assist). Handbrake comes out as well and I'll be down to a rolling chassis, probably as far as I'll go before taking it to the body shop. Weather this long holiday weekend has been excellent, so I'm taking advantage to get as much done as possible before the real winter sets in.

A nice empty engine bay, ready to have the engine pulled.

IMG_0883.jpg


Tank all gone. Under floors look really good, other than the peeling paint.

IMG_0886.jpg


And here's the reason I'm doing all this. Silly really, as it shouldn't be that important to have a VIN with no "L" in it (indicating a car that was originally right hand drive) considering all the other mods this car will get, but it *is* that important to me for whatever obscure and ultimately expensive reason. No matter, I couldn't be happier.

IMG_0885.jpg
 

JPSmit

Moderator
Staff member
Silver
Country flag
Offline
you mean originally "Left" hand drive don't you?
 

Rut

Obi Wan
Country flag
Offline
Drew, save all of those old lines to use as patterns, they will come in very handy.
Rut
 
OP
drooartz

drooartz

Moderator
Staff member
Gold
Country flag
Offline
you mean originally "Left" hand drive don't you?

Intention was that no "L" means RHD (and also holiday cheer, but that's something else). :grin: "L" indeed means LHD.

Drew, save all of those old lines to use as patterns, they will come in very handy.
Rut

Do have the old lines. One got a bit out of shape getting it out, but they'll do for patterns if necessary.
 

Jim_Gruber

Yoda
Country flag
Offline
So I've got a question on VINs. Drew I thought Bugsy had a very close brother with a VIN of AN525172and a body number of 25291. There is no L on the Title Paperwork. BMH is having some issues with this VIN as they feel it should be a RHD. I know now that Bugsy II received a new trunk and complete rear clip after doing some spelunking in the boot. VIN Plate is missing along with BAE Plate. Engine is a replacement from a RHD Midget. So is it possible way back when Bugsy was imported from the UK and was converted to LHD after an accident. Unknown at this point. Writing behind dash is illegible but can make out BLACK.

Was writing chalk or wax crayon. Perhaps with some cleaning.
 
OP
drooartz

drooartz

Moderator
Staff member
Gold
Country flag
Offline
So is it possible way back when Bugsy was imported from the UK and was converted to LHD after an accident.

It is certainly possible. Bugeyes have all the necessary body fittings to convert one drive side to another, and I could see that if a car was in a big accident the owner might have wanted to convert it at that point -- most folks prefer LHD over here. Could have been done when the car was imported to the USA as well if someone had bought it over there.
 
OP
drooartz

drooartz

Moderator
Staff member
Gold
Country flag
Offline
Getting closer

No pictures today, the work was mostly small things under the car. Pulled the handbrake mechanism and removed all the bolts for the transmission. Drained the oil from the transmission and engine in prep for removing them both.

At this point, everything is stripped off the car other than the engine, transmission, and suspension (and steering rack). For logistical purposes I will probably be leaving the car as a rolling shell to make it a bit easier to get out of my shop and down to the city to the body shop. Not the ideal method, but probably necessary in my situation.

So that said I'm pretty much left with pull the engine and transmission and I'll be ready to send her out for repairs. The weather here over the Thanksgiving weekend (I had Thursday and Friday off) has been stellar, been out in the shop long hours all days making big progress. I can pull the engine once I can con a few friends into stopping by and helping me pull the bonnet.
 

Jim_Gruber

Yoda
Country flag
Offline
Some liquid courage to ward off the cold and you can get it done. You're moving fast.
 
Similar threads
Thread starter Title Forum Replies Date
KVH General Tech Engine Teardown on the Way Triumph 43
davester Help me make some engine teardown/evaluation/might-as-well decisions please. Spridgets 6
J TR6 73 TR6 teardown. Triumph 3
TR6BobNF TR6 TR6 Teardown - Winter 2011 Triumph 4
JodyFKerr Spifire 1500 Carb teardown question Triumph 10
swift6 TR6 Teardown of a 150k TR6 engine... Triumph 4
R BE Teardown In Process Spridgets 11
smaceng Ready for engine teardown? Spridgets 4
spit71 Finally doing teardown Triumph 5
drooartz 1275 teardown continues, a few questions Spridgets 9
drooartz Next steps in engine teardown? Spridgets 8
drooartz A bit more teardown Spridgets 32
JPSmit 2 questions, #1 teardown, #2 vinyl? Spridgets 4
DonPete3 Teardown almost complete. Spridgets 6
Baz 2012 Mini CEL - Now it begins........ British Motor Corp 0
longbridgehealey And so it begins....... Spridgets 6
Bayless Progress finally begins Spridgets 5
Westcoast M5 The Journey Begins - BJ8 restoration Austin Healey 74
Jim_Gruber Decopnstruction of Rear End over, Reconstruction Begins Spridgets 4
S And so it begins again Spridgets 48
R TR2/3/3A And so begins the body work... Triumph 10
Jim_Gruber And so it begins - Bugsy II - Floorpan Replacement Spridgets 1
drooartz Penny's bodywork begins Spridgets 131
bugedd The journey begins....maybe Spridgets 9
simon1966 The BN1 resurrection begins today. Austin Healey 7
Jeepster Now the fun begins! Austin Healey 30
60Bugeye Bodywork Odyssey Begins Spridgets 3
Basil The Tank Saga begins Jaguar 9
O And so it begins...again Triumph 16
PAUL161 Restoration Slowly Begins MG 16
MadRiver And so it begins MG 1
J And so it begins! Triumph 20
hondo402000 The Painting begins Triumph 44
G MGB 1971 MGB...The Project begins! MG 24
drooartz The week of Tunebuggery begins! Spridgets 3
B Voting begins for Midget 50th National Venue!! MG 1
B Voting begins for Midget 50th National Venue!! Spridgets 26
JPSmit Wiper Motor - the saga begins Spridgets 5
S My Jaguar Adventure Begins Jaguar 22
Monark192 MGA MGA Restoration Begins MG 3
Dadandson Now the Fun Begins Spridgets 16
T The Battle Begins Triumph 104
Brosky Powder coating begins next week Triumph 2
tosoutherncars Front-End Rebuild Begins!! ['78 1500] Spridgets 8
Brosky Bumper rechroming project begins... Triumph 23
B The rebuild begins! Austin Healey 6
sideache My Barn Find Resto begins Spridgets 27
A And so it begins!! Spridgets 3
B painting begins on the BE! Spridgets 11
Brosky New Overdrive adventure begins tomorrow Triumph 15

Similar threads

Top