Speedo Recalibration
For those that skipped ahead, I learned that it only takes a small rare earth magnet to calibrate the speedo. After smashing the tach face with the mutha magnet, I HIGHLY recommend you use the smaller magnet for the procedure. It's....well....more civilized when every knife and screw driver in the shop is not flying at you from every direction.
So, to recap, you will need:
1) a way to spin the speedo at a steady speed. I used a drill and a spare flex drive cable.
2) A stop watch. I used an iphone.
3) A SMALL!!! rare earth magnet.
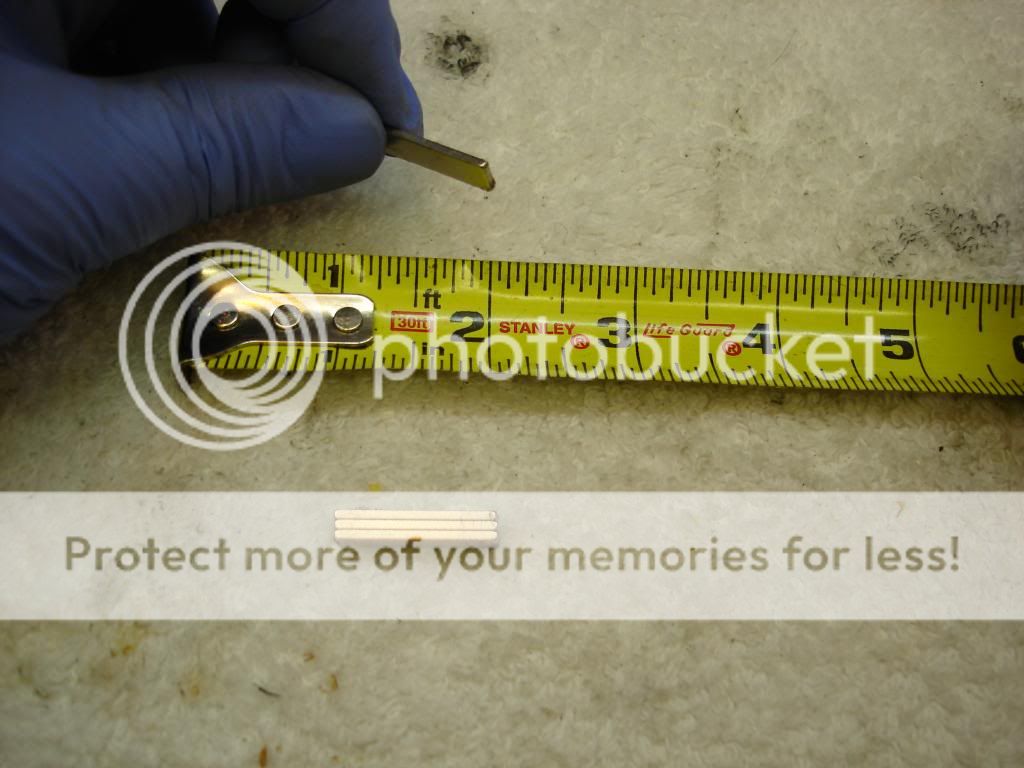
Here is the magnet I used...$1.50...
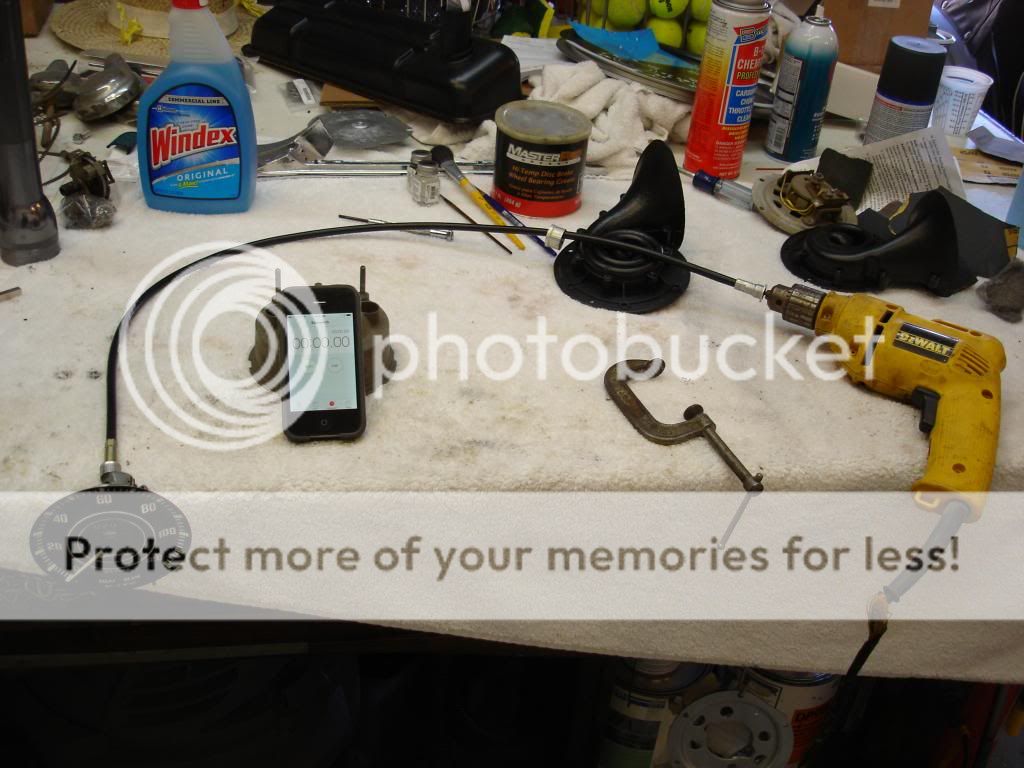
Here is the set up I used to spin the speedo. You will notice I have a C-clamp by the drill. When you want to weaken the rotor magnet, it has to be spinning so it sees reversing poles. I use the c-clamp to hold the drill trigger at a reasonable speed. The trigger lock on the drill was WAY too fast for the speedo.
Notice also that I always have the speedo oriented as it will be in the car. The needle is counter weighted to balance at the pivot...but over the years I do not trust the counterbalance to be perfect. So orient the gage the way it will be mounted.
Here is the synopsis of how this works. I will be making a couple assumptions that I am sure many will not like. Please remember there are many ways to accomplish this process. I am inherently lazy, so this is the easiest I could think of. There are likely more accurate...but more time consuming ways to do it better. Feel free to attempt them if you want...and let us all know how it works.
1) Remember how we set the needle to the little dot on the tach face at about minus 500? There is a similar dot for the speedo at about minus 5 mph.
It is essential that you start with the needle set for this dot when the clock spring is unwound. The dot is more important on the speedo than on the tach. Just set the needle and forget about changing it.
2) In Anthony's write up, he recommended a drive test to calibrate. I'm not going to do that. I will make the assumption that the odometer is geared correctly. I will calibrate the speedo to match the odometer reading...and I will be happy with that! In actuality, the speedo will be inaccurate by the same amount that the odometer is inaccurate. I can live with that. I did the same thing on the TR3, and it amounted to a 1% error. Again, I am happy with that small of an error.
3) Remember the game you always play on a road trip, where you hold exactly 60 MPH and time how long it takes to travel a mile? That is what we will be doing. We are going to spin the speedo at exactly 60 MPH using the drill. When the trip odometer passes .1 we will hack the stop watch. After holding the 60 MPH for exactly 60 seconds, we will stop the drill and read how far the odometer registered. One minute should be exactly 1 mile.
There are two possibilities...well three, since you could be right on for the first try. But that is never my luck.
If the distance travelled is less than 1 mile in 1 minute: The speedo is reading to fast. We need to reduce the rotor magnetism. Do that by attaching the c-clamp to the drill trigger to spin the speedo while you place the small rare earth magnet 1/4" from the spinning rotor for 5 seconds.
 If the distance travelled is greater than 1.0 mile in 1 minute:
 The speedo is indicating to slow. We need to strengthen the rotor magnet. Touch the rare earth magent to the back of the rotor magnet and slide it outward and off. I guarantee it is now too strong, so after the next timed run you will surely have to repeat the de-goussing step.
Repeat this process until 60 MPH indicated gives you exactly 1 miles travelled.
Once you have checked the accuracy of the speedo at 60 MPH, double check it by holding 30 MPH for 1 minute and see how far the odometer travels. It should be exactly .5 miles. If it is off noticeably, then the clock spring pre-load is off. You likely missed the dot in the first step. Just move the needle a tad in the direction it needs to go...and start over.
One point to note...if the needle "bounces" consistently a couple MPH while you are trying to hold a steady speed...the aluminum disc is likely bent. Use a screw driver to gently bend it straight.
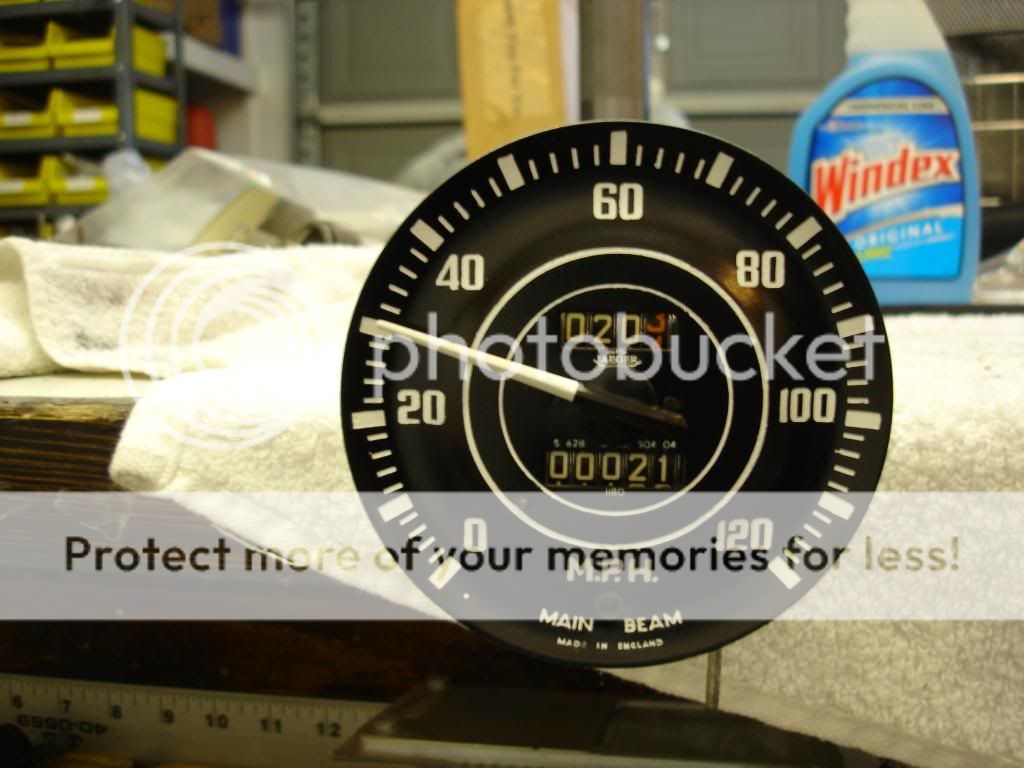
Here is my finished speedo. I started with the odometer at zero, so you can see exactly how many trials it took to get it calibrated...one mile per trial. 22 trials.

Oh, installing the speedo in the case is exactly like the tach, with the exception of this felt seal for the trip reset shaft. Don't forget it!

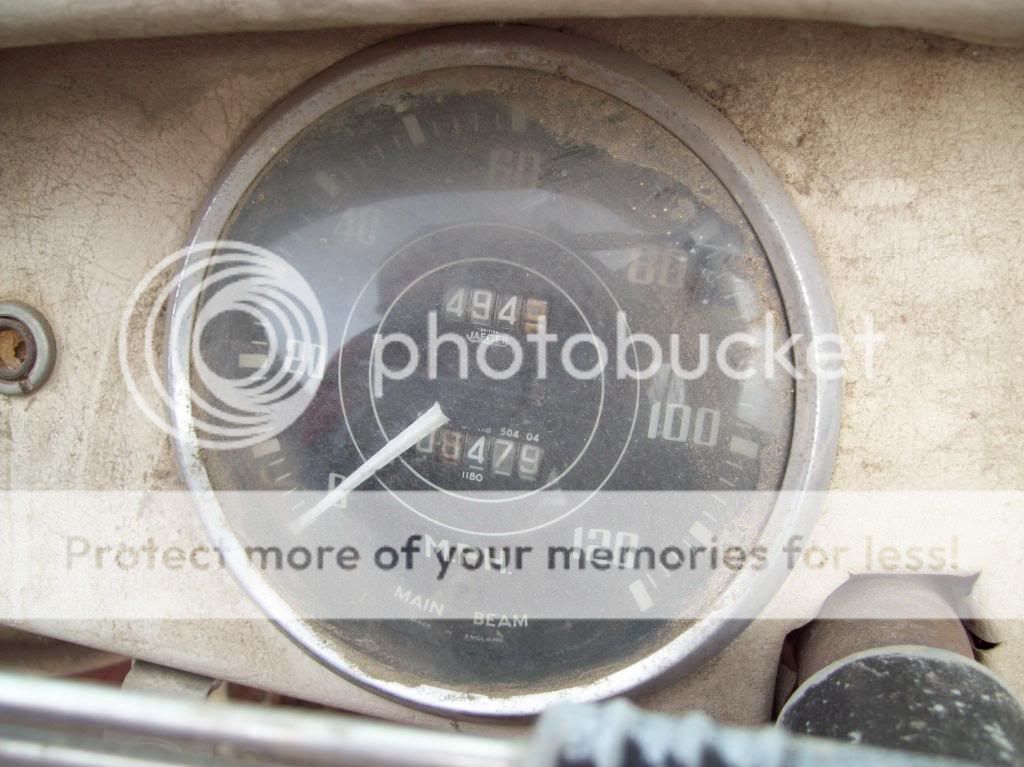
And finally, the starting point, for old times sake:
I'll be taking a break before I tackle the small gages...
 Hey there Guest!
 Hey - did you know if you click on the title of a thread it will take you to the first unread post since you last visited that thread?
 but were afraid to ask:
  STOP!! Never post your email address in open forums. Bots can "harvest" your email! If you must share your email use a Private Message or use the
  smilie in place of the real @
 Pretty Please - add it to our Events forum(s) and add to the calendar! >>


 OYep that first time an 18 wheeler rolls by on the interstate highway can be a bit fun... that is great to hear. I have marked this for reference as I have with all of your posts John. Glad that your are getting some drive time in!
 A friendly reminder - be careful what links you click on here. If a link is posted by someone you don't know, or the URL looks fishy, DON'T CLICK. Spammers sometimes post links that lead to sites that can infect your computer, so be mindful what you click.