 Hey there Guest!
 Hey - did you know if you click on the title of a thread it will take you to the first unread post since you last visited that thread?
 but were afraid to ask:
  STOP!! Never post your email address in open forums. Bots can "harvest" your email! If you must share your email use a Private Message or use the
  smilie in place of the real @
 Pretty Please - add it to our Events forum(s) and add to the calendar! >>
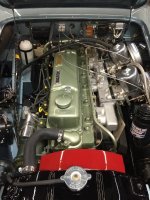
I have started my first engine rebuild. BJ8.
The crank is out for inspection. The head is at a machine shop for new exhaust seats, bronze guides, valves and springs.
Block will be dropped off in a few days to tank and check bores. Still looking for a local shop to lighten the flywheel.
It seems people have reported variable results after rear oil seal installation. I bought one; that was the easy part.
Is it worthwhile getting it installed?
Is ceramic coating exhaust manifolds really better than a good coat of High Temp Rustoleum?
Thanks,
Douglas


 A friendly reminder - be careful what links you click on here. If a link is posted by someone you don't know, or the URL looks fishy, DON'T CLICK. Spammers sometimes post links that lead to sites that can infect your computer, so be mindful what you click.