 Hey there Guest!
 Hey - did you know if you click on the title of a thread it will take you to the first unread post since you last visited that thread?
 but were afraid to ask:
  STOP!! Never post your email address in open forums. Bots can "harvest" your email! If you must share your email use a Private Message or use the
  smilie in place of the real @
 Pretty Please - add it to our Events forum(s) and add to the calendar! >>
KVH
Darth Vader
Offline
I have several questions with regard to the reassembly of my engine, etc.
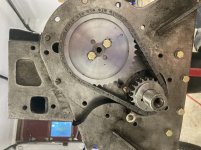
1) the new timing chain tensioner pin that I bought would require a lock washer behind it in order for the rear face to be flush with the engine block--and the threading seems to demand a washer. None of the manuals or parts catalogs appear to show a lockwasher there, however, despite that, I feel I must use one and also some Loctite. Any feeling in that regard?
2) I have a new aluminum front engine plate. My old steel one has some “hole distortion” where the generator pedestal fitting goes. So, I intend to use the aluminum plate absent reports they are problematic?
3) I intend to install the front damper extension and torque it to spec while the engine is still on the stand. If I do that am I creating any problem when I drop the completed engine and transmission into the engine compartment?
4) I am once again curious about opinions for the front engine plate gasket sealer. I can use Permatex Aviation, Permatex High Tack, or Permatex Ultra Black. Any of those seem acceptable to me.
5) Same question for sealing the engine oil pan. I’m inclined to go with High Tack.
6) Finally, is there any thought as to how high off the garage floor my car frame should be when I’m reinstalling the engine and transmission. I’m about 12 inches off the floor and a transmission jack will slide under. Does that sound about right? I seem to recall pushing the tail of the transmission up by hand last time I did this, then shoving that rear support piece into place.
Thank you all.
(Sorry for the tome)

 - but keeping things level was difficult. Level both front/back, with an engine leveler, but I also tied a cone-along for left/right leveling. I found this helped with aligning engine mounts. I did not install the carburetors, distributor, manifolds, or cooling piping prior to install to give me the most room.
  A friendly reminder - be careful what links you click on here. If a link is posted by someone you don't know, or the URL looks fishy, DON'T CLICK. Spammers sometimes post links that lead to sites that can infect your computer, so be mindful what you click.