• Hey there Guest!
    If you enjoy BCF and find our forum a useful resource, if you appreciate not having ads pop up all over the place and you want to ensure we can stay online - Please consider supporting with an "optional" low-cost annual subscription.
    **Upgrade Now**
    (PS: Subscribers don't see this UGLY banner)
Tips
Tips

TR2/3/3A stainless steel rear spring pins for TR3

jwolff

Jedi Hopeful
Offline
Does anyone know who sells stainless steel rear spring locating pins, #12 on this diagram:
TRI-030.gif


Roger William's "How to Restore..." book recommends using them, but I haven't had any luck finding them. Or is this overkill?

Thanks in advance
 

DNK

Great Pumpkin
Country flag
Offline
Unless it was aircraft grade I would be concerned of it shearing.
'member, SS can be brittle
 

martx-5

Yoda
Country flag
Offline
Just slather on a bunch of never-seez...

V057740_NG.jpg
 
OP
J

jwolff

Jedi Hopeful
Offline
Good point about the stainless being brittle and thanks for the advice on the never-seez. I'll just go with the standard ones and slather this on. thanks
 

TR3driver

Great Pumpkin - R.I.P
Offline
Any decent FLAPS should have an equivalent product. I do suggest looking for the copper-based stuff though, it seems to work significantly better for me than the nickel or aluminum based. Eg https://fwd4.me/0iWo

It's also a good idea IMO to clean out the tube through the frame as best you can. I used a round brass brush from a shotgun cleaning kit, plus some PB Blaster (or Liquid Wrench, etc).
 
OP
J

jwolff

Jedi Hopeful
Offline
thanks Randall, I appreciate the advice. I'm guessing it would be wise to replace the pins and bushes while the body is off, right?
 

Number_6

Jedi Warrior
Country flag
Offline
OP
J

jwolff

Jedi Hopeful
Offline
thanks Randall, I appreciate the advice. I'm guessing it would be wise to replace the pins and bushes while the body is off, right?
 

TR3driver

Great Pumpkin - R.I.P
Offline
Bushes, yes. I reused the original pins, as they were in decent condition and I worry about the quality of new parts. No doubt they are easier to do with the body off, but I can't really comment since I've never had the body off.
 
OP
J

jwolff

Jedi Hopeful
Offline
somehow submitted that twice... reading the recommended removal process on the RevingtonTR site (thanks Number 6) makes this sound almost impossible, cutting the springs to remove the pins. I didn't plan on replacing the springs, do you think it would be okay to just leave the old pins and bushes?
 
OP
J

jwolff

Jedi Hopeful
Offline
Randall, hadn't seen your post before submitting... just replacing the bushes sounds like a good plan to me. I'll just use plenty of anti-seize. thanks again
 

Number_6

Jedi Warrior
Country flag
Offline
I've been thinking of tackling this job myself over the winter. After reading the removal description on the Revington TR site, I'm thinking I'll probably leave the rear pins in situ. It sounds like it's a job that's only easily done if you have really good access to the frame such as with the body removed.

It seems that a lot of the parts that Roger Williams mentions in his book "How to Restore" are sourced from Revington TR. I purchased a lot of parts from them when I had my steering rebuilt. Nylon column bushes, steering box cover, upgraded idler arm, etc.. They worked out very well.
 

TR3driver

Great Pumpkin - R.I.P
Offline
I haven't read the Revington description, but IMO it's not all that hard as long as the pins aren't badly stuck in the tubes. Last time around, I bought some hardened all-thread, "setup" washers and Grade 8 nuts from MMC, to suit the tapped holes in the head of the pin. Don't recall the size offhand, but maybe it was 5/16 NF. I used a bottoming tap (same thread) to clean out the holes first. The only other thing you need is an assortment of spacers that will fit over the pin head. I used an impact socket plus several short (like 1") sections of pipe.

It's a multi-step process, you start by installing just the socket and all-thread, then using the nut to pull the pin out until it contacts the socket. This is the hard part. Then take it apart, install another spacer and do it again. At some point the nut & all-thread will be showing signs of wear, so replace them. Lather, rinse & repeat until the pin falls out.
 

TR3driver

Great Pumpkin - R.I.P
Offline
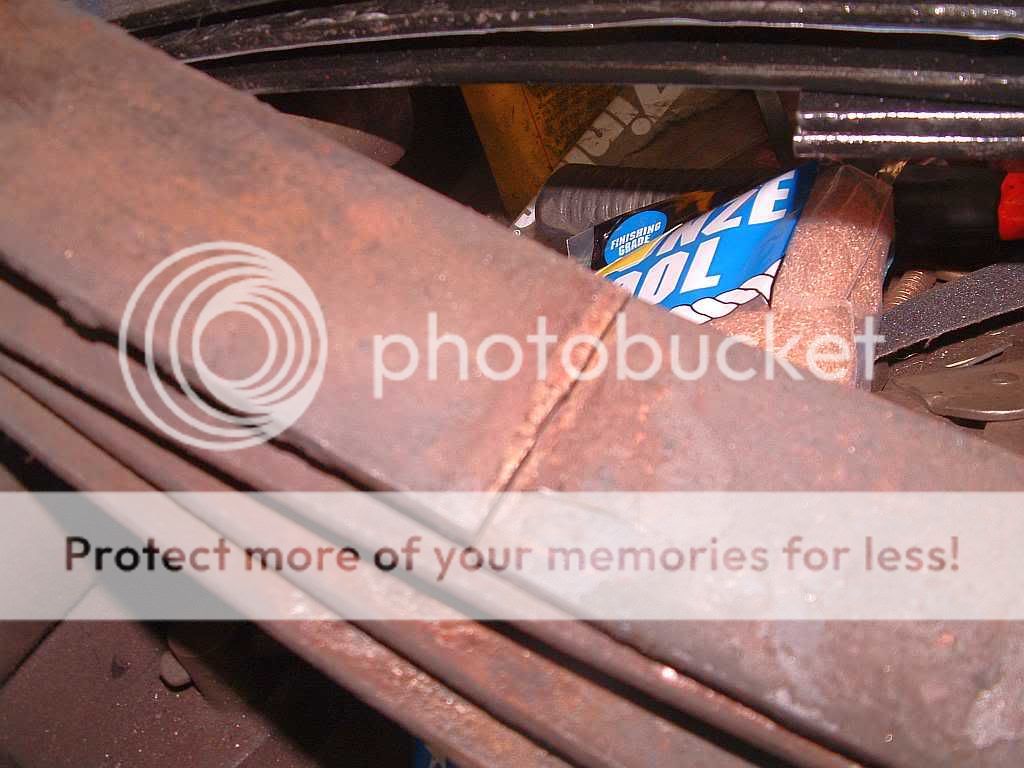
Also a good idea to disassemble, clean and inspect the spring leaves, IMO. This was not obvious before I took the spring apart:

DSCF0007_reduced.jpg


On TeriAnn's advice, I installed some UHMW poly tape between the leaves on reassembly. So far, I am very pleased with the results, there is a lot less stiffness and vibration from the rear even though I used 30 wt oil in the shocks and poly bushes at the rear of the springs.
 

martx-5

Yoda
Country flag
Offline
Number_6 said:
...After reading the removal description on the Revington TR site, I'm thinking I'll probably leave the rear pins in situ. It sounds like it's a job that's only easily done if you have really good access to the frame such as with the body removed.

Revington's removal description also mentions that "the spring cannot be slid off the bolt on TR2-3B with the body on the car". So if you want to change the bushings and/or springs, you're going to have to remove the pins...or the body. :hammer:
 
OP
J

jwolff

Jedi Hopeful
Offline
Thanks for the instructions on removal, I'll give it a try.

I hadn't planned on disassembling the springs, but guess I should while I have easy access. How difficult is it to reassemble the springs? Did you paint the leafs while apart? I'm sure I'll have more questions as I start. thanks again
 
OP
J

jwolff

Jedi Hopeful
Offline
Art,
I already have the body off of the frame so I figured now is the time to tackle this.
 

TR3driver

Great Pumpkin - R.I.P
Offline
jwolff said:
How difficult is it to reassemble the springs?
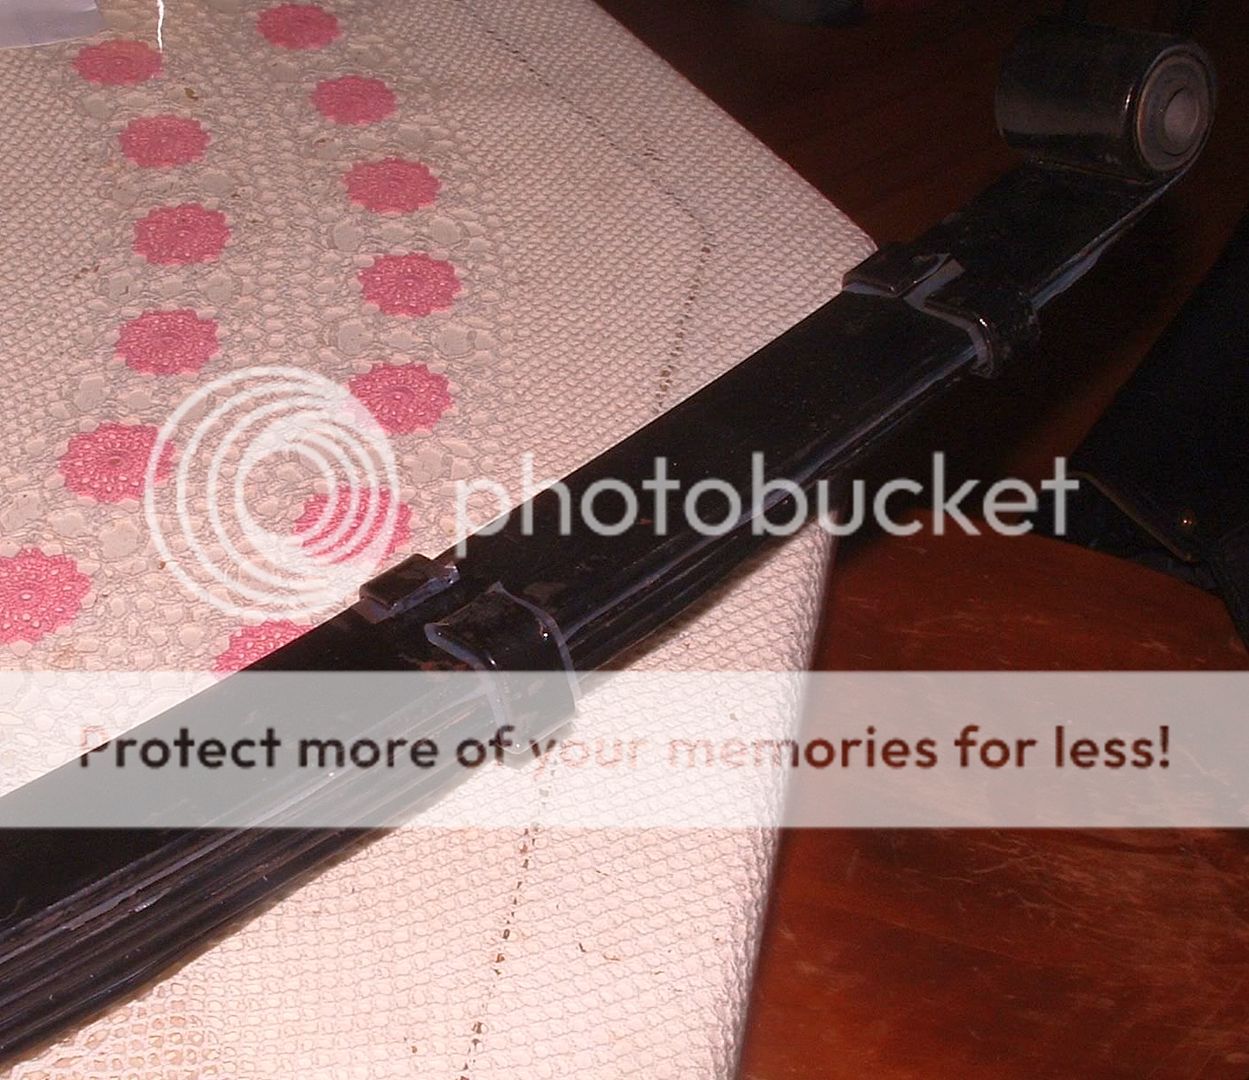
I wouldn't call it trivial, but it wasn't too hard either. You have to bend the clips and then remove the center bolt to disassemble them. For reassembly, I put all the leaves through the clips first, then stuck a longer bolt through the center hole, and clamped the assembly in the vise to compress the leaves. While it was clamped, I inserted the original bolt and installed the nut; then bent the clips back into place.

Here's a after picture, with the UHMW peeking out

TR3springwithUHMW.jpg
 
OP
J

jwolff

Jedi Hopeful
Offline
thanks for the instructions and photo... I'll let you know if I have any questions when I tackle it (working on the front suspension now, but this will be next)
 
Similar threads
Thread starter Title Forum Replies Date
Tim Tucker TR4/4A Phoenix Stainless Steel Sports Full Exhaust System Inc Manifold experience Triumph 3
Guido36 Stainless Steel Bumpers Austin Healey 5
B Stainless Steel Exhaust System Wanted Austin Healey 5
BoyRacer Best-Sounding Muffler - Stainless Steel or Mild Steel? Austin Healey 9
B Electrochemical cleaning of stainless steel welds Restoration & Tools 7
AngliaGT MGB-GT TT Stainless Steel Exhaust Re-Installtion Suggestions MG 2
bighealeysource Installing stainless steel brake hose on BN2 Austin Healey 5
G For Sale Stainless Steel TR6 Bumpers Triumph Classifieds 0
I Stainless steel exhaust. Austin Healey 5
DornTRoriginal TR2/3/3A Stainless Steel Exhaust Installation Triumph 4
J General Tech Stainless-steel caliper pistons Triumph 8
Rob Glasgow Tourist Torphy Stainless Steel Exhaust Systems Austin Healey 27
Jeepster Mixing stainless and mild steel exhaust Austin Healey 5
TulsaFred Polished stainless steel bumpers? Spridgets 13
S TR2/3/3A radiator pipe in stainless steel Triumph 5
bighealeysource Installing new stainless steel beading on BN2 Austin Healey 4
60TR3A What's The Recommended Stainless Steel Exhaust for '63 BJ7? Austin Healey 5
C BJ8 Stainless Steel Exhaust - throaty sound ? Austin Healey 4
af3683 TR2/3/3A TR3 Stainless Steel Exhaust Triumph 5
T Stainless Steel Fender Beads Triumph 1
Frank C. Stainless Steel Exhaust Austin Healey 6
R Stainless Steel Exhaust system Austin Healey 14
RJS Stainless Steel Bumpers Triumph 11
G stainless steel exhaust Austin Healey 14
T TR4/4A Stainless steel brake lines for a TR4a Triumph 12
T Regular vs stainless steel pistons for calipers Triumph 13
S Spitfire Stainless Steel Spitfire Bumpers on ebay- Info Triumph 7
T Stainless steel brake hoses - two questions Spridgets 13
T Let's talk about stainless steel brake lines... Triumph 4
bighealeysource Installing front fender stainless steel beading Austin Healey 4
Brosky TR6 Stainless Steel Bumpers for TR6 Triumph 20
Tinkerman Stainless Steel Tenon Plates On Ebay Triumph 1
S Stainless steel exhaust Austin Healey 30
N Who supplies Stainless Steel lines for clutch? Triumph 12
LuckyLuke Stainless steel battery trays Austin Healey 1
S BJ8 Stainless Steel Exhaust Austin Healey 7
Carlos TR4/4A Stainless Steel exhaust on a TR4A Triumph 6
I Stainless Steel Fasteners? Triumph 10
G Braided Stainless Steel Hydraulic Hoses Austin Healey 15
S Falcon Stainless Steel exhaust info needed. Triumph 3
Frazier Stainless Steel Polish Restoration & Tools 1
Y Stainless Steel Brake Lines Austin Healey 4
M XJ8L Stainless steel problem Jaguar 2
7 For Sale Stainless trim for Herald Convertible top. Triumph Classifieds 0
I TR6 How to distinguish between stainless and aluminum Triumph 6
E Moss stainless exhaust offering. Austin Healey 28
Gliderman8 TR6 Stainless oil pressure line install HELP! Triumph 8
T Rattling stainless muffler Austin Healey 10
B Stainless hood / bonnet and trunk / bood support rods Austin Healey 2
drambuie Getting a better deep throaty sound from my Stainless exhaust Austin Healey 5

Similar threads

Top