• Hey there Guest!
    If you enjoy BCF and find our forum a useful resource, if you appreciate not having ads pop up all over the place and you want to ensure we can stay online - Please consider supporting with an "optional" low-cost annual subscription.
    **Upgrade Now**
    (PS: Subscribers don't see this UGLY banner)
Tips
Tips

Wiring harness: need motivation

bcbennett

Senior Member
Offline
Hey all,

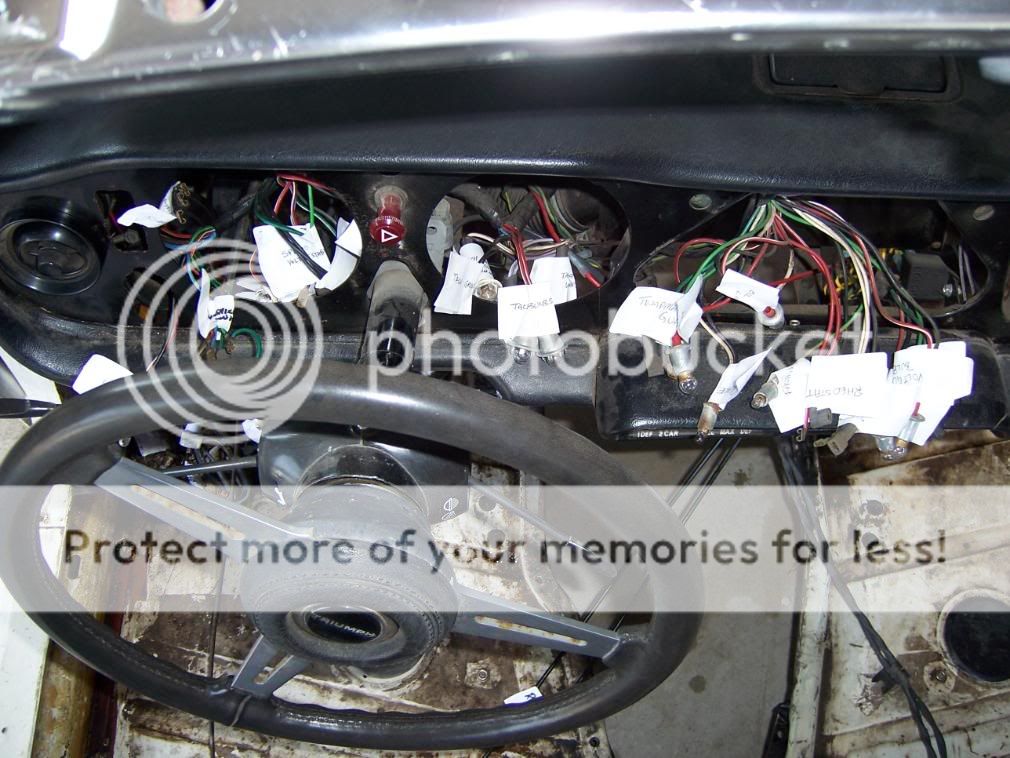
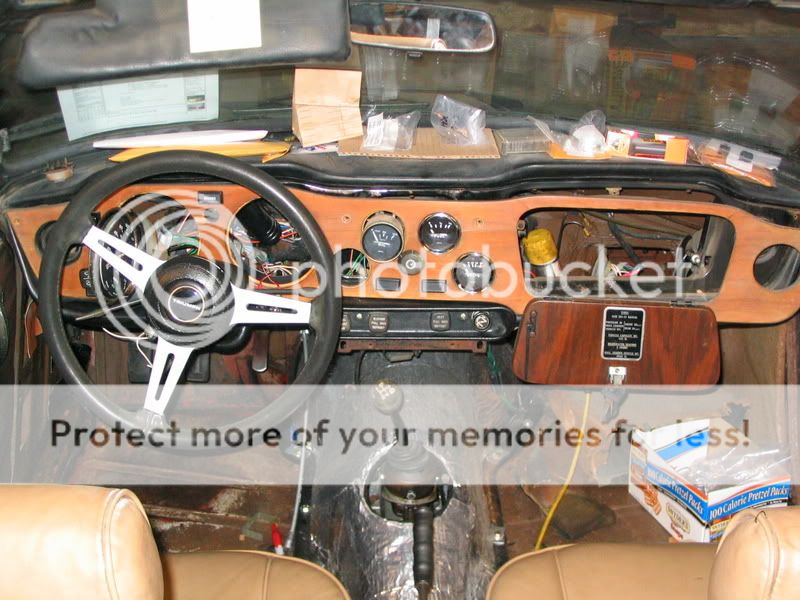
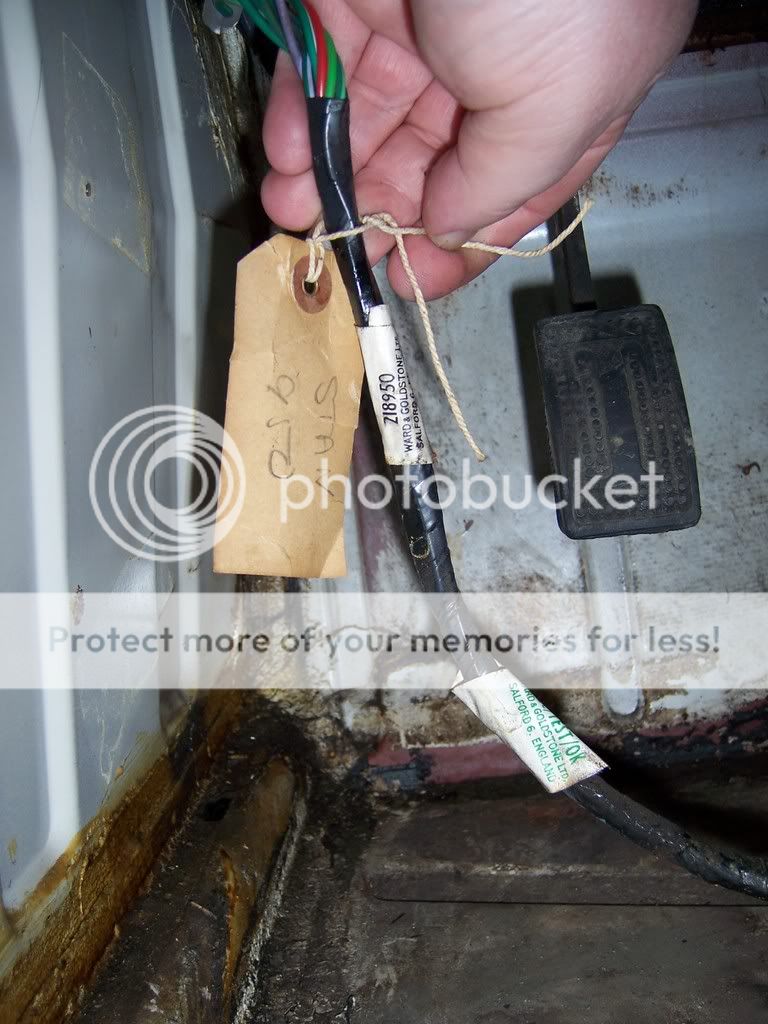
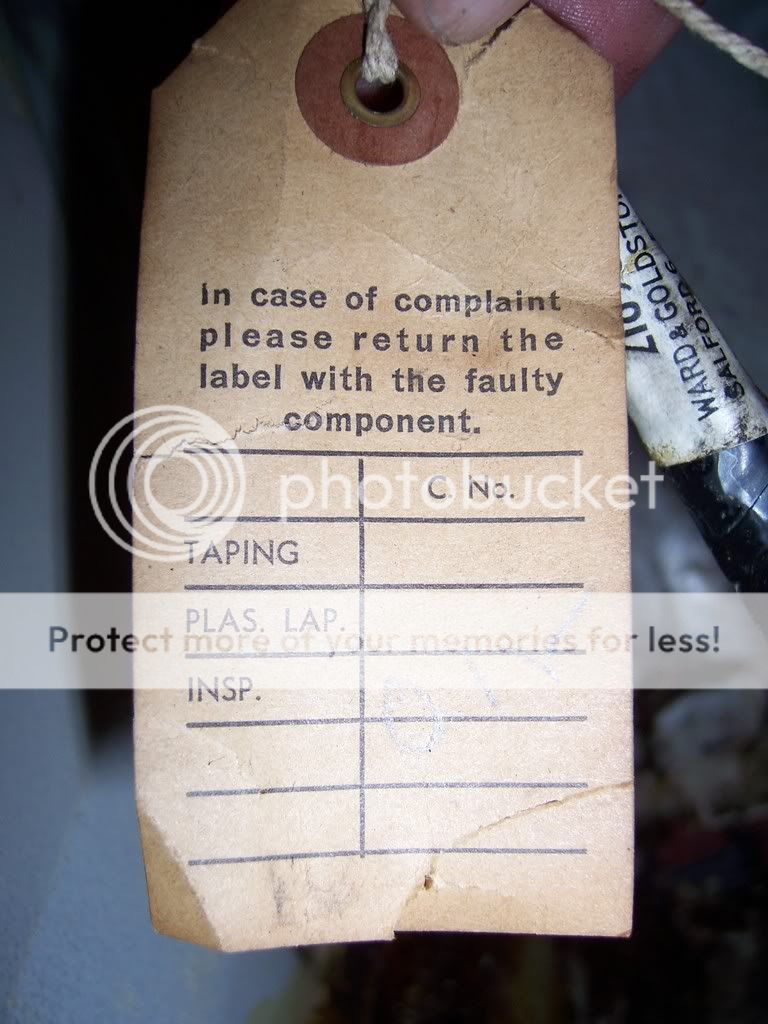
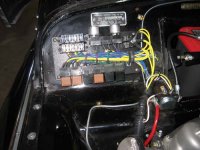
My '74 TR6 wiring is kaput. The combination of age, previous owner screw-ups, and band-aid repairs have come to an end, and I need to buy a new harness.

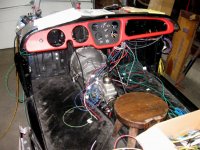
The question: to do it myself or hire it done. I am a reasonably intelligent person, who can read diagrams and fit into short spaces. I need a new dash anyway, so I could do both things at once.

I guess I just need some realistic advice as to what replacing the harness entails and whether I'll lose my sanity trying to do it myself.

Thanks in advance,

CB
 

M_Pied_Lourd

Darth Vader
Country flag
Offline
Hi CB,

You can do it.

Easiest thing to do is as soon as you remove a wire from a connector, label it. I used laser jet labels that you would use for a printer. They wrap around a wire well and stick to it. Also gives you some room to write on.

What you might want to do is write yourself a coding system and keep a log in a book. Mark the harness connector and the component connector with the same letter/number etc.

I bought the new harness for my 73 TR6 from TRF. Be warned though...I bought a bulk kit at the same time to change all the bulbs as I installed my new harness. Turns out the new harnesses come with push in bulbs versus the original push turn/screw in bulbs. Also, the new harness came with some additional grounds to compensate for no metal bulb holders etc.

100_1780.jpg


You can use the old harness that you remove with all the labelling to install your new harness.

Cheers,
M. Pied Lourd
 
D

DougF

Guest
Guest
Offline
If everything is wired properly to begin with, the labelling works very well. I used a different method that also works well if everything is right to begin with. I cut all of the wires about 1-2" short of the connection and left the connectors plugged in. The harness is trash anyway, so I didn't mind cutting it, though I did keep it in case of future needs.

Once the harness is properly placed into position, it is fairly easy to figure out what goes where. I ran into one wire that wasn't an exact match. They had the same base color, but one had a stripe and the other didn't. Through the process of elimination, it was easily sorted out.

You need to be careful around the heater and headlight pigtails since some of the wires aren't part of the harness.

I also purchased Dan Masters TR6 elecrical book which has very nice large print electrical diagrams for each harness used in the cars. Well worth the money. Available from TRF.
 

PeterK

Yoda
Offline
I'm facing the same lack of motivation. My TR3 was rewired by the Dpo with all red wire. It all works well so I don't NEED to do it. But I've have a new harness on the shelf for a while and really should do it.

So if I label the red wires and what they comnnect to, maybe I can lay them side by side and get some idea.

Labels are a must.
 

rikiwho123

Senior Member
Offline
i had to rewire my spitfire when i bought it and was all cut up so out came the shop wire diagram ; it was so easy i couldn't believe it just follow the color codes on the wires; the only thing i didn't like was paying over 400.00 for the harness and having a woods rat chew through it over the winter ;no garage here oh well solder and tape and everthing works good luck.
 
OP
bcbennett

bcbennett

Senior Member
Offline
Thanks, everyone, seriously. I love this forum.

I am wondering: could I get by with just replacing the "body" harness? That's where my problem is (this I know). I know it "joins" the front harness somewhere near the "A" pillar, but I am not sure where. Can someone help me with the location and the type of connection between the harnesses?
 

eschneider

Jedi Warrior
Offline
Yes, you can absolutely do it yourself. Very rewarding, especially if you master the concepts along the way.

Labelling is a good idea.
Know how to read a witing diagram.
Know how to use a test light and volt/ohm meter - and know how to do a voltage drop test. (resistance is only half the story in most cases)

Not sure about a TR6 specifically off the top of my head, but I always test unfusted circuits (most of 'em on Morgans, including lights) with a circuit-breaker protected test light. Reversing the leads on a parking light cost more than one of my customers a $400 harness. Done it myself many times, but caught it with the tester before it melted anything. You can make your own, or buy a fancy one for $100.

If you plan ahead to make mistakes, then they won't cost you anything when you make them.
 

Geo Hahn

Yoda
Country flag
Offline
For motivation... I would have to say replacing the harness on my TR3 was one of the nicest things I have ever done for myself. With clean tight connections there are no more electrical mysteries and it all looks so much better.

Before:

TR3%20Old%20Wiring.JPG


TR3%20Old%20Control%20Box.JPG


After:

TR3ControlBox%20after.JPG
 

M_Pied_Lourd

Darth Vader
Country flag
Offline
cb,

You are correct. A post drivers side you will see the connector for the front and rear harness. It is a multipin connector block that is a push/click fit together. Follow your rear harness running along the floor/inner sill up the A post and you can't miss it.

Cheers,
M. Pied Lourd
 

M_Pied_Lourd

Darth Vader
Country flag
Offline
Oh, one more thing....learned the hard way. If you are replacing the harness that runs from the connecting block to the rear of the car, pull the wires from from the front over the wheel wells and into the trunk area....

May sound silly but I decided to work towards the front of the car and started at the farthest part of the harness (passenger tail light)...worked my way around did the drivers side taillights/fuel sending/trunk light etc...then I realized that there is a small hole in the body where the harness runs through and the connecting block will just not fit through no matter how hard you wish that it will.

Cheers,
M. Pied Lourd
 

mrv8q

Luke Skywalker
Country flag
Offline
To add to M's post, you'll find the multi-pin connector behind the driver's side kick panel, held to the body with duct tape, as I recall:

IMG_0849.jpg


Hmmm, hard to see in this still....

If you know that's all you need, should be relatively easy!
 

TR6oldtimer

Darth Vader
Offline
Here is a shot of the harness on the driver's side. The connector is under the the top taped area.


M_Pied_Lourd

Darth Vader
Country flag
Offline
I have to say, the TRiumph engineers used darn good tape! Mine looked like Ray's, like the day it was put on. Still stuck on quite well. If your lucky, and your harness is original, you might find the inpsection tag still attached.

Cheers,
M. Pied Lourd
 

Geo Hahn

Yoda
Country flag
Offline
M_Pied_Lourd said:
...If your lucky, and your harness is original, you might find the inpsection tag still attached...

If not, or for the truly anal, here is a typical tag (I think it was off a TR4 harness):

Wiring%20Label.jpg


And here a file that should print out as a reasonable facsimile:

Harness4.JPG


The one I used as a sample did not have that "C. No" on it and the 3 items were each initialed by different workers.

Print on buff card stock, stick on a hole reinforement, etc and attach under the dash with a bit of string. It's a shame you'll be the only one who knows it there.
 

M_Pied_Lourd

Darth Vader
Country flag
Offline
Here is mine that was on my 6

100_1300.jpg


WFront.jpg


Cheers,
M. Pied Lourd
 

BobbyD

Jedi Knight
Offline
If you're not concerned about originality go with the AAW harness. You can't beat the price or the outstanding quality. You get upgraded/uprated wire, fuses and relays. I have one of the first TR6 harnesses that they sold and documented the whole installation on my site. I had never done this sort of thing before and found it to be a fairly "easy" though time consuming project. Because you'll be replacing every single wire (except for the dash bulb wires), I ended up labeling only the dash wires. My original intent was to lay the new harness in alongside the old harness.......but Dan Masters told me to just cut all the old stuff out and run the new wires based on the power block location. So I took a leap of faith and tore all of the old harness out. I also downloaded the "old" wire schematic from the AAW site to compare to the new wire schematic.

Go for it!
 

martx-5

Yoda
Country flag
Offline
I went with Advanced Auto Wire's harness also, and glad I did. It is a lot of work, but not difficult as the instruction manual is top notch. Here's a pic of the power block and one when I was running the wires. It looks like a load of spaghetti that has no meaning, but that isn't really the case. I do have a few labels on some of the wires, just to make things easier. Installing Advanced's harness was one of the more pleasant jobs in the restoration.

Also, starting the wiring all from scratch as the Advanced system seems to dictate, the knowledge gained from running the whole harness yourself is incalculable. You'll know the whole system inside and out, and the wiring and electrical aspect of the car will never again be intimidating.

Edit: Yes, that's a Toyota 5-speed...
grin.gif
 

Attachments

  • 23623.jpg
    23623.jpg
    38.4 KB · Views: 285
  • 23624.jpg
    23624.jpg
    141.2 KB · Views: 287

BobbyD

Jedi Knight
Offline
Unless something has changed since I did my AAW harness back in '04, it does not provide for connecting to the stock Lucas alternator. They assume that if you're going to the trouble and cost to upgrade your harness, you'll also upgrade to a Delco Alternator which is a harness plug in.
 
Similar threads
Thread starter Title Forum Replies Date
BoyRacer Need Tips on getting wiring harness through firewall Austin Healey 4
MikeAH100M Need New Wiring Harness BN2 Austin Healey 2
R TR6 Need Photo of DS Wiring Harness Route '71 TR6 Triumph 0
EinsteinsDad Need Wiring Harness Recomendation MG 5
EinsteinsDad need Wiring Harness recomendations Restoration & Tools 7
C For Sale Center wiring harness for a 1959 Sprite Spridgets Classified 0
N For Sale Wiring harness 64-67 mk lll Spridgets Classified 0
S Wiring Harness Replacement Spridgets 1
B TR4/4A Wiring Harness Triumph 6
Healey Nut Wiring Harness Routing Austin Healey 5
J Wiring Harness Austin Healey 5
nichola TR6 Question on new wiring harness Triumph 6
R TR2/3/3A Replace wiring harness in steering column Triumph 61
Ripper01 For Sale- TR6 Wiring Harness Triumph Classifieds 0
R TR2/3/3A Install new wiring harness in steering column Triumph 16
ckeithjordan TR2/3/3A Wiring Harness Question[s] Triumph 10
nichola TR6 Victoria British wiring harness for TR6 Triumph 6
C For Sale MGA wiring harness MG Classifieds 3
C MGA Wiring harness question MG 7
R TR2/3/3A Installing wiring harness in steering column Triumph 59
BoyRacer How to clean a cloth wiring harness Austin Healey 14
S TR2/3/3A installing the wiring harness Triumph 8
A Spitfire BMCNE -Tech Session Custom Wiring Harness Creation -Links to Album Triumph 2
W TR2/3/3A New wiring harness Triumph 8
T TR2/3/3A Wiring harness Triumph 3
D new wiring harness Austin Healey 15
D 62 tri-carb wiring harness Austin Healey 10
Gerald_Gordon TR4/4A Routing of wiring harness to the rear of a 1961 TR4 Triumph 8
SherpaPilot Wiring Harness for XJ6 Jaguar 1
tr3guy TR2/3/3A New Wiring Harness Triumph 7
MisterB How to spin engine sans wiring harness? Austin Healey 3
Rut TR4/4A Wiring harness female bullet connectors Triumph 6
Marvin Gruber BJ8 wiring harness install Austin Healey 6
wkilleffer MGB 1974 MGB- New main wiring harness, but no start MG 11
Rut 73 Midget wiring harness Spridgets 0
K TR2/3/3A Wiring harness "wire gauge" sizes? Triumph 20
G '70 Series II engine bay wiring harness -- Jaguar 7
G '70 Series II engine bay wiring harness -- Jaguar 3
charleyf TR6 Wiring harness/ dash bulbs Triumph 2
K TR2/3/3A Wiring Harness Triumph 9
Got_All_4 TR2/3/3A TR3 A wiring harness Triumph 17
B TR6 Reverse light wiring harness routing Triumph 4
J Protecting new wiring harness under car section-Use clear shrink tubing? Austin Healey 4
mt10flyer TR2/3/3A TR3 wiring harness Triumph 7
Rut Wanted, Bugeye wiring harness Spridgets 0
Griz Rear Wiring Harness Question Austin Healey 6
R TR2/3/3A TR3A Overdrive Wiring Harness Installation Triumph 19
Rut Bugeye wiring harness Spridgets 2
mt10flyer TR2/3/3A Winter Project-Wiring Harness Triumph 4
R New wiring harness Austin Healey 8

Similar threads

Top