• Hi Guest!
    You can help ensure that British Car Forum (BCF) continues to provide a great place to engage in the British car hobby! If you find BCF a beneficial community, please consider supporting our efforts with a subscription.

    There are some perks with a member upgrade!
    **Upgrade Now**
    (PS: Subscribers don't see this gawd-aweful banner
Tips
Tips

TR2/3/3A Rear tail light cutouts

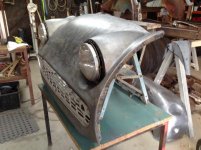
Pretty well finished the front apron today and cleaned it up. Found a small section that I will do a bit more hammer and dolly work on as I was cleaning the metal with rust converter. Had a couple of headlights and buckets they mount in that I scrounged from a local man. Correct ones for the job but not sure what car they came off. Still need some surrounds but plenty of time yet.
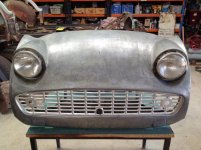
IMG_1505.jpgIMG_1508.jpg
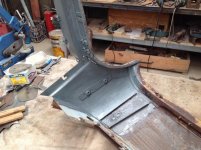
Finally worked up the focus to do the last bit that has been stopping me reassembling the scuttle / firewall. Needed to replace some of the cage nuts that hold the doors. They are difficult to do if trying to spot weld them rather than just tig them in place due to the restricted access for clamping the metal layers together. Ended up using a variety of methods including G clamps, bolts and nuts and the like. Welds not as good as usual due to the limited area of metal being welded and doing it from the cage nut side. Even so, the welds are solid and they will be enclosed and out of sight.
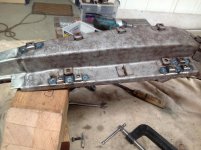
IMG_1507.jpg

Next job is to weld in the kick panels and start reassembling the firewall to the scuttle.
 
It amazes me what can be done when people try with great effort. Those head light rims come in many forms and widths often they pop on easily, but some have screw hole on the bottom that is usually for the early tr3 and tr2. There is a tool for removing them basically a bent little steel bar. MGB and other car headlight rims will interchange, I guess because the chief vender was Lucas.
 
Steve. Unfortunately the ones I have are those with the srew at the bottom. This would be OK on the TR2 which has the headlights protruding forward. With the 3A you would need a bent screw driver to access the screw. Not a problem at the moment as I only have them in situ to see what it will look like. Will look for the later version as I proceed.

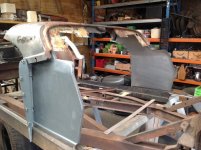
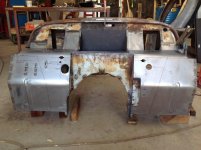
Meanwhile I have been continuing reassembly of the scuttle and firewall. Have been waiting to get my sand blasting gear sorted out. Needed to clean out the areas that would be enclosed once the kick panels are welded back in place. Blasted the area and applied a couple of coats of industrial strength zinc rich cold galv.

IMG_1509.jpgIMG_1512.jpg

It took quite a bit of work to to ensure the angle of the A post is correct in relation to the sills. Getting the correct height at both the back and front of the clip and the same on each side of the car required a lot of clamping and adjusting. Once correct, then I found the floor level of the lip at the bottom of the firewall differed. Had to redraw the the line accross the base and rebend the lip. Also, in getting all heights and angles correct required undoing the spot welds on the left A post and adjusting the position of the kick panel. About one millimetre difference at the bottom of the A post was enough to throw out the alignment. All done though and left right, front back measurements are all now within a millimetre.
IMG_1515.jpgIMG_1516.jpg
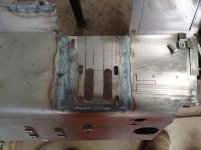
In the photo above you can see that I found the slots for the brake and clutch were in the wrong position from when I transposed the measurements from the left side to the right. Had to cut the section out and move it sideways. Unfortunate as it was very neat initially.

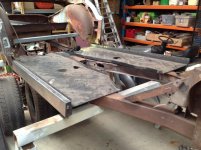
Once the scuttle and firewall were attached, the kick panels had to be welded to the firewall. The position of the kick panel is defined by the sills so their position were set when the scuttle was assembled on the sills and then tacked to the firewall. Once this was set, the floor pans were trimmed and spot welded to the sills.
IMG_1518.jpgIMG_1521.jpgIMG_1522.jpg

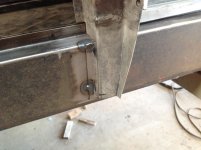
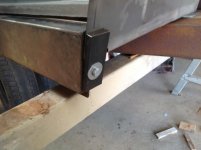
Finally tacked in place. The metal block at the front of the sill locks the height at the front of the scuttle until the spot welds are complete along the base of the kick panels.
IMG_1525.jpgIMG_1526.jpg

Finally! Starting to reassemble the car.


More amazing work.

It is coming together and is starting to look like a TR again.

What is the black block in the end of the inner sill? Trying to remember what I had there.

Hope you had a great Christmas.

David
 
Hi David. Christmas was great. Hope yours was also.
The block is there temporarily to hold the scuttle / firewall at the correct height until I spot weld the bottom of the kick panel permanently. The block is held by a bolt in the end of the sill, which normally holds the bottom end of the guard between the firewall and the mudguard.
Just got to make a long clamp now to reach in and hold the sheets together while I spot weld them.
 
Hey Lionel...still looking great. One thing I notice is missing in the pics is the driver side kick panel relief for the headlight dimmer foot switch. It may be needed to give enough clearance with the pedals. Of course...with an RHD car it may not be applicable?? You can see it on the TR3 body in this pic:

anD3btB.jpg
 
Hi John. It was a deliberate decision on my part to not do the relief in the panel. The car will never be converted back to left hand drive in my time and likewise will never be in concouse reviews so I took the easy option. At the time I considered it but was looking down the barrel of lots of other panels to do and wanted to focus my attention on them.
 
Hi Lionel, hope you have had some time off for the holiday. I got my tuck fork made today. Now i have the tuck fork and the hammer so now it is hammer time. I started the repair panel for the rear passenger tail light area. My template showed shrinking around the tail light crease. the shrinking is going well but i find it a slow process but i see the repair panel looks like i am on the right track. Thank you for your help and encouragement. I think I have figured out how to post some pictures so I hope to get my panel posted soon. I find metal working easier than computers. Hope to be up to speed soon. Thanks , Frank
 
Way to go Frank. Take it slowly and just keep easing the metal where you want it. I spend a lot of time just looking at the piece and thinking through how the metal has to change to achieve what I want.

I meant to ask previously if you are using correct grade of steel for the job? I use what is known as CA2SE which is cold rolled with very good maleability. Surprised me how many times I can make mistakes with it and still flatten it out and start again.

Have a great New Year
 
Thank you for that question. I was pretty sure I had ordered the correct sheetmetal but went back and checked the invoice. I am using 20 gauge cold roll formable sheetmetal for the body panels and 18 gauge for other panels that are heavier. when i have a piece to repair I check the thickness with my calipers and match the thickness. This makes the welding much easier as well as the finishing. Continued thanks for your pictures, it is a tremendous help. Frank
 
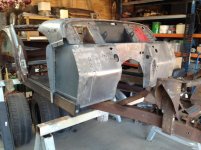
Got the kick panels spot welded in place locking the scuttle in place. Installed the old doors to double check alignment of the scuttle with the sills. All OK.

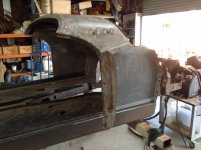
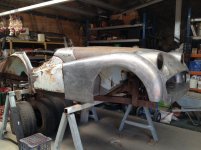
Decided to fit the mudguards and front apron to check alignment. The inner guards are not attached to the firewall yet. Once the alignment of all components are checked, then I will tack them in place and remove the outer guards and apron to complete the welds and then weld in the strengthening gussets between the inner guards and firewall.
IMG_1540.jpg
Regardless of how much care you take with the idividual panels, until they are attached to the sills and chassis and each other, you don't know how well they will fit. Pretty much all the issues others have noted in their assemblies showed up.
Although the doors align with the sill beautifully, the gaps between mudguards and the scuttle are terrible. The gap between the door and the scuttle on the left is nearly half an inch. The right door is better but will need work. At this stage both doors are going to be rebuilt with new skins so plenty of opportunity to improve the situation.
IMG_1533.jpgIMG_1541.jpg
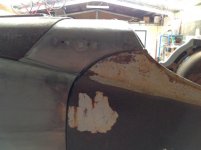
When I made the repair sections for each side of the scuttle I managed to mess up the lower bends where they meet the rear top of the mudguard. The right is too low and the left one is at the wrong angle so it slopes up in relation to the line of the mudguard.
IMG_1531.jpgIMG_1543.jpg
Having the inner guards firmly attached to the chassis mounts at the front has affected the alignment of the bolt holes between the inner and outer guards on the left side so some tweaking to do to get them aligned. The right side lined up well. Sitting the bonnet in place highlighted the poor gaps between it and the guards and also the curvature of the scuttle. Not too much of a problem though as I think fixing the scuttle alignment will assist with the alignment with the guards. The bonnet has yet to be rebuilt to the shape will be finessed then.
IMG_1537.jpgIMG_1539.jpgIMG_1536.jpg

Still, when you use two outer guards, an apron and bonnet from different cars, one has to expect a bit of a mismatch. Add to this the modifications that have been done to each of the panels without being in a position to offer them up to the main body during refurbishment, one has to expect a bit of tweaking will be called for.

On my way to a busy 2019. Happy New Year everyone!
 
Lionel, you will get to refit those doors and panels so many times before you have finished it will be like an assembly line, looking good.
Happy new year.

Graham
 
Looking great Lionel; the hoods and the doors from my understanding never fit that great to begin with plus there is that chrome beading that runs down both sides of the hood, so the gap is large to start with, so the hood will open and close without hitting the chrome. Because I am more of a carpenter than welder, I bent and twisted the hinges toward the front or side to push the door where I wanted. Then later I saw how CJD would undo the spot welds and reposition the sheet-metal sometimes. Anyways, at your skill level I am sure you will have those doors nice. Heck the doors are so small that sometimes with the weight of the side-curtain the door drops down in the back also. In addition, the hoods in general all seem to have that higher arch spot in the center. When you’re done, you might have 1 square foot of the original metal anyway probably under the vin plate. Anyways, better than TV keep posting.
Steve
 
I’ve been sitting here in DFW waiting for a flight and wondering...

...it’s New Year’s Day here, but is it New Year for Lionel today or yesterday?
 
I got thinking about the hood fit I have seen over and over again on these cars and wondered, could the slight arch of the hood be that the cowling has gone down over the years with these cars and not the hood gone up. Heck the battery sits there and there is that hole for the vent and there does not seem to be a lot of structural members under the cowling. Or the arch could perhaps a combination of the hood rising up from engine heat and the cowling sagging, but my experience has been that gravity is in charge. So did you make your cowling Lionel and see any evidence of the cowling sagging?
steve
 
John,here in the west we are 12 hours ahead of you when it's 0001 midnight in the US its 1200 mid day here in West Australia so we are now into 02 Jan 2019

Graham
 
12 hours...so exactly half a day. So you guys had New Year the day before us. Thanks, Graham, another one of my little mysteries solved!
 
My sister lives in NSW. Back in Y2K days coming up to midnight here in the US I e mailed her to make sure everything was still working. Luckily it was and she answered my message.

David
 
Never been too clear on the time zones so I just celebrated new years day on first of January. Do the same each year and I'm never confused. Don't upset my status quo John.

Steve, I remade the middle section of the scuttle with the air vent so there was opportunity for a bit of sag in the re-fixing. Hopefully I haven't locked in any sag. I think I will jack it up a bit while I can access the area and see if there is any change.

Update without any photos!
Had the problem I think John mentioned at at one stage. The holes in the left mudguard didn't line up satisfactorily. Ended up filling all the holes in both the inner and outer guards and then redrilled to match the cage nuts. All good now.

Re-bent the lower edge of the scuttle where it meets the top of the guard on the right side. Matches fine now. Still to do the left side.

Welded in the brackets for the supporting bar across the back of the apron onto the inner guards. Apron and guards all bolt up beautifully now.

Drilled the holes and bolted up the tray in the bottom of the grill opening so it fixes to the inner guards now. Of course I managed to get one in the wrong place and had to do the fill and re-drill routine. So much for measure twice, cut once!

Have removed the guards again to clean the areas where the inner guards attach to the firewall. Tomorrow is the big day where it all gets welded together and the car has a front end again. Been separated since about 2009.

Might move on to the back end then so I can get all the tub complete this year. That's my resolution for the new year.
 
Back
Top