• The Roadster Factory Recovery Fund - Friends, as you may have heard, The Roadster Factory, a respected British Car Parts business in PA, suffered a total loss in a fire on Christmas Day. Read about it, discuss or ask questions >> HERE. The Triumph Register of America is sponsoring a fund raiser to help TRF get back on their feet. If you can help, vist >> their GoFundMe page.
  • Hey there Guest!
    If you enjoy BCF and find our forum a useful resource, if you appreciate not having ads pop up all over the place and you want to ensure we can stay online - Please consider supporting with an "optional" low-cost annual subscription.
    **Upgrade Now**
    (PS: Subscribers don't see this UGLY banner)
Tips
Tips

TR2/3/3A Changing out the battery liner

Gatheringtree

Senior Member
Gold
Country flag
Offline
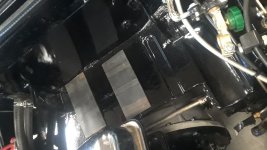
This is a heads up. I had to change out the old cracked ABS plastic battery box liner. My battery was starting to fall through it. (Perhaps there was a metal compartment before, but now there is only a hole for the liner to sit in.) I purchased a new holder/liner from Moss Motors. The old battery liner was installed with screws. I would recommend against drilling and fastening it because plastic expands and contracts as it heats & cools. The engine compartment takes that temperature flex to greater extremes. The ABS battery holder is vacuum formed from a flat 1/8" thick sheet. As it is heated, then stretched over the mold and vacuumed to conform to the mold, it thins down to about 1/32~1/16" inch on the deepest parts. This makes it weaker at the bottom. I added 1/8" closed neoprene foam under all outer flanges before seating it. This gets the plastic off hot metal and provides for easier expansion / contraction. I think it will extend the life of the liner. The neoprene is available on Amazon. I used the same neoprene in the floor of the battery compartment. Both battery and compartment are held in place well by an existing bracket system. So, there is no need to screw the liner in place. Do not over tighten the clamp. This will put undue stress on the thin battery liner floor over time. The bottom of the liner is much thinner and weaker than it appears at the flanges.
50CD352C-A5EF-464B-BD6F-2795DFCC5C4E.jpeg
898BD61A-E5E1-44BE-BD39-0B6059367A2B.jpeg
E765984C-9BEA-4371-A100-A524C6B57550.jpeg
05809263-5252-4126-B5A3-EBD2A56C44E6.jpeg
 

CJD

Yoda
Country flag
Offline
Yes, there was originally a steel box to hold the battery, and not a simple job to replace it. The liner, as the PO found out, will work for a while, but will eventually crack from the heat, weight and vibration.
 

TomMull

Darth Vader
Silver
Country flag
Offline
Good solution and maybe better than the original steel box which was a curious arrangement that rotted out from acid spills on almost every TR. It had a hole in the bottom with a hose on it that went into the cab and down through the transmission tunnel where it dripped past the transmission, and seemed to do little damage. But the box bottom stayed wet even with the drain hole and rotted famously.
Tom
 

bobhustead

Senior Member
Gold
Country flag
Offline
I built a new steel box for mine and coated it with black bed liner. I then cut a plastic battery box to the heights and angles of the compatrment and set the battery there. 11 years, no problem.
Bob
 

charleyf

Luke Skywalker
Country flag
Offline
Another option that I did was to use a battery mat. Which is treated to absorb/ neutralize the acid. This along with the rubber pads sold by TRF and others. I placed pads below the plastic box and on top of the battery mat, which will be below the battery.
Charley
 

Attachments

  • 20230403_183317.jpg
    20230403_183317.jpg
    1.2 MB · Views: 49
  • 20230403_183159.jpg
    20230403_183159.jpg
    1.1 MB · Views: 50
  • 20230403_183228.jpg
    20230403_183228.jpg
    1.4 MB · Views: 49
OP
Gatheringtree

Gatheringtree

Senior Member
Gold
Country flag
Offline
Another option that I did was to use a battery mat. Which is treated to absorb/ neutralize the acid. This along with the rubber pads sold by TRF and others. I placed pads below the plastic box and on top of the battery mat, which will be below the battery.
Charley
Good idea.
 

CJD

Yoda
Country flag
Offline
If you are having acid issues, then you are over-filling the cells. I used to be guilty of the same. I used to fill to the bottom of the plastic fill tubes...and I would get a lot of acid all over the battery boxes. In the RV I run 6 lead acid batteries, so it became an issue. I learned that there is no reason to to fill past the plates being just covered...which is about 1/2" lower than I used to fill. The RV has gone 10 years without a drop of acid in the battery bay...my fresh TR2 battery box is as clean as the day I painted it 8 years ago.
 
OP
Gatheringtree

Gatheringtree

Senior Member
Gold
Country flag
Offline
If you are having acid issues, then you are over-filling the cells. I used to be guilty of the same. I used to fill to the bottom of the plastic fill tubes...and I would get a lot of acid all over the battery boxes. In the RV I run 6 lead acid batteries, so it became an issue. I learned that there is no reason to to fill past the plates being just covered...which is about 1/2" lower than I used to fill. The RV has gone 10 years without a drop of acid in the battery bay...my fresh TR2 battery box is as clean as the day I painted it 8 years ago.
This is always good advice and I am glad your RV is battery compartment is in good shape. In this case, I did not fill the battery with acid. I purchased the car a few weeks ago. The box was already worn and cracked at the screw sites. I did have a bad leak in the master cylinders. Corrosive brake fluid spilled and took off nearby paint and had an effect on the battery liner that contributed to its deterioration. This post is primarily a tip about the installation of a new battery liner. ( I also replaced both master cylinders and solved the brake fluid leak problem.)
 

CJD

Yoda
Country flag
Offline
I had some acid issues from my PO too...just trying to help. Remember this thread will be searched by many future owners :smile:


JqqnvnN.jpg


OBxqCe7.jpg


Oh...a tip for brake fluid. The silicone fluid doesn't remove paint...in fact, we Harley guys use it to "gloss up" painted surfaces when showing our bikes.
 
OP
Gatheringtree

Gatheringtree

Senior Member
Gold
Country flag
Offline
I had some acid issues from my PO too...just trying to help. Remember this thread will be searched by many future owners :smile:


JqqnvnN.jpg


OBxqCe7.jpg


Oh...a tip for brake fluid. The silicone fluid doesn't remove paint...in fact, we Harley guys use it to "gloss up" painted surfaces when showing our bikes.
So true
 
Similar threads
Thread starter Title Forum Replies Date
vping Changing from 2 batteries to 1 battery - Why? MG 28
K TR2/3/3A Further to changing motor and gearbox mounts. Triumph 1
A TR6 Changing bulbs in gauges Triumph 27
R Changing BJ7 Differential Ratio Austin Healey 10
T Kilmartin Changing Ownership Austin Healey 2
bighealeysource Changing Steering Box Lube (BN2) Austin Healey 9
R TR2/3/3A Changing to a voltmeter. Triumph 6
red57 Changing Lock Barrels Austin Healey 15
FlyingCat Spitfire Checking/Changing Fluids Triumph 5
N Spitfire Changing Differential oil Triumph 14
jfarris TR2/3/3A Changing rear wheel studs in a later Girling axle Triumph 3
R TR2/3/3A Changing rear seal Triumph 23
C changing ignition light bayonette Austin Healey 2
J Changing Brake Discs on my 63 BJ7 Austin Healey 9
R Rear quarter elliptical suspension changing Spridgets 12
F Changing fuel Austin Healey 6
drooartz MGB Changing clutch hose - tips? MG 13
T ?Changing BE to SU electric fuel pump Spridgets 8
J TR2/3/3A Changing fan belt. Triumph 9
A TR4/4A Changing rear diff seals Triumph 15
R TR4/4A Changing from 4 speed to Overdrive on a TR4 Triumph 18
D TR2/3/3A Changing polarity on TR 3 Triumph 9
O TR2/3/3A Changing Ignition Switches Triumph 5
B Spitfire Changing leaf spring bushing - any tips? Triumph 6
Z TR6 74 TR6 - Changing headlight beam switch issue Triumph 0
M Changing coolant Triumph 14
P Changing Brake Fluid & Brake Pressure Switch Austin Healey 17
bobh Changing Transmission Oil in 10 minutes Triumph 8
P CHANGING TO FRONT DISCs Spridgets 22
Reh Changing things up Triumph 13
af3683 Changing tires on Original TR 3 Wire Wheels Triumph 4
tweety Changing a half axle Spridgets 1
58Custom Any tricks to changing front wheel bearings? Spridgets 7
Stewart Changing crossmember pads MG 2
P Changing the Oil on a 100-4 Austin Healey 81
TRnorwegian Changing clutch master cylinder - peace of cake? Triumph 10
M Brakes are terrible. Any tips on changing calliper Spridgets 14
theleisure Changing Out Front Bushings Spridgets 5
R Changing Motor Mounts Triumph 6
BritcarsUSA Changing 5/8 to 3/4 Midget filter adapter nipple? Spridgets 4
rchakr Changing Rear Springs Triumph 6
beaulieu changing an old car to E85 Restoration & Tools 14
T Changing fluids Triumph 16
G Changing bearings Triumph 7
B Changing to Silicone Brake Fluid Spridgets 18
G Changing Horses in Mid Stream.... Triumph 47
Paulus TR6 Changing a TR4A fan to a TR6 fan Triumph 3
T Changing front bolt pattern? Triumph 9
19_again changing right angle drives MG 1
G Changing my Sway Bar Triumph 11

Similar threads

Top