• Hey there Guest!
    If you enjoy BCF and find our forum a useful resource, if you appreciate not having ads pop up all over the place and you want to ensure we can stay online - Please consider supporting with an "optional" low-cost annual subscription.
    **Upgrade Now**
    (PS: Subscribers don't see this UGLY banner)
Tips
Tips

Carpet installation fit questions

tdskip

Yoda
Country flag
Offline
OK guys - big week this week. Time to get the interior on the road to being ready to drive the '74 TR6.

I've look at a number of your sites that cover this, including your excellent post on this Paul.

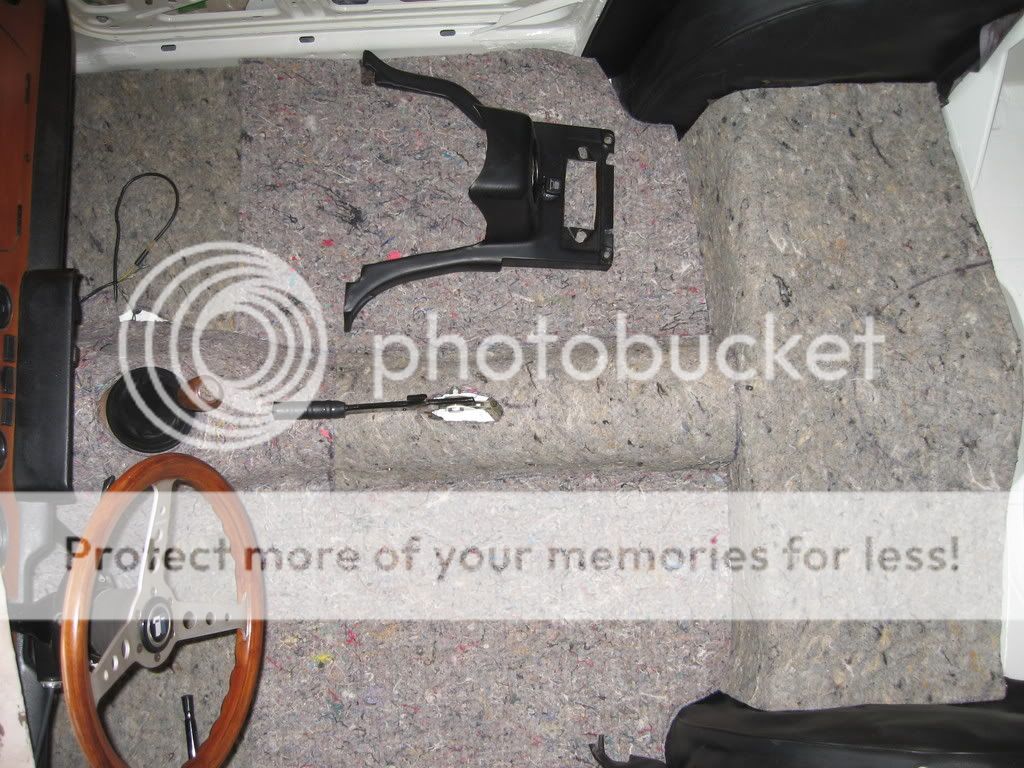
My carpet set did not come with pre-cut backing, so I'm looking for coaching on how to approach this.

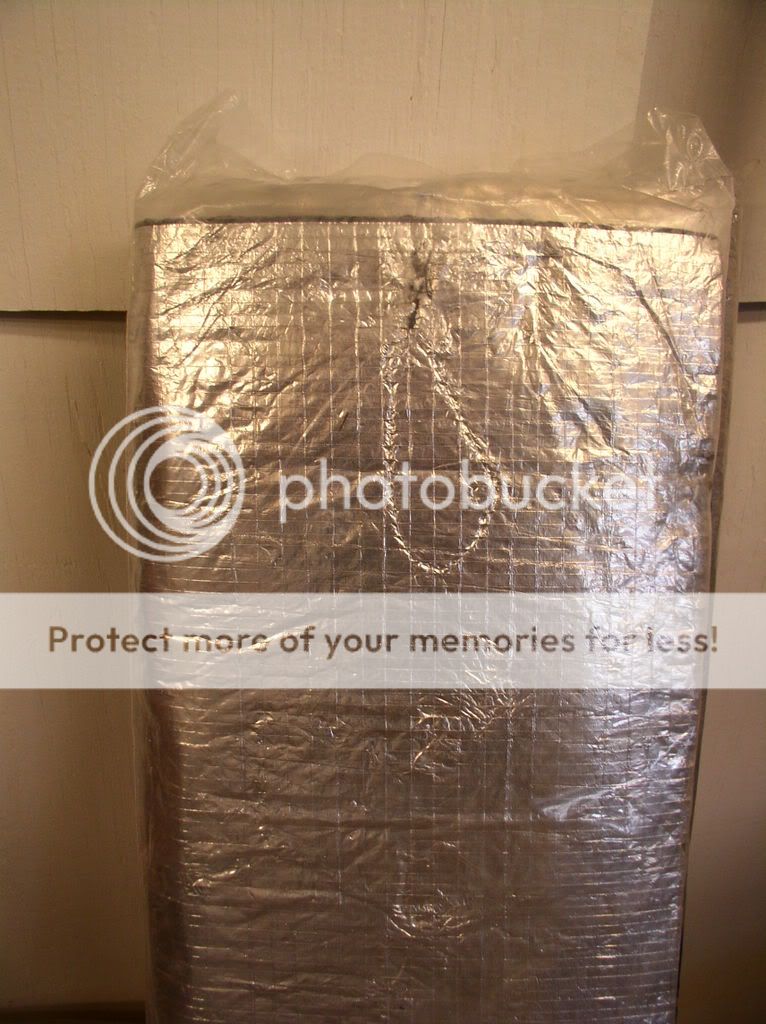
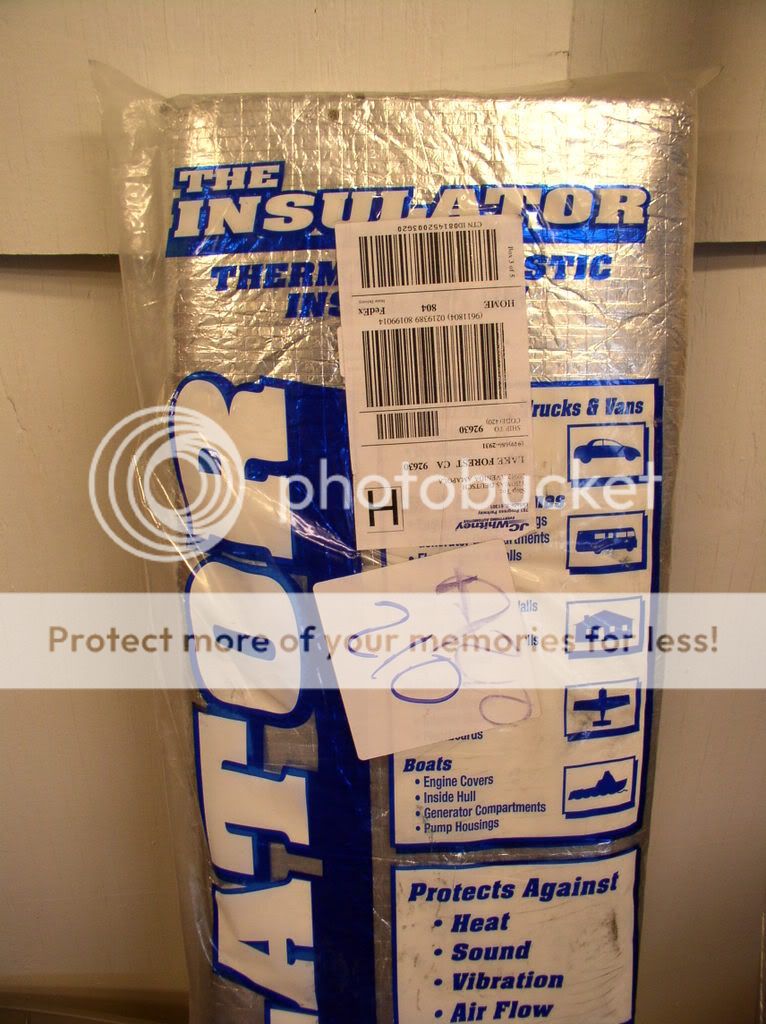
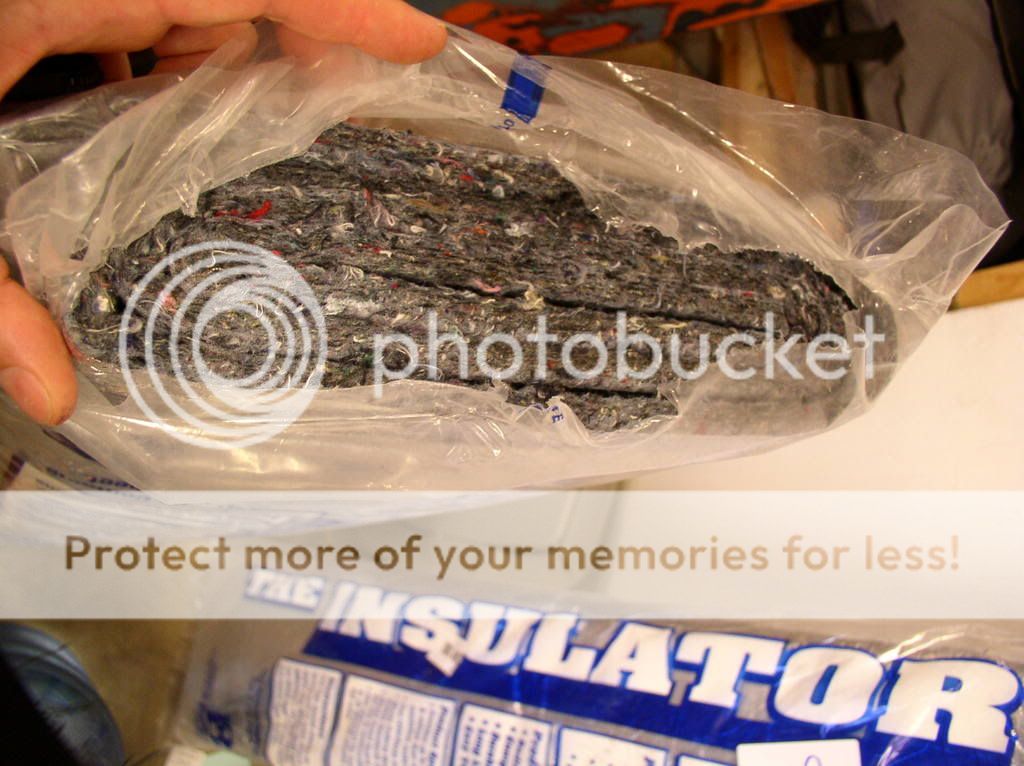
This is what I'll be using for backing. It has a reflective heat material that goes shiny side down.

74TR6carpetbacking0011.jpg


74TR6carpetbacking0012.jpg


74TR6carpetbacking0014.jpg


My questions;

1) Do I cut this to match the pattern of the carpet?

2) Should this be glued down?

Thanks!
 

Brosky

Great Pumpkin
Offline
TD,

Cut it slightly smaller than the carpet shape.

DO NOT glue it to the floor. Glue the carpeting to the mat only.

JMHO....
 

Mickey Richaud

Moderator
Staff member
Gold
Country flag
Offline
Brosky said:
TD,

Cut it slightly smaller than the carpet shape.

DO NOT glue it to the floor. Glue the carpeting to the mat only.

JMHO....

Yep - don't glue ANYTHING to the floor. It can be held down by the seat runners. That way, it can be removed for cleaning, and won't hold moisture.
 

jjbunn

Jedi Knight
Offline
I found the placement of the underlay on the transmission tunnel cover to be ticklish, so that the console support H can be fitted afterwards. It's a tight fit, and the extra thickness of the underlay in the wrong place can make it a real b***er to get in.
 

jjbunn

Jedi Knight
Offline
It looked just like the backing in your photo (all mys tuff was from Moss). I'd be especially concerned if there was also a layer of foil insulation as well, depending on how thick it is.

Just my 2c ... it may be a non-issue in your car, depending on how the H piece fits.
 
D

DougF

Guest
Guest
Offline
Larry Learn, who did the much of the interior work for TRF before The Magic Carpet Factory, told me to cut underlayment 3/4" inside the carpet edge to allow the carpet to lay down properly.
 
T

Tinster

Guest
Guest
Offline
tdskip said:
Thanks guys - appreciate the info.

Julian - how thick was the backing you used?

<span style="color: #000099">TDSkip- you have exactly the heat shield I used
when I replaced the interior of my 1969 TR6.

Yes, everyone is correct about cutting the heat shield about 3/4"
smaller than the carpet piece. Also, cut out for the seat rail
runners-don't install on top of carpet.

All the carpet snaps were long gone when I install my carpet so
I had to improvise.

Agreed- don't glue the heat shield to the metal floor surfaces.

Once the heat shield is cut - dry fit all the pieces into the car
and make minor
adjustments as needed.

I used yellow bonding adhesive to stick the heat shield to
the carpet backs.

I then got a bunch of 2 inch width, self adhesive Velcrow
and laid down strips onto the floor, foot wells, etc.
Press the shiny aluminum surface onto the velcow and it sticks
real good and is easy to remove the carpet when needed.

It is fairly important you install the 2 each door sill pieces
first. No underlayment here.

My car is ever so much less hot and noisy as a result
of the heat shield.</span>
 

kodanja

Obi Wan
Country flag
Offline
I tried using velcro,
the problem I had with it was the sticky side always comes loose.
 
T

Tinster

Guest
Guest
Offline
kodanja said:
I tried using velcro,
the problem I had with it was the sticky side always comes loose.

<span style="color: #000099">Maybe the wider widths help. I pushed the
velcrow firmly against the painted metal and then pressed the
carpet pieces onto the 2nd sticky velcrow. I also laid
down a strip of yellow bonding adhesive on the foil and
sticky velcrow.

I don't yank the carpet out; I kinda peel out.

d</span>
 

Halkett

Freshman Member
Offline
Hi,
(This is my very first post – just finished restoring my car with all of your help – thank you).
My experience:
Get two pairs of sharp sizes, one for long straight cuts and one for curves or tight inside radius cuts. I did not glue or tape down, nor did I use the ¾” relief that has been mentioned (although this is probably a good idea). I covered pretty much everything inside the cockpit and had considered attaching it to the back side of the rear panel at the fuel tank but elected not to in case of fuel spill / absorption and possible eventual board warping.

I found the snaps to be very difficult to align with the veltex carpet ring things and eventually decided against using them at this point as the carpet tended to have wrinkles or not be in the exact perfect spot….

Julian has made a important point ref the center dash support feet – cut a relief in the under pad here..the center support will go in easier / bolt’s are easy to locate and fit… and you will only have to install the center support once – reducing the possibility of damaging the support covering ( which is pretty brittle around the edges by this time…)

Can’t comment on the before or after results..never drove my car before I restored it – but it does seem nice and cozy.

(sorry ...havent figured how to add pictures yet...)

Stephen.
 
OP
T

tdskip

Yoda
Country flag
Offline
Hi Stephen - welcome!

Thanks for the tips and experience. What did you use to secure the backing to the floor?

You can post pictures by uploading them to photobucket.com or similiar and the cutting and pasting the link they provide inbewteen the following code
.

The
closes the link out.

We'd love to see pictures.
 

Halkett

Freshman Member
Offline
Hi TdSkip.

I have two photo's here:
IMG_2433.jpg


IMG_2432.jpg


(not shown is the center support cut outs at the bottom of the dash bracket - this realization came after the picture was taken...)

I used the seats to hold carpet and pad at the runners. On the back deck the carpet is tucked under the side and back panels and holds tight. I used small amounts of double sided tape on the contoured parts (gear box and prop shaft covers)..

The side (carpet) panel the DS foot well holds the carpet and pad at the front edge - just under the pedal box I have some double sided carpet tape....my carpet seems OK - nice and flat and covers every square inch of the interior - I have no exposed steel or under pad...and it has not moved in the 500miles since I have had the car on the road..
I did not want to use glue / and the veltex were giving me huge grief with proper locations. ( I got over my need for concourse appearance through self hypnosis, rationalization and the unusual appeal of a nice flat properly located carpet)..

Thanks for the help with photobucket...
Good luck on the install / take your time..
Stephen.
 
Similar threads
Thread starter Title Forum Replies Date
G TR2/3/3A Carpet and upholstery installation Triumph 17
S TR2/3/3A TR3A Carpet Installation Triumph 7
Tinkerman TR2/3/3A 1960 TR3A carpet installation Triumph 5
B Carpet Kit Installation Advice Austin Healey 7
69sprite carpet installation over dynamat Spridgets 13
R Moss carpet installation question Austin Healey 19
Newkie MGB Looking for MGB carpet installation instructions MG 6
I Bugeye carpet installation help Spridgets 3
KVH Carpet Installation Triumph 8
I Bugeye carpet installation tips? Spridgets 4
L Carpet installation Spridgets 5
tahoe healey Carpet installation Austin Healey 24
ekamm TR2/3/3A tr3a carpet installation Triumph 8
B Carpet installation question BN7 Austin Healey 1
longbridgehealey carpet installation 100-6 BN4 Austin Healey 2
Shinsen774 Molded Trunk Carpet Installation MG 10
B Title: AH Carpet installation video? Austin Healey 11
Tinkerman TR2/3/3A Under Carpet Felt installation, TR-3A Triumph 11
Stinky TR6 TR 6 Carpet Kit Installation Question Triumph 4
Kurtis Bugeye Carpet Installation Spridgets 5
C carpet installation Austin Healey 2
Todd78d Bugeye carpet Spridgets 7
AUSMHLY Karvel vs Wilton Wool Carpet Austin Healey 1
AUSMHLY Carpet Backing Austin Healey 4
AUSMHLY BJ8 Trans Cover Carpet Austin Healey 7
AUSMHLY BJ8 Carpet and Snaps Austin Healey 2
T Carpet "Direction" Austin Healey 3
kodpkd My New Carpet Austin Healey 9
T Carpet By-the-Yard Austin Healey 0
T TR2/3/3A tr3 front carpet replacement Triumph 5
S TR2/3/3A carpet kit and the interior done Triumph 8
S TR2/3/3A foot well driver side carpet Triumph 3
D Carpet Questions Austin Healey 2
J For Sale Triumph TR2 TR3 TR3A New Moss Motors Black Karvel Style Carpet Kit Triumph Classifieds 0
T BJ8 carpet Austin Healey 2
ckeithjordan TR2/3/3A TR3 Bulkhead Carpet Triumph 9
T TR2/3/3A Carpet recommendations Triumph 16
ckeithjordan TR4/4A TR4 Carpet Comparison Triumph 7
T BJ8 Carpet Padding Austin Healey 4
S TR2/3/3A copied an old original interior piece and carpet pad Triumph 6
S TR2/3/3A carpet kit Triumph 11
pbraun Carpet going in the bugeye Spridgets 12
maxwedge5281 Carpet Recommendations Austin Healey 0
P BJ7 Carpet Install Questions Austin Healey 29
TulsaFred Carpet fitting in the Bugeye Spridgets 3
E TR4/4A TR4 Carpet Sets Triumph 5
J TR4/4A Did my own carpet Triumph 16
N Best carpet glue???? Spridgets 5
S For Sale Austin Healey 100-4 Carpet Kit and Interior Panel and Trim Kit Austin Healey Classifieds 0
2 TR2/3/3A carpet snaps Triumph 5

Similar threads

Top