• Hi Guest!
    You can help ensure that British Car Forum (BCF) continues to provide a great place to engage in the British car hobby! If you find BCF a beneficial community, please consider supporting our efforts with a subscription.

    There are some perks with a member upgrade!
    **Upgrade Now**
    (PS: Subscribers don't see this gawd-aweful banner
Tips
Tips

TR2/3/3A Beginning the TR2 Bodywork


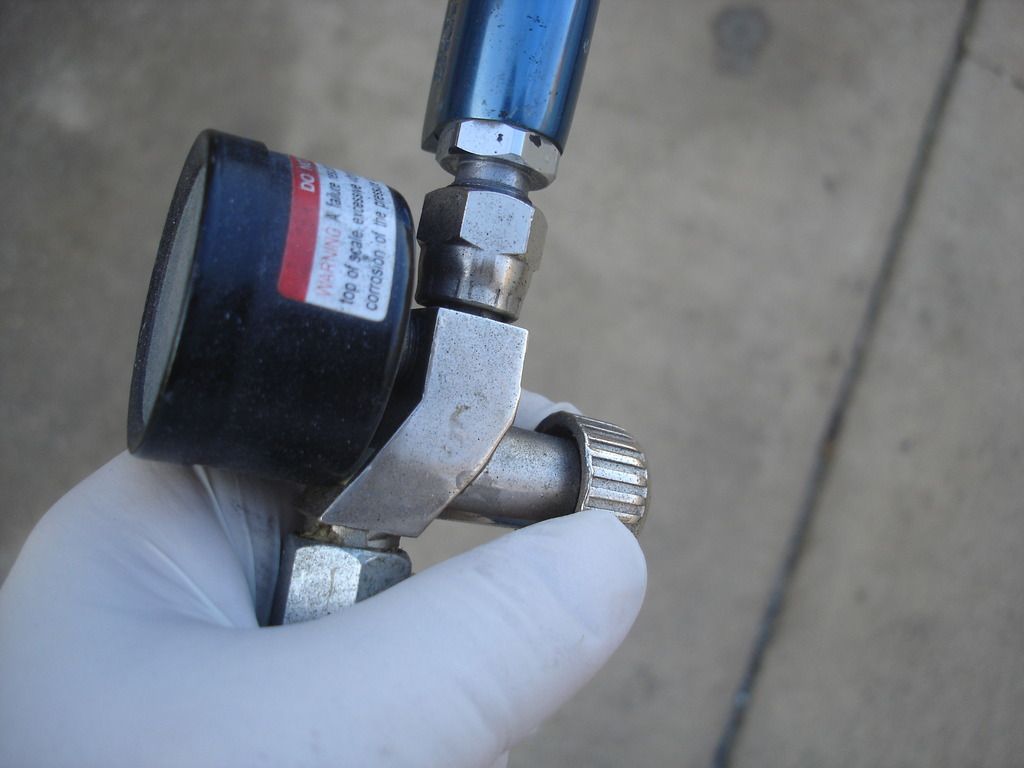
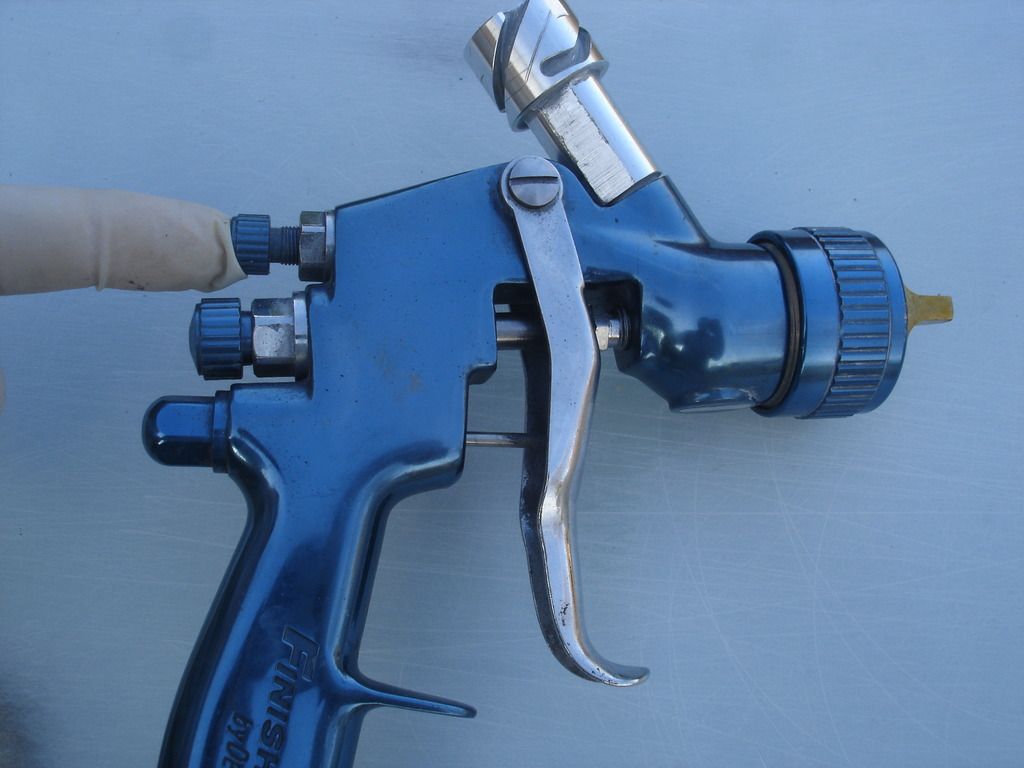
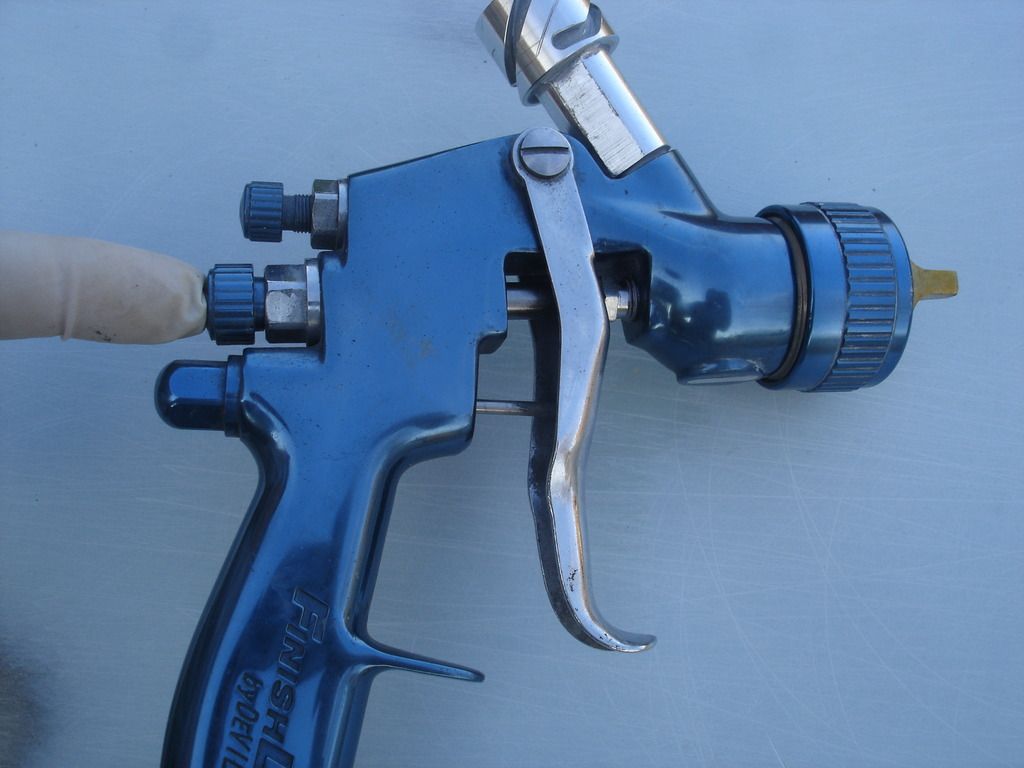
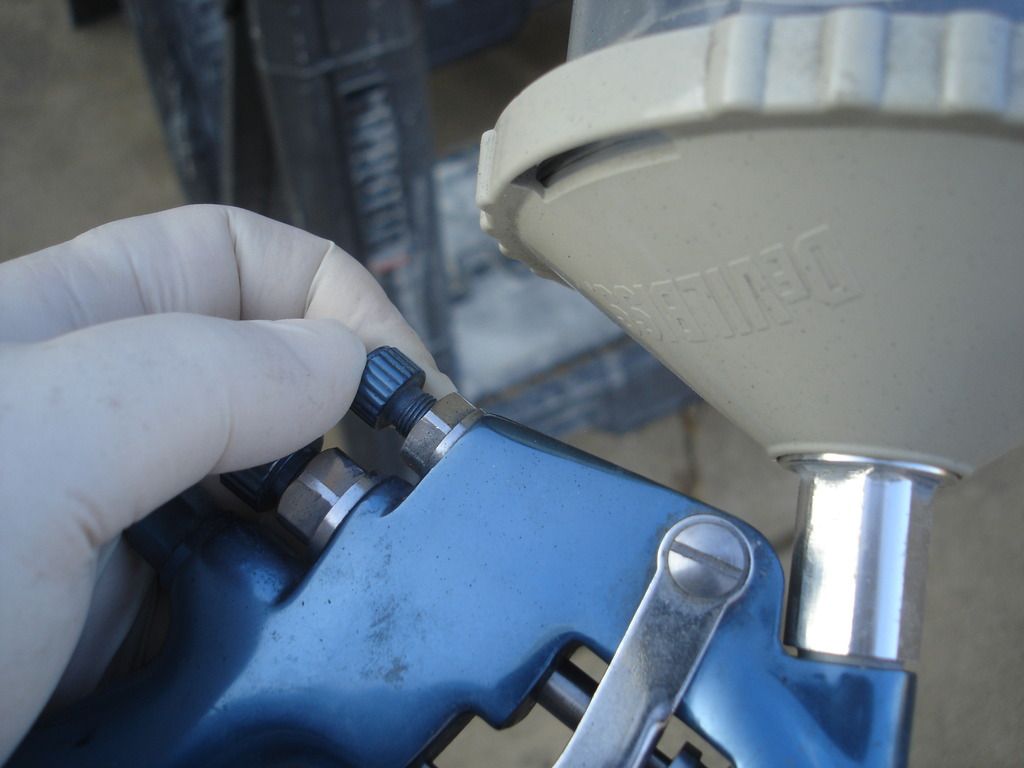
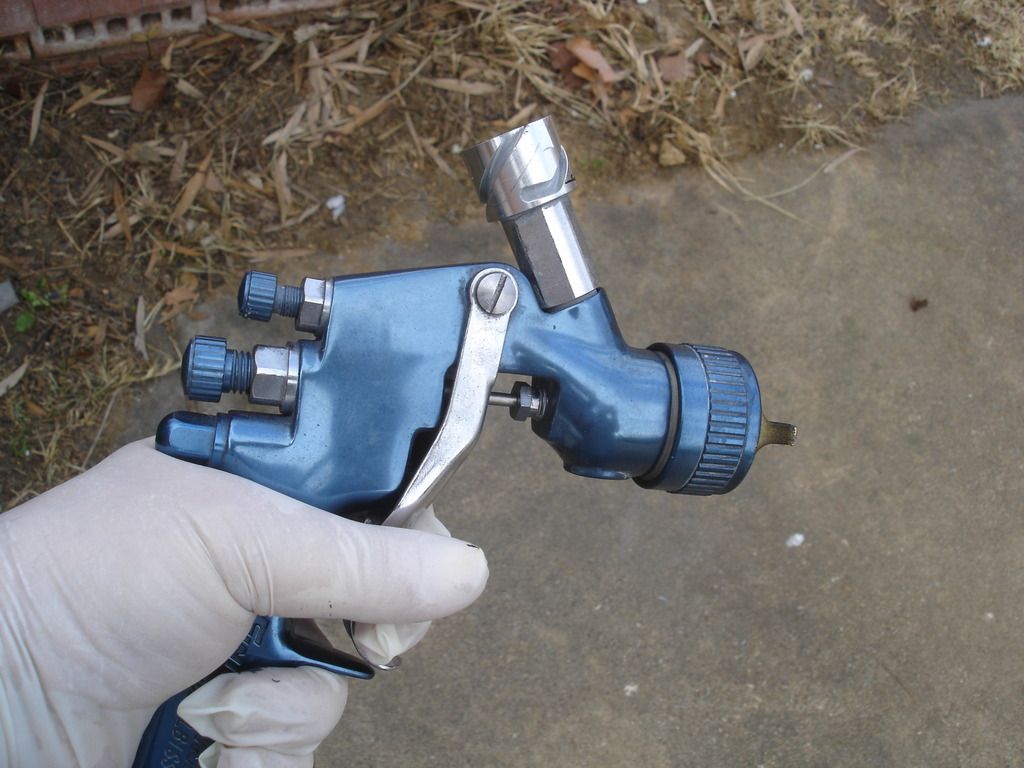
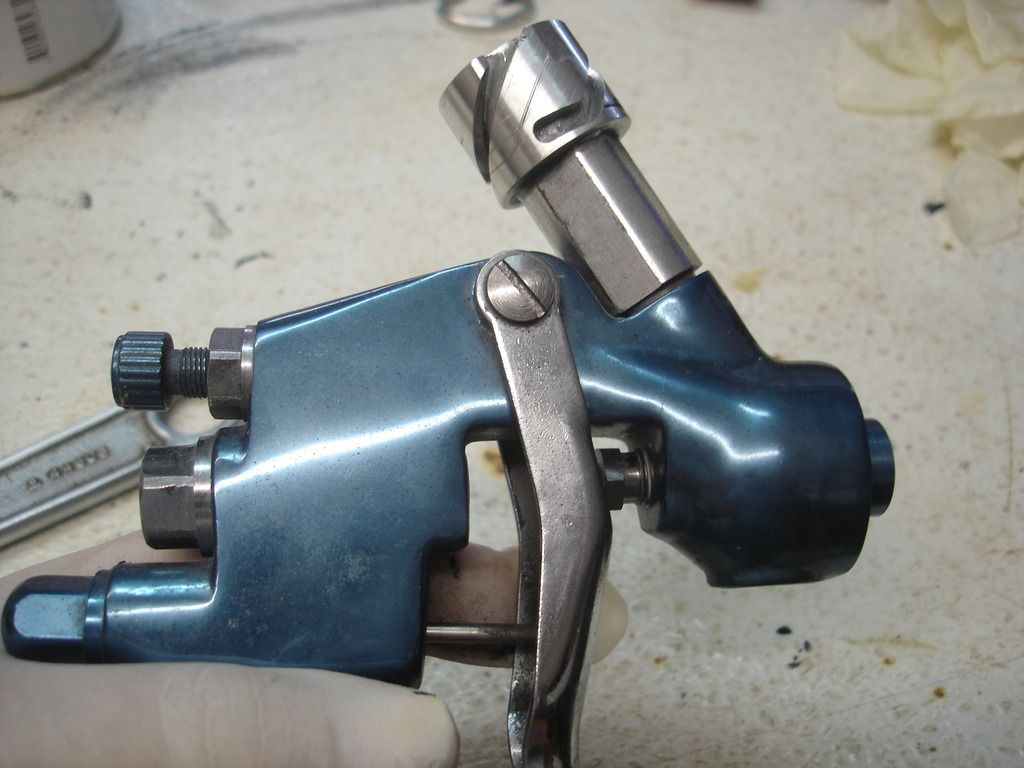
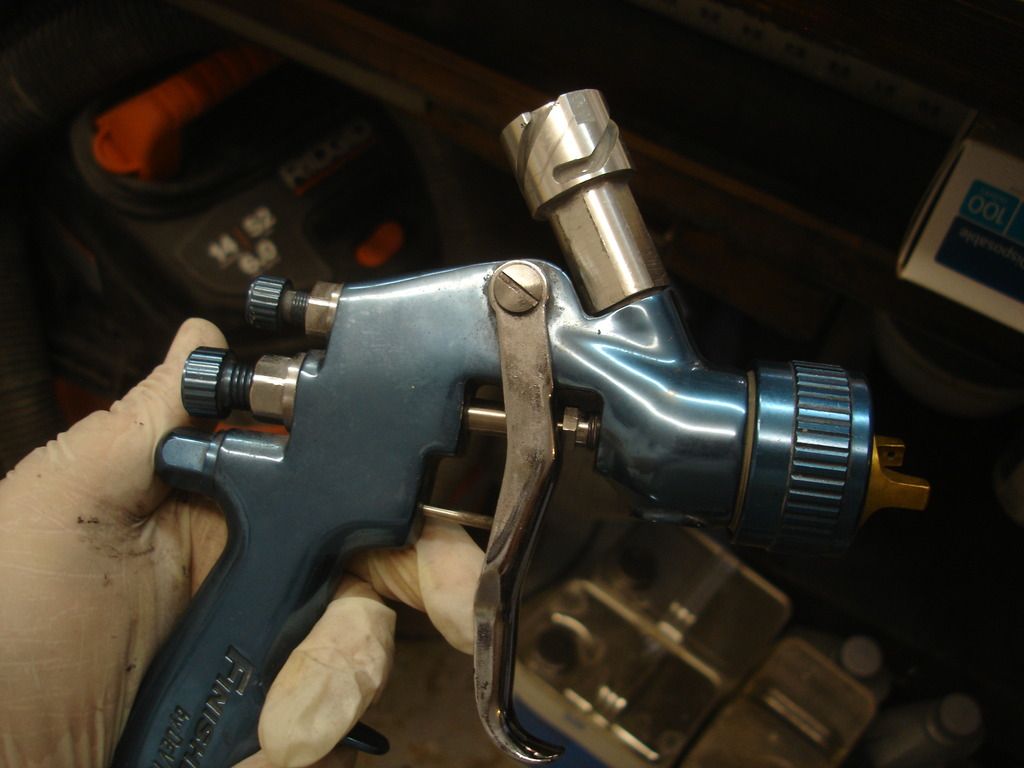
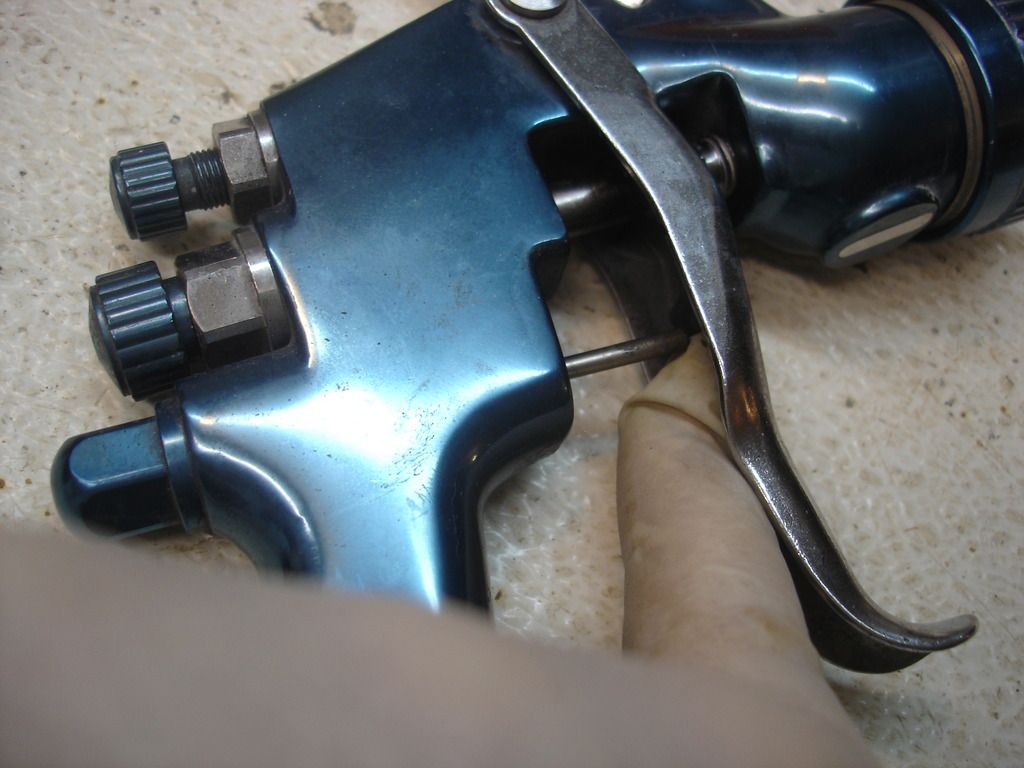
The 3rd nut is not an adjustment. It is the cap for the air valve, and should not be messed with unless the gun starts leaking air when the trigger is NOT pulled. It will last many years without trouble.
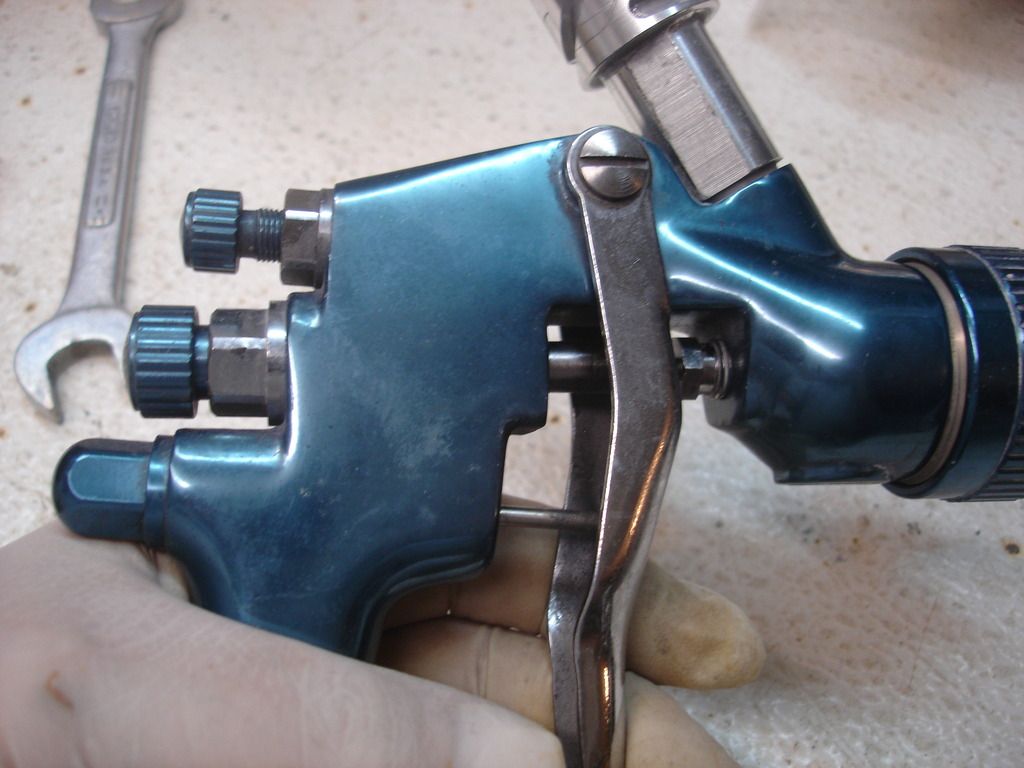


With the gun reassembled, you can see under the trigger all the parts. The silver rod at the bottom is the first thing hit when you pull the trigger...the air valve actuator. As you continue the trigger pull, it next contacts the shoulder of the ring on the paint needle. So you get airflow first, then paint flow. As you release the trigger, paint stops right before the airflow.
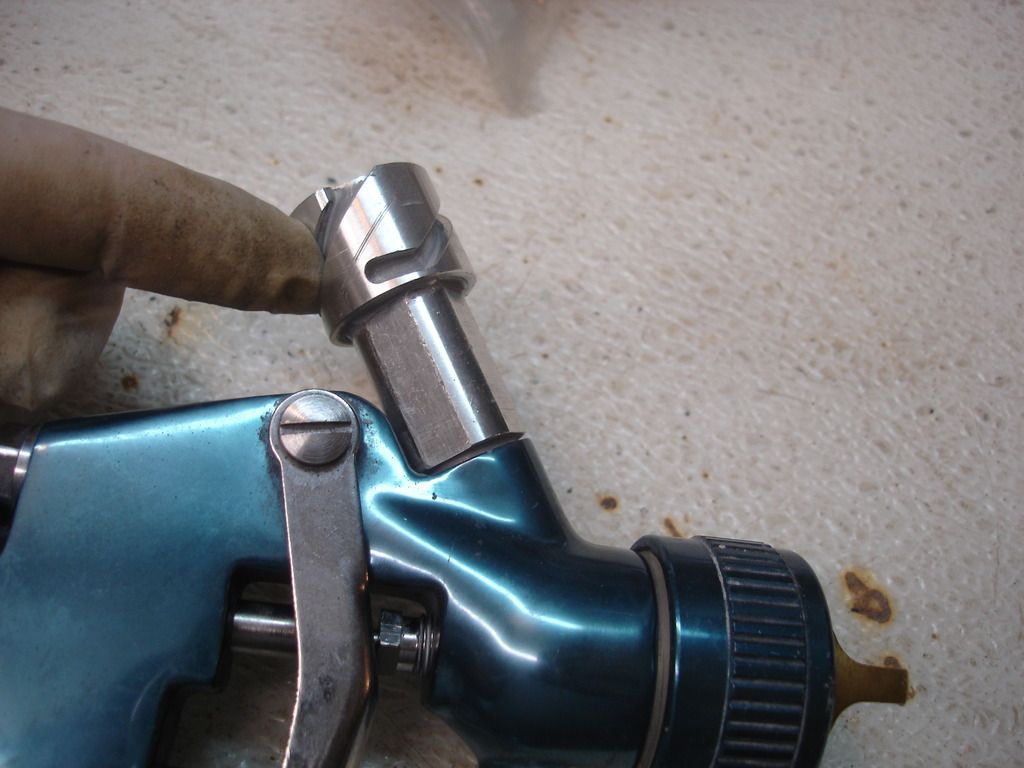


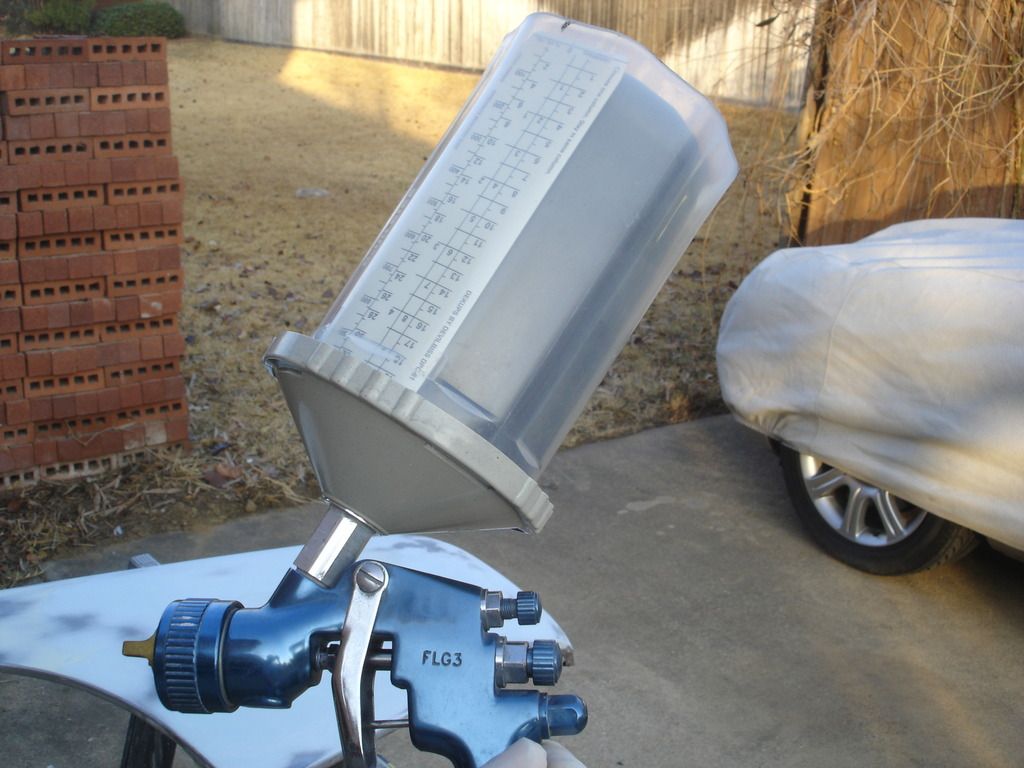
We have seen how the air and paint flow works. Here we look at the top of the gun to see how the paint gets to the needle and tip to begin with. I am pointing to a disposable cup adapter. The aluminum cup I showed earlier, and that came with the gun, would screw into the top of the gun where this adapter is screwed in.

For a solid cup, the paint simply gravity feeds from the cup down into the top of the gun and to the paint tip. Very simple...but simple is not always better. Disposable cups are the bomb! Let's look at how they work and why they are better.
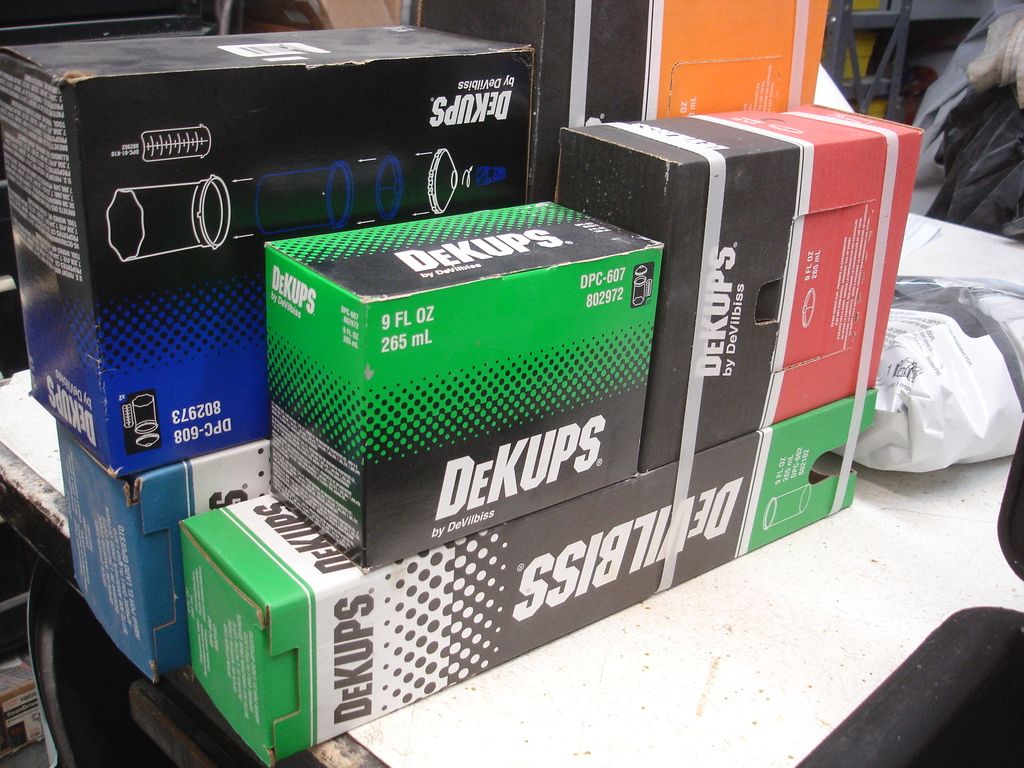


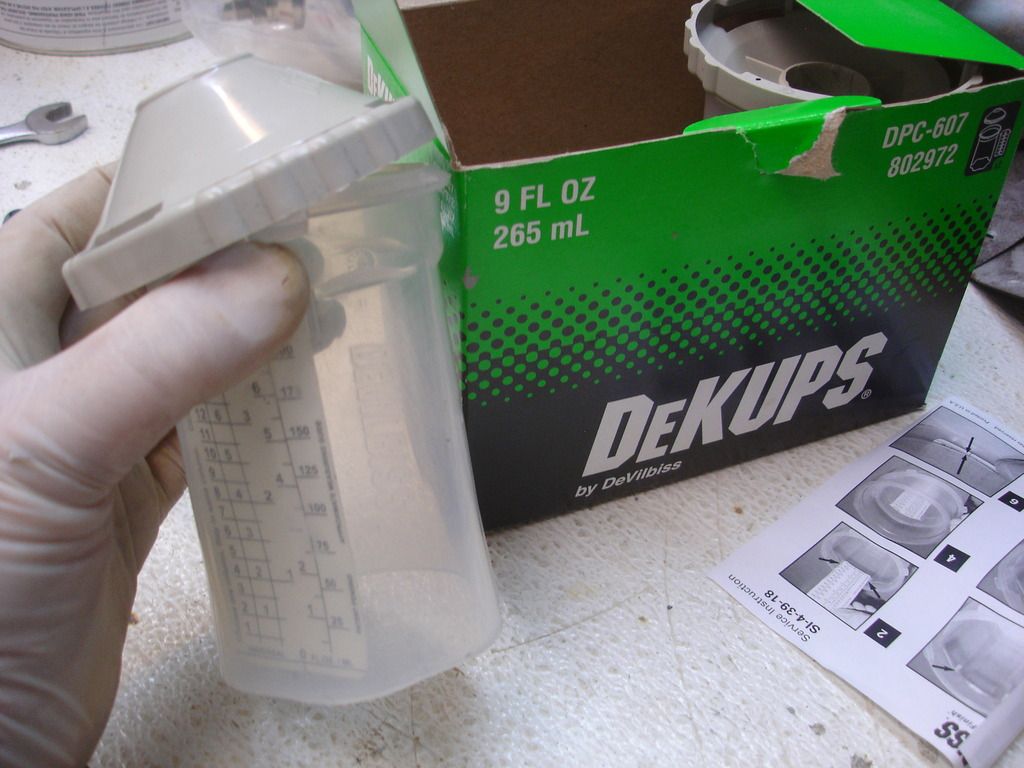
These are how you buy disposable cups. They include:
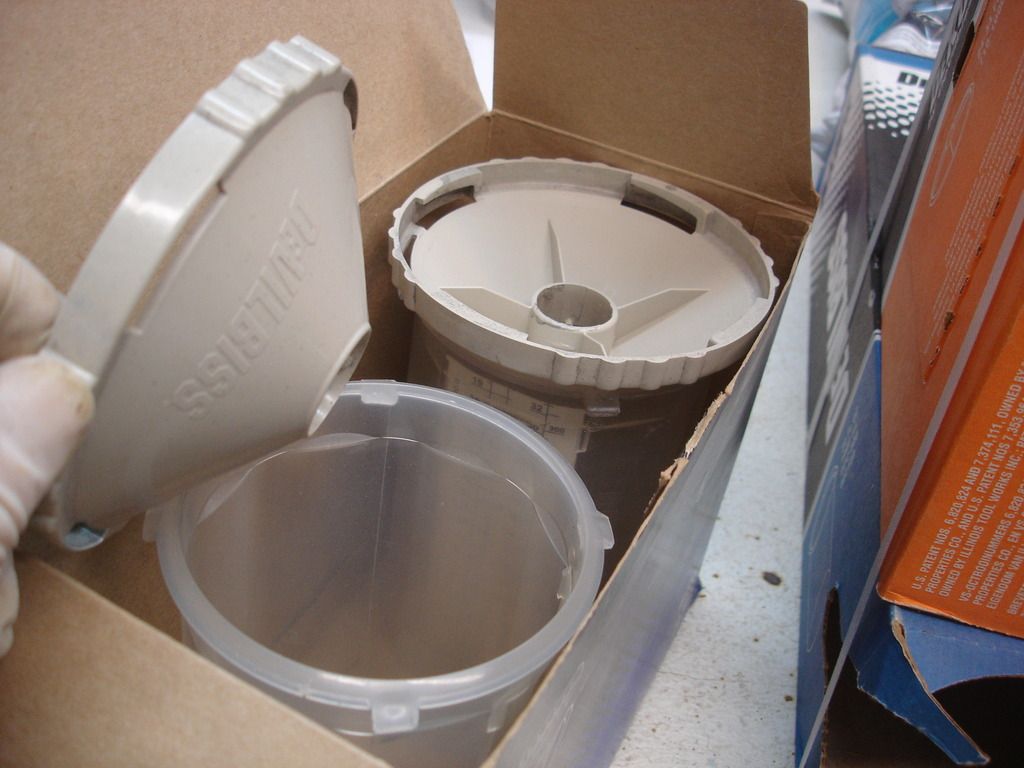


2 reusable cup holders. These are quart size, which is right for large jobs.
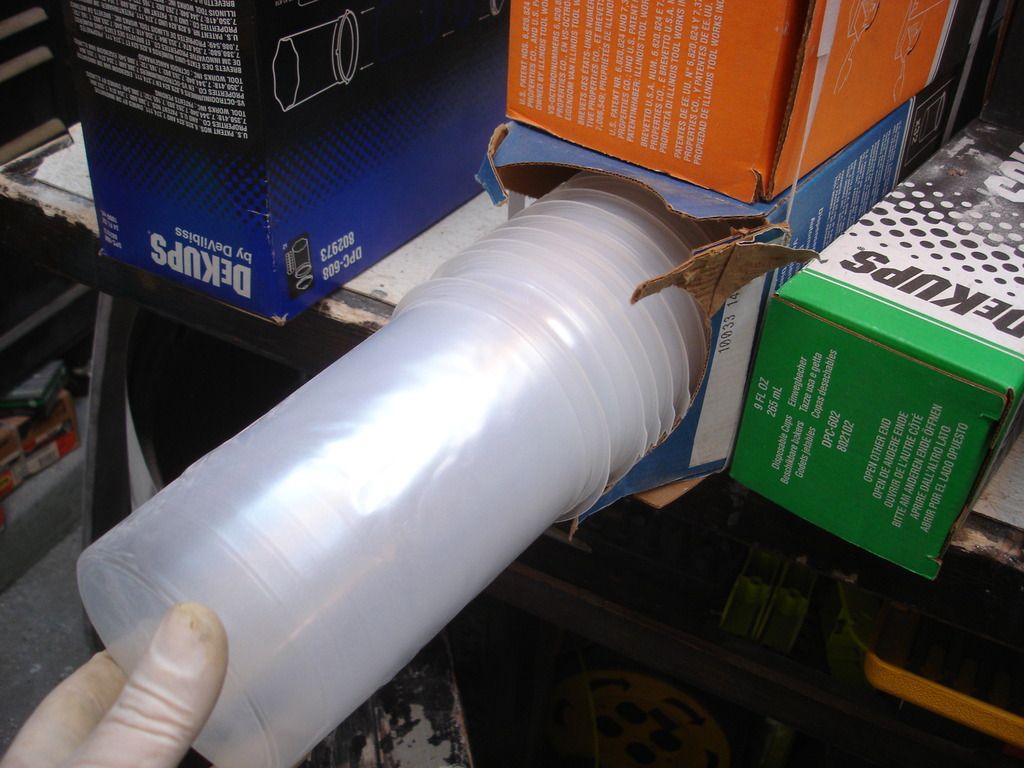


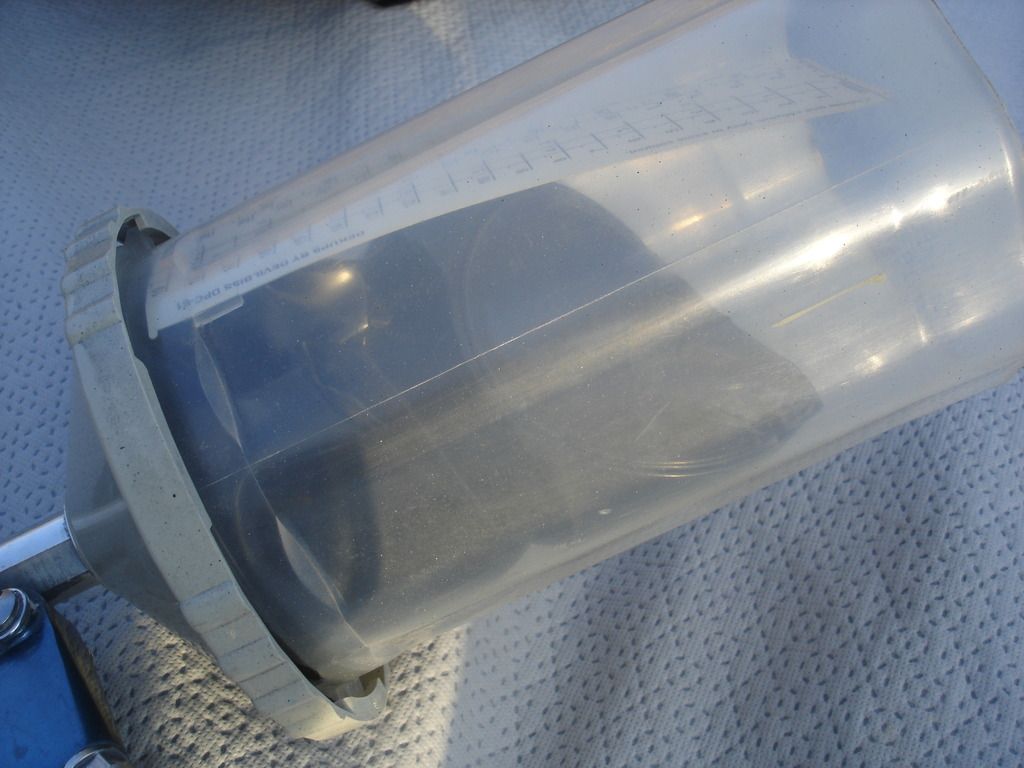
This is the disposable liner that goes inside the reusable cup holder.
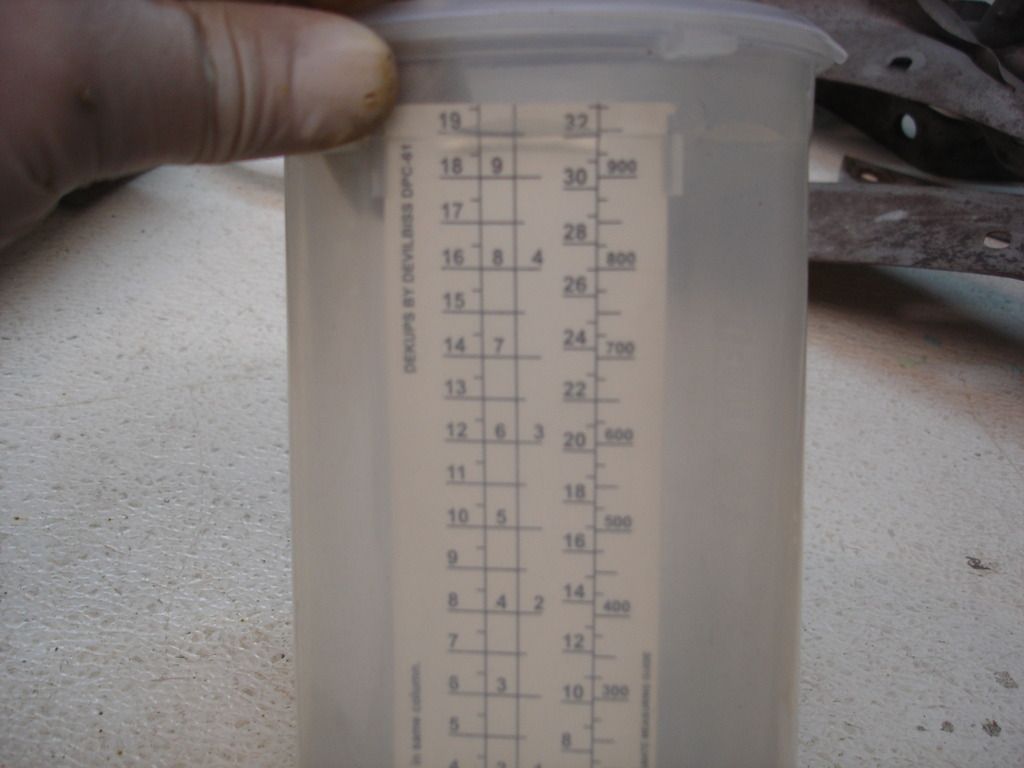


Once the cup is in the colder, you even get a scale on the side that helps measure paint and hardener. You can now mix the paint right in the cup!


The disposable liner is flexible. Think about that for a minute. With the aluminum cup, as the paint goes out, a vent must be provided for air to replace the paint, or you'll get a suction in the cup and the paint wil stop flowing.

With a flexible cup, the cup can collapse. No vent needed! Anyone who does not recognize the benefit of not having a vent has not had the exasperation of having the cup vent drip a glob of paint right on your near finished bonnet! Plus, you can now paint with the gun completely upside down...or at any angle in between. Nothing is more frustrating than trying to get in a tight space with a hard cup, and the paint flow keeps cutting out...in addition to the paint running out of the vent!
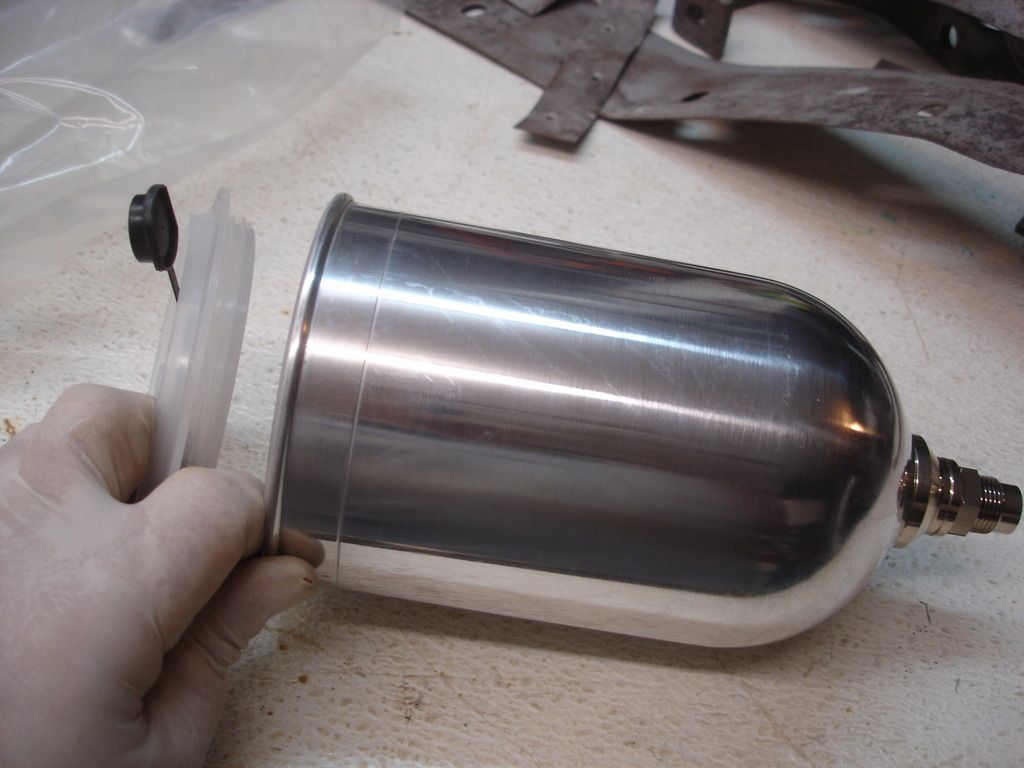
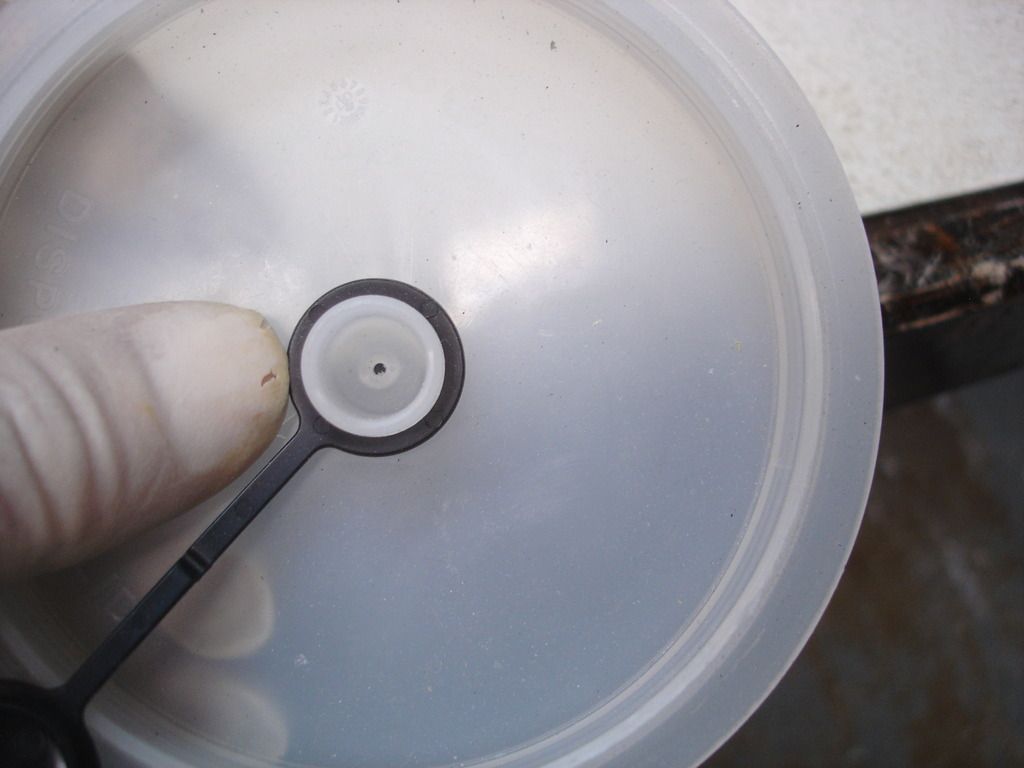


Here is the hard cup, showing the vent hole in the top. As hard cups go, and especially if you find yourself having to use one for whatever reason, this one is a decent one. Note it has a cover for the vent. So, if you needed to tilt the gun to reach an odd corner, you would close the vent and then tilt and spray. Of course you need to re-open the vent to let air in before too much of a vacuum is built up.
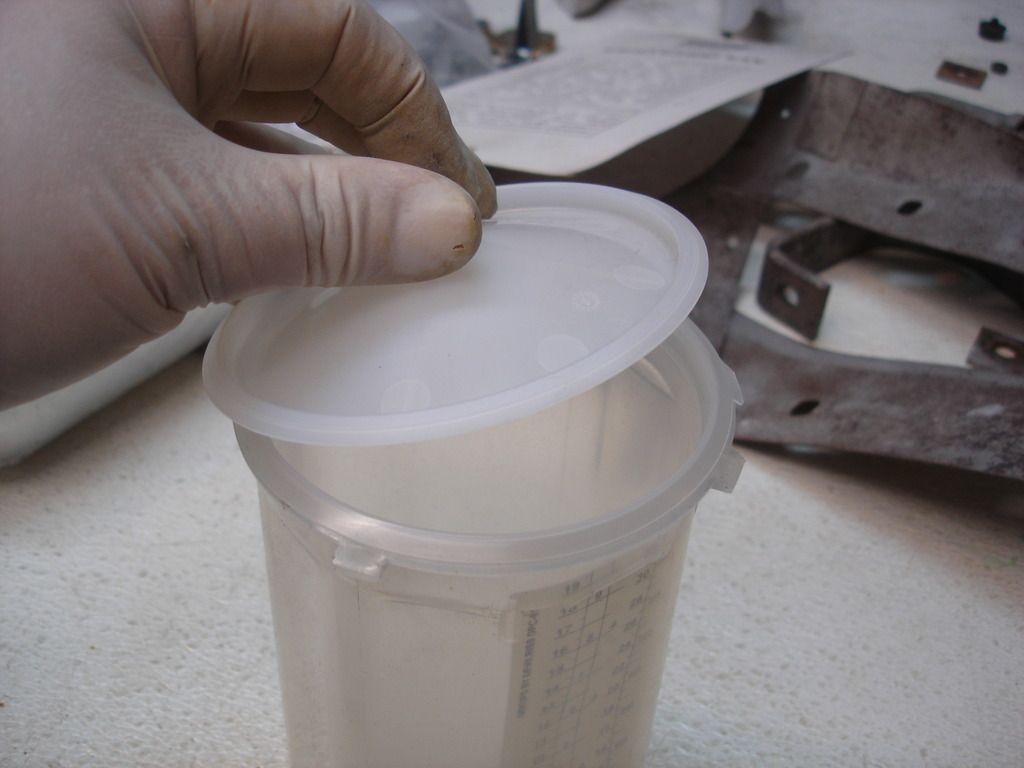


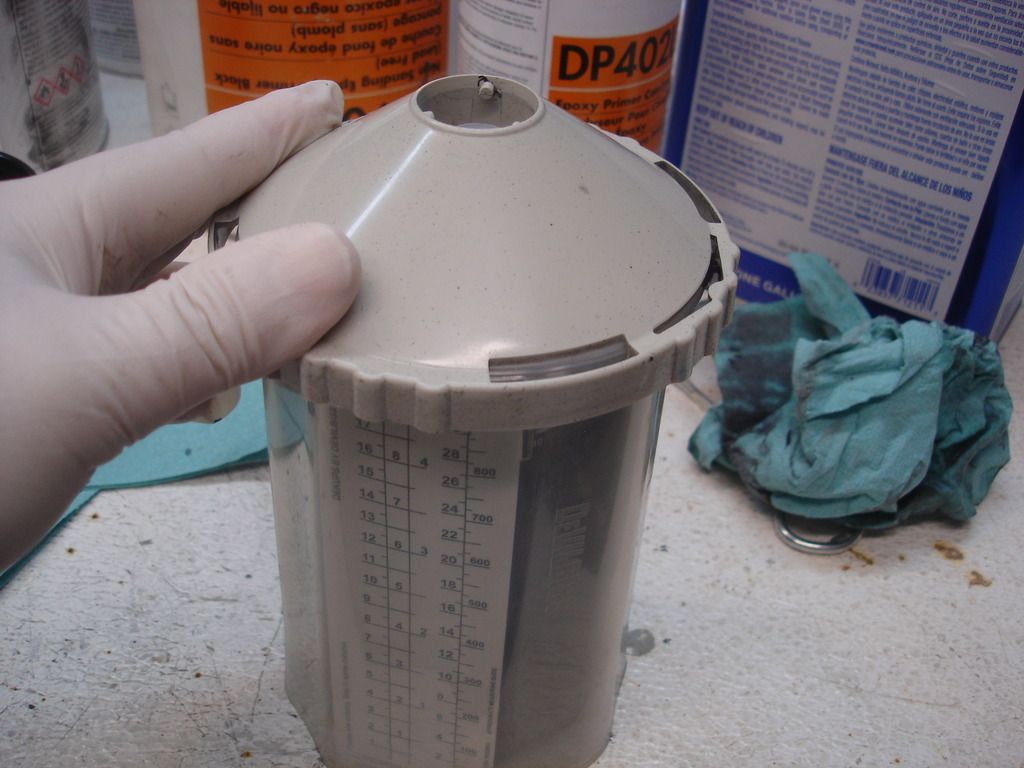
Continuing on...once the paint is in the cup, a disposable cap goes on, that seals perfectly around the sides.
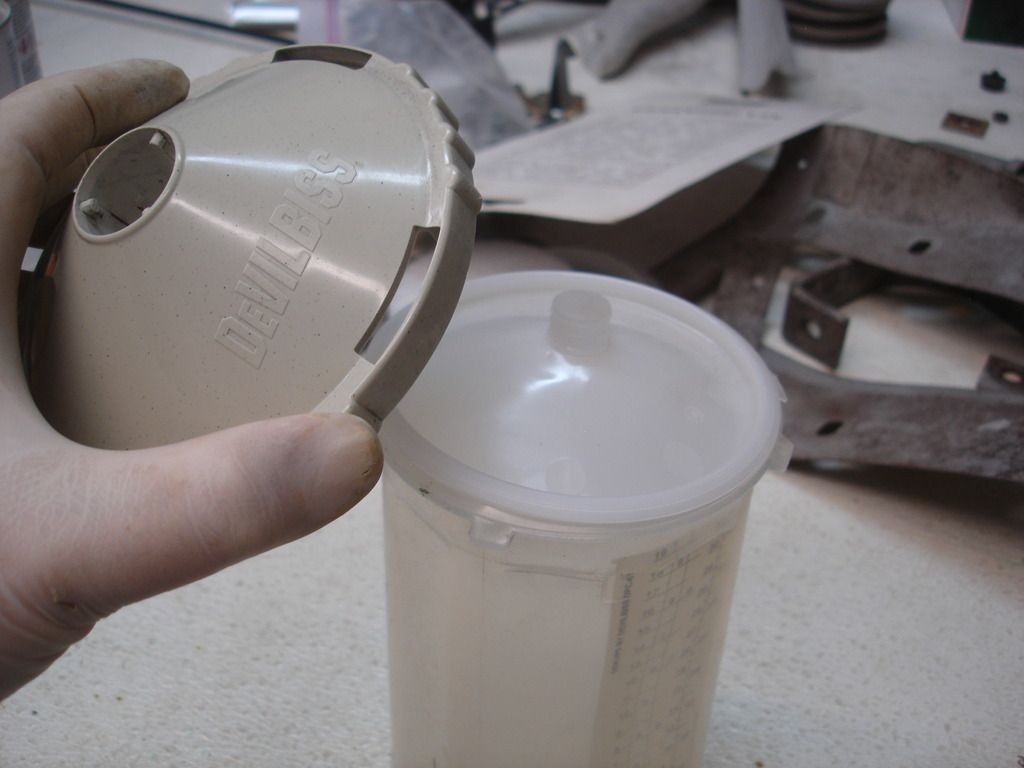
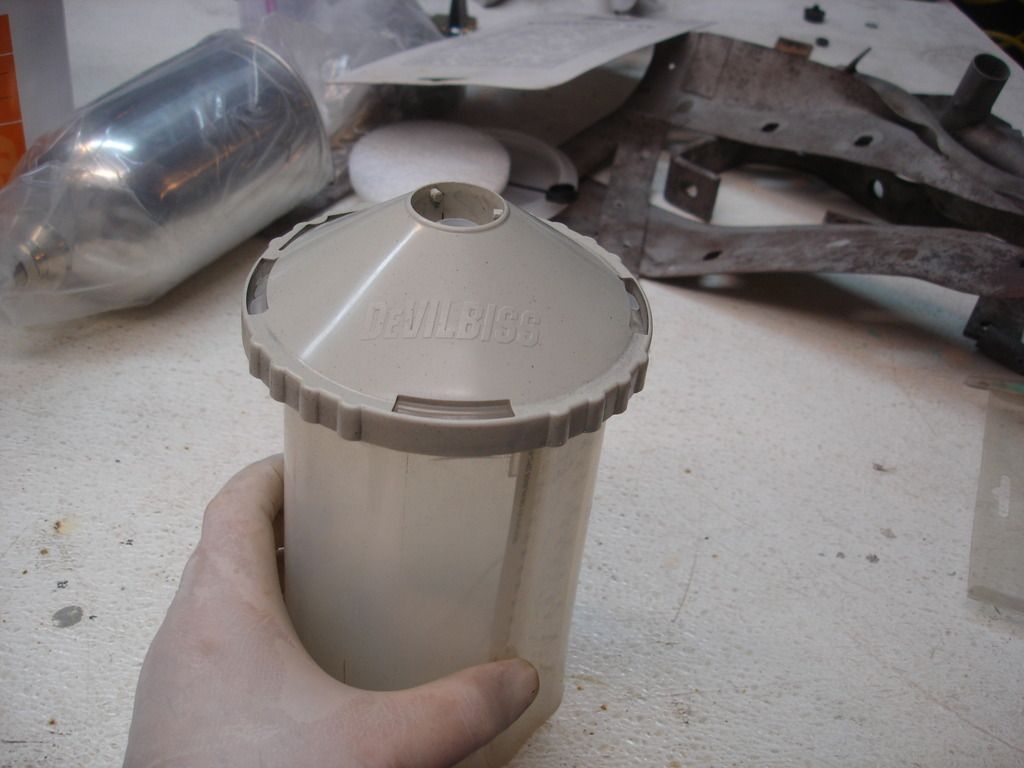


Then the reusable cap retainer screws on the holder.


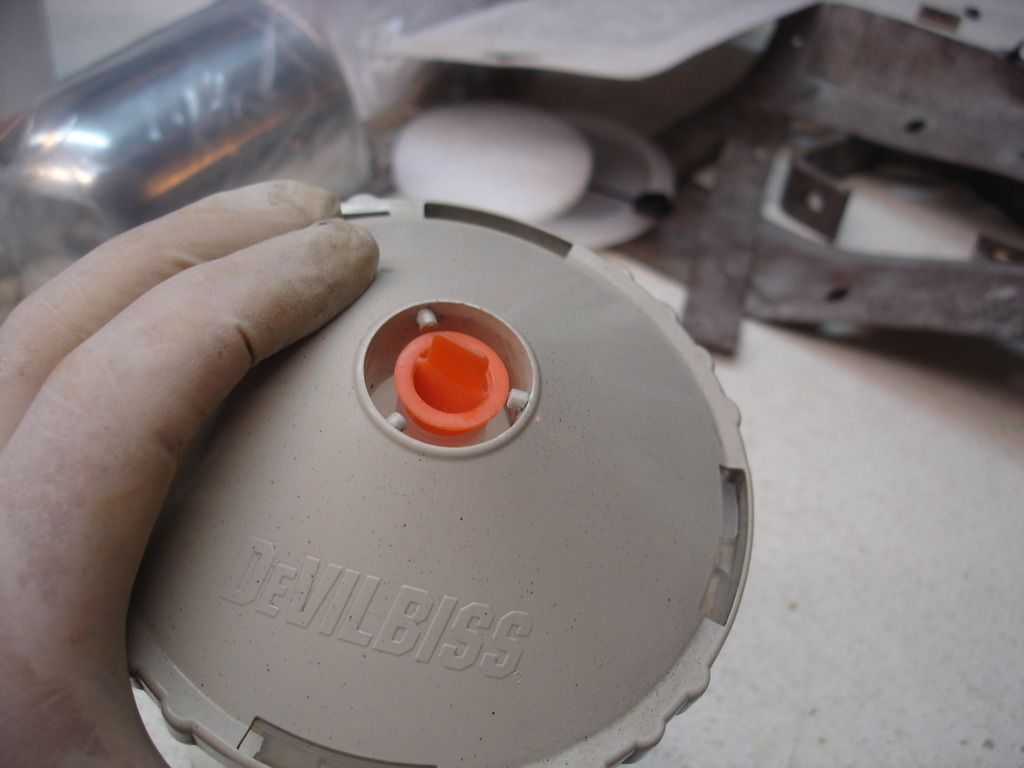
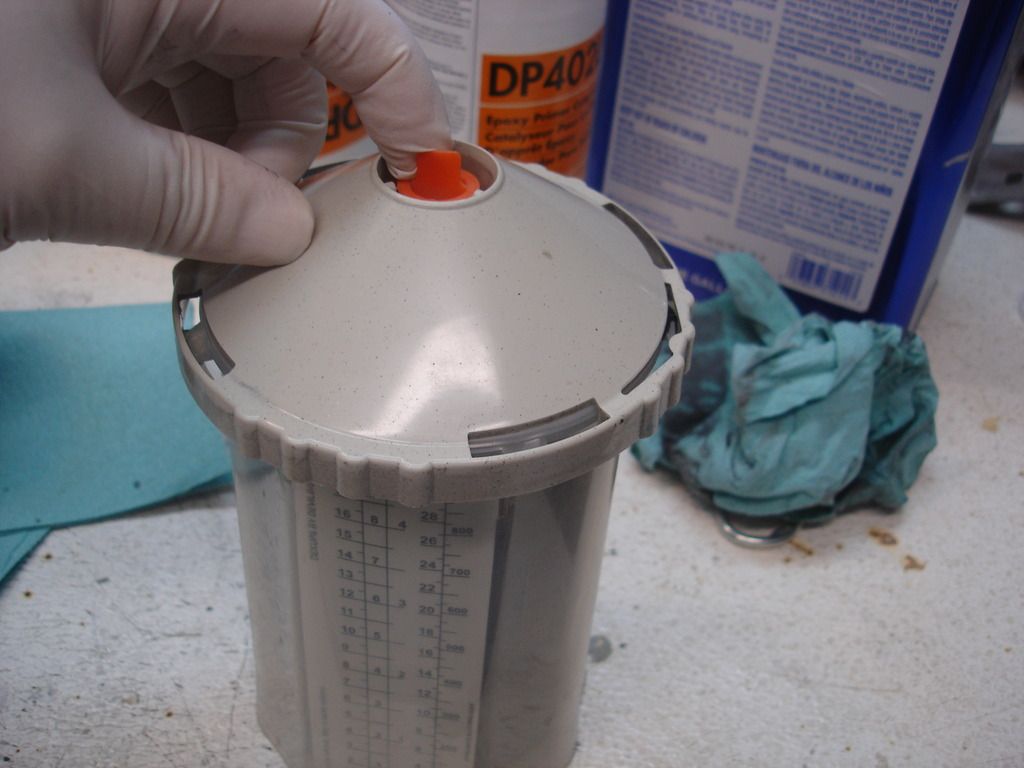
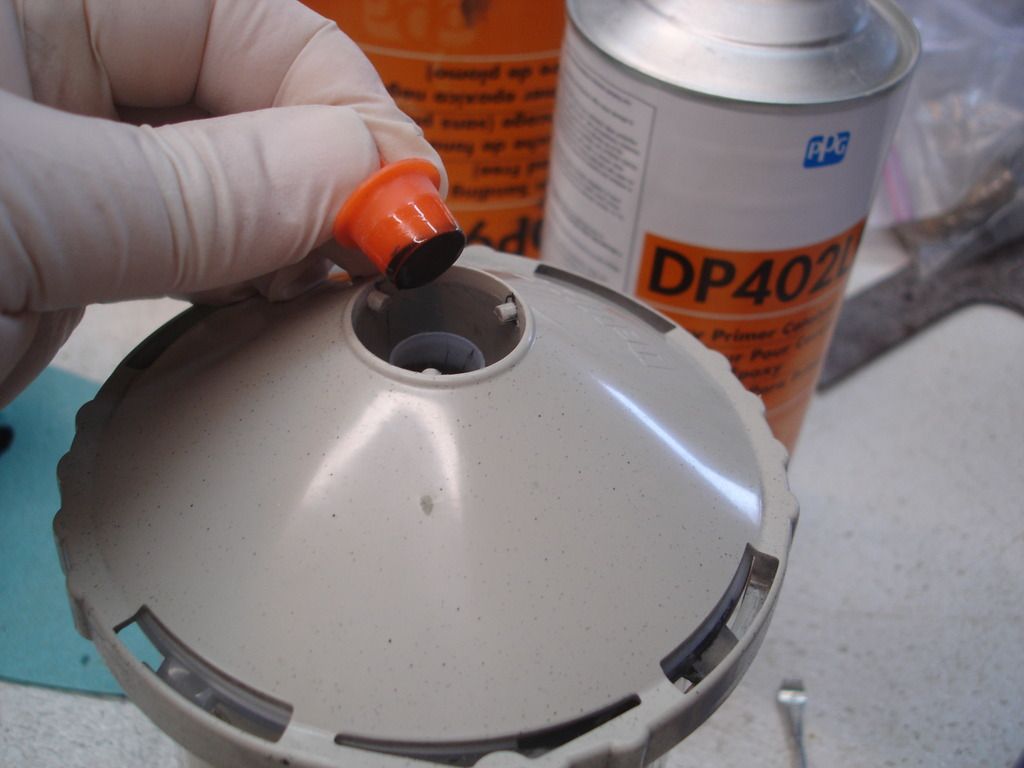
Once the assembly is together, there is still a hole in the top where the cup plugs into the gun. The liners come with these little plugs, so you can plug the top and mix the paint by shaking the cup. How cool is that!
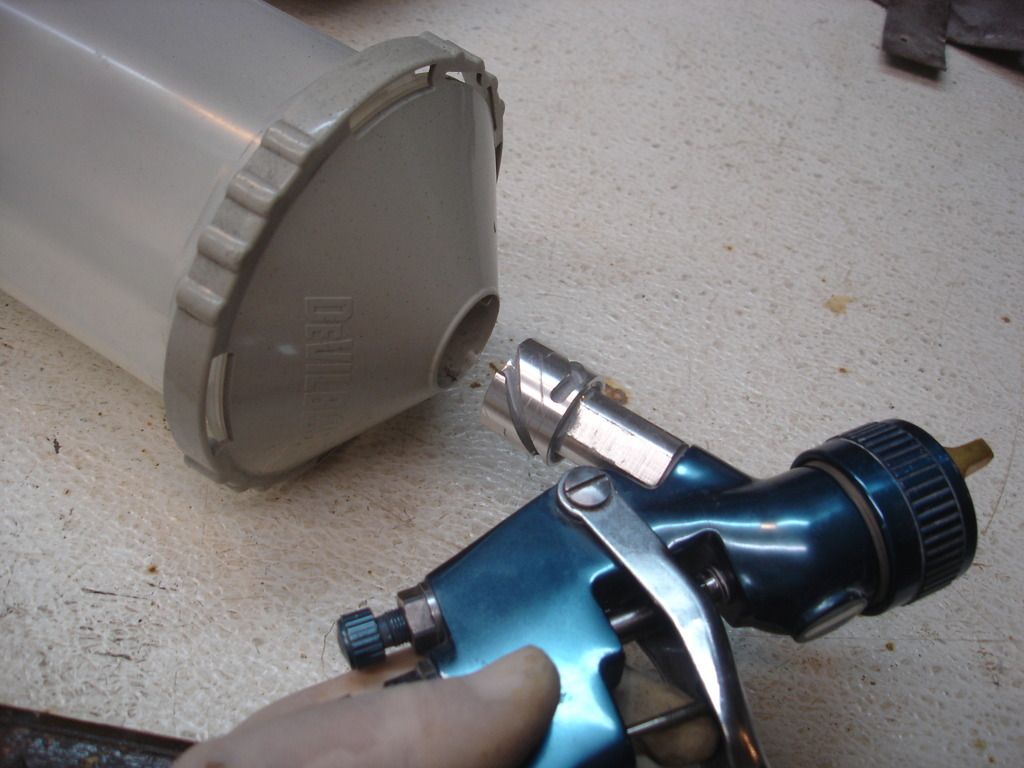
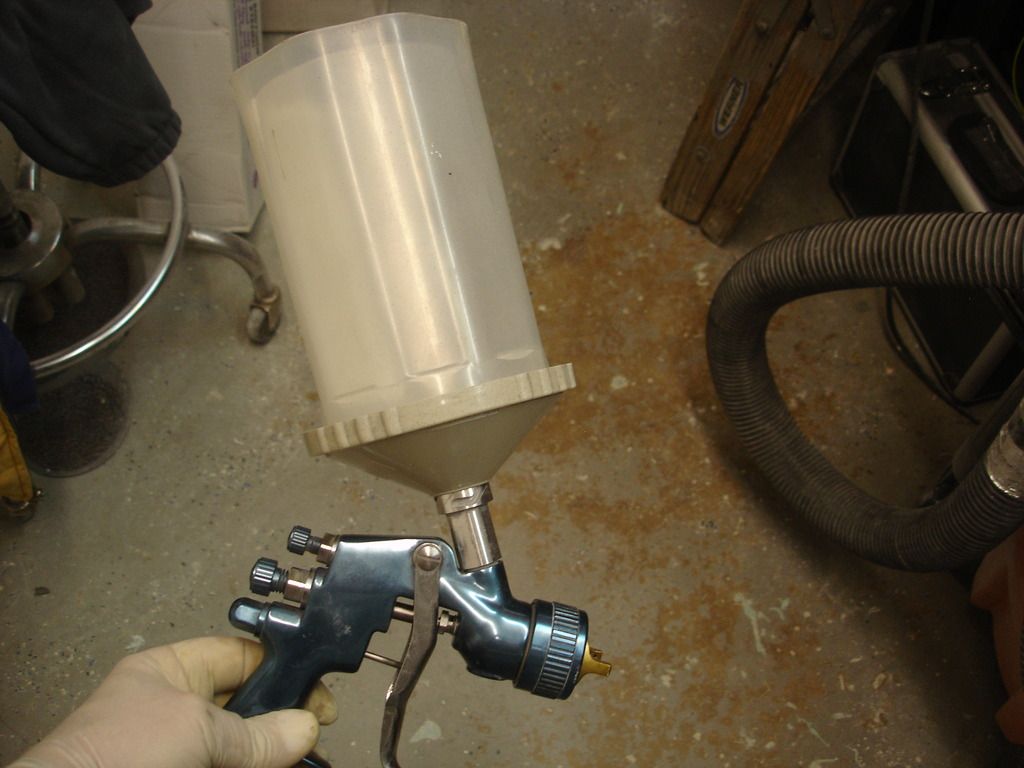


Now, to install the cup you remove the plug and push the cup onto the adapter with a quarter turn to lock it. Of course this would normally be done with the cup upright and the gun upside down. I didn't have enough hands to film and show it though!?!
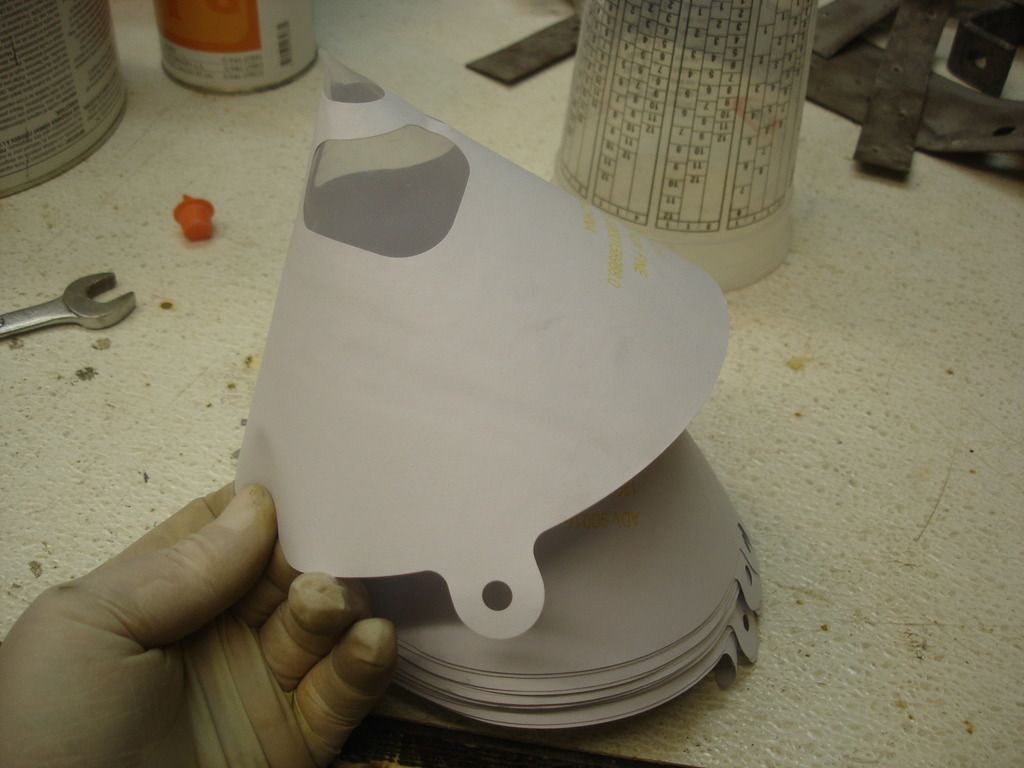


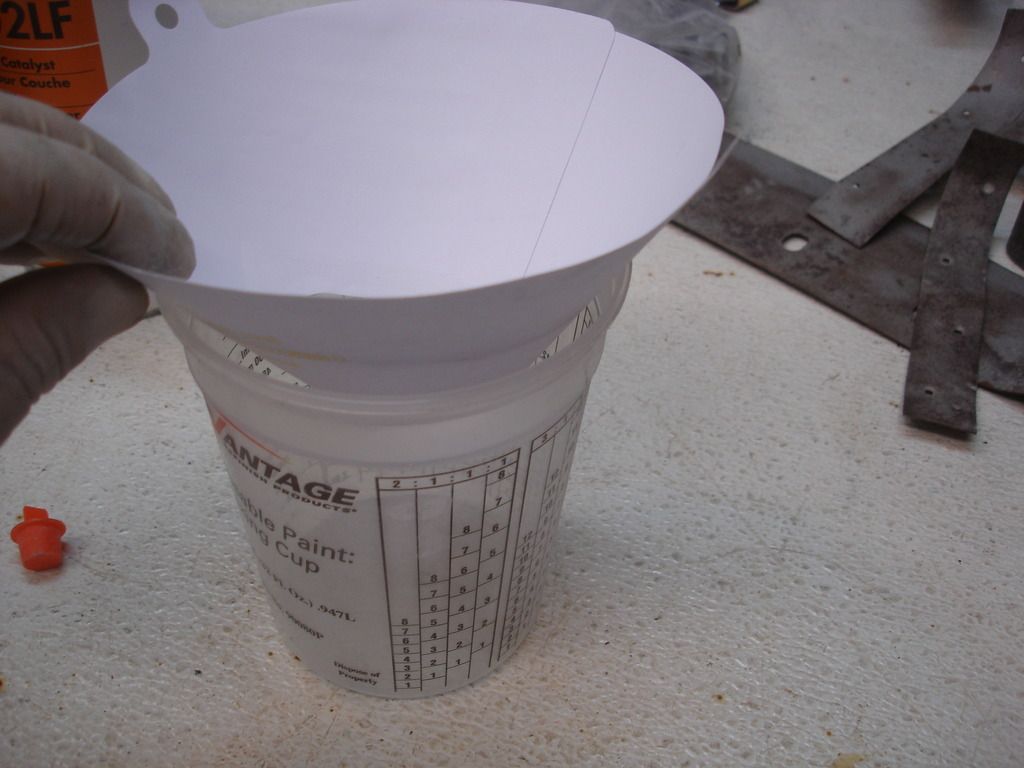
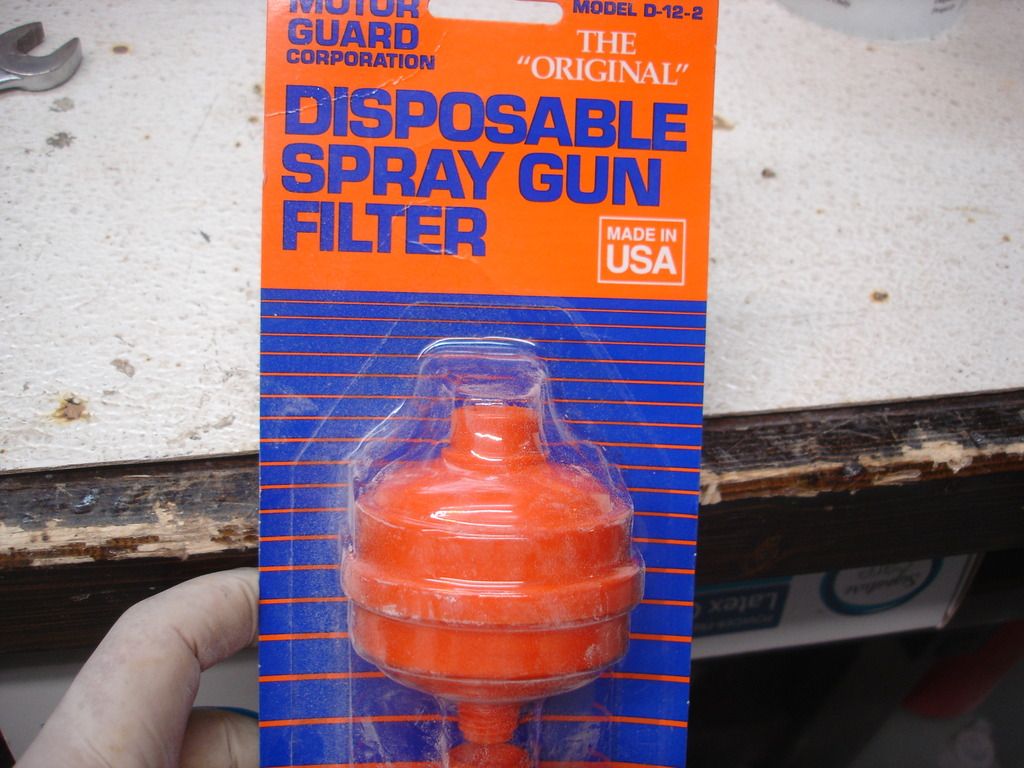
These paper filters are free at every paint supply I have used. Clean paint is as important as clean air, so they do help.
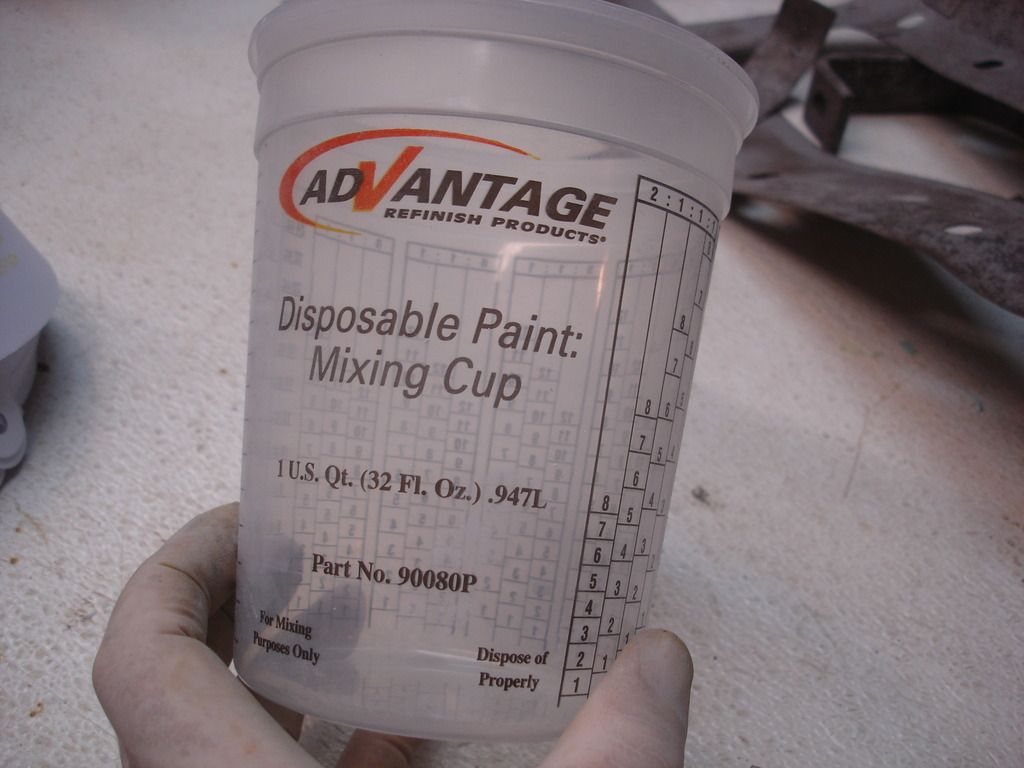


Also free, if you remember to ask, is a handful of these or similar mixing cups.
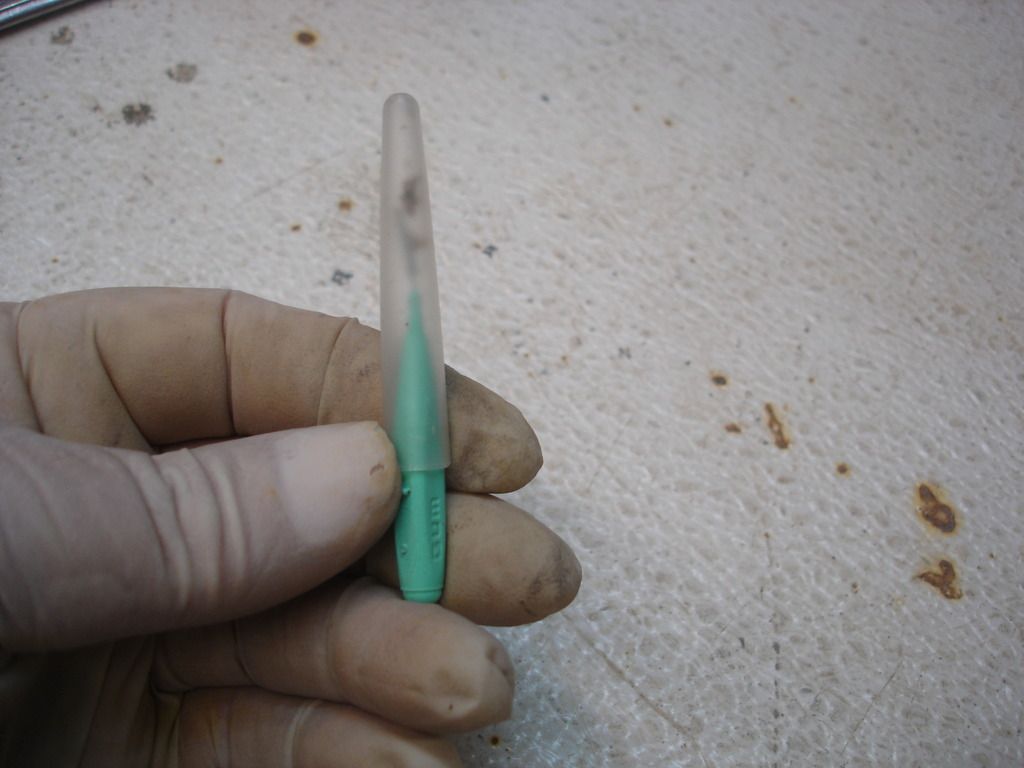


The last tool I recommend is a little pic like this one. These are sold at any paint supply, and they allow you to pic off a bit of dirt that falls on your work...or mosquito!?! It can't always save a job, but many times it has saved me from having to do a complete respray!

That's all I have time for. I'll get to the spraying next installment...
 
Very informative John! I have watched an old friend of mine painting some high end cars and he had a downdraft setup in his second bay. He also had three different kinds of lighting but watching how steady he sprayed, not only distance but speed, that was the impressive part! It was like watching a robot arm. He also would look at humidity and temp and lots of other things before he mixed paint! He was PPG rep and obviously knew his product.
I am sure you will get into that shortly! I am hooked on the progress and can't wait to see the next steps....it is looking awesome.
 
Yeah, I absolutely love the dekups system. I have never been able to bring myself to mix in the liner cups...I guess I'm old school that way. I still prefer to mix in mixing cups and pour it in...

I guess the only other thing that I would mention is that if you are buying a paint gun, check the CFM requirements to use it. Some guns I've had required between 10-13 CFM. Smaller compressors won't drive them properly.

Since I have a smaller home compressor now, I'm currently using an Eastwood concourse gun that requires 6.5 CFM for the full size gun and 3 CFM for the detail gun.

Cheers
Tush
 
JP, i am always left with my mouth open when I'm around a real painter! The early lacquers and especially the 2 part systems used to be finicky. I'm spoiled by how forgiving the latest generation of paints are. Tush is right, the proper way to mix is in a decent mixing cup! So, following Tushes tips...let's go into the details of air and mixing....


This is the favored way to use the "free" cup and "free" filter. Both are disposable...so you don't have to spend a lot of time cleaning either...just throw them into the recycle bin. In the old days cleaning lacquer thinner was cheap. Today I am paying $15 a gallon for cleaning thinner from Lowes or Home Depot. Cleaning is no longer cheap!?!


This is a small air filter and descendant that every paint supply sells. Before I got a good handle on condensation in my air supply, I used these religiously. You use a filter once and then toss it. If you see any tendency for your gun to spit water while you're spraying, stop and swap the filter for a fresh one. It's a great, relatively inexpensive last line to fight water spitting.

Now it's time to prepare for our first spray. The following is going to get technical!?!


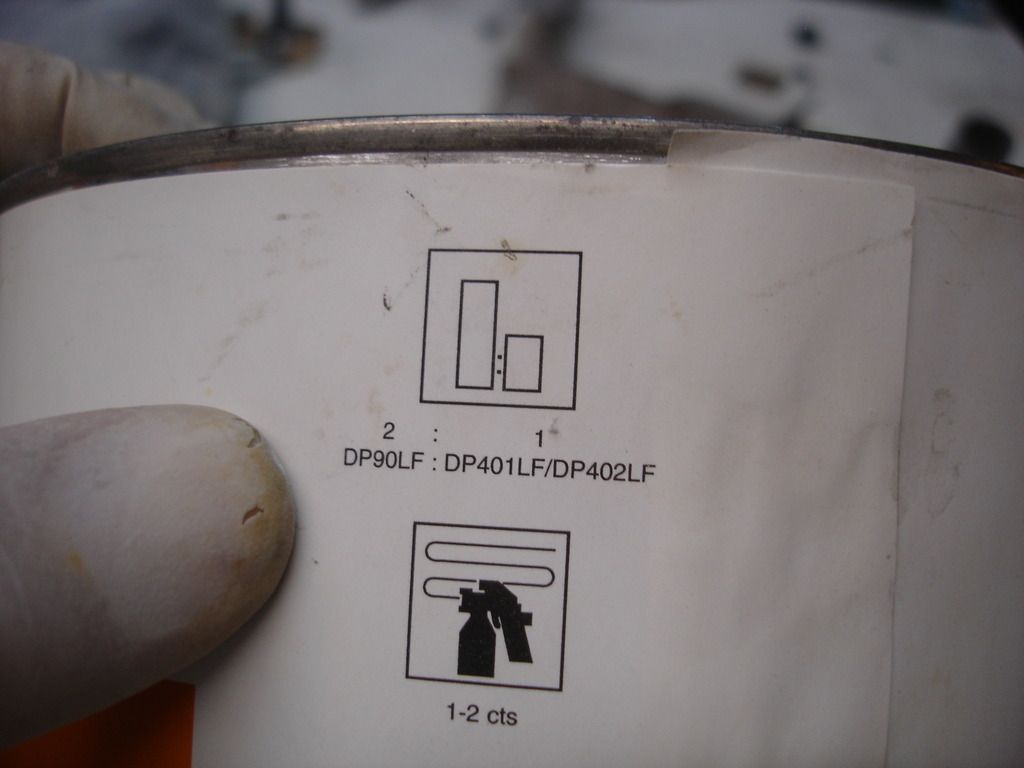
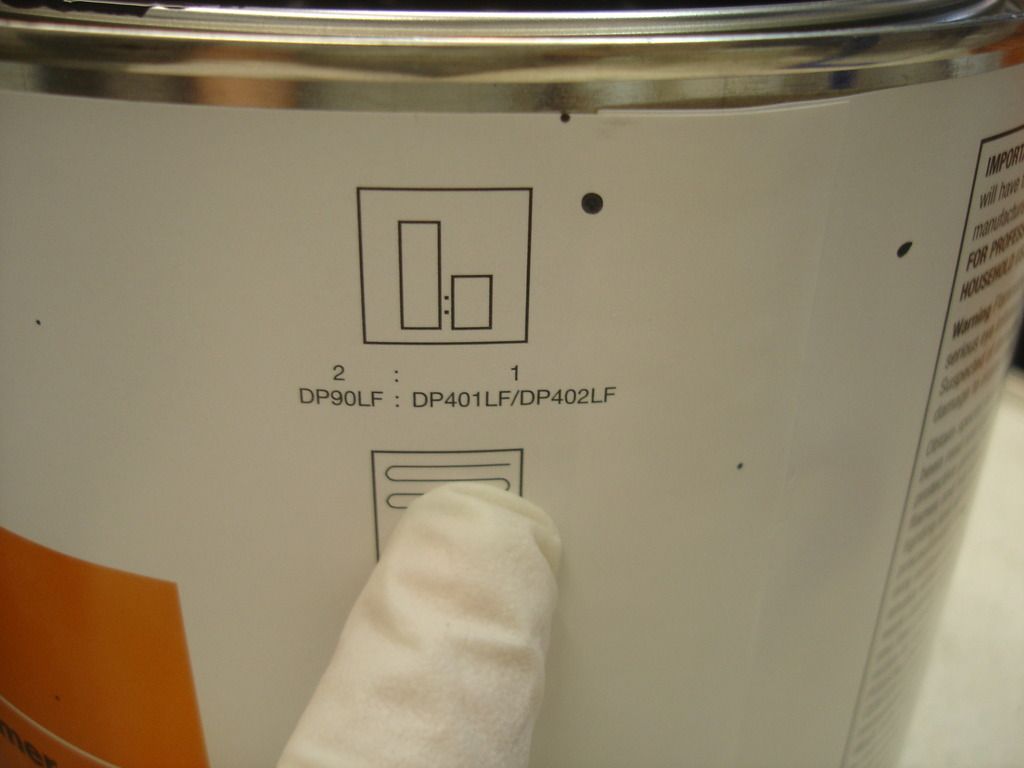
This is a little mix reference on the back of the epoxy primer I am using. It tells me that I want 2 parts of the primer to one part hardener. Most cans have this reference right on the can like this. If your can does not have it...you need to ask the supply house for the paint "spec sheet" for your particular paint. If you forgot, I have yet to find a paint that I cannot Google to get the spec sheet. The spec sheet is filled with valuable info...that we'll look at shortly!

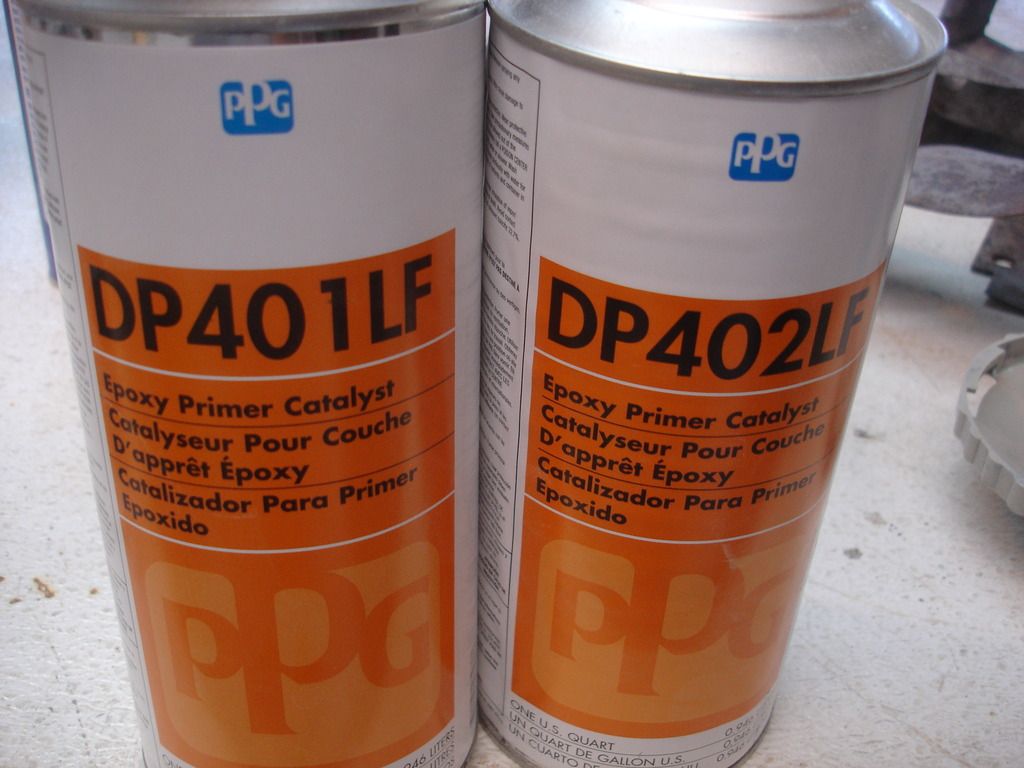
Notice that my reference shows I can use 401 OR 402 hardener. In the spec sheet you will learn that 401 is a slow drying hardener for use in warm weather. The 402 is a fast drying hardener, so your spray won't run in colder weather. The 402 must be allowed to "cure" for 30 minutes after mixing. That is always a good idea for any 2 part paint...i.e. Mix it and then set it aside for 30 minutes to cure. But! The spec sheet will tell you that the 401 can be sprayed immediately. That is just one example of how important the spec sheet can be.

The little picture with the "1-2 cts" means the recommended spray for this primer is 1 or 2 coats. Presumably 1 coat would be a thick "wet" coat. Meaning that the paint sits wet on the work for a short while before "flashing". If you did the 2 coats, usually the first would be a "dry" coat...meaning that it is just a light coat that dries almost immediately. That would be followed by the second "wet" coat to finish off.


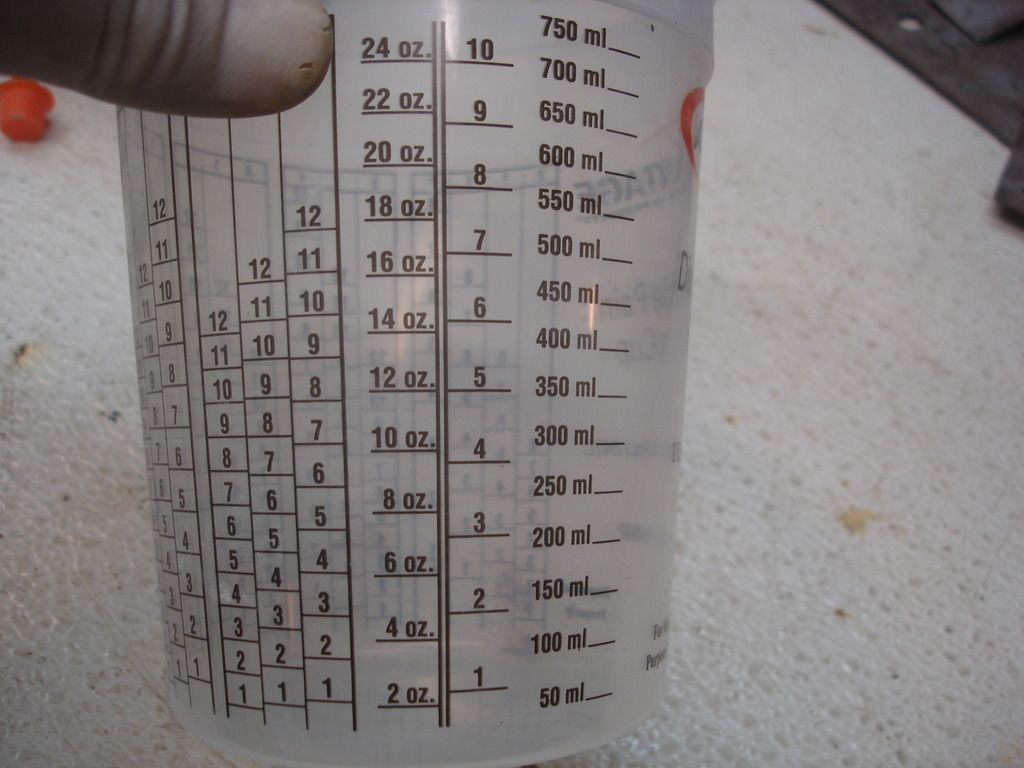
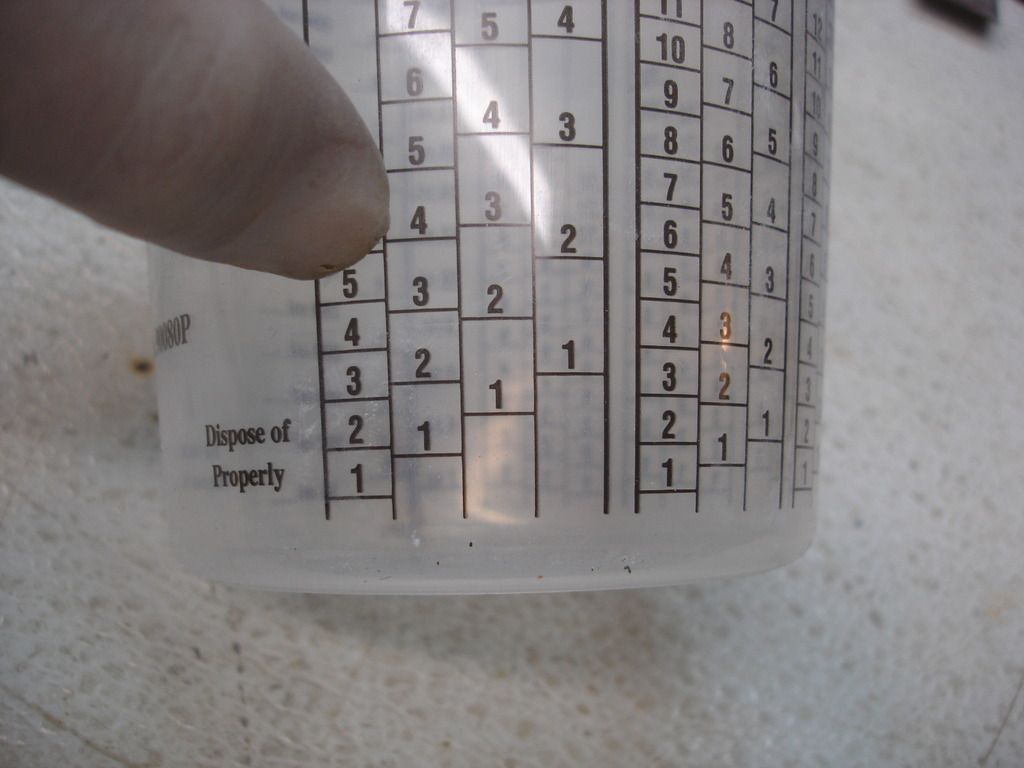
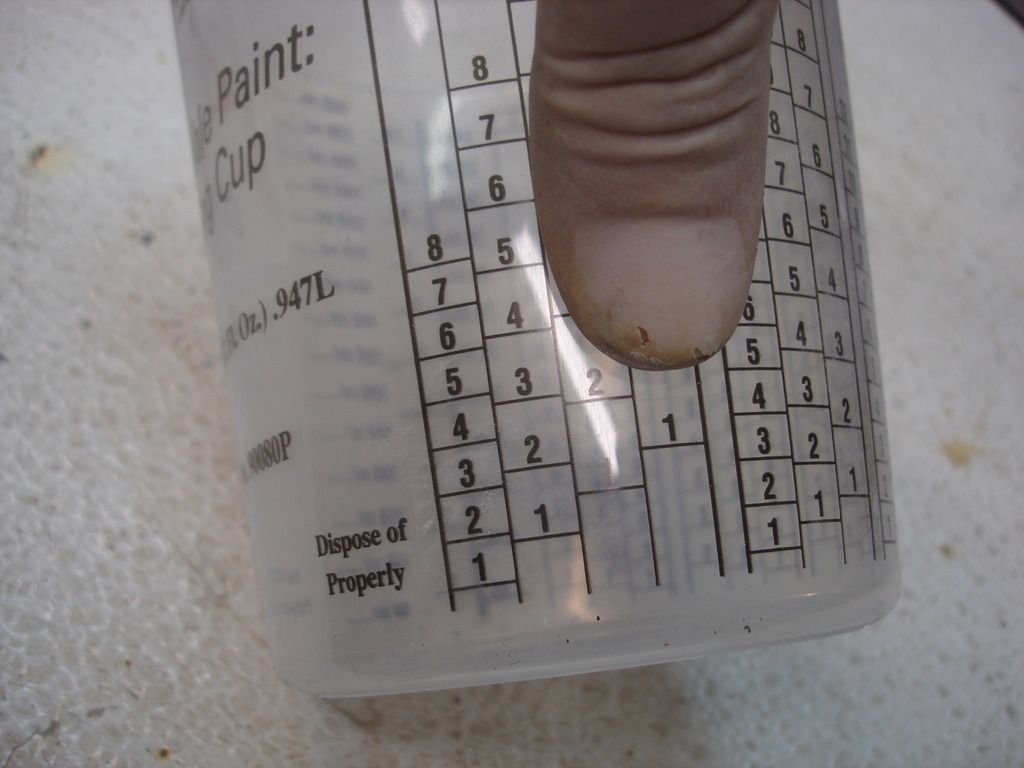
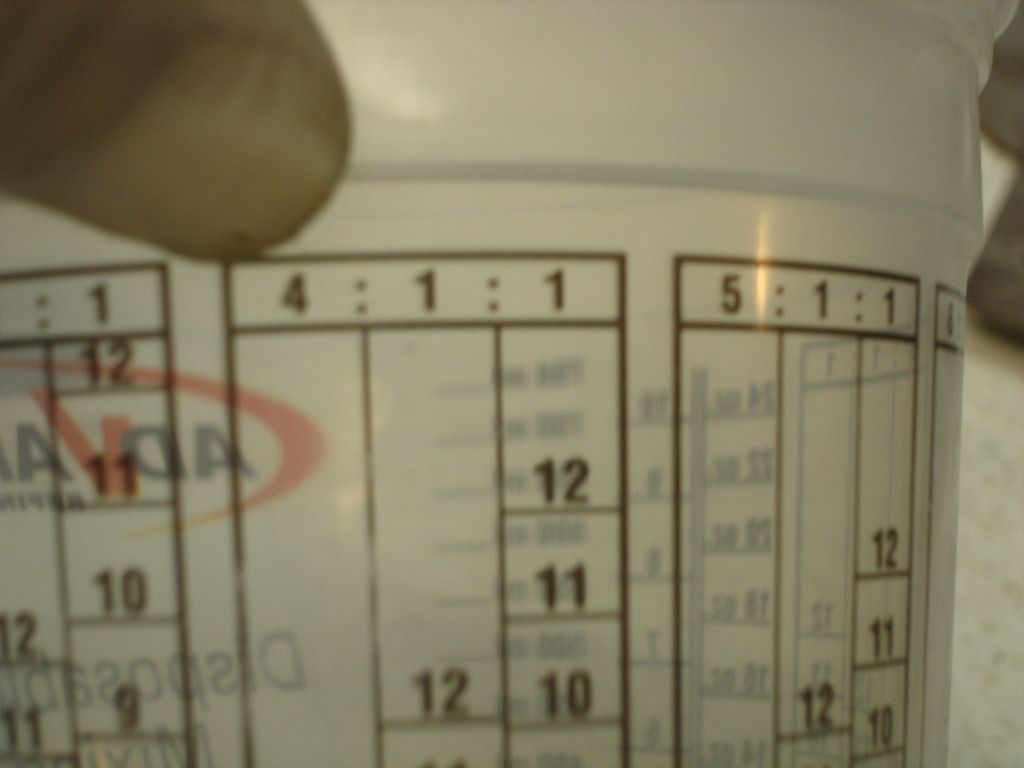
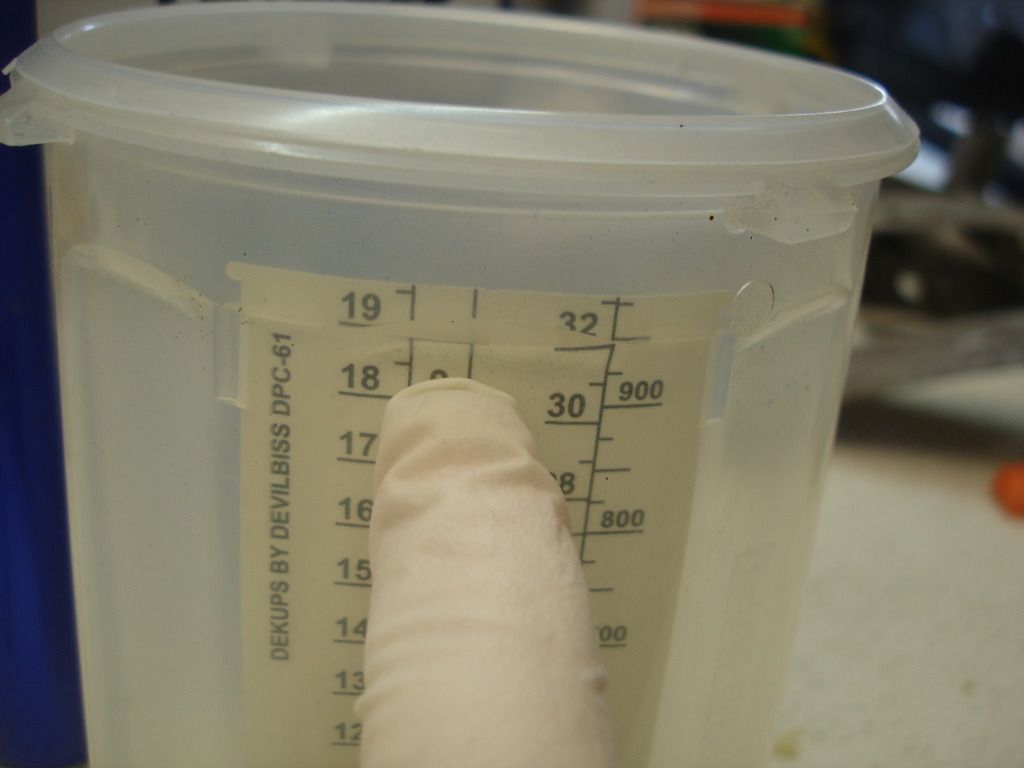
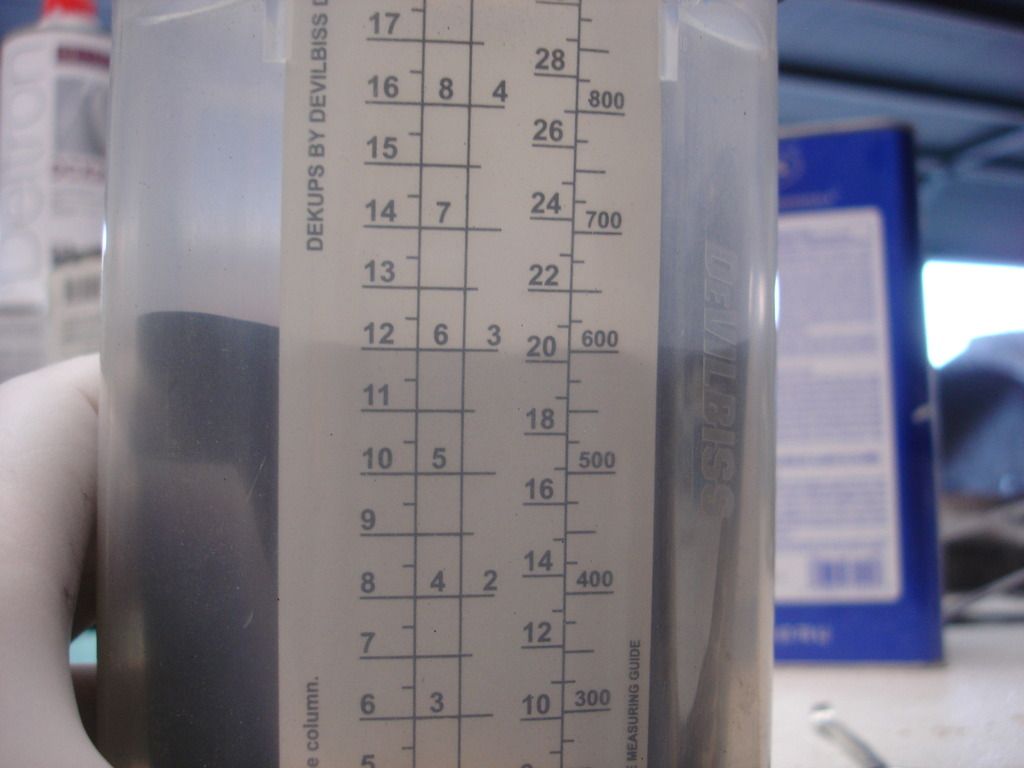
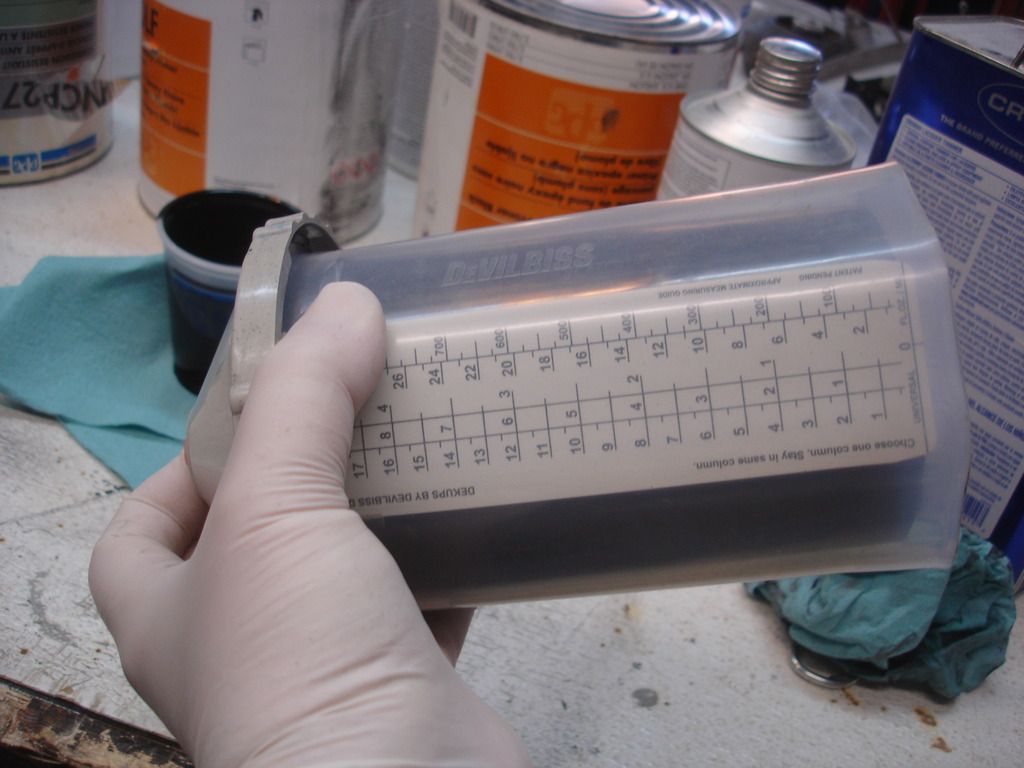
Let's look at the "free" mixing cup, to see how it works. On the side shown, you can decide how much paint you plan to mix. In my case I plan to use a large quart size cup, so I want a full 24 oz...or close to the top. I could choose a pint cup and only mix 12 oz. Let's see how either would work...


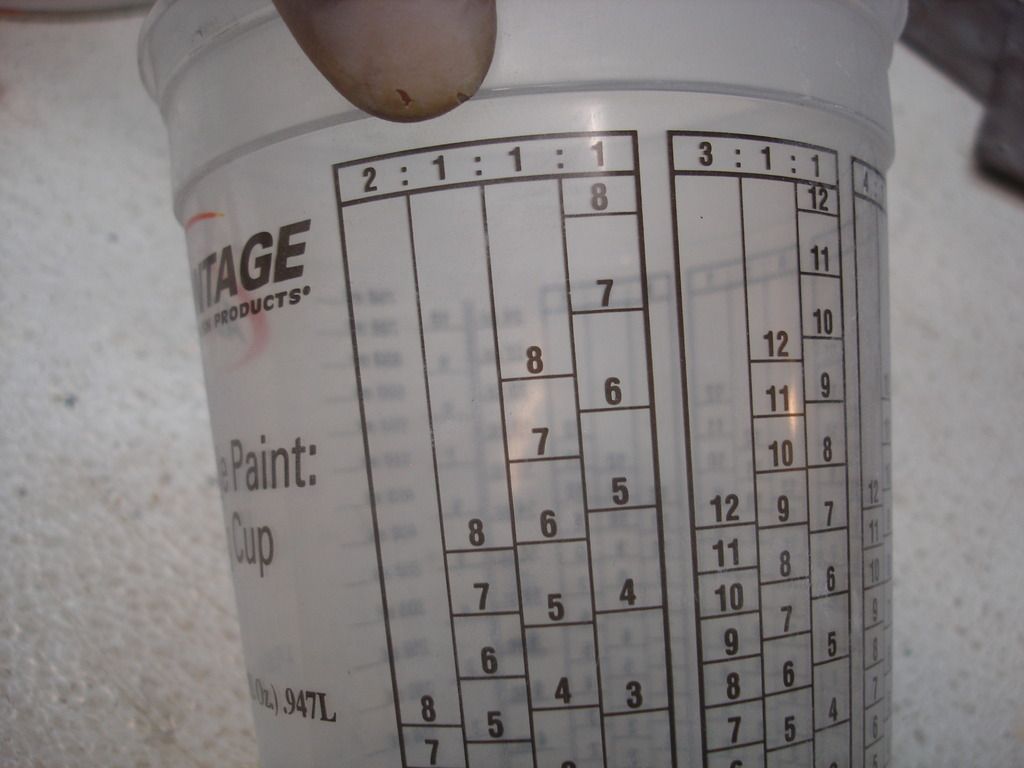
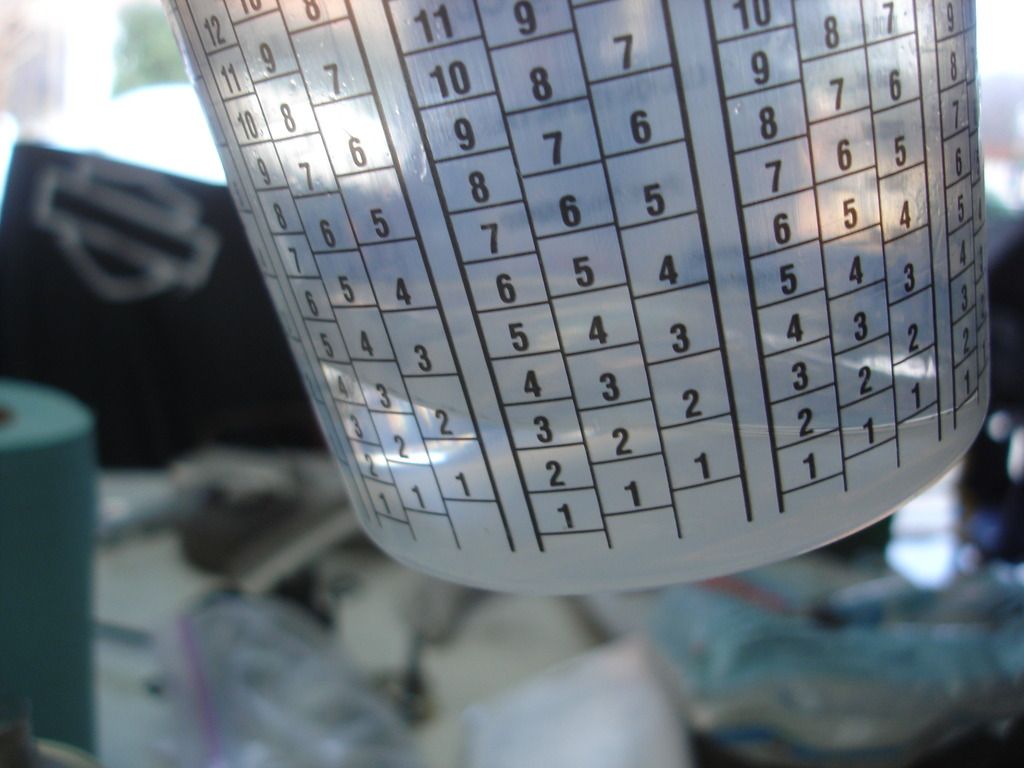
As you roatate the cup around, you find all the different mix options that are possible. For my DL90 primer I want a 2 to 1 mix, so I stop at the 2:1:whatever mix. The 3rd and 4th numbers are if I was going to thin the paint. I am not thinning for this spray.

So...looking at this pic, assume I am mixing a full cup full to spray. The highest number for mixing is the "8". I will then set the cup on a level surface and fill to the first number 8 under the "2" column. So the first number 8. I will then add the
Hardener until the total liquid in the cup is brought up to the "8" in the second column.

I'm then done. I can mix it and spray. But, let's say I only want half that amount...


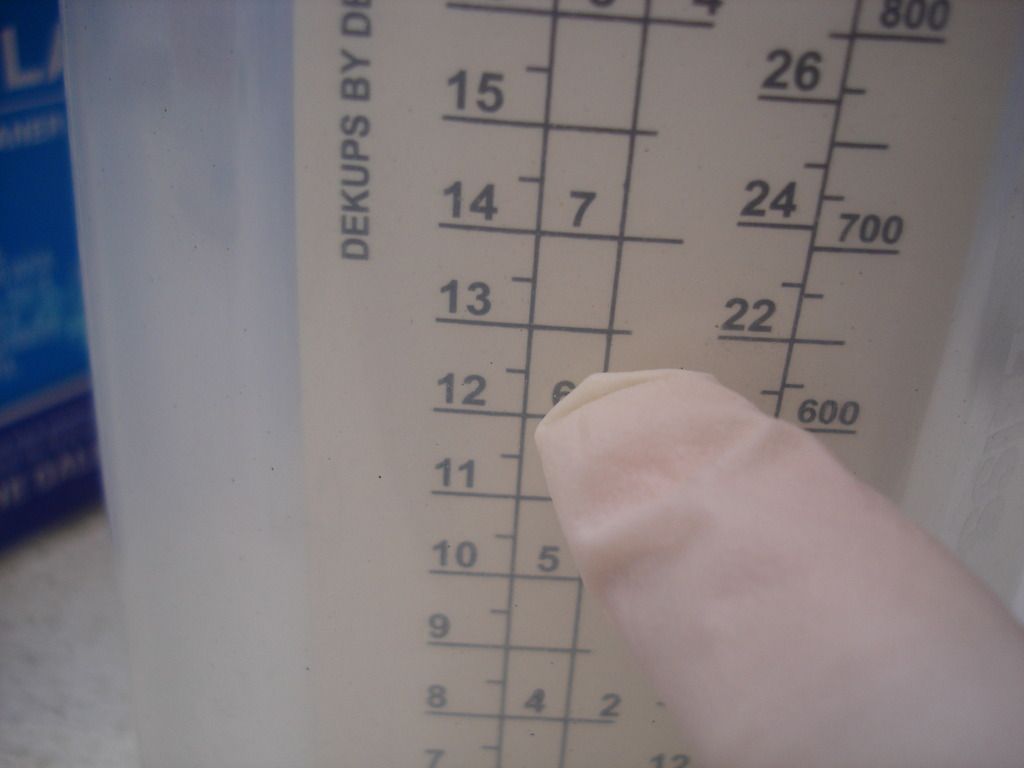
So, to mix half as much, I stay in the same "2:1:1:1" column, but I will now fill to the numbers "4". So I add paint until it reaches the first "4".


Then I add hardener to bring the paint up to the second column number "4". Then I am done again, and ready to mix it and spray.


So, I can mix any amount of 2:1 paint I want, by simply choosing an appropriate number on the cup, under the ratio heading I need. Once you start, just add each ingredient until you reach the same number every time on the adjacent column. 1 to 1 to 1. 2 to 2 to 2....etc.

If you have a 4:1 paint, you turn the cup to the 4:1:1:1 heading and do the same thing. That's all there is to a mixing cup!


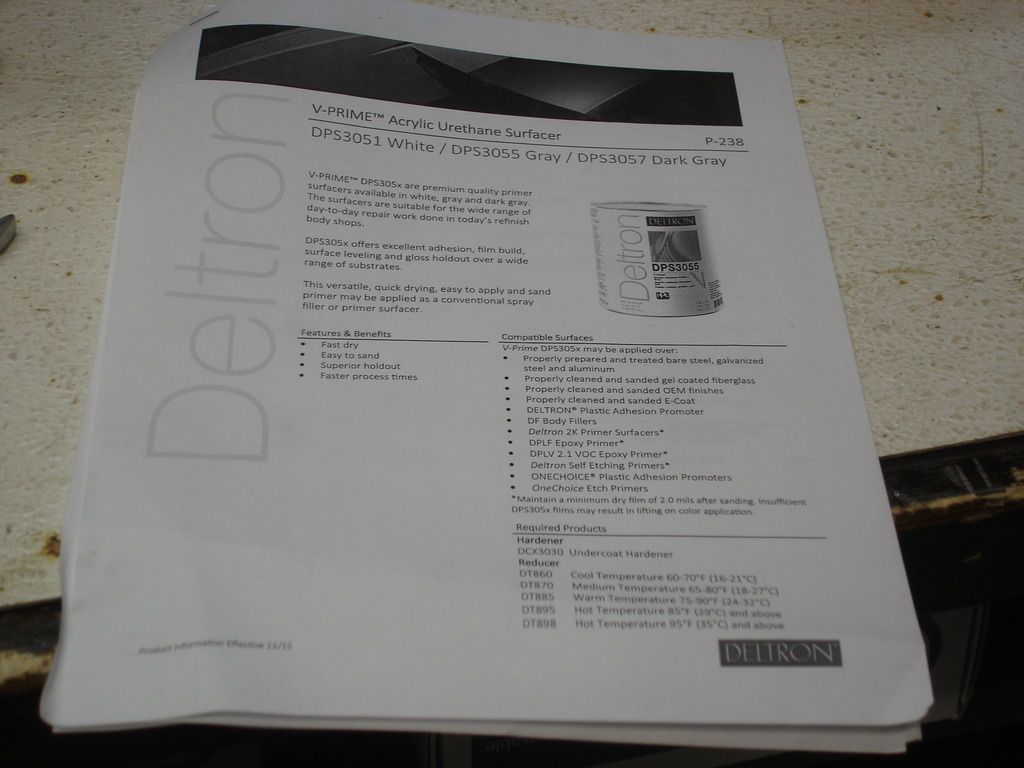
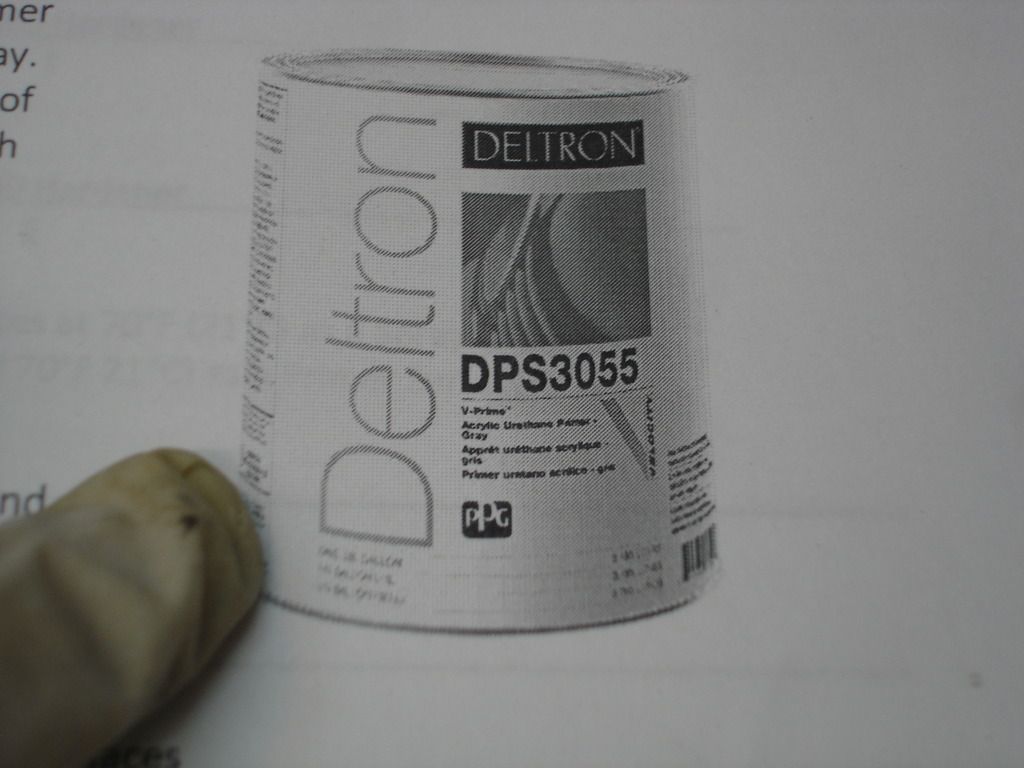
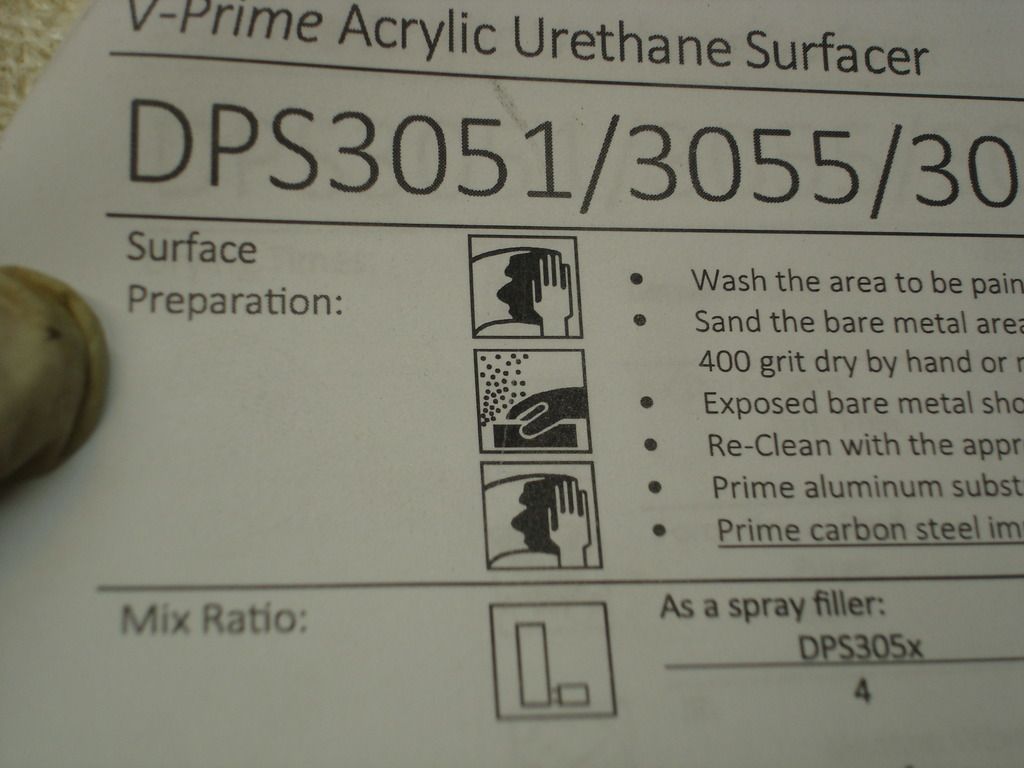
Now. My urethane primer has no little reference picture on it. Bummer! Not really...we need the spec sheet before we start. Let's look it over a bit.


First, make sure it is the correct sheet for the paint you plan to spray. Close does not count when it comes to painting. You want the exact spec sheet.


On the second page you see the way to prep your car before spraying. It recommends 400 grit paper for pre-sanding. It tells you to seal all bare metal FIRST. That is very important! It tells you this is not an etching primer, or one that is made to bond to bare metal. You can only spray this over a base layer of primer sealer. In my case...that. Is why I am spraying the DP90 sealer/primer first.


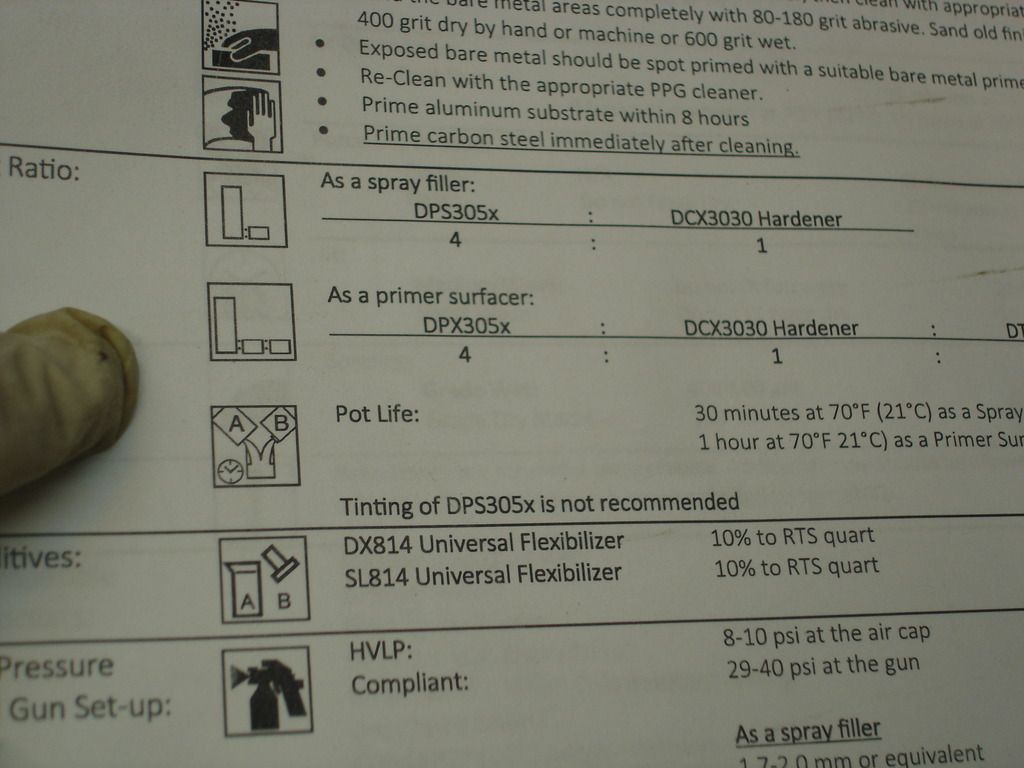
Next down is the mixing information. In this block it tells you what hardener to use...and at what ratio. The DP90 was a 2:1 ratio. Note that this primer is 4:1. We need to use the 4:1:1:1 block on our mixing cup for this primer.

Notice the reference to "pot life" under the mixing ratio info. Pot life is how long you have to spray the paint after it is mixed with hardener...and at 70 degrees. That could be very important! Notice that if you use the fast hardener you only get 30 minutes from mixing to "light off" of the urethane in your spraying cup. Remember how if we used one primer with the DP90 you had to wait 30 minutes before spraying? This shows how important the spec sheet can be! Using this paint you MUST finish spraying your mix in 30 minutes! If you use the slow hardener that can be extended to 1 hour.

Now...you have to remember that all drying times are usually referenced to 70 degrees temperature. If it is cold out...you will get longer drying times and pot life. If it is 100 degrees in Texas, well, don't even spray that day!! You would not be able to mix the paint and get to the car before y9our pot life is over. That exact thing happened to me last summer. My son's car got dinged in the school parking lot. The first time we sprayed the primer on the fender...we went to sand before putting the top coat of paint, and the primer wouldn't sand. It just balled up on the sanding paper. Talk about a bummer!?!

I finally read the spec sheet...and learned that the pot life was 30 minutes at 70 deg. We were at 95 deg, and I was taking time to teach my son how to spray. We were WAY past the pot life when we finally sprayed, so the primer never bonded. I was "to smart" to read the dang spec sheet!...Not!


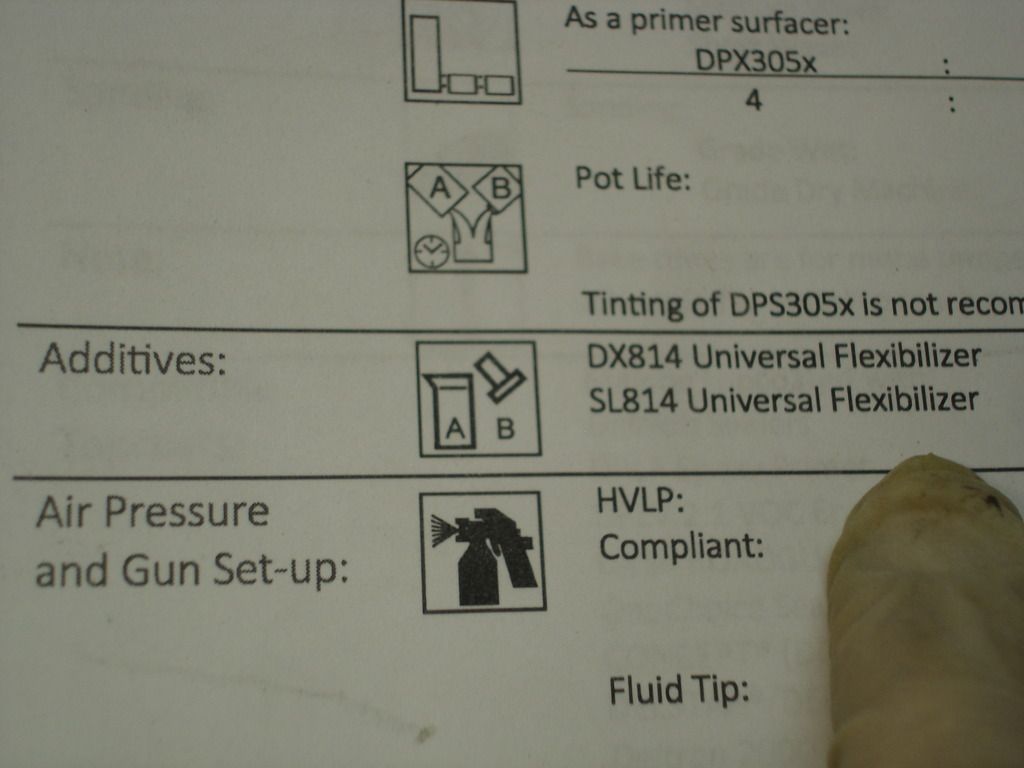
The next column tells you which flexibilizers you can use. If you plan to paint a VERY flexible plastic part, you would want a flex agent like these. In most cases, including plastic bumpers, this is not necessary. Modern paint is much more flexible than the old enamels and lacquers we used to use. But! Realize a flex agent is an option. The only down side is a flexible paint is, by definition, not as hard as a paint without flex. Hard is more wear resistant. So, as with all things, you don;t get something' for nothin'!


Now you get some gun information.


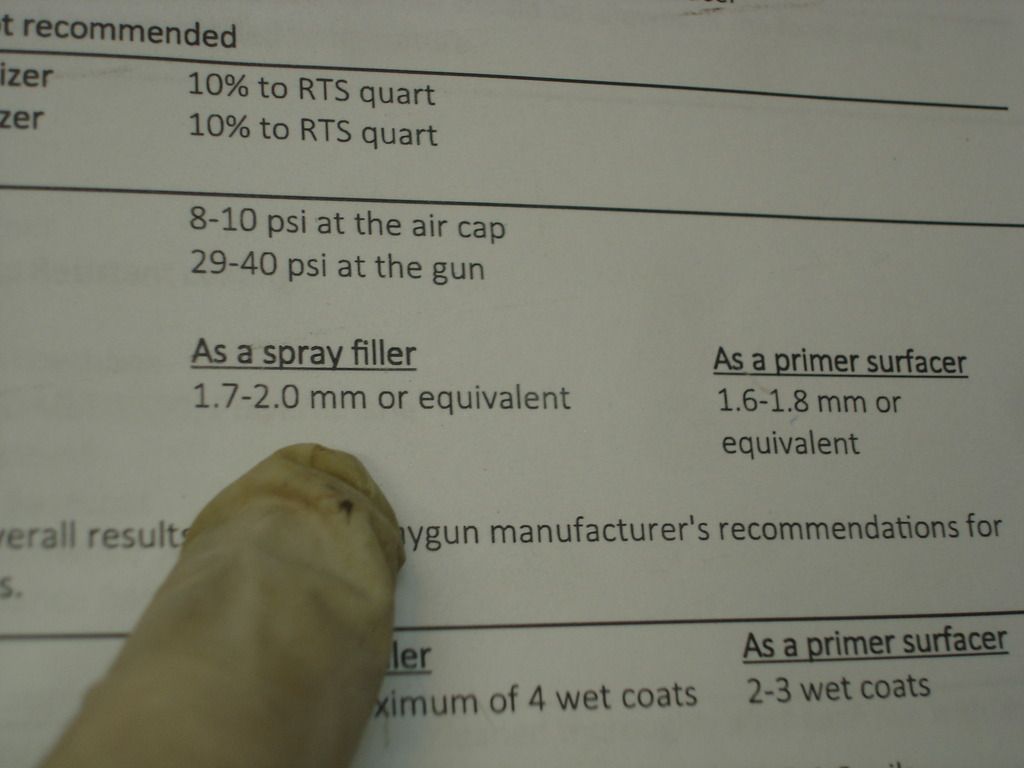
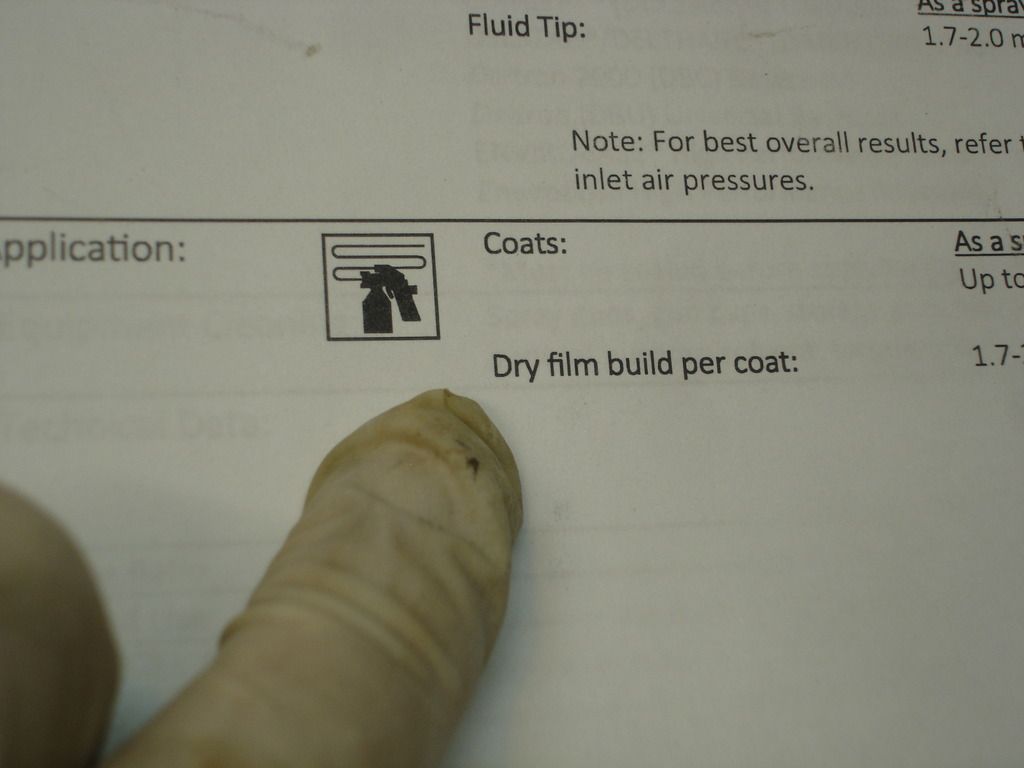
This is a closer look at the gun info. It tells you the recommended tips to use. 2 mil is my large tip. If you have no removable tips, you would have to thin appropriately for your particular gun tip size.

It references the recommended pressure for the spray...at the "air cap". Huh?? To set the pressure properly for an HVLP gun, you are suppose to attach a a-recital pressure gage that registers pressure that the fan tip sees. i don't have a gage to do that. All pro painters will. I use the cap pressure and add a couple psi...and then set that at the gun inlet. That is not perfect, but it gets me close enough. Cap pressure is entirely an HVLP thang! In the old days with traditional guns we set inlet pressure only.


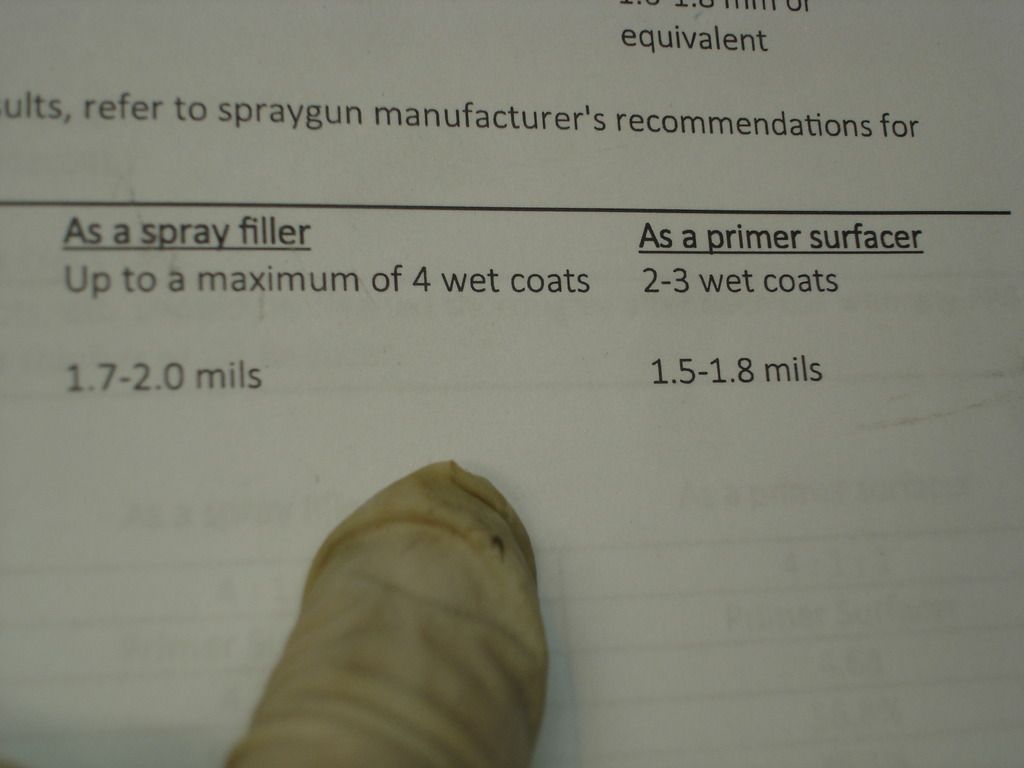
Next we see the recommended number of coats...and whether to spray "wet" or "dry". In this case it wants dry, but with a good amount of "build". So a good amount, but not enough to run or remain wet for any significant amount of time.


For this particular paint, depending on what you are suing it for, you can also spray 3-4 "wet" coats. A "filler" layer is a thick layer of primer that you plan to sand down to make it level. That is how I will be using the paint. A "primer" use is one in which you do not plan to sand level, but rather just want a good layer of primer that the top coat will adhere to. You may plan to rough it, but do not pan to use it as a levelling paint.


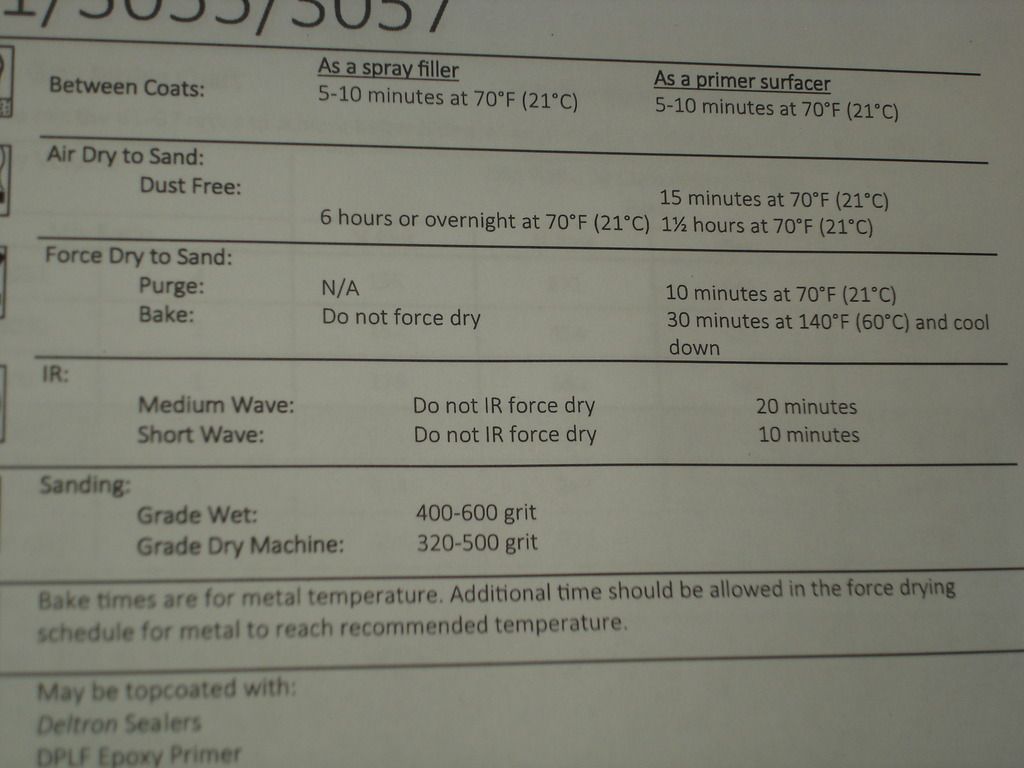
Next, drying times. A good fdpaint will tell you all the info you see here, and it answers the most obvious questions a painter has...like...

"How long before I can sand it?"
"How long before I can spray more paint over it WITHOUT having to sand the surface?"
"After how much time must a sand the paint before I spray over it?"

This paint can even be "force dried", by putting it in a heat booth. That is for the pro painters who have several cars to paint in a day. Air dry is fine for most of us hobby restorers.


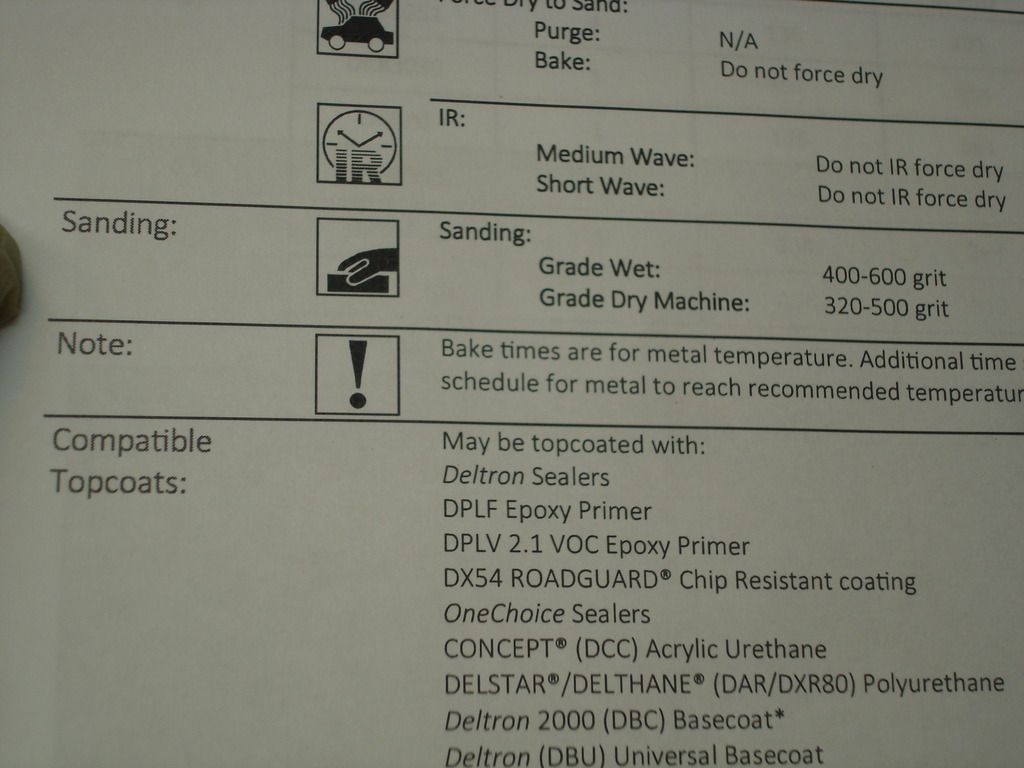
This paint spec sheet even goes as far as telling you what grit papers to sand it with!


Finally, there is a list of compatible paints to spray over it. Most urethanes are not finicky, being totally inert chemically. There are types of paints that can be solvents to other types of paint. So this info is worth a quick glance if you are doing something "different" from the usual.


As mentioned earlier, this paint is a 4:1 mix...so this is the column you would use on the mixing cup.


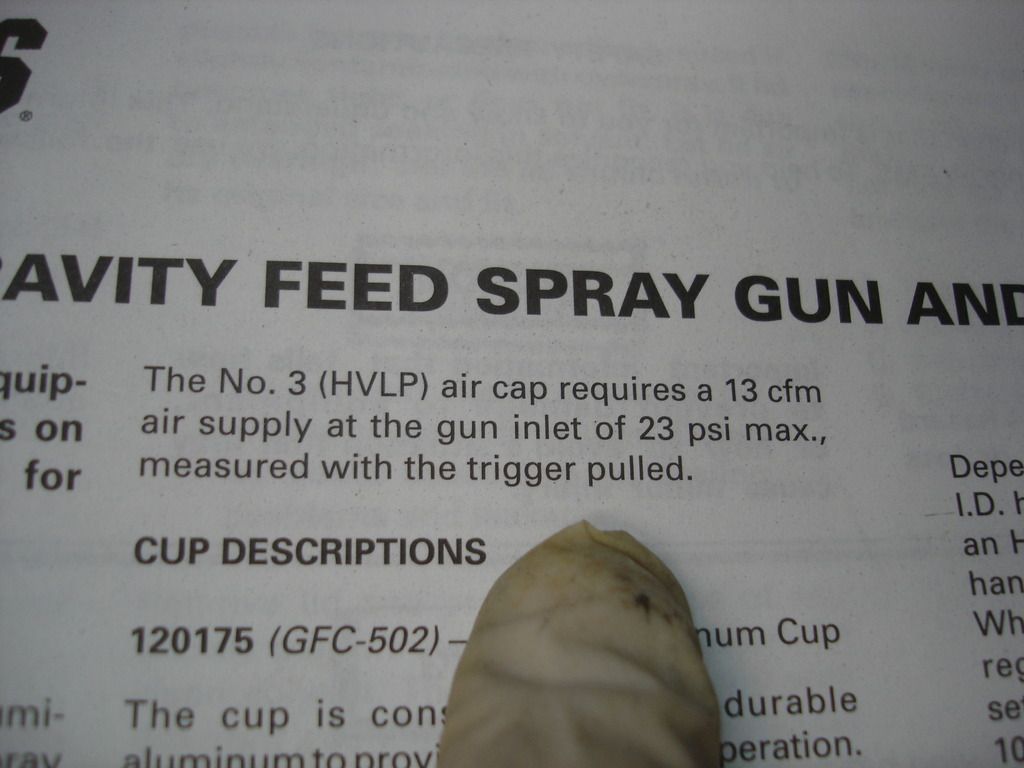
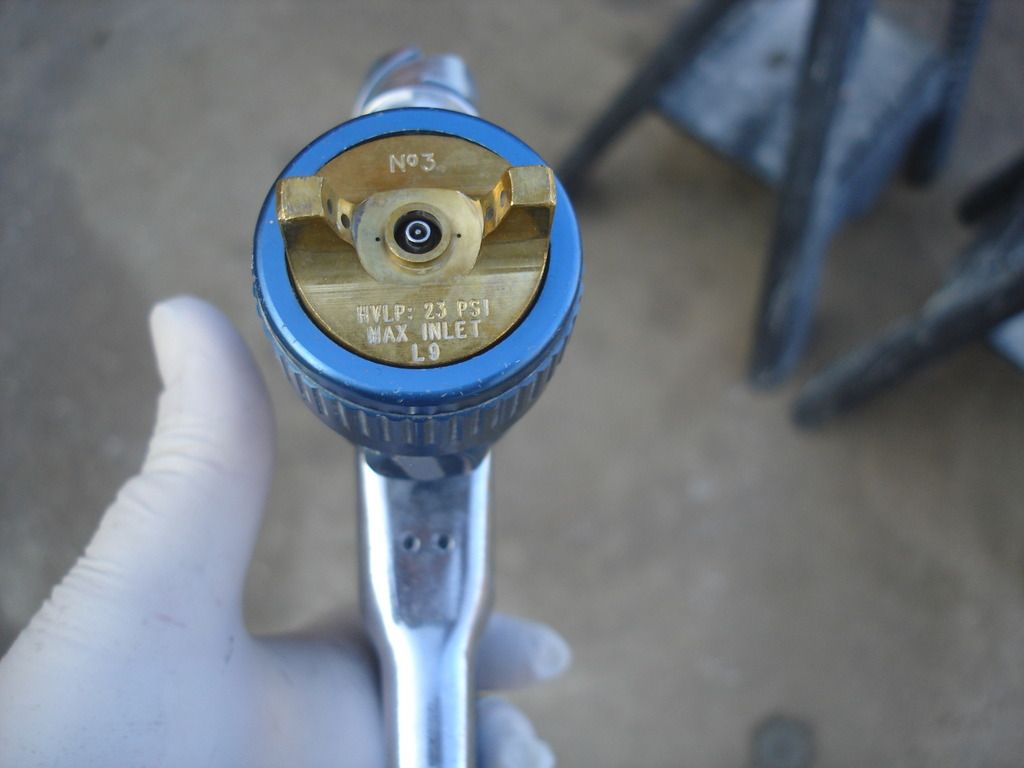
Here is a spec that is almost always confused by amateur painters. It says 23psi max at the gun inlet. Most would see the 23 psi and set that at the regulator at the base of the gun...or even worse, at the regulator going into the 50 ft hose they are using. They think this is a "high volume, low pressure" gun, so 23psi is correct. The gun spits and spatters, and all it will lay is a very dry coat that looks like a Marine's beard stubble.

Absolutely Wrong!!

Read closer and you will see it specifies "with the trigger pulled". There is a HUGE difference between the pressure at the inlet for the gun trigger off, and that with trigger pulled. Here is how I set up my gun for this job:

I set the pressure at the hose inlet to 60 to 90 psi. I want ample flow to the gun, and I get this by pressurizing the hose well. Next, I pull the trigger on the gun fully (paint adjustment off, of course!), and watch the regulator going into the gun. I then adjust the regulator until I see 23psi. WITH THE TRIGGER PULLED!!

Now the gun is set correctly. WHen you release the trigger the gage at the gun goes up to 60-90 psi. That is fine! Read that again...!! You only care about the pressure with the trigger pulled. You care not what the gun sees when it's turned off!

If you play around a little, you will find that if you put less than 60 psi in your hose, you cannot get the required inlet pressure out of the hose. I always use 90 psi. I set the inlet with the trigger pulled to what the paint recommends.

Note: Guns always spray a better pattern with higher pressure. This has always been true. The EPA mandated the entire HVLP thang. Not painters.

Note 2: The only reason to lower pressure is to reduce overspray. I don't care as much about overspray as the EPA does...so I always set my pressure to the high side of recommended.
 
Last edited:


Here the spec sheet even gives you an idea of how much air volume it takes to spray at the recommended pressures.

As Tush pointed out...you MUST make sure your compressor can handle this flow. If it cannot, then you can compensate by spraying the car one panel at a time. A little 12 cfm compressor can spray at 17 cfm for a short time...like long enough to finish a wing. It will loose pressure and provide more water than air if you tried to paint the entire car at one time with the same little compressor.

Note: before buying a spray gun, plan for what you will spray and how much air your compressor can provide.

That ends the spec sheet review. As you can see, it has a plethora of critical info. Paint was once cheap, and all you lost if you goofed was time. Today's paint is like liquid gold. If you ignore the specs, you may find yourself facing a very expensive...and avoidable...respray.
 
Hi John:

Thanks for detailed information! I know absolutely nothing about all this but you have laid it out well for my later reference. If I plan to use a "single stage" or in other words, with no clear coat on top, how would your instruction change, if at all? I don't really want the shiny coating and think maybe a more original singe stage would be nice when I do paint mine.

Cheers

Dan
 
It's time to spray. A couple things I line up before a spray:

I either clean everything I can and/or, I wet everything with water. Water holds down the light dirt and dust that will kick up when you spray and get all over your paint.

Use some kind of disposable gloves. You WILL get paint on your hands. If you are not wearing gloves that can be quickly ripped off and replaced, then you find yourself stopping constantly to clean your hands...and then missing spots that spread paint onto everything you touch...and from there back on you on other parts of your body!?! Wear gloves and save the frustration. When you get paint on a latex or vinyl glove, just toss it and get another. All stays clean and you stay happy!


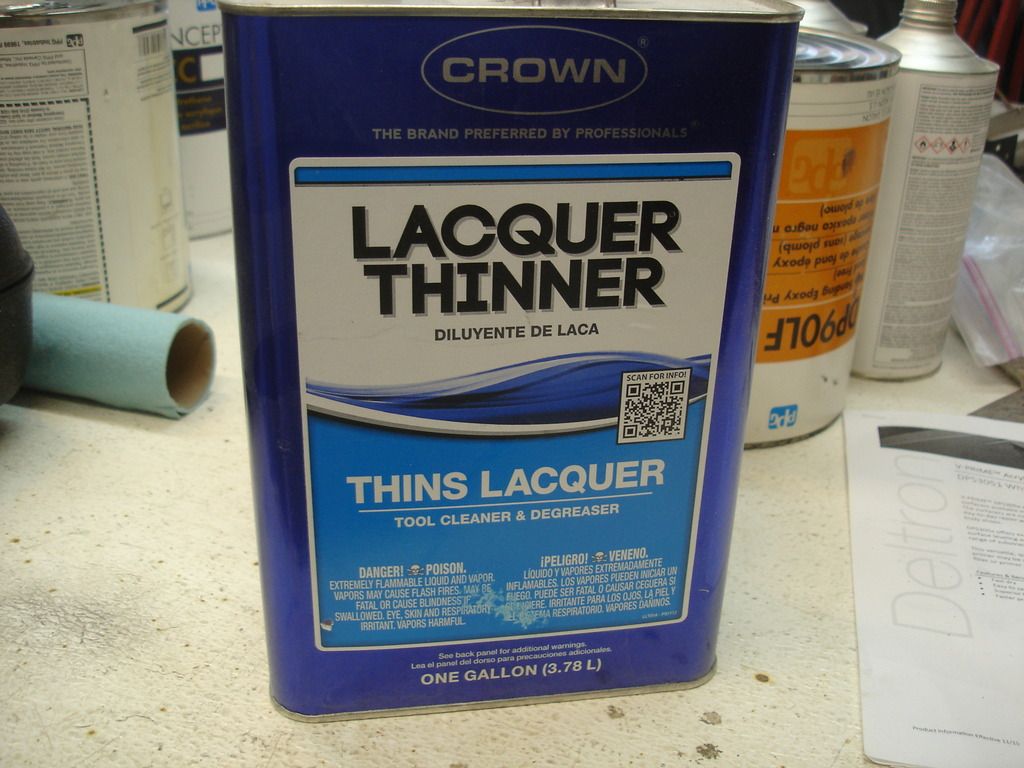
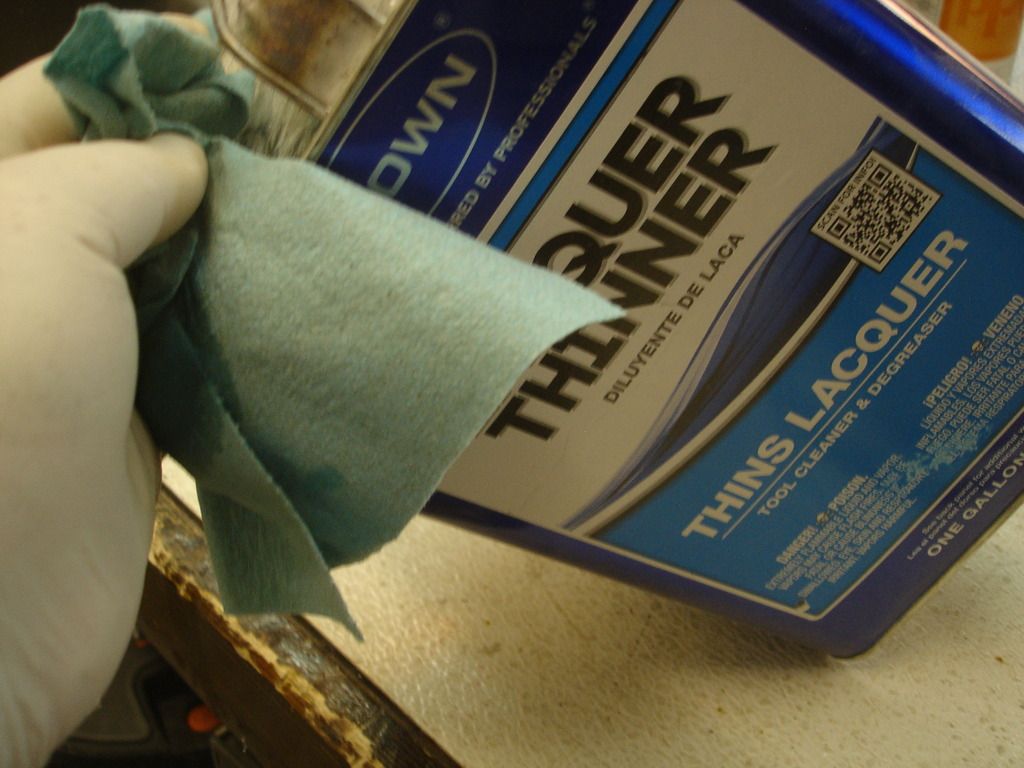
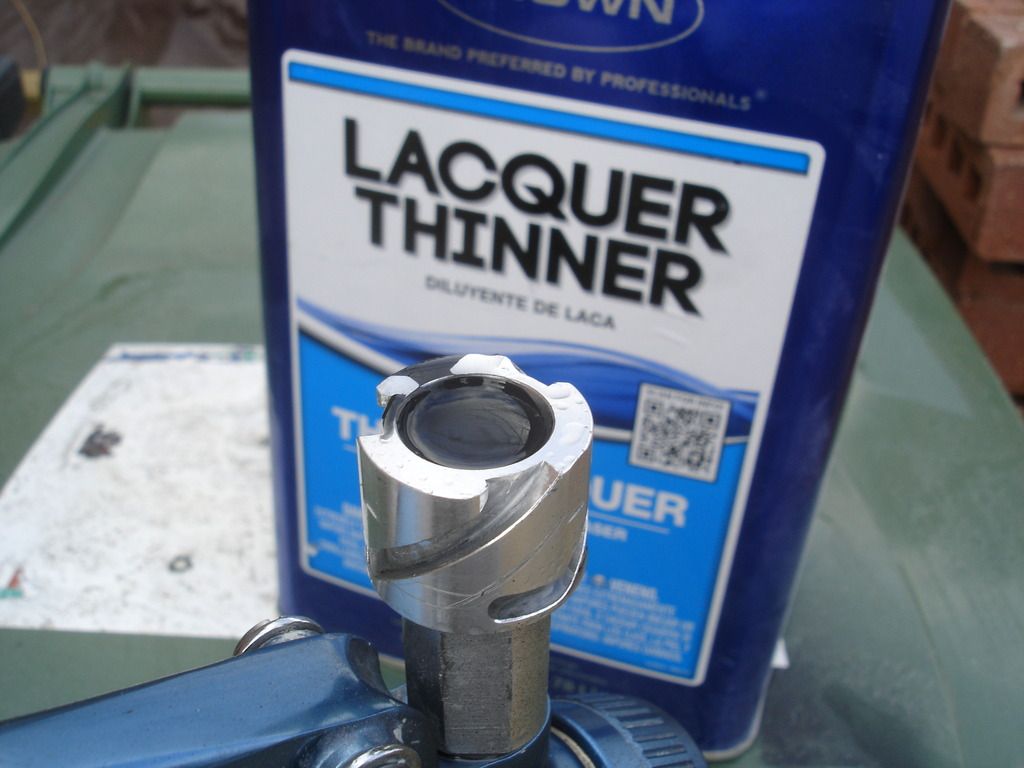
This is the cheapest lacquer I have found, from Lowes. Lacquer is great for almost everything. I use it to wipe down panels to remove dust, silicone residue and oil. It cleans almost any type paint you want to spray. It is essential for cleaning you and your gun at the end of spraying. Keep plenty on hand at all times.


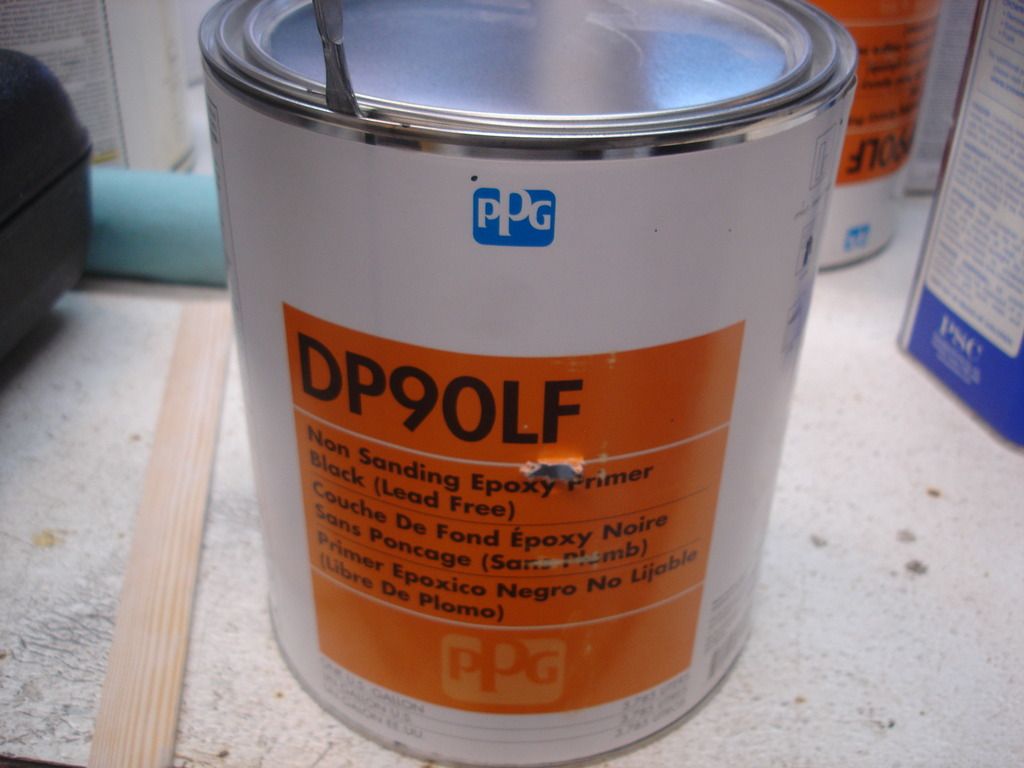
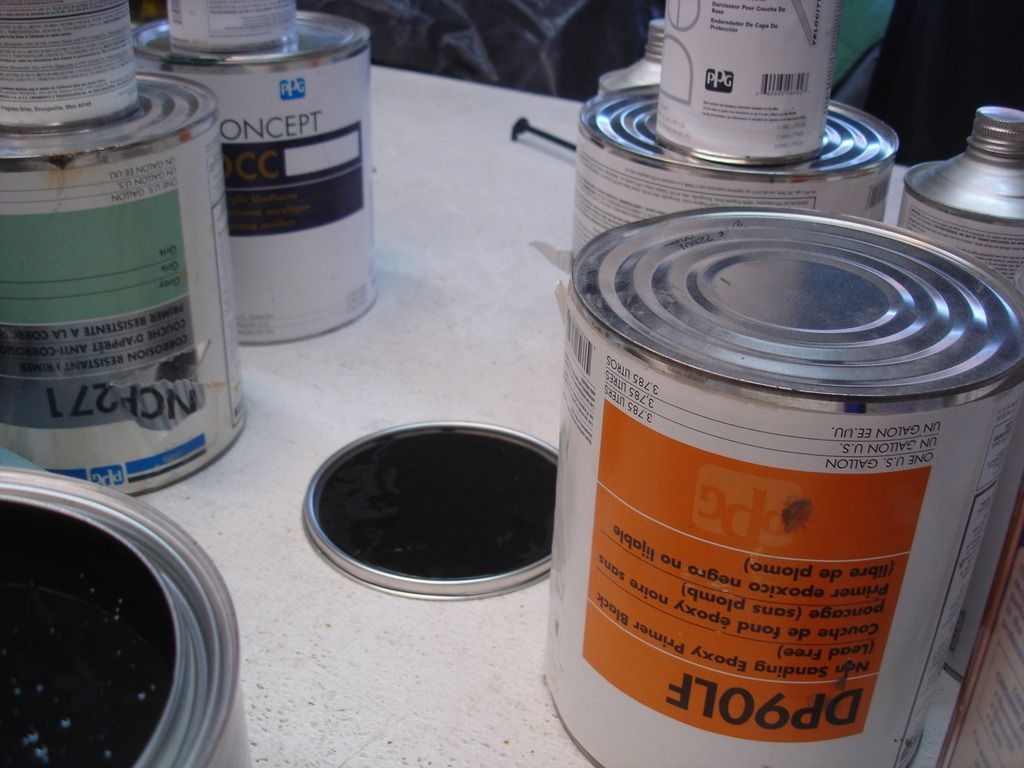
This is the epoxy primer we will be spraying today.


ALWAYs fully mix your paint. I took this back to the paint store the day before spraying and had them mix it. If it sits, I shake it every day and flip it top for bottom and back to prevent the solids from sticking to the bottom. Finally, before you use it, check the bottom for solids with your "free" mixing stick to make sure it is shook up enough.


Here you see all my paints that will get sprayed in the next week or two. Some are upside down and others right side up. EVERY day this week I will shake and flip each can. If they sit more than 2 weeks undesturbed, it's easier to take it back to the paint store than to free the goo stuck to the bottom of the can!


I'm being lazy and mixing in the disposable cup. I want a full cup, so I will mix my 2:1 ratio as 12 oz of paint to 6 ounces of hardener, for a total of about 18oz.


I spent many years trying to pour gallons without spilling. It's MHO that it is not possible. I even tried using those fancy spouts...better but eventually things always turn South. Here I have learned to use disposable mixing cups to scoop and pour with. With proactive it makes a spill free transfer. You will see I'm out of practice right now, though!?!


Note the cup is against the can. I pour with one end of the cup still over the can and the open over the cup. The drips tend to stay in one place or the other. Emphasis on "tend".


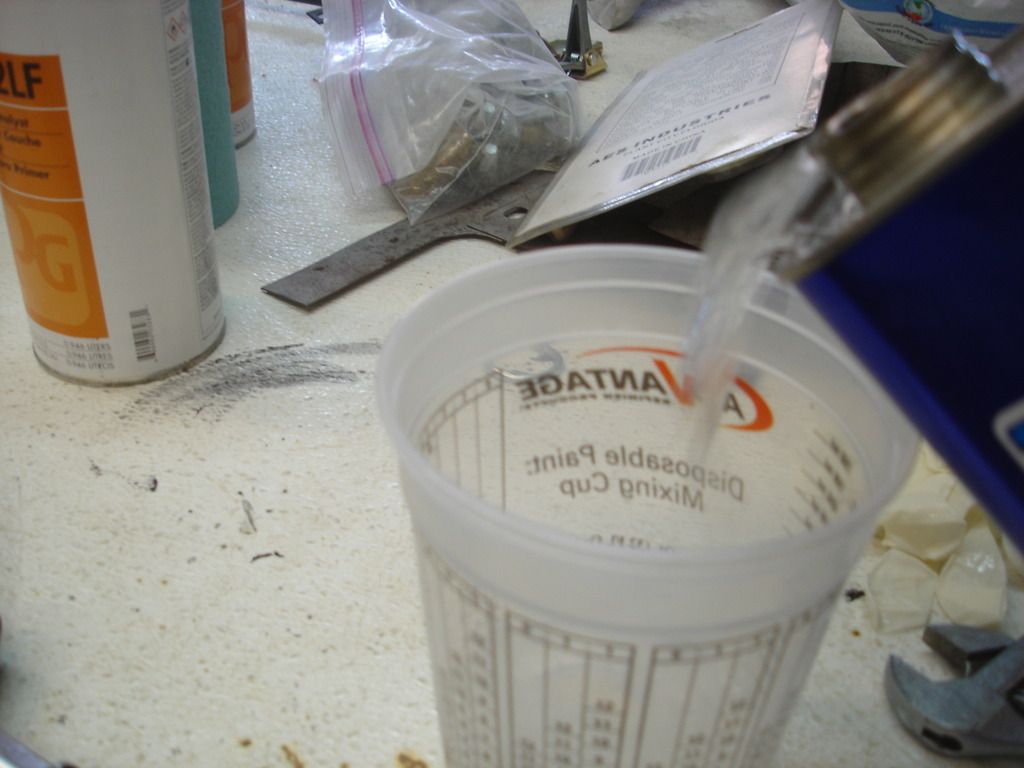
Here is the 12 ounces in the cup.


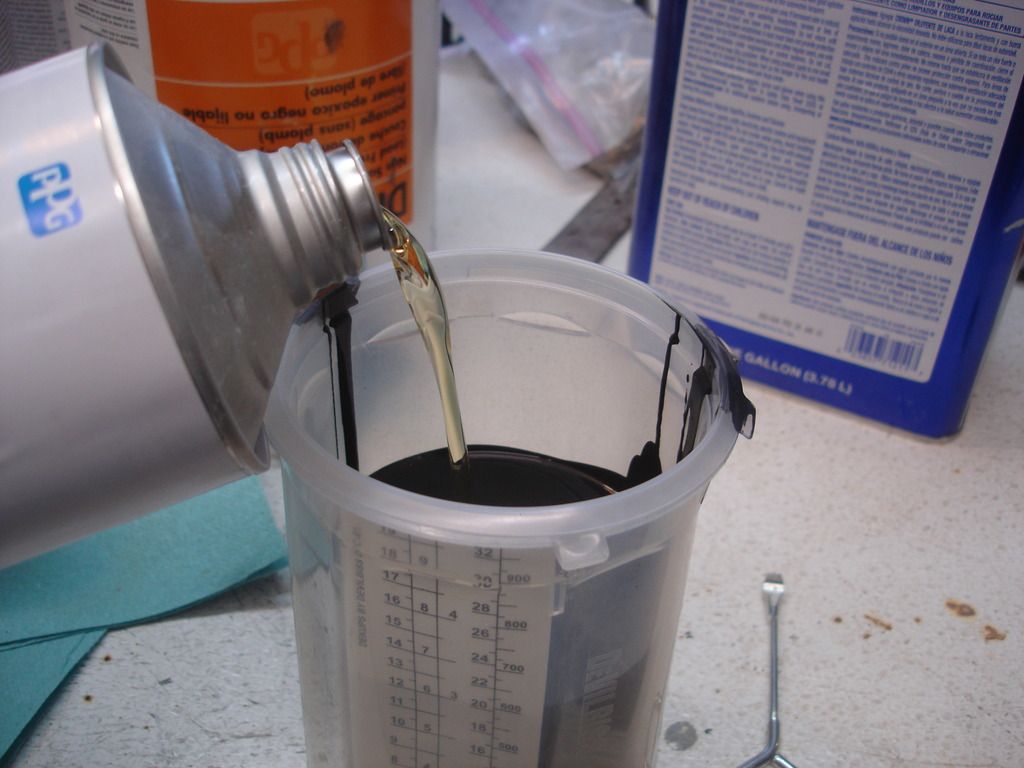
As we saw earlier, there are 2 options for hardener. It's cool today, so I will use the 402, fast drying option.


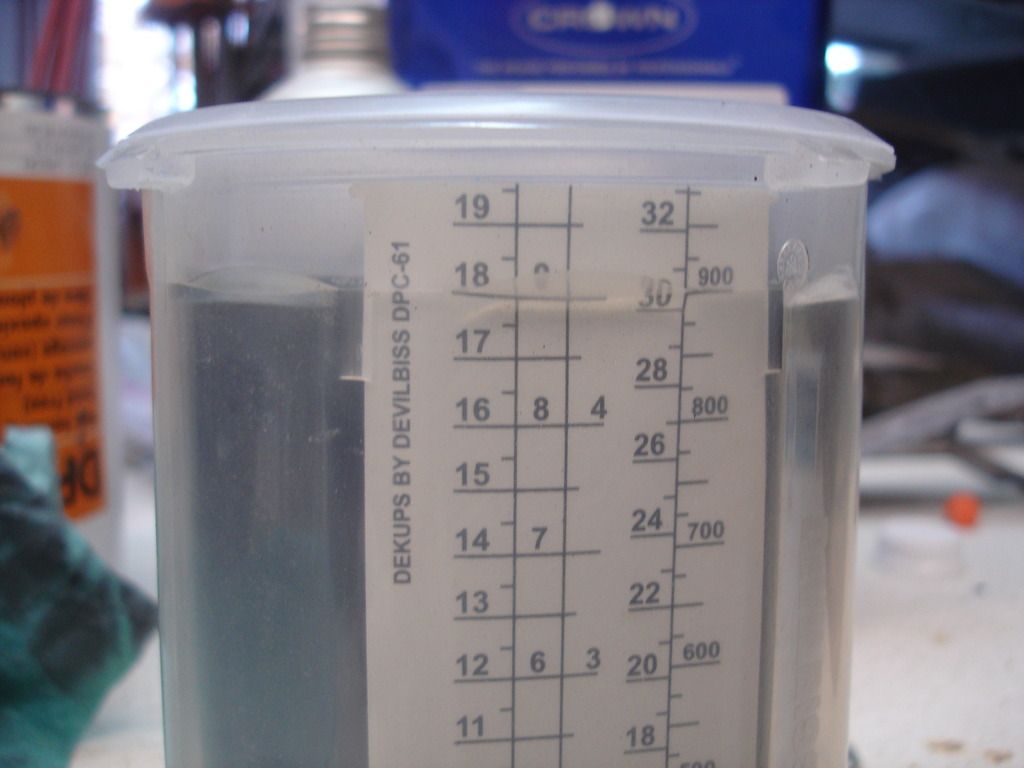
I add the hardener up to the 18 ounce mark. So that makes out 2:1 ratio.


So, above I put the disposable cup together and plug it. I then shake it for a good minute to distribute the hardener completely. If you remember from earlier, the 402 requires a 30 minute cure time. I will set this cup aside as i prepare all my guns, hoses, and parts for painting.


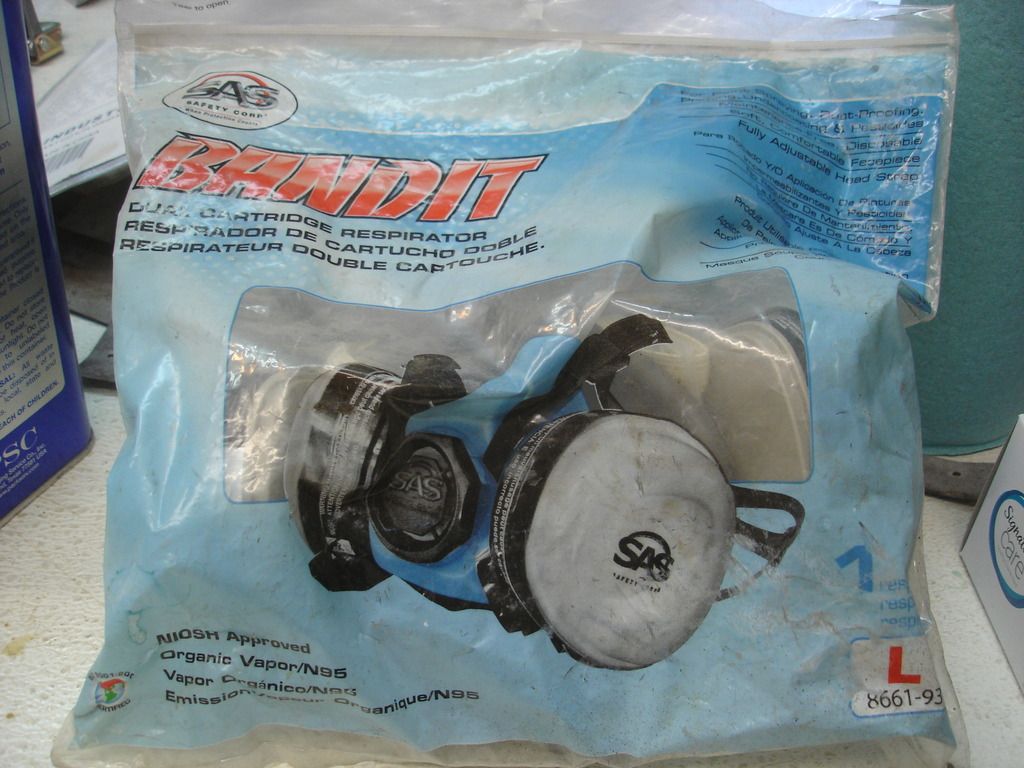
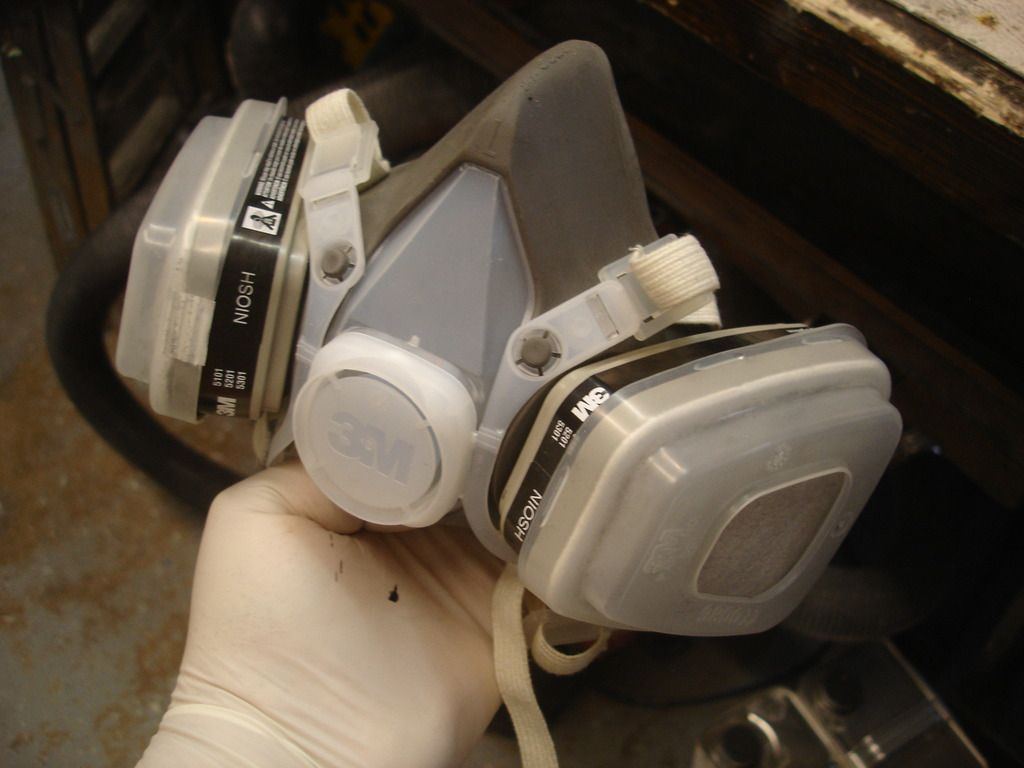
We'll, every time I turn around I remember more necessary equipment. This is a carbon active disposable mask. I used to only find them in paint supply stores. I now even find them in Lowes, which really brought the cost down. The mask is good for 40 hours out of the bag. The distinction is important. If you spray for 40 hours....toss it and get a new one. If you spray for 2 hours and remember to reseal the zip lock storage bag that it comes with, then you can leave it on the shelf for a year...and STILL spray another 38 hours with it.

If you forget to seal the mask in the bag over the weekend...it's still used up, even though you didn't spray with it. It is good for 40 hours out of the bag, regardless of how you are using it.

Now...I do save the used up masks for sand blasting. Sand basting has no solvents, so the mask makes a great dust filter even after the carbon is shot.

The important thing is that you absolutely need an active filter mask for spraying. Technically, when spraying the urethane clear you are supposed to use a forced air mask, as carbon doesn't cut it for that. I don't spray enough clear, so I fudge along using the carbon masks, but I toss them after spraying the clear coat. If you look at the mask after spraying clear you see why the mask doesn't last!


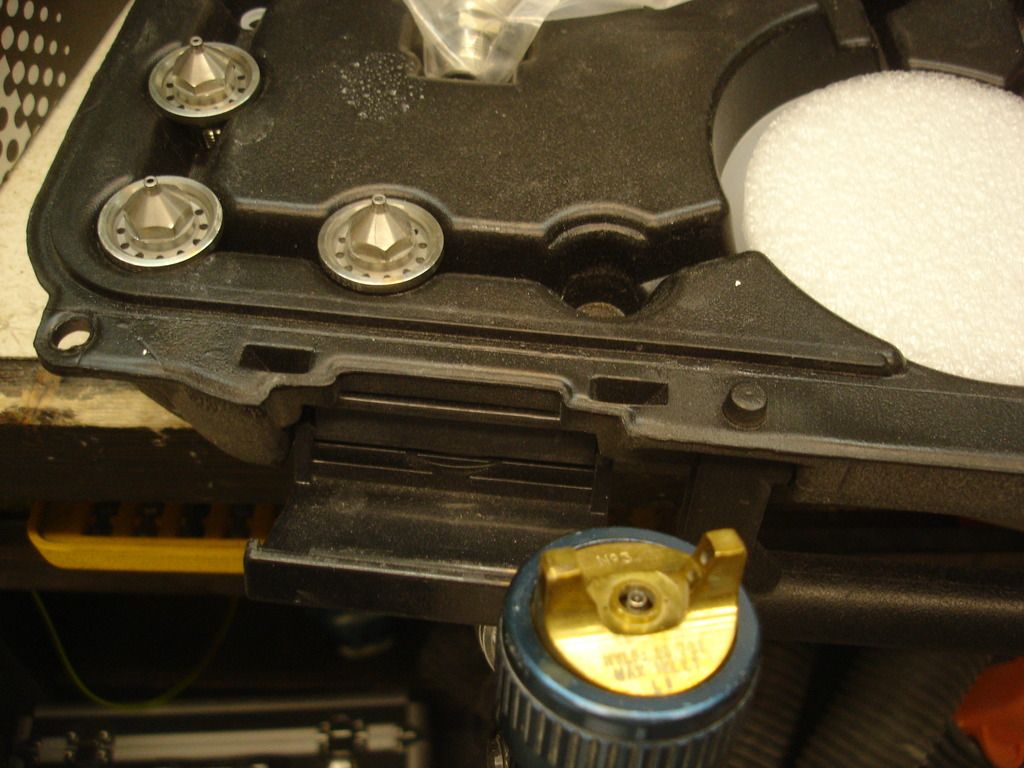
Here I have switched to my 2 mm spray tip, as per the spec sheet.


In my section talking about air supply I showed you everything I do to remove air from the lines. Here, if you note I have laid out my entire hose. Make sure there are NO loops. Once the air is in the hose, you must do everything you can to prevent water from accumulating. Read this carefully.

Once in the hose, if you have any low spots in the hose, water will condense and build up in the low spots. That allows puddles of water to form in the hose. The puddles will blow out all at once onto your fresh paint. You want the hose laid out as flat as possible. Leave no loops hanging on the wall to accumulate water. With the hose flat, the water will continue down the hose and out the gun BEFORE it has accumulated enough to spit. So, in the hose the goal is to keep any water IN suspension. Any condensation that does occur we want to blow on through while the droplets are tiny.

Empty all your water traps before spraying...and several times during any long spray. Water screws up painting quicker than cheap paint.


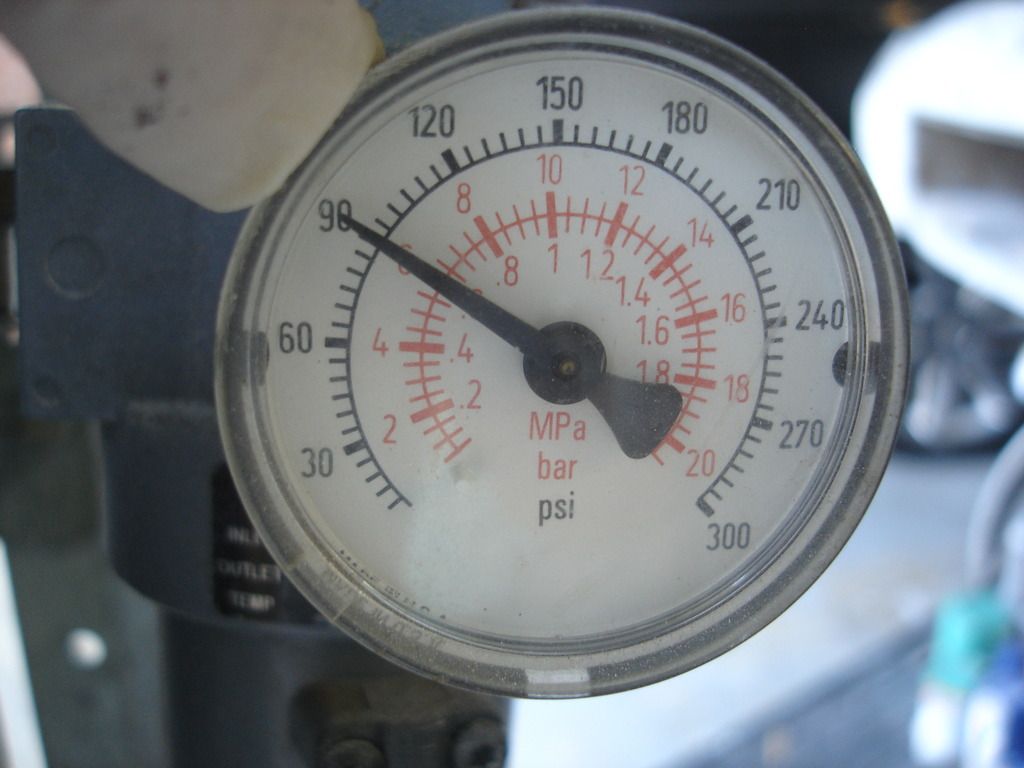
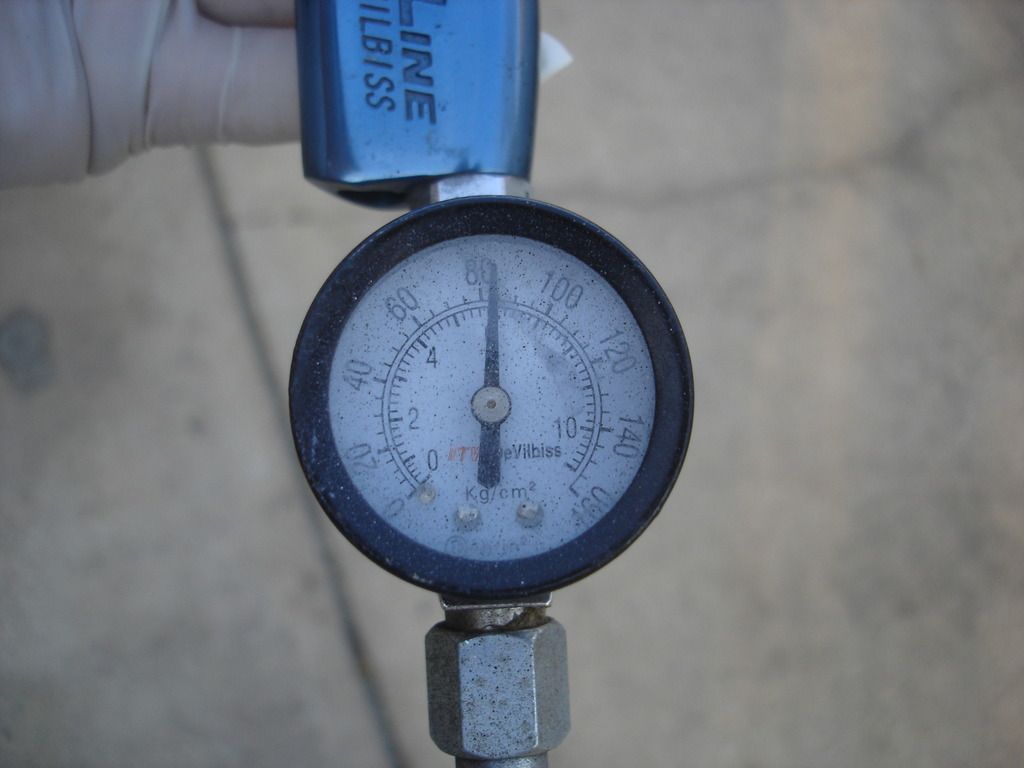
My pre- hose regulator is set to 90 psi.


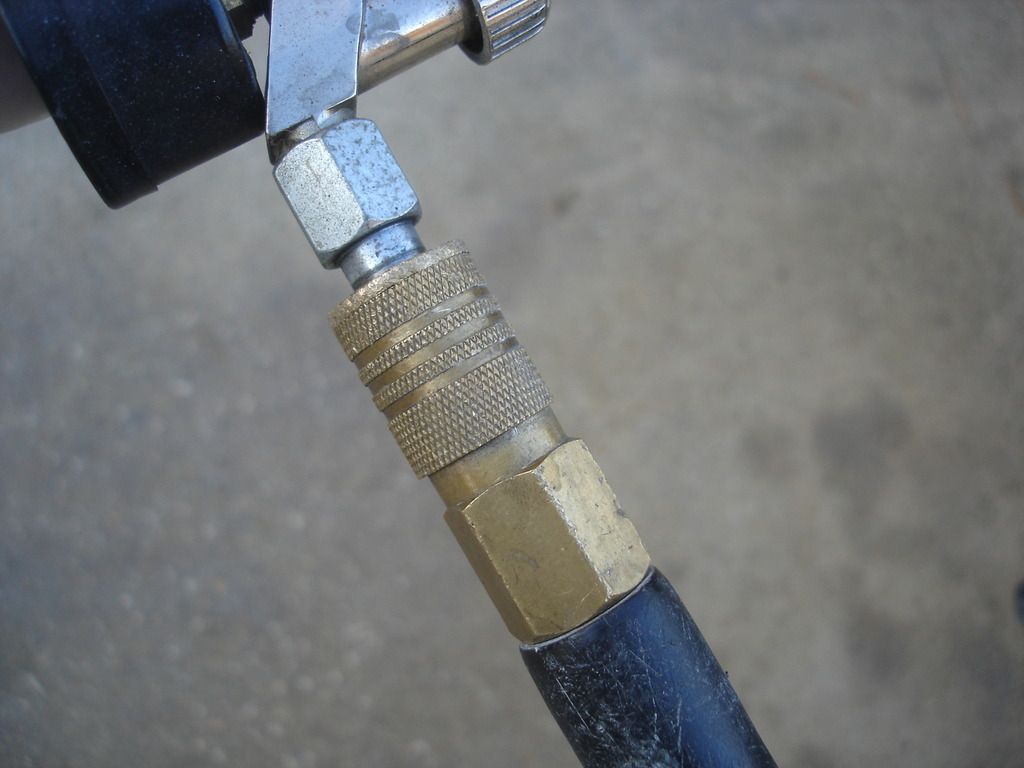
Once the gun is plugged into the hose, the reading with the trigger released is almost the same 90 psi.


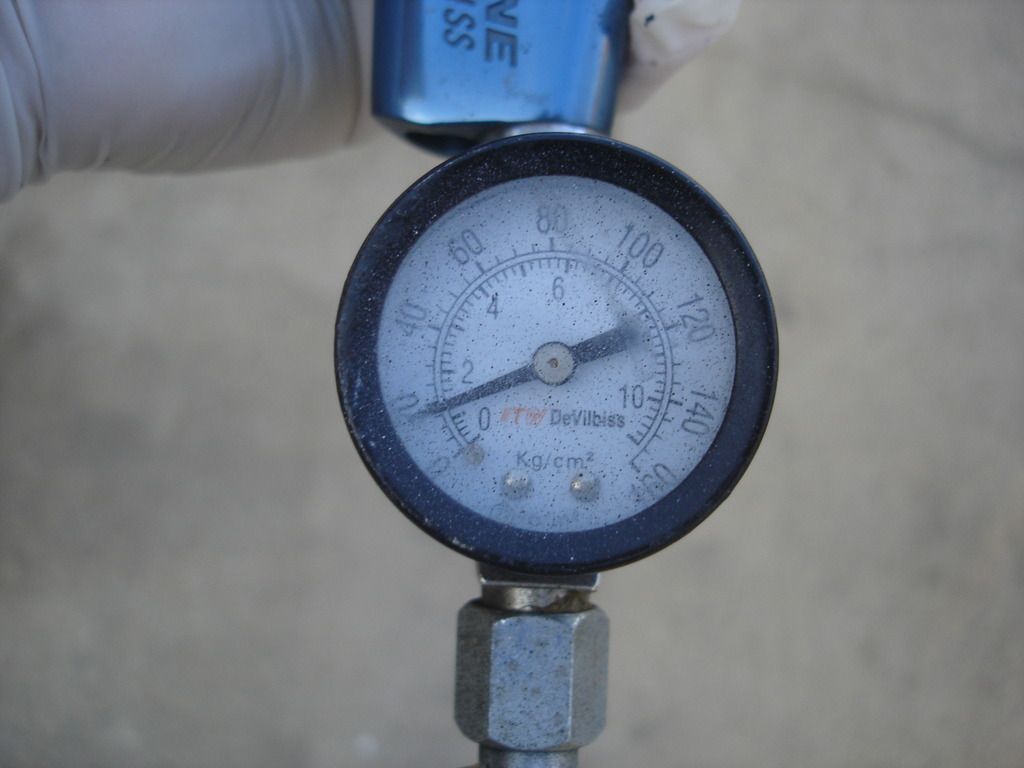
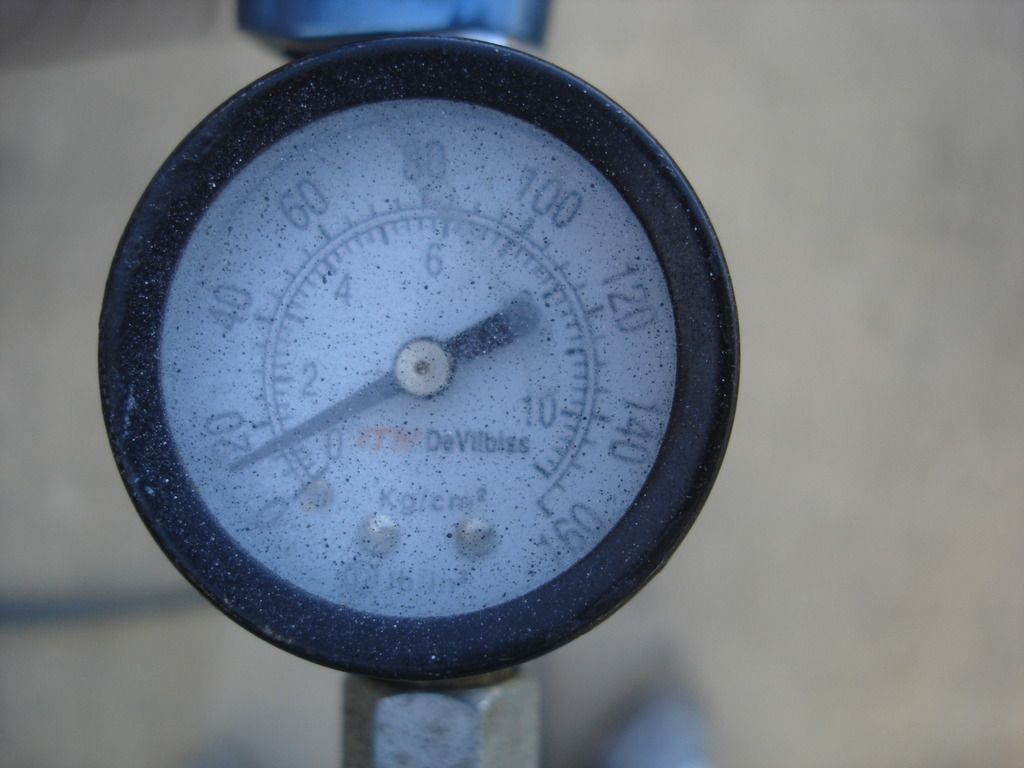
Look how much the pressure drops at the inlet when you pull the trigger. This should show you how so many new painters get confused about HVLP!
 
Last edited:


So, with the trigger still pulled, set the pressure to recommended. In this case I am setting 17 psi. When I release the trigger the gage will pop back to 85 psi. That is normal! Do not readjust!


Orient the tip for the direction you want your pattern. With the shown orientation, the pattern will be taller than wide, which is preferred for spraying a left and right direction.

If you roatate the tip 90 deg, it would work best for up and down spraying.


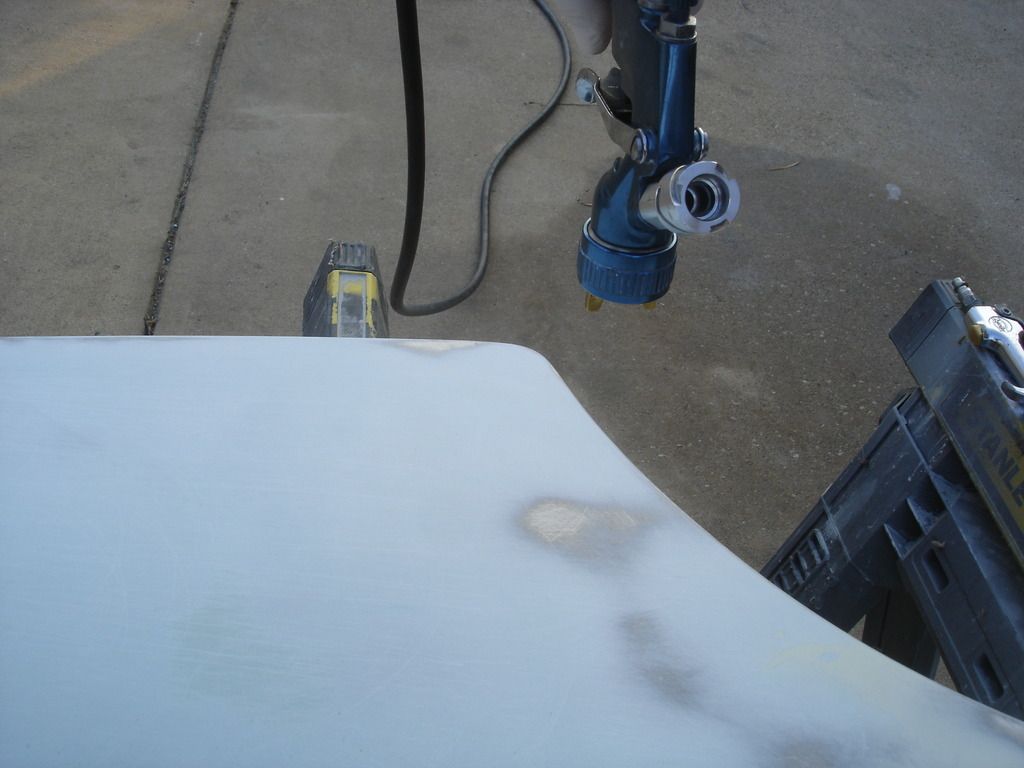
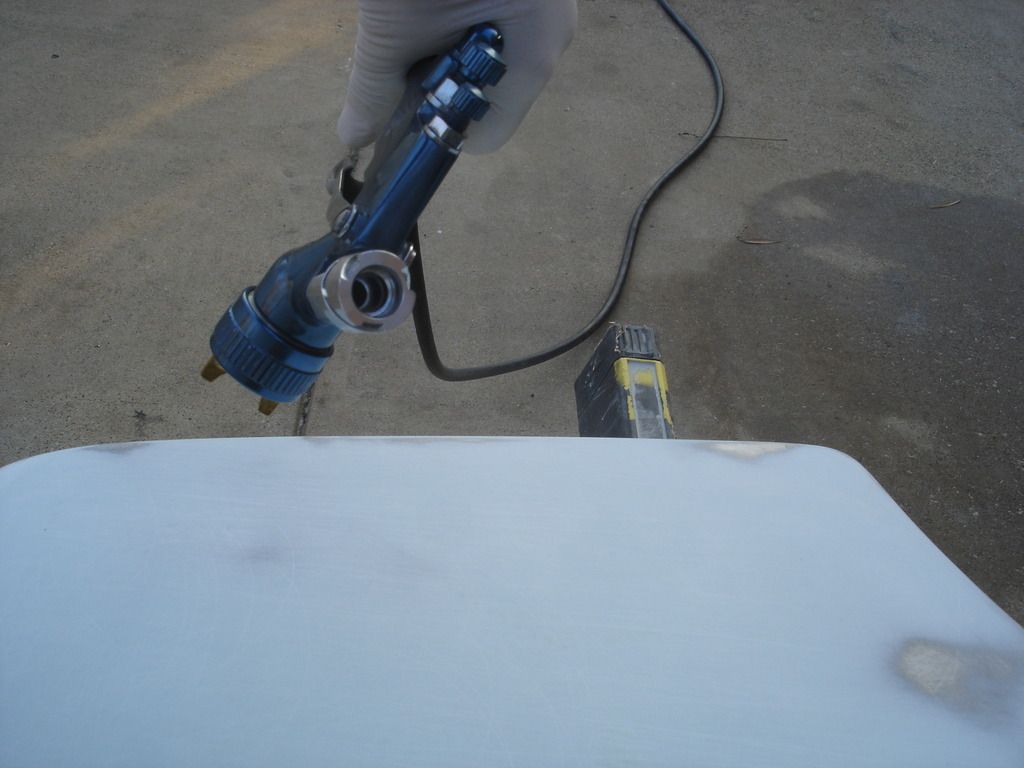
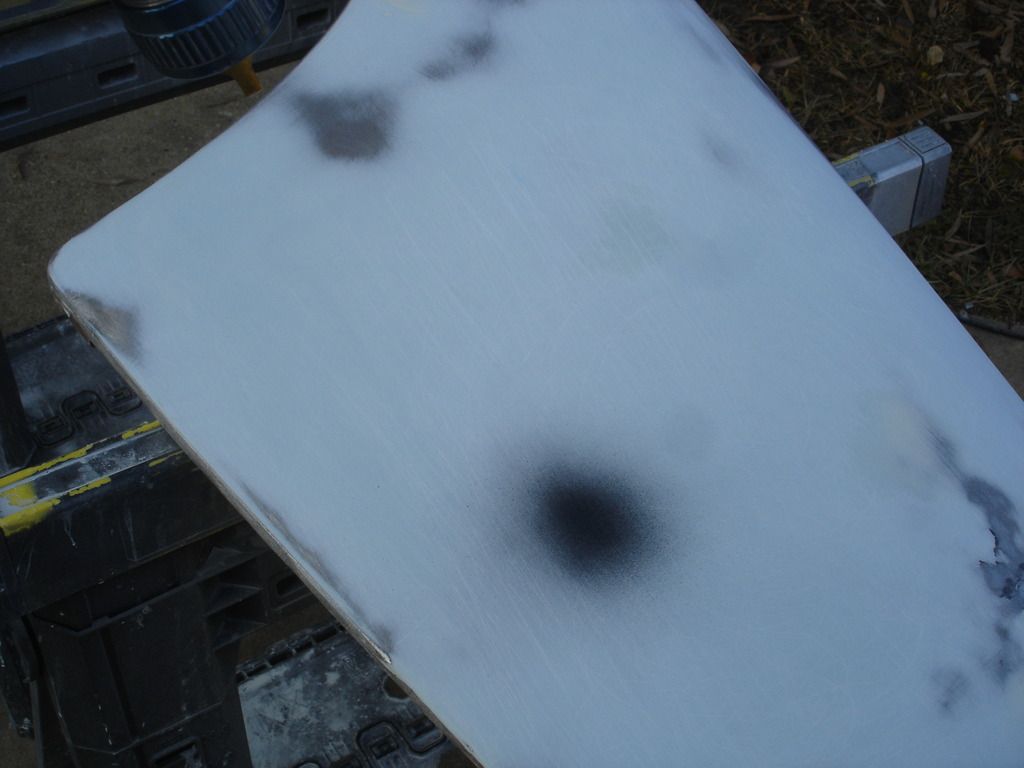
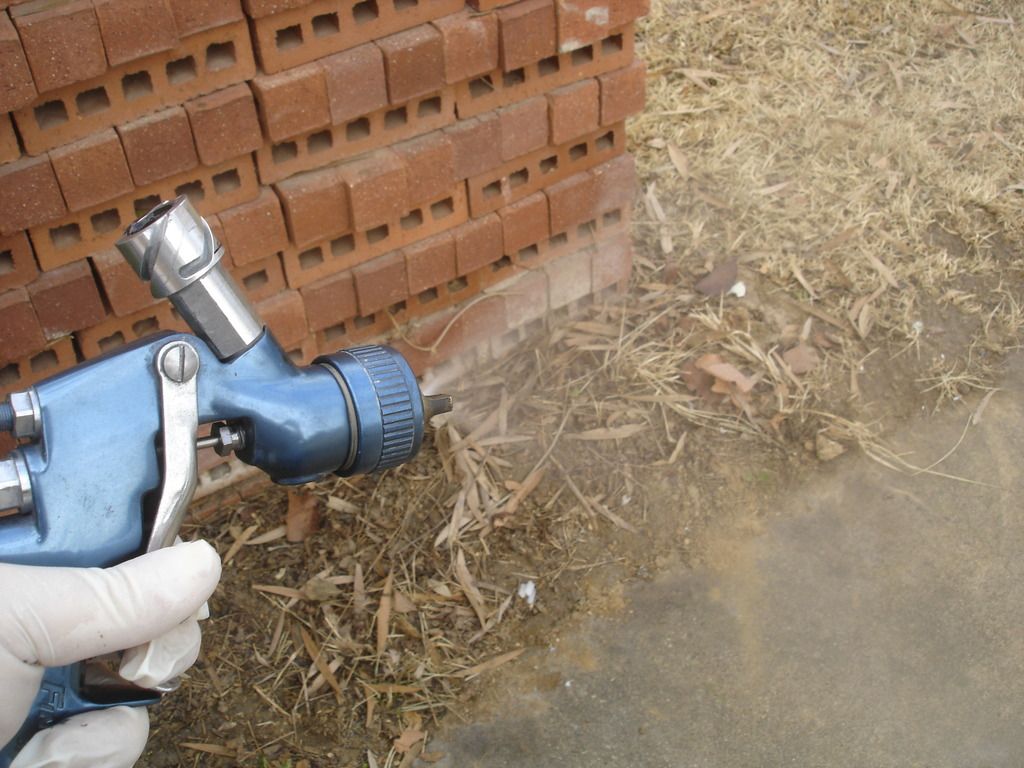
Here is a quick practice spray. Notice the gun is perpendicular to the work surface. It should remain perfectly perpendicular as you move it across the work. Always perpendicular. The painters on Discovery and History channels do it wrong!

Next, note I am actually starting the stroke off the work. I will start the gun in motion and then pull the trigger BEFORE I reach the panel. That gets the paint flowing smoothly before I get to the panel. Hold the trigger down until you pass completely over the work on the other side...and only then release.

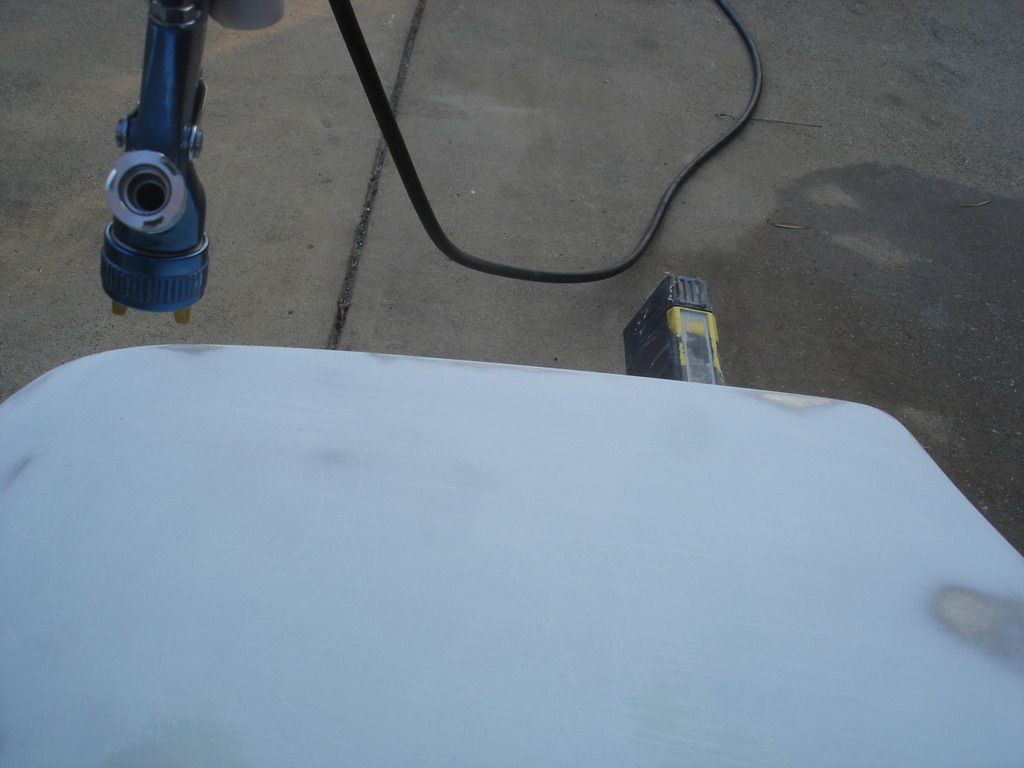
Practice...it is not a natural stroke, both squeezing and holding perpendicular while constantly moving. Never squeeze without moving the gun.


Here I have moved across the panel...still perpendicular. I will not release the trigger until after I pass the panel.


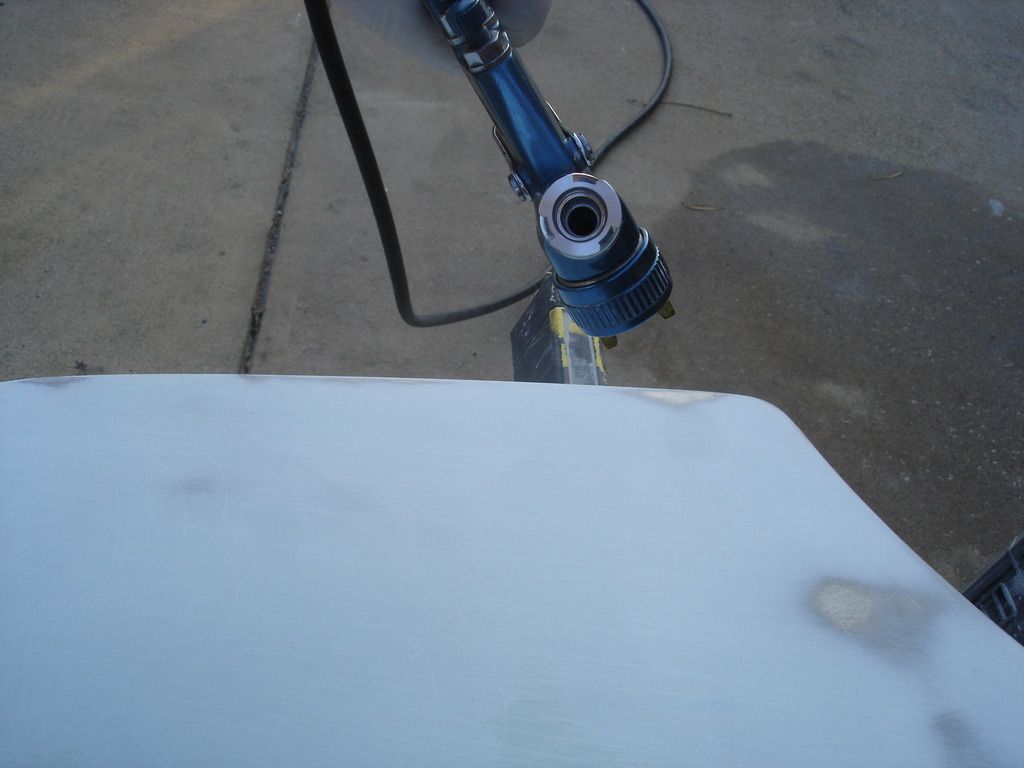
This is WRONG!! Don't swing your wrist. The gun stays perpendicular at all times to the work. Have you noticed how many times I have typed Perpendicular?!? It is important!


Start with both the fan and paint flow adjusters in all the way. Once you set them for a spray you can leave them, but for starting a spray they always start in.


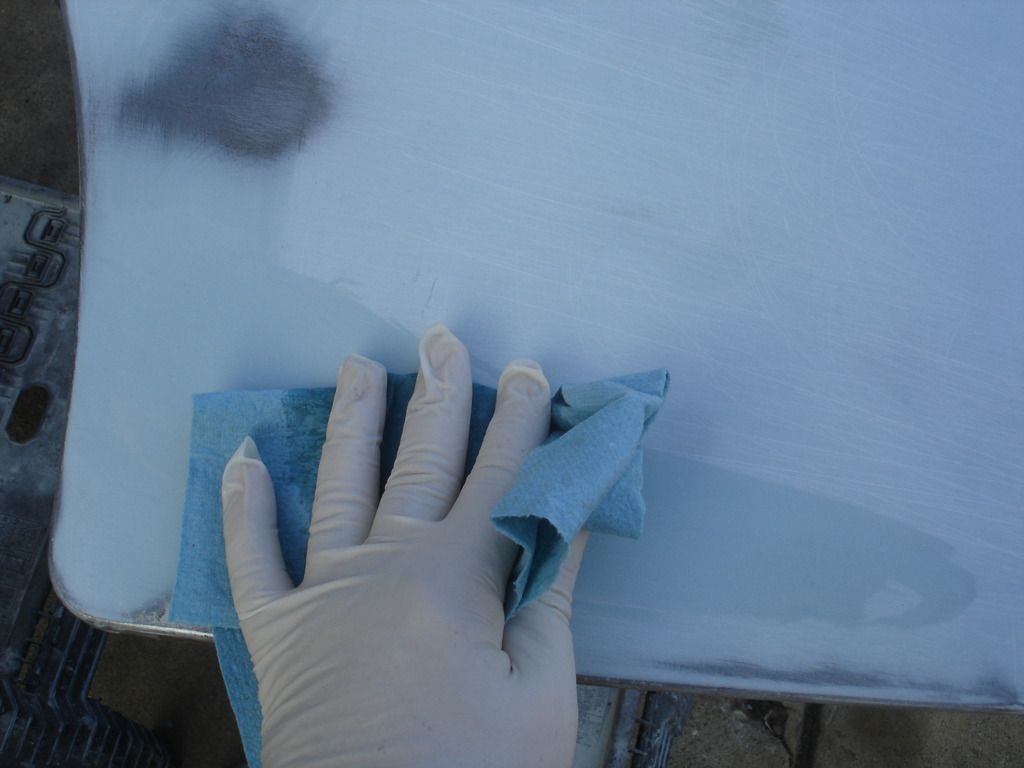
When everything is all ready to spray, it's time to wipe down the work one last time. I prefer lacquer thinner. There are professional products...I haven't liked any of them better than thinner. It works to wipe down anything EXCEPT lacquer paint. It, of course, is a solvent for lacquer.


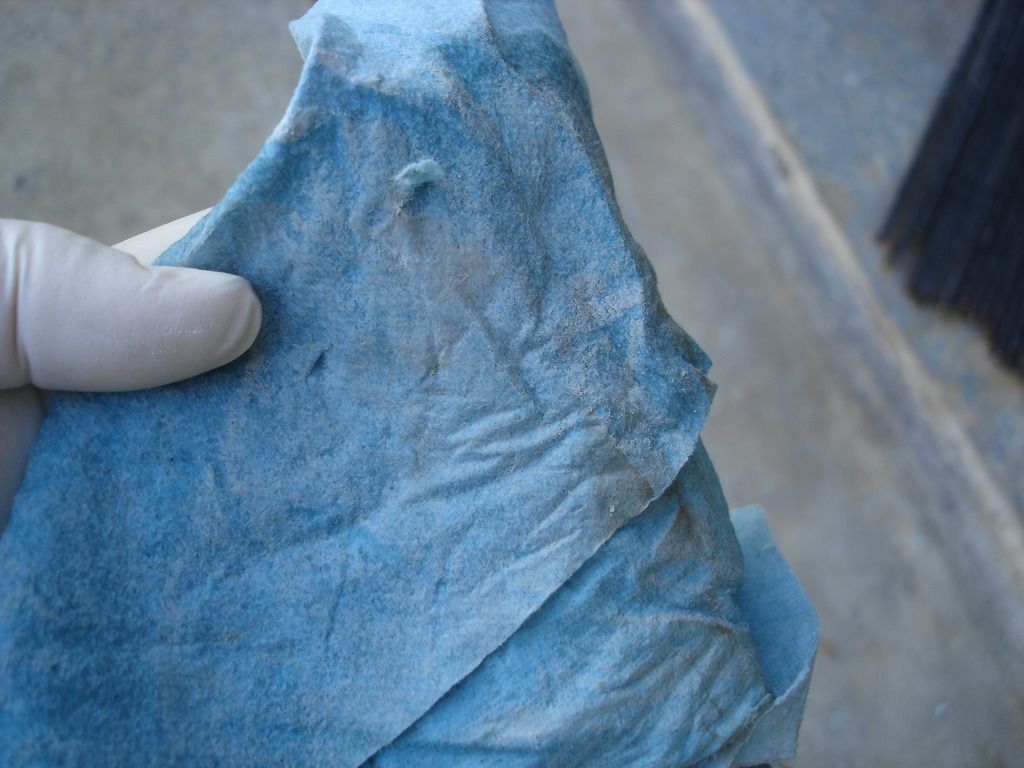
This is why you wipe down every panel. Dust is dirt that contaminates your spray.

After wet wiping with thinner, all subsequent wipes will be dry, using a clean latex glove. If you like tack rags, which are available from anywhere that sells paint, use the tack rag to wipe down the panel now.


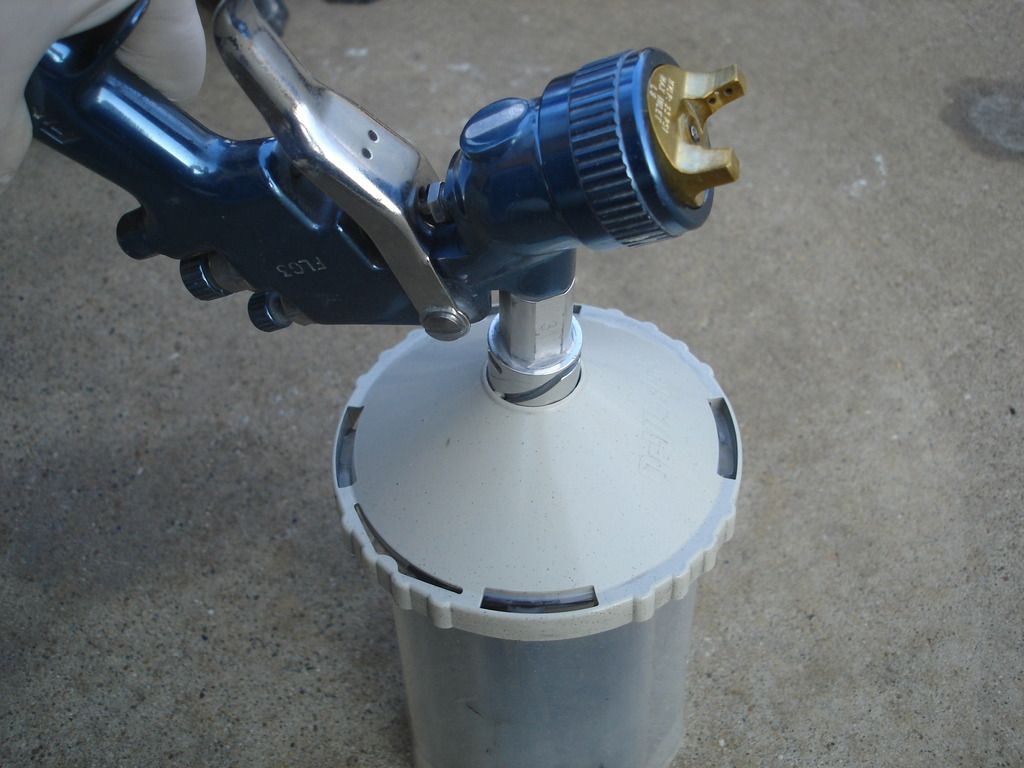
Our 30 minutes cure time is up, so the cup goes on the gun. By the way, this set-up is called a "gravity feed". The cup is over the gun, so gravity feeds the paint. It is preferred in most cases. The other option is "suction feed", where the cup is under the gun. Suction feeds often have a dead time after pulling the trigger before the paint gets sucked to the nozzle. There is no delay with a gravity feed gun.
 
Last edited:
John, et all
Going back to the TR2 fender bead. I got my 23' vinyl "D" profile bead/Piping from Moss (part no. 249-738). I will be getting a 2 x 8 x 6' piece of wood and ripping several 1/2" cuts the length of the board. I will measure each piece of bead and place in the slots so that approx. 3/8" of "tang" and the "D" head are exposed and paint the body color with plasticizers. Since I plan to do the final exterior paint with the bolt on panels loosely attached I will place the bead into the gaps (after final buffing of the panels) and then snug everything up.


It is best to start spraying on a scrap sheet of cardboard or similar background. Open the paint flow nut slowly until a decent flow of paint comes out on your test board.


This is how it will look...round.


Now open the top fan nut adjuster until the shape of the pattern turns a good size oval. You will find that the air to power the fan takes away from the paint. Once you get the right shape pattern...you will need to open the paint nut farther to increase the amount of paint flowing.


Here is the fan pattern I like, but the flow reduced too much. Time to open the flow control nut.


Before I opened the flow, I first laid a very light base coat on the panel. This is old school, mainly for one part paints. You dust the panel and let that "tack' dry. This coat will help subsequent coats to lay better without running. With primer you couldn't get a run if you tried...it dries that fast! I show you this technique in case you spray enamel or lacquer.


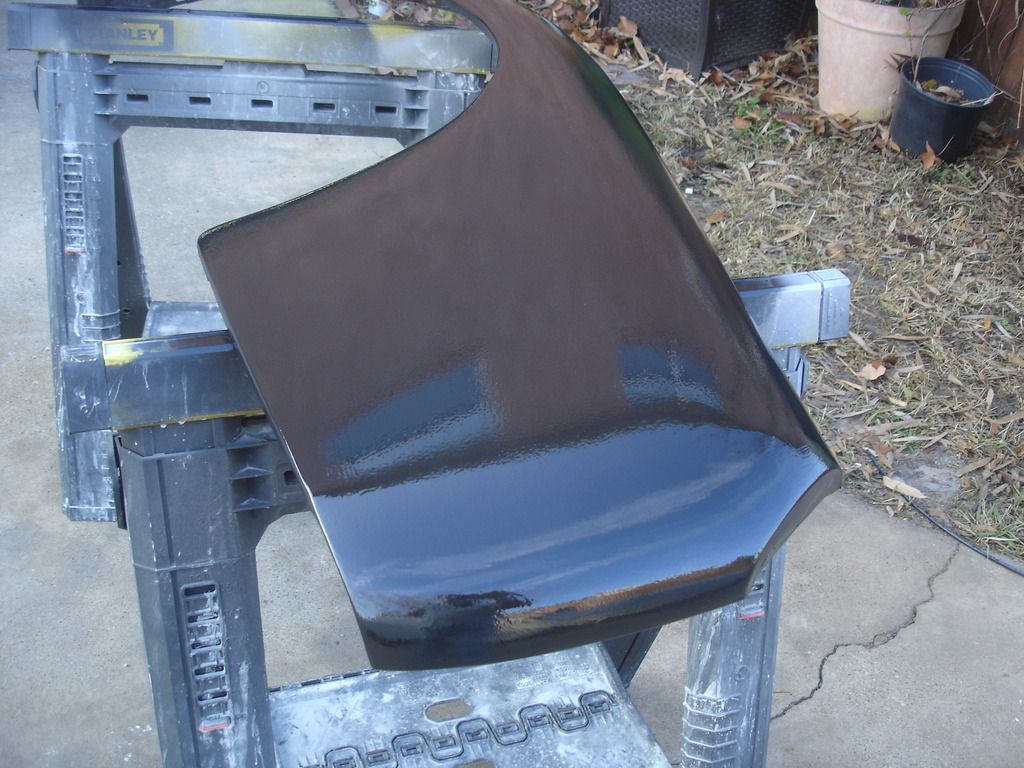
This is the wet coat. By controlling the paint flow AND the speed you move the gun, you want the paint to lay down wet, so it flows into subsequent lines. If too light, you get orange peal. Too thick, it will run. You have accomplished something if you lay enough to run primer, though!?! But, practice laying a good wet coat with primer, so when it comes time for the top coat you can get a nice layer without orange peal OR runs and sags.


You can use the disposable cup at any angle you want. As the paint leaves, the cup collapses, so no air gets sucked into the spray. It's awesome!

Cleaning:


When you are done, remove the air hose. And turn the gun upside down. Pull the trigger and the paint in the gun will flow back into the cup. You can then remove the cup. Plug the cup and put it in the refrigerator if it still has pot life AND you plan to spray with it later.

Once the cup is off, turn the gun upright and reconnect the air hose. Spray the last of the paint out. Now remove the hose and take the gun to the cleaning table.


If the gun has been used a while, there will be a film of dried paint in it. I fill the adapter with thinner and spray it out by pulling the trigger with the air attached. I repeat until the thinner comes out clear.


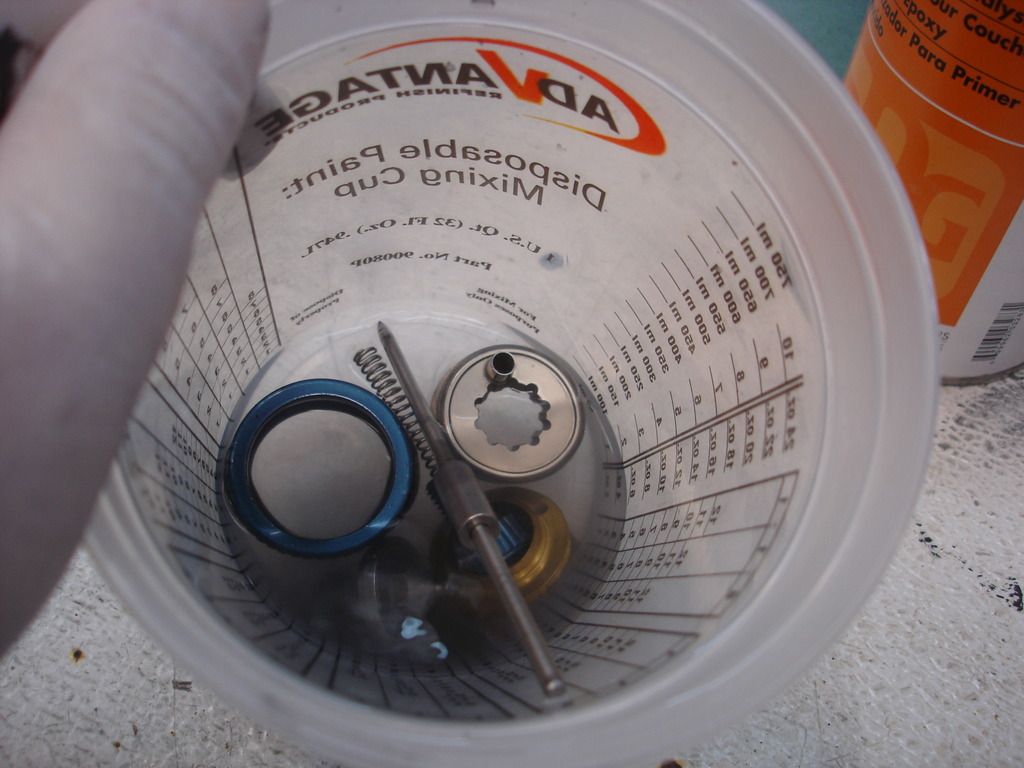
Now fill a "free" cup with about an inch of thinner. We will take the gun apart and let the parts soak in this for a minute.


Shake the parts around for a while...


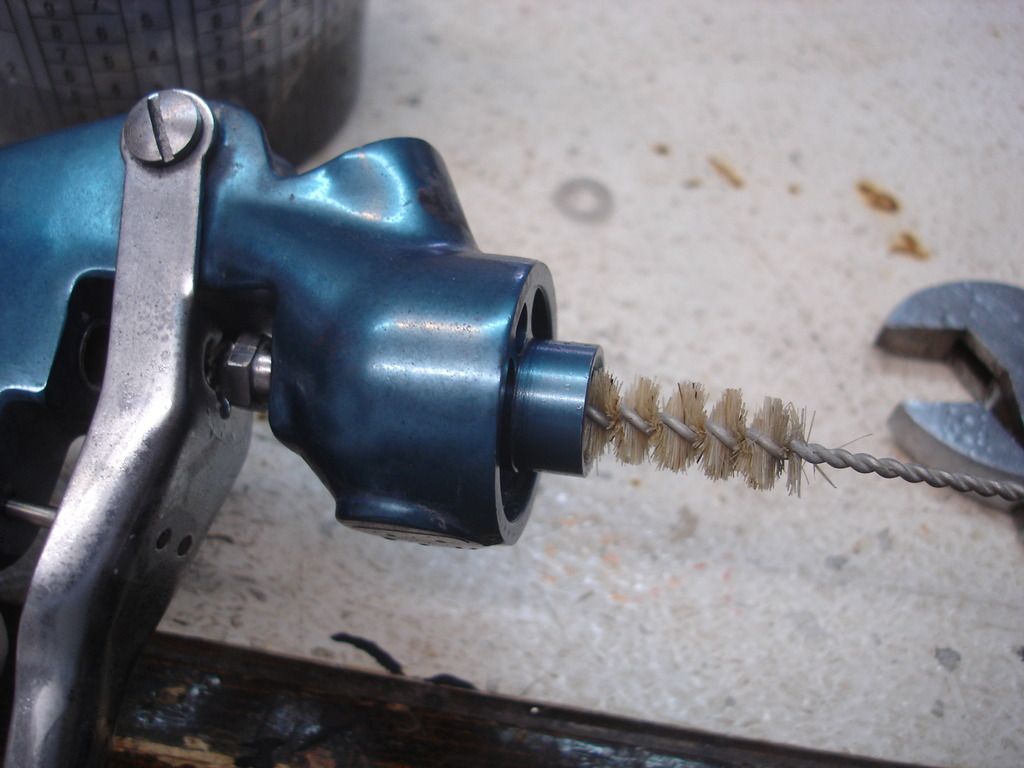
Anywhere the paint was, scrub it with a brush and thinner.


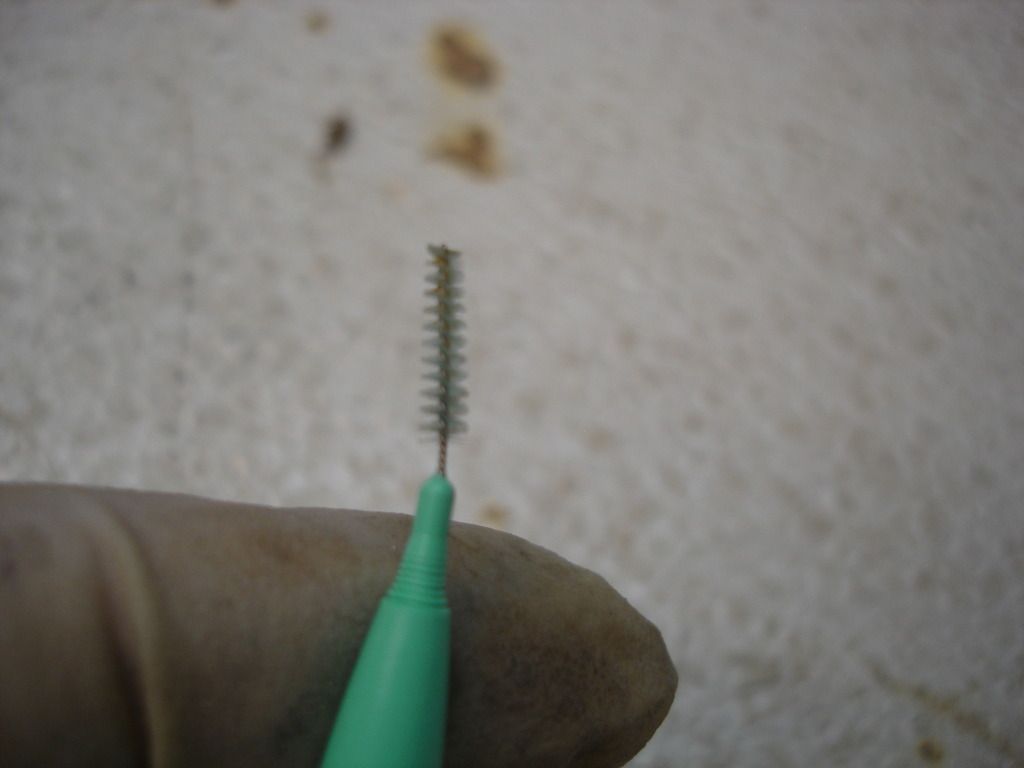
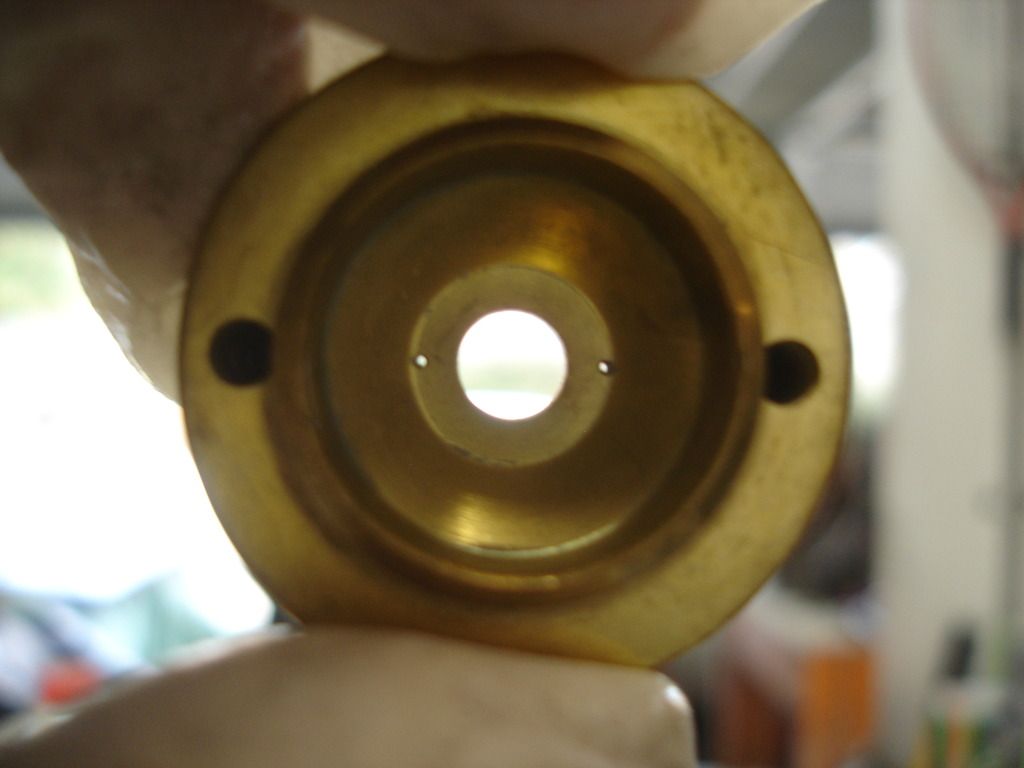
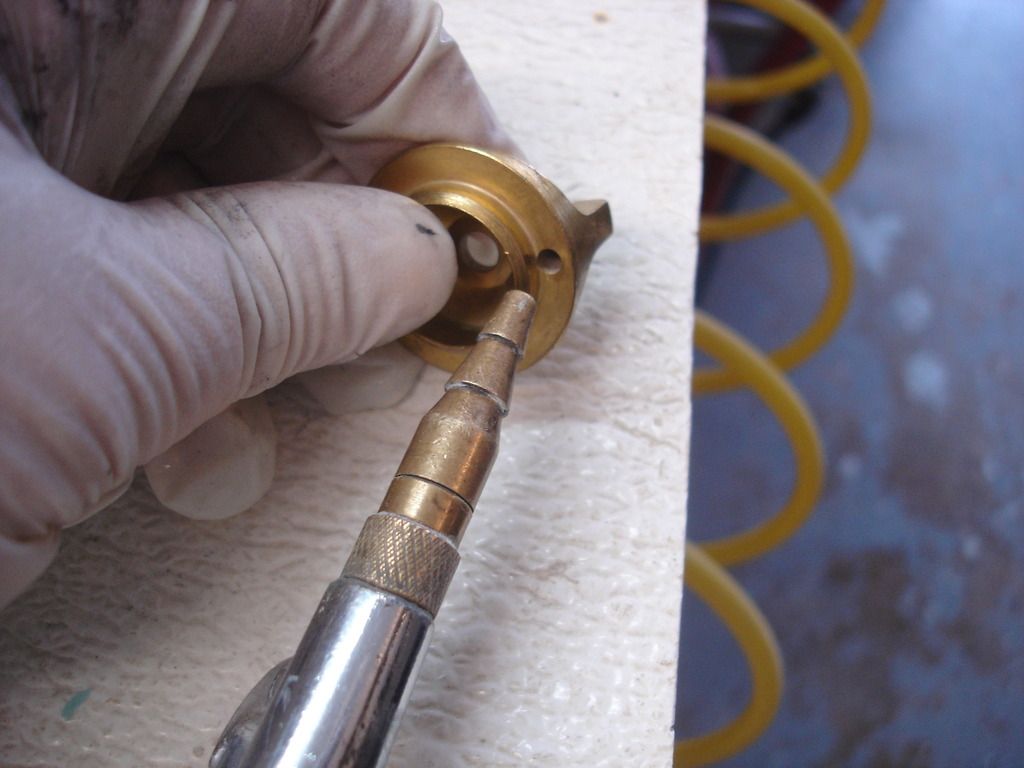
Notice how small the fan nozzle air holes are! Be sure they are all unplugged, or next time you will cuss up a storm until you figure out what's wrong. Been there. Done that.


Everything goes back together, although I leave the adjustments loose to prevent stressing the springs for long periods. Just me. The goal of cleaning is to leave your equipment cleaner when you're done than when you started.

One note: By using disposable cups, the cleaning is reduced to about 5 minutes. The cups go in the trash can. If you have a hard cup, add another 15 minutes plus, with a ton of sticky rags.

That's the basics! Like I said, I am far from a professional, and I only impart what I have learned from far better painters over the decades. Please...anyone with other techniques let everyone know.

Hopefully next installment will show some primed panels!
 
Last edited:
Hey Dan, the type paint really has no factor. The viscosity is usually less for one part paints, so a small tip would be in order. Other than that, the technique is about the same. The main difference is in dry time and time before re-spraying. A one part paint dries slower, so it takes more time before you can sand or respray on top of it. Even one-part paints have spec sheets...so all the info you need will be on it. But the spraying is the same for any paint. A decent gun will spray any paint you need to.

If you have any one-part left over, it can go back in the can. That's always a bonus! For 2 part paint, once it is mixed it has a short life. Putting it in the refrigerator to lower it's temp extends the pot life...but only marginally. In most cases left over 2 part is going in the garbage. I counter that by lining up yard equipment and such that can use a bit of paint!?!
 
Last edited:
John, et all
Going back to the TR2 fender bead. I got my 23' vinyl "D" profile bead/Piping from Moss (part no. 249-738). I will be getting a 2 x 8 x 6' piece of wood and ripping several 1/2" cuts the length of the board. I will measure each piece of bead and place in the slots so that approx. 3/8" of "tang" and the "D" head are exposed and paint the body color with plasticizers. Since I plan to do the final exterior paint with the bolt on panels loosely attached I will place the bead into the gaps (after final buffing of the panels) and then snug everything up.

That sounds like a great idea. Be sure to fill us all in on the results. I will be posting a pic of the British bought beading on the beading thread, so be sure to post a pic of the Moss for comparison...so we can see any difference...
 
Excellent write up John.

Cheers
Tush
 
That sounds like a great idea. Be sure to fill us all in on the results. I will be posting a pic of the British bought beading on the beading thread, so be sure to post a pic of the Moss for comparison...so we can see any difference...
​John---I went to the Woolies site and looked at their fender bead. It appears to have the very same profile and specifications as the Moss bead. Only difference seems to be Cost and Woolies comes in white and black where the Moss product is a light grey only. Same width, height, tang, etc.


Take a look on the "Fender bead" thread on the Triumph Forum and see photo of Moss product.

 
Hello John
A lot of great info in this thread. I will have to keep this handy when I get to this point.

Trying to find the FinishLine FLG3 kit that you are using it seems that it is not available now. There is a FLG4. Do you know if that is a similar gun?

David
 
Hey Tush, I thought I'd run the paint "how to" , as there always seems to be a lot of questions about painting on the forum. I know you have a lot of experience to share too!

Ad...still waiting for the beading from Woolies. I ordered it 3 days before my Rimmer Bros order, and I got the Rimmer in the mail yesterday. So any time now...

David, I looked at the FLG4 on the DeBilviss site, and it looks like it is the follow-on gun that replaced mine. Mine is over 5 years old, so I am sure the new gun is better. I don't see any significant differences in the pics...but then pretty much all guns today are set up the same. DeBilviss makes a decent mid range gun, which for must of us hobbiests is as good as we'll ever need!

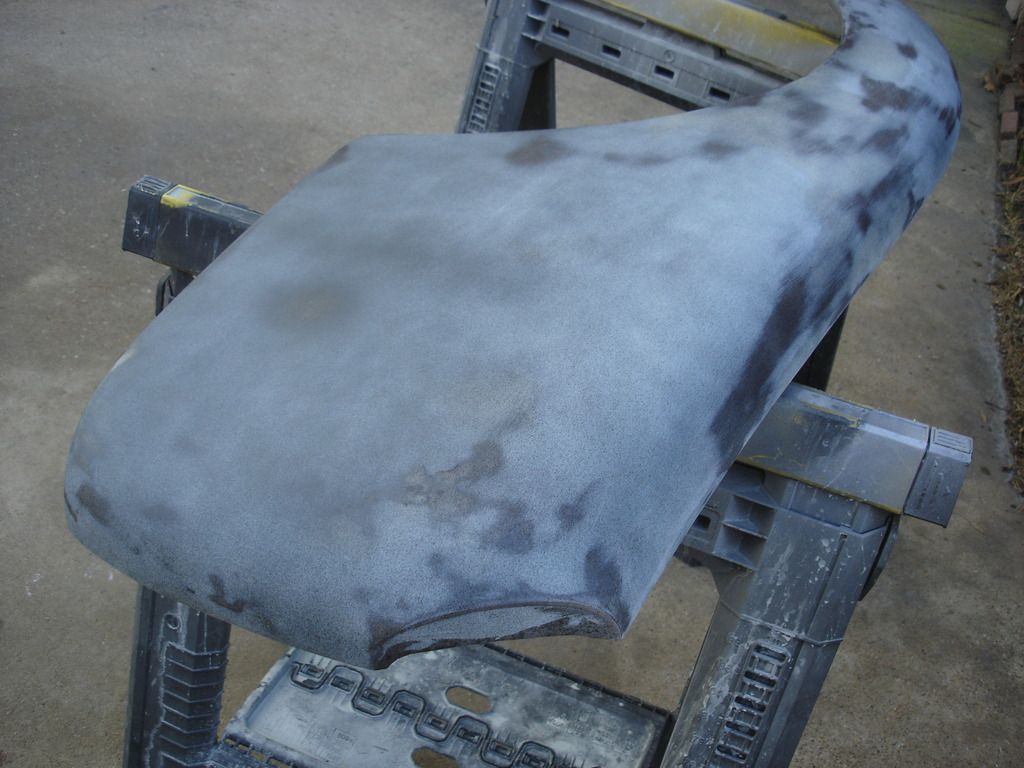
I've been making lots of messes this week, but the paint is slowly coming together. I rushed the first epoxy spray, so when I flipped over the panels to do the back side...the first side stuck to the towels I laid them on. Bummer! I just stopped the operation...waited a week to re-sand the parts that stuck, and had to respray. Sad to say I was slow to realize the mess-up, so most of the panels had to be re-sprayed!?! I lost a week to that mishap.

Then, yesterday things were going so well that I figured I could spray the bottom parts of the tub before the rain set in. Nope! It drizzled for a mere 5 minutes. If it drizzled 10 minutes earlier, I could have stopped and called it off...10 minutes later and the spraying would have been done. But, it rained at the absolute worst time...so that will have to be resprayed too. Double Bummer! That's part of the game, though, when you don't have access to a paint booth...
 
Hello John.

Thank you. Have to get one on order.

Why did you paint the outside of the panels first?

How are you holding the Tub to spray the bottom? I was thinking of putting mine back on my roll around stand.

David
 
I'll post the pics later this week. You'll cringe when you see how I manipulate the tub solo...but it works. I would definitely use your rotary if you have one! What I did so far is seal the panels with black epoxy primer. Within the "recoat time" of 1 week on the spec sheet, I sprayed dark grey primer on the outside of the panels, and the finish coat of 1 stage urethane green on the insides. I did the outside first, so the overspray from the primer would not get on the finished insides. The inside of panels are, hopefully, finished now.

The outsides will wait until final assembly, and I will block (wet sand with a long sanding block) those panels as a finished car. For all future sprays on the outside, I will have to mask the inside to prevent overspray.

This is not necessarily the "best" way...there are many options for the order you do all this. In fact, if you have a decent rotary body holder, you may want to do it like Standard did. They assembled the entire body and painted it as a unit. The down side of the way they did it is that they had no paint under the panels where they bolted together. So, it would probably be best to prime the panels apart, but then spray the final with the panels together.

On my last TR I painted the panels individually, and only assembled them after they were completely painted. The advantage of doing it that way is I only had to deal with small paint jobs at a time. Small jobs are usually easier to do well than a single huge job. You have to really plan out a large job for it all to line up.
 
Awesome body work Thread!!!

Anyone try the rear panel for Triumph TR2-3 parts from Germany?

https://www.bastuck.de/content.php?id=1154

KA13TR3_500.jpg
 
Back
Top