• Hey there Guest!
    If you enjoy BCF and find our forum a useful resource, if you appreciate not having ads pop up all over the place and you want to ensure we can stay online - Please consider supporting with an "optional" low-cost annual subscription.
    **Upgrade Now**
    (PS: Subscribers don't see this UGLY banner)
Tips
Tips

TR2/3/3A TR3 Front Fender Washers?

luke44

Jedi Warrior
Silver
Country flag
Offline
Question for the group. I'm putting on my front fenders, and I looked at a bunch of photos I took at TRA 2010. Pretty obvious the rear most 2 flat washers are bigger than the rest (a lot of cars had this) but I can't determine is there should be a lock washer or not. Common sense tells me yes, but I don't seem to see any. So, what say ye? Lockwashers or Loctite?? Thanks in advance, Bruce

8973190368_9a669f3550_b.jpg


8973190906_6a5f31f1c6_h.jpg


8971997473_dcee1303e4_h.jpg
 

M_Pied_Lourd

Darth Vader
Country flag
Offline
Hi Bruce, Thanks for posting this. I was not aware that the washers were bigger at the first two locations. I bought my fender kits from Macy's and I don't believe they have larger washers in them. Cheers David
 

CJD

Yoda
Country flag
Offline
No lockwashers, and after the struggle I had removing mine, I wouldn't personally use any locktite. Those caged nuts spin pretty easily...
 

mallard

Luke Skywalker
Country flag
Offline
Again no lock washers, or threadlocker. On my TR6 I found some mylar washers that I put under the heads of the bolts so they would not grab the paint. 8 years later no loose bolts. Instead of mylar washers I now make my own out of some old clear blister pack, and punch them out with hole punches I got from HF. The washers also work great under the Lift a Dot studs on the paint and capping. One thing I did notice from all the pictures is that no one is putting the packing back into the corners next to the wiper motor. My TR6 and TR3 had what looked like a glob of bondo pushed into the opening to prevent water from running in.
 

martx-5

Yoda
Country flag
Offline
I agree with NO LOCTITE... as a matter of fact, when i did my resto, every bolt and screw that went into a caged nut got anti-seize smeared on them. I've had the apron off once since, and was glad I used the anti-seize.
 

MDCanaday

Jedi Knight
Offline
The rear most hole is often found to be reamed or slotted out from the factory(or some latter effort?)
in any case the quick fix is the larger washer.Anti seize is a hot lick unless you want to do as original and let it rust solid
as it comes over on the boat!!
MD(mad dog)
 
OP
luke44

luke44

Jedi Warrior
Silver
Country flag
Offline
The rear most hole is often found to be reamed or slotted out from the factory(or some latter effort?)
in any case the quick fix is the larger washer....MD(mad dog)

Can't say for sure. Mine are not reamed. Some of the photos I took above were previous TRA winners and my guess is they had a choice and went this route but not as a quick fix. When you are that far into a resto it isn't that much extra work to fix an elongated hole. As well, I have noted the larger washers on the back 2 positions in other TR3 books. So maybe that was why they did it, but I'm fairly confident they did do it.
 

HerronScott

Darth Vader
Offline
Does the SPC help at all? They show the following attaching the front fender?

FRONT WING ASSEMBLY, L.H.1900461
Screw, front apron to front wing12HU0706/P
Washer, plain, on screw12WM.0057
Screw, front wing to "A" post12HU0705/P
Washer, plain, on screw12WM.0057
Screw, front wing to sill6HU0705/P
Washer, plain, on screw6WP.0023
Screw, front wing to scuttle panel2HU0706/P
Washer, plain, on screw2WM.0057

WM.0057 are washer, plain, medium with ID 1/4" and OD .75" x .065".

WP.0023 are washer, plain, light with ID 1/4" and OD 1/2".

Scott
 

charleyf

Luke Skywalker
Country flag
Offline
Here is what I found regarding the rear washer of the front fender. The Triumph Factory realized that the last hole did not get covered up by the normal sized washer, so they put a larger washer in that spot. However, I happen to have TR3B and it did not have the larger washer in that spot. This happened to be mentioned by a know-it-all at a concours during judging of MY car. So I undertook an explanation and what I found was the above story but with this twist. Because the TR3B's were not assembled by the Triumph Factory ( they were building TR4's by that time) but rather by the Forward Radiator Company who did not know about the larger last washer. The result was that TR3B's did not get the larger washer treatment.
Intead of any locktite I would recommend that you use anti-sieze on each of these fender bolts. That is what I now use after disassebling a few cars.
Charley :encouragement:
 

Geo Hahn

Yoda
Country flag
Offline
...TR3B and it did not have the larger washer in that spot. This happened to be mentioned by a know-it-all at a concours during judging of MY car...

Interesting detail. I try to be no more than a 'know-it-some' as I have not seen every TR built.

Bruce -- another for you collection. Probably original insofar as those bolts have not moved since Coventry.

WingWashers_zpsdaad00de.jpg
 

Bruce100

Jedi Trainee
Offline
If I can ask you all, what do you do as far as painting the bolts and Fender Washers? Before, after? How do you prevent damage if before when installing?
 
OP
luke44

luke44

Jedi Warrior
Silver
Country flag
Offline
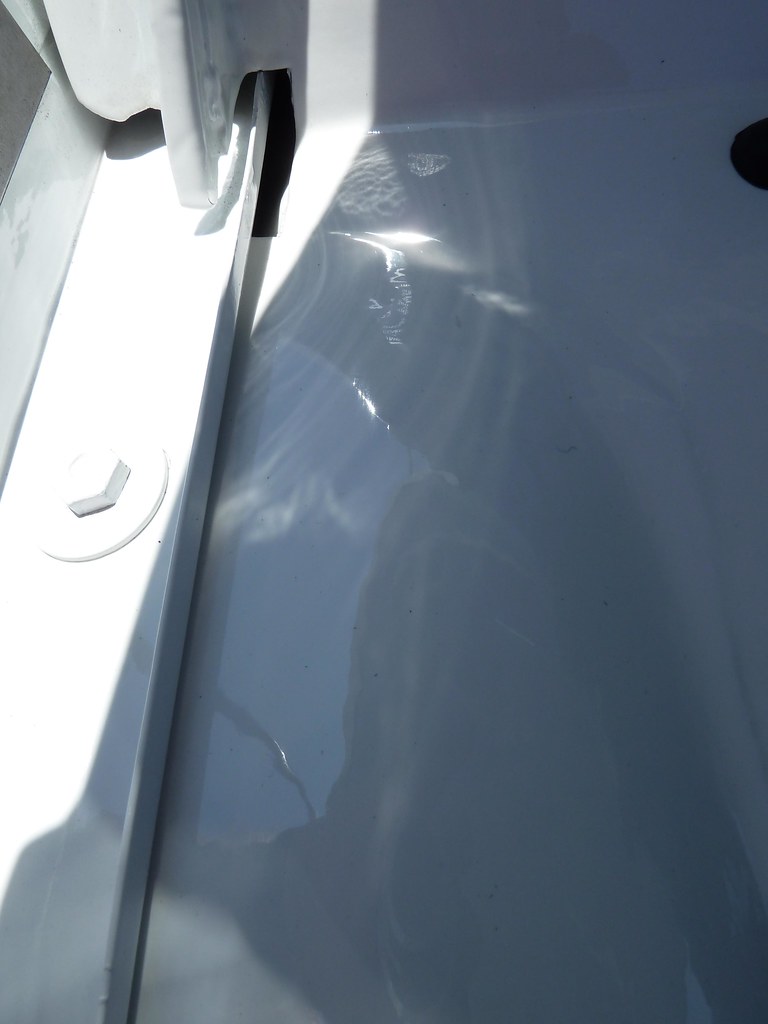
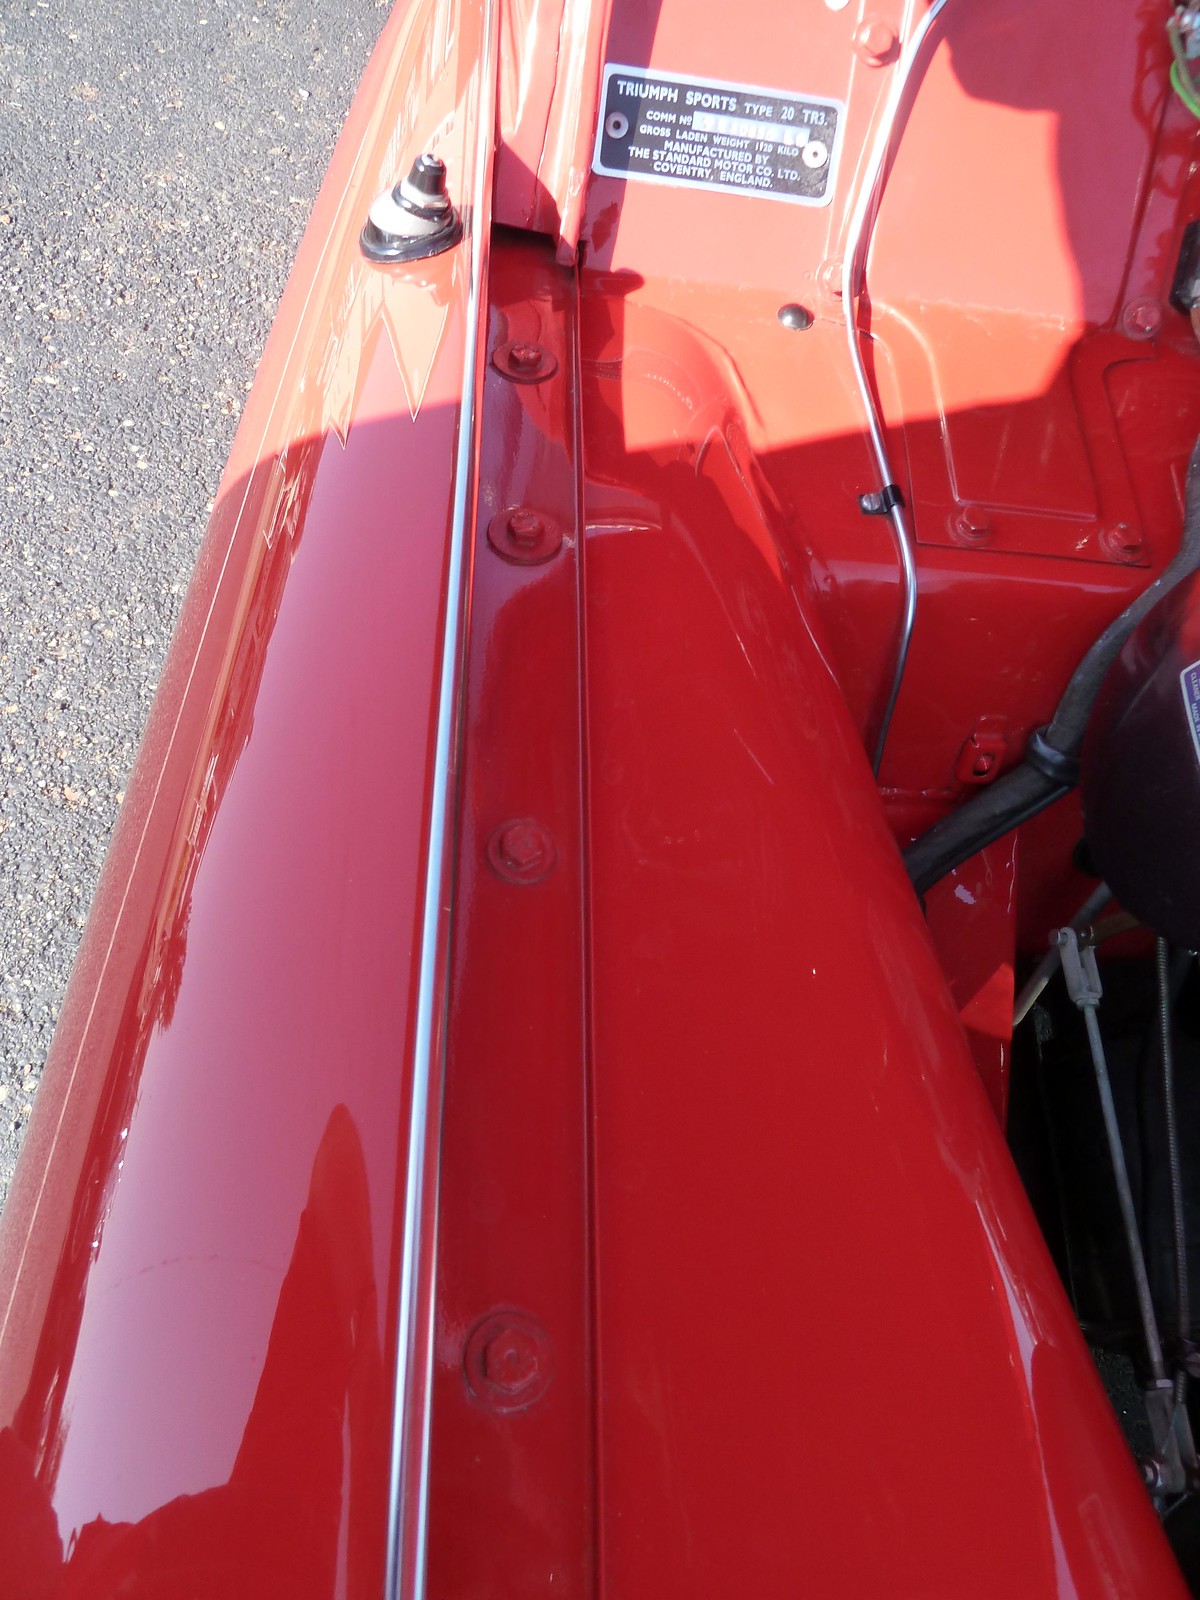
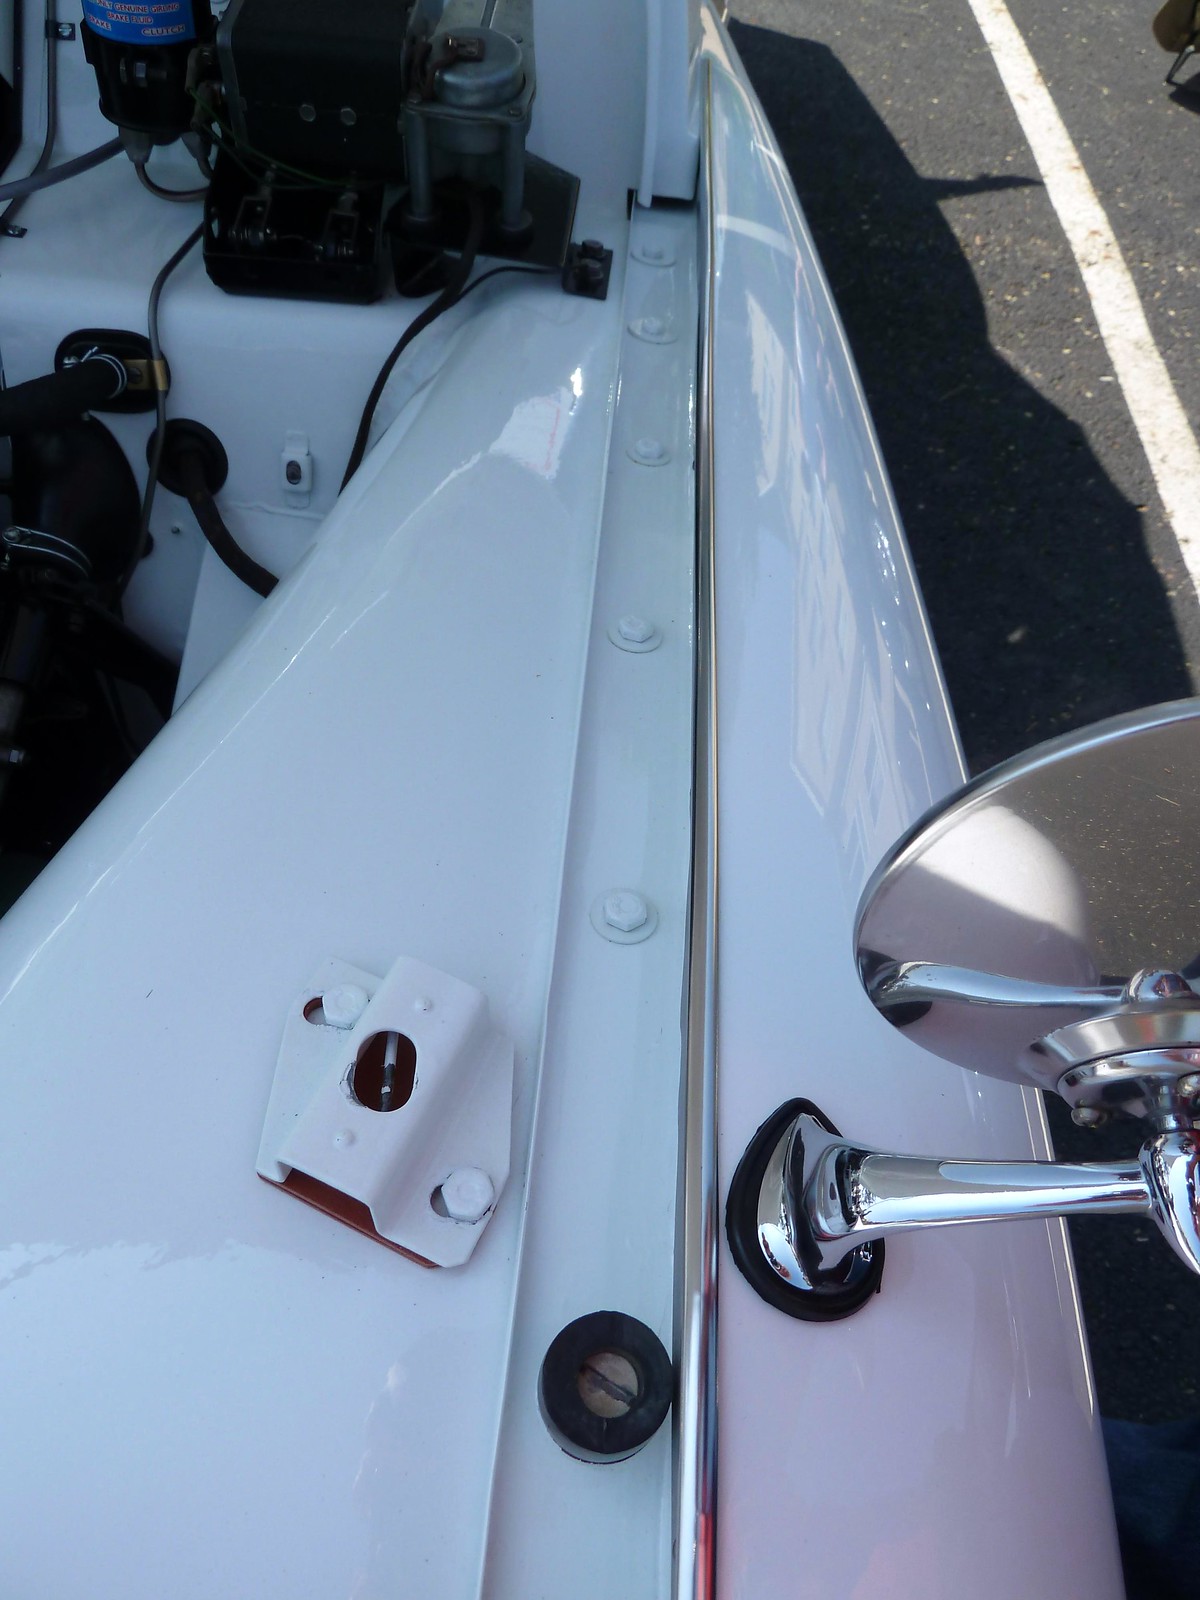
Interesting. Based on George's photo which matches my research it is the last 2. This of course does not match up with Charlies comments where he indicates it was only the back one, or the one white car I posted earlier that had 3. One thing that does seem consistent is no lockwashers.

Bruce 100 - good question - a tough detail. Being as we are not an assembly line, we all do not have the luxury of doing it in the order the factory did. While there is always more than one way to skin this cat, what I did was I painted my bolts and washers off the car - set them up by poking small holes in a piece of semi rigid cardboard for the bolts to pass through to head height, and using old nuts as pedestals for the washers to sit on. I got a pro spray can from the body shop that was a perfect color match for the car. Then I did my first batch - with primer, base, and clear coats as per how the shop painted the car (yeah yeah, I know - it's not single stage paint like the original). Anyway, I was not happy with the result as the definition and markings of the original bolt heads got lost. So I stripped them and did them over this time with real light dusting of primer and then the lighter base/clear which I was happy with. I've since ended up using the spray bomb for all sorts of little pieces that have come up.

To instal, the first step is be sure they are well cured - I left mine several weeks so the paint got hard. Then I used plastic wrenches and a socket inserts that I sourced from Bojo. This eliminates all but the very smallest paint chips which I touched up with a really fine brush.
https://www.bojodownloads.com/downloads/BrochureSocketInsertsandWrenches.pdf

And of course, in the end we have to also remember it's all personal taste. I've also seen lots of cars with unpainted new hardware/bolts. I personally like the look of that approach too.
 

mallard

Luke Skywalker
Country flag
Offline
When I put mine together I used an extra set of hardware to install all the body panels. You can get them cheap from McMasters Carr, I order 100 count boxes of bolts and washers, under $20.00. That way you can make all the needed adjustments to the panels without damaging any of the paint on the bolts. I put some masking tape under the washers so I would not mare the paint making all the adjustments. I did like Bruce did to paint the bolts but I used some old window screen instead. For the washers I wired each one with a very thin solid wire in sequence so I could get both sides. My paint cured for at least 4 months before they were used, and some still have not been used. To screw all the bolts down I used a good quality 6 point nut driver with great success. Yes this can be very time consuming but in the end you'll like the results.
 

martx-5

Yoda
Country flag
Offline
...

And of course, in the end we have to also remember it's all personal taste. I've also seen lots of cars with unpainted new hardware/bolts. I personally like the look of that approach too.

So true. I opted for the unpainted look. I have so many other modifications, that any concours judging would have my car owing points.
 

HerronScott

Darth Vader
Offline
Bruce,

I'm pretty sure that these fenders have not been off the car so this should be original with the back 2 washers being larger and no lock washers. You can see the original Silverstone Grey trying to escape. Car has not been on the road since 1975 so that's antique rust!

Scott


charleyf

Luke Skywalker
Country flag
Offline
I surely will not defend the story that I was told about the one last washer being larger. It seems that some of you have shown proof that there might have been two at times . I do know that when working on TR3's I have noticed that the last hole seems to have a bad fit where a larger washer is needed to cover up the hole. The other part of my story was that the TR3B's apparently did not have any larger washers.
As to how to treat the paint on the bolts and washers, I have used a piece of cardboard and stuck the bolts on it and also painted the washers separately before assembly.
I understand that originally the cars were assembled and then painted. Which is why you see the paint running over the edge of the bolts and washers.
Charley :encouragement:
 

TexasKnucklehead

Jedi Knight
Country flag
Offline
I understand that originally the cars were assembled and then painted. Which is why you see the paint running over the edge of the bolts and washers.

But that makes me wonder how they got the beading in place, without damaging the paint on the bolts or screws in the trunk.
 
OP
luke44

luke44

Jedi Warrior
Silver
Country flag
Offline
But that makes me wonder how they got the beading in place, without damaging the paint on the bolts or screws in the trunk.

Good question. I guess you could install the beading after the fender is loosely bolted in place, but it's a lot easier to install at the same time as the fender is bolted up.


9094936778_05c1afa089_b.jpg
 

charleyf

Luke Skywalker
Country flag
Offline
The front fender washers that we are discussing would not affect the fender bead installation. The bolts that need to be tightened would be those underneath the front fender. So it is very likely that they did pull those bolts down tight and then leave the underside /apron bolts loose. This would also allow for separation of the two body pieces to make sure that paint did not bridge the two pieces. In the trunk they would have had to leave the screws loose for the beading installation.

We do a lot of guessing on these cars.
Charley :encouragement:
 
Similar threads
Thread starter Title Forum Replies Date
S TR2/3/3A tr3 front fender Triumph 4
luke44 TR2/3/3A TR3 Rear Fender Alignment at Front Edge Triumph 8
mountainman TR2/3/3A TR3 Front Fender Bead Triumph 2
mountainman TR2/3/3A TR3 Front Fender Alignment Triumph 5
mctriumph For Sale front apron 57 Tr3 Triumph Classifieds 0
vpanza Wanted TR3 FRONT backplates needed Triumph Classifieds 2
G For Sale NEW PHOTOS: Triumph TR3 Chassis Frame + Front Suspension, Fits TR2,TR3,TR3A,TR3B Triumph Classifieds 1
K TR2/3/3A TR3 front air vents mounted under the grill...seen on race cars for better air flow to radiator. Triumph 1
T TR2/3/3A Photo of front TR3 carb linkage Triumph 11
K For Sale TR3 front passenger side fiberglass floor panel.....$100 CAD OBO plus shipping. Triumph Classifieds 3
T TR2/3/3A tr3 front carpet replacement Triumph 5
S For Sale TR3 front nose,trunk & petronix distributor Triumph Classifieds 0
B TR2/3/3A 'A' type Front calipers, TR3 vendor??? Triumph 7
S TR2/3/3A tr3 front apron body work Triumph 9
jfarris TR2/3/3A Front Sway Bar on a 56 TR3 Triumph 13
F Wanted TR3 Front Float Bowl Lid SU H6 Triumph Classifieds 6
T TR2/3/3A Pictures of my TR3 with over riders on front Triumph 14
toysrrus TR2/3/3A "WANTED": TR3 Small Mouth Front Apron Medallian Triumph 14
B TR2/3/3A TR3 Front Hub Felt Seal questions Triumph 2
Got_All_4 TR2/3/3A Tr3 front suspension re-bush, what's good out there Triumph 15
sqbsprite TR6 Do the TR3-6 front spring pans interchange? Triumph 6
G TR2/3/3A Front Sway Bar Installation on Wide Mouth 61 TR3 Installation Problem? Triumph 9
charleyf TR2/3/3A Front wheel bearing--inner tr3 Triumph 4
Tinkerman TR2/3/3A 1960 tr3 a petrol tank front millboard question Triumph 6
BillyB62 TR2/3/3A TR3 front end shake Triumph 24
BillyB62 TR2/3/3A TR3 Ball joints & front end Triumph 5
mgbmedic TR2/3/3A Modern Seal for Front Wheel Bearings TR3 Triumph 8
T TR2/3/3A Vent hole in lower front valance of TR3? Triumph 7
mgedit TR2/3/3A TR3 Front Banjo Connectors Triumph 2
mgedit TR2/3/3A TR3 Front Banjo Connectors Triumph 7
T TR2/3/3A TR3 front license plate Triumph 4
mgedit TR2/3/3A Front Drum Brakes 56 TR3 Triumph 2
PatGalvin TR2/3/3A TR3 Engine Front Sealing Block, Oil Pan Screw Size and Thread Pitch? Triumph 11
BillyB62 TR2/3/3A Front Float Cover Lid for TR3 H6 Carb Triumph 10
AHS TR2/3/3A Which way does the TR3 front crankshaft oil seal face? Triumph 8
Kleykamp TR2/3/3A TR3 Front Emblem??? Triumph 7
Scotsman TR2/3/3A tr3 front wheel hub stud removal Triumph 2
Tr3aguy TR2/3/3A TR3 Front suspension breakdown..Help Triumph 2
JFeher TR2/3/3A TR3 Type "A" front brake caliper rebuilding Triumph 17
AEW TR2/3/3A TR3 engine front cover repair Triumph 10
O TR2/3/3A TR3 front End Alignment Triumph 8
B TR2/3/3A Fitting the front wing 57 TR3 Triumph 2
B TR2/3/3A Installing front fenders on TR3 from TRF Triumph 12
Kleykamp TR2/3/3A TR3 Front Suspension rebuild????? Triumph 12
C TR2/3/3A Where to buy front calipers for an early[57] TR3? Triumph 7
K TR2/3/3A Mounting TR3 Body to frame with front apron on? Triumph 4
S TR2/3/3A front bumper override tr3 Triumph 6
S TR2/3/3A tr3 front end alignment Triumph 9
O TR2/3/3A 1960 TR3 Front Brakes Triumph 2
B TR2/3/3A Tr3 removing front wings Triumph 8

Similar threads

Top