
-
 Hey Guest!
British Car Forum has been supporting enthusiasts for over 25 years by providing a great place to share our love for British cars. You can support our efforts by upgrading your membership for less than the dues of most car clubs. There are some perks with a member upgrade!**Upgrade Now**
(PS: Upgraded members don't see this banner, nor will you see the Google ads that appear on the site.)

Tips
- We have a special forum called "Member Articles" where you can submit actual articles for consideration for publication. Learn More
- Don't have an Avatar? If not, your avatar will default to the 1st character in your username. Go into "Account Details" to change your Avatar.
- Some basic forum navigation info: click
 Hey - did you know if you click on the title of a thread it will take you to the first unread post since you last visited that thread?
- Hey Guest - Is your British Car Club in our Clubs database? If not, send me a PM - Basil

- Looking for a local club? Click the "Clubs" tab above and browse hundreds of clubs world-wide.
- Add Android or iPhone APP: click
- Did you know - any picture or video you add in your posts in any marque-specific forum will also get added to the Media Gallery automatically.
- A few more tips about posting and replying: click
- Hey there Guest - be sure to keep your profile page up to date with interesting info about yourself: learn more
- More tips and tricks on Posting and Replying: click
 but were afraid to ask:
  STOP!! Never post your email address in open forums. Bots can "harvest" your email! If you must share your email use a Private Message or use the
  smilie in place of the real @
- Want to mention another member in a post & get their attention? WATCH THIS

- So, you created a "Group" here at BCF and would like to invite other members to join? Watch this!
- Hey Guest - A post a day keeps Basil from visiting you in the small hours and putting a bat up your nightdress!
- Hey Guest - do you know of an upcoming British car event?
 Pretty Please - add it to our Events forum(s) and add to the calendar! >> Here's How <<
- Hey Guest - you be stylin' Change the look and feel of the forum to fit your taste. Check it out
- If you run across an inappropriate post, for example a post that breaks our rules or looks like it might be spam, you can report the post to the moderators: Learn More
- If you would like to try some different "looks" or styles for the site, scroll to the very bottom, on the left and click the Style Selector.
You are using an out of date browser. It may not display this or other websites correctly.
You should upgrade or use an alternative browser.
You should upgrade or use an alternative browser.
TR2/3/3A TR3A Inner Sill Repair Question/Advice
- Thread starter M_Pied_Lourd
- Start date
OP
M_Pied_Lourd
Darth Vader
Offline
Eric,
I plan on coating to area that I will be welding to, and the back of the patch that I won't be able to access once everything is sealed up.
For areas that will not be seeing direct welding heat, I will be using a rust converter primer followed by a coat of paint before closing it up.
Cheers,
M. Pied Lourd

Offline
TR4nut said:TRMark said:I was taught the pulse weld technique by a friend who owns a body shop and does alot of restoration work. I was working for him on rustbucket Mustang. There is a video on this page that illustrates the technique. this There is alot of good info if you look around the site, including a fair amount about restorations.
Mark-
Thanks for bringing that link to life again- I had seen it before but had lost track of it. It is excellent. I'm quietly watching Pied's work here as I'll need to tackle similar issues later this year.
Randy
I post the link almost every time this type of thing comes up. Really good information, the video is great.
OP
M_Pied_Lourd
Darth Vader
Offline
Eric,
If you grind off the area to be welded and leave it as unprotected metal, (and it will be as you won't be able to go back and access it after the patch is complete), It will be prone to rust in the future.
Remember Eric, I am new to this as well and only know what I have been told/seen and read
Don't want to steer you in the right direction if my answers are wrong....I am sure that the experts on here will correct me if/when required.
Cheers,
David
ekamm
Jedi Warrior
Offline
That's what I expected to happen so hopefully some learned welders will comment. I understand the, you get one chance thing. My point was that since its hard to get inside the sill, that I might spray the whole thing with the converter. Then prep the metal to be welded , use the weld through primer on the soon to be interior portion of the sill. Then weld it up and paint the exposed portion before covering with the kick panel.
ekamm
Jedi Warrior
Offline
I finally got to work on mine to day. I really just started with cutting out the stuff that I know is going away. I'll work on cleaning up everything next. As far as I can see the sill and the floor/kickpanel pieces are separate. With the sill being a bit thicker material. I think that I am going to try and put it back in two pieces like it was. I purchased a flange tool at a local tool store, it works of of my air hammer. Because it is a small piece I think that I can use some angle as a brake and recreate the bends. I'll replace the inside of the sill and the bend a piece to attach to the floor and kick panel.
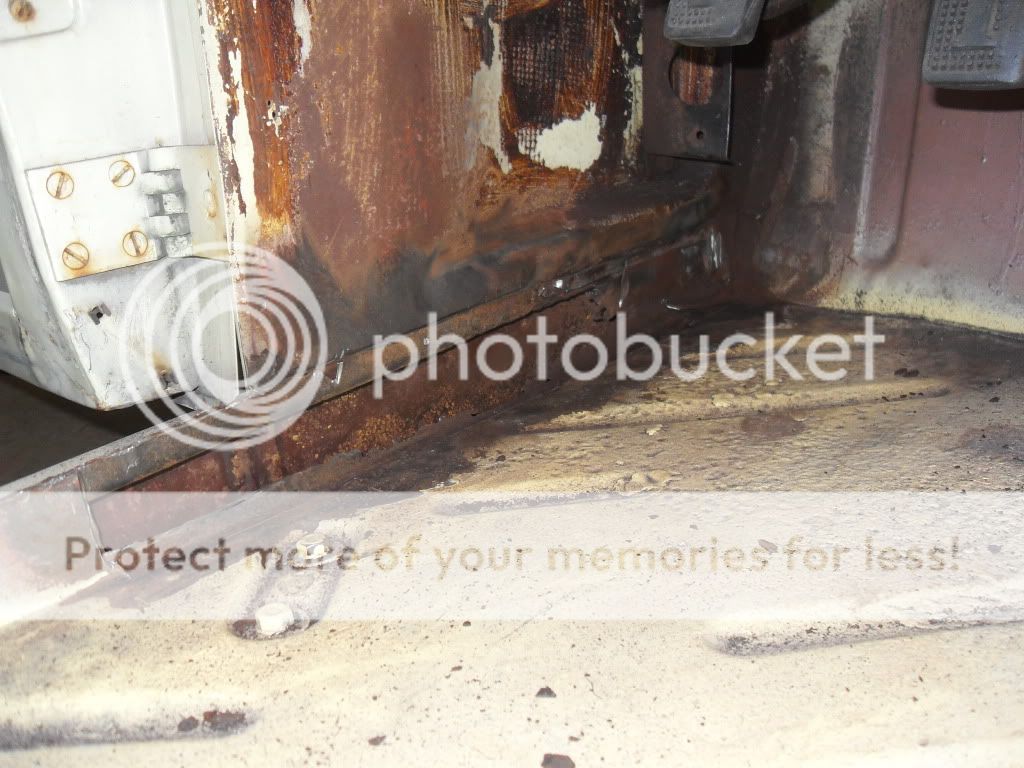
Oh and all the stuff on the side wall is just 50 year ol glue from the carpet.
Oh and all the stuff on the side wall is just 50 year ol glue from the carpet.
OP
M_Pied_Lourd
Darth Vader
Offline
Eric,
You and I are on the same page.
I am going to do everything that you suggest plus one other thing.
I am going to spray the rear inside of the sills with Waxoyl or Penetrol before I put the patch in while I have access. After the patch is done, I may drill a small hole in the sill at the bottom front to spray in waxoyl/penetrol under pressure.
Cheers,
David
OP
M_Pied_Lourd
Darth Vader
Offline
Hi Eric,
Nice pics. I didn't think that you were going to get into is so quickly.
Yes, there are two pieces. The sill is defiantely thicker and I used 16 guage. That is my first patch. The Second patch will be to add on the verticle edge of the floor that attaches to the sill. Looks to be about 18 guage
Cheers,
David
OP
M_Pied_Lourd
Darth Vader
Offline
GregW
Yoda
Offline
Instead of rivets or clecos, I use self drilling sheet metal screws. You can get wide truss heads that will help keep the metal from pulling out of shape. Once your done, simply unscrew it and weld up the hole. Use them sparingly. Available at Home Depot Oh, and don't weld too close to a magnet. Molten steel does weird things.PatGalvin said:Pop rivets or magnets work great to fit and hold patch panels during tack welding.

M_Pied_Lourd said:Eric,
If you grind off the area to be welded and leave it as unprotected metal, (and it will be as you won't be able to go back and access it after the patch is complete), It will be prone to rust in the future.
Remember Eric, I am new to this as well and only know what I have been told/seen and read
Don't want to steer you in the right direction if my answers are wrong....I am sure that the experts on here will correct me if/when required.
Cheers,
David
Tush has it right - primer the whole panel front and back being welded in place, as well as the metal you cleaned (and then cleaned again) that is going to take the weld. Most of the front side of the weld-through primer will be removed when you use your angle grinder but the back side won't be accessible and would otherwise be unprotected. Even a closed section will trap some amount of humidity and if not protected the metal will rust.
The UPol weld-through prime is nice stuff to work with, and I haven't had any problems with it.
M_Pied_Lourd said:Eric,
You and I are on the same page.
I am going to do everything that you suggest plus one other thing.
I am going to spray the rear inside of the sills with Waxoyl or Penetrol before I put the patch in while I have access. After the patch is done, I may drill a small hole in the sill at the bottom front to spray in waxoyl/penetrol under pressure.
Cheers,
David
You might want to spray afterwards unless you can keep the back side of the joint clean from the anti-rust cavity wax. Standard practice in the UK is to drill access holes for spraying. The weld won't like that stuff on the joint.
I've used the Eastwood Heavy Duty Anti-Rust cavity wax a bunch, and it makes a mess (likely a lack of skill on my part) and needs to be really warm to be sprayed, stinks for a while, but beats the heck out of the alternative which is what we're all dealing with now.
OP
M_Pied_Lourd
Darth Vader
Offline
Hi Skip,
The rear of the sill is no where near where I will be welding in the patch so I am confident about applying it there while I can. I will wait however as you suggest to spray the front of the cavity until the welding is complete. This will probably involve drilling a small hole in the sill for application purposes.
I am going to ckeck out the Eastwood product as I have had good success with their products in the past. Thanks for the tip.
Cheers,
M. Pied Lourd
M_Pied_Lourd said:The rear of the sill is no where near where I will be welding in the patch so I am confident about applying it there while I can.
You are good then, just wanted to make the point extra clearly since we have some folks diving in for the first time. Go guys, go!
Don Elliott
Obi Wan
Offline
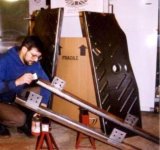
When I was restoring my 1958 TR3A from 1987 to 1990, I pre-painted everthing before closing and welding all the box sections. I even poured primer paint inside my new sills. When it was all welded together again, I touched up all the outer visible spots needing more protection and applied a spray of Wax-Oyl inside the inner sills, the outer sills and the rear box seation under the spare wheel well door.
Attachments
ekamm
Jedi Warrior
Offline
Dave I was fashioning a patch for the inner sill today and I really feel that the 22 gauge steel is a little thin. I think that the 22 is good for the floor and the piece that flashes up against the sill( really the same piece). I am going to look for some thing a little thicker, the problem being that the places that I have found to buy metal don't offer the widest size selection. What do you or anyone else think about that?
OP
M_Pied_Lourd
Darth Vader
Offline
Eric,
I think that the sill is more likely about 18 gauge. I was playing around with 16 gauge and it is most definately better than the 22. For the floor piece, I am going to cut a piece from my spare body tub floor.
Was working on another problem area ( I was aware of it) tonight at the rear of the car. Will post some pics later on and ask for some advice probably in another new thread.
Cheers,
Dave
GregW
Yoda
Offline
I think 22ga is too thin, not enough structural support in it. I've bought 20ga replacement floors for my Healey that flexed too much when installed. I wound up making my own out of 18ga.ekamm said:I think that the 22 is good for the floor and the piece that flashes up against the sill( really the same piece).
