
 Hey Guest!
OP
CJD
Yoda
Online
Now we're in the home stretch. Time to "wet sand" or "block" the car. This layer of primer is only the first. Even if everything goes perfectly, I am planning to need at least one more coat before we get to the final painting. Let's get started...

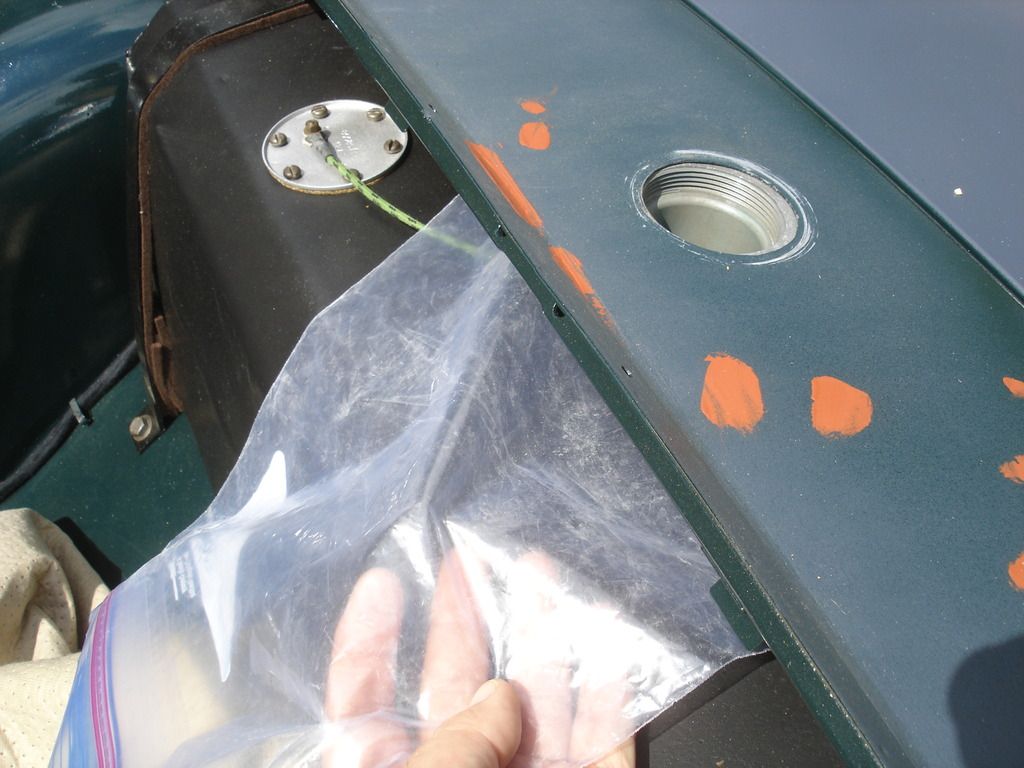
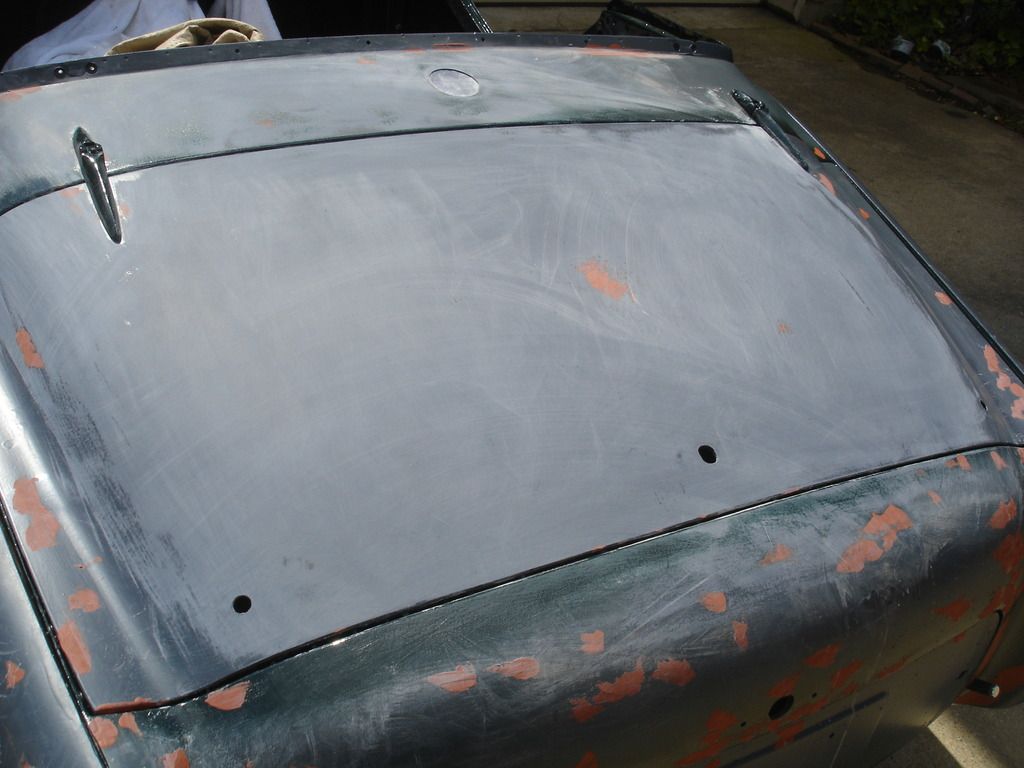
We are going to wet sand now, so anything that cannot get wet must be covered. I am placing plastic over the filler neck to keep water out. Other holes just get a towel under them, so the water won't spot my interior work.
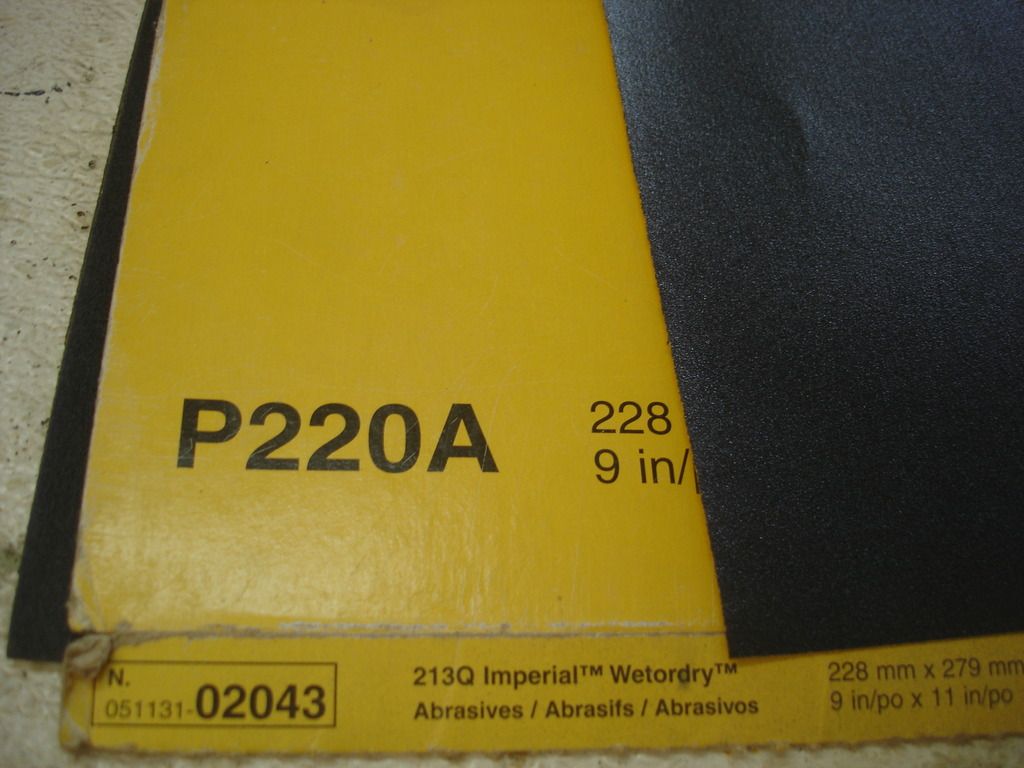
I know that I will need at least one more coat of primer after I sand this one, so I will use 220 grit wet or dry paper. 220 will not show under primer, but it will show sanding marks under finish color coats. I am using it now as it will speed the job immensely. For all subsequent primer layers we MAY be spraying color over them, so we will switch to 400 grit for them.
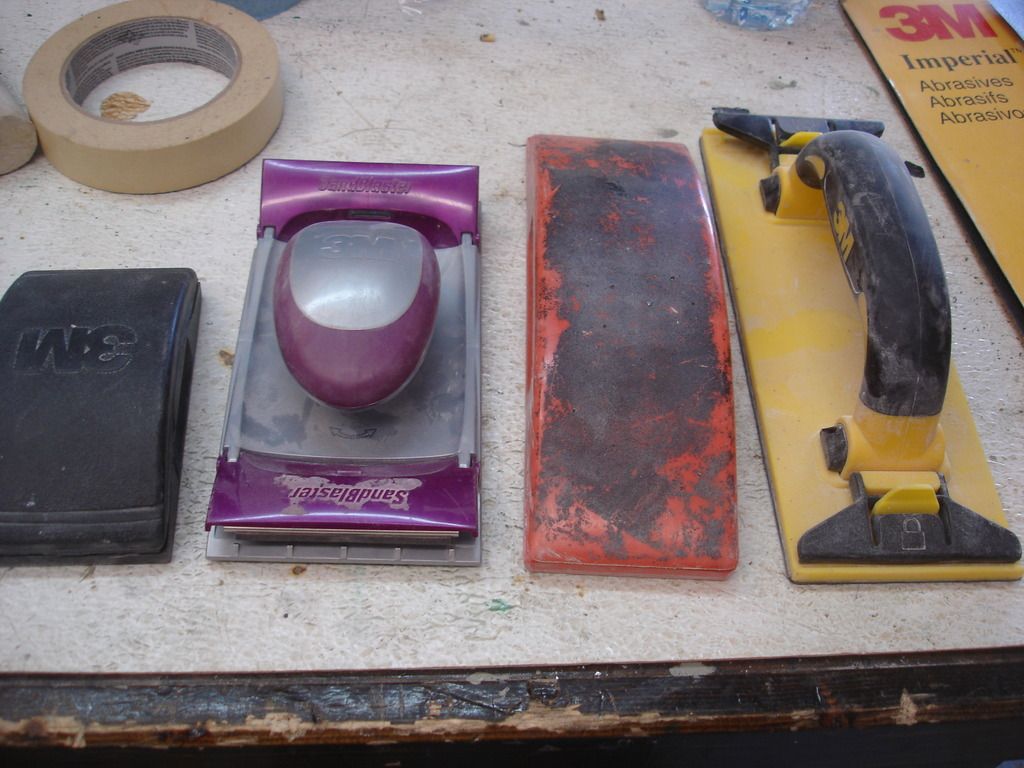
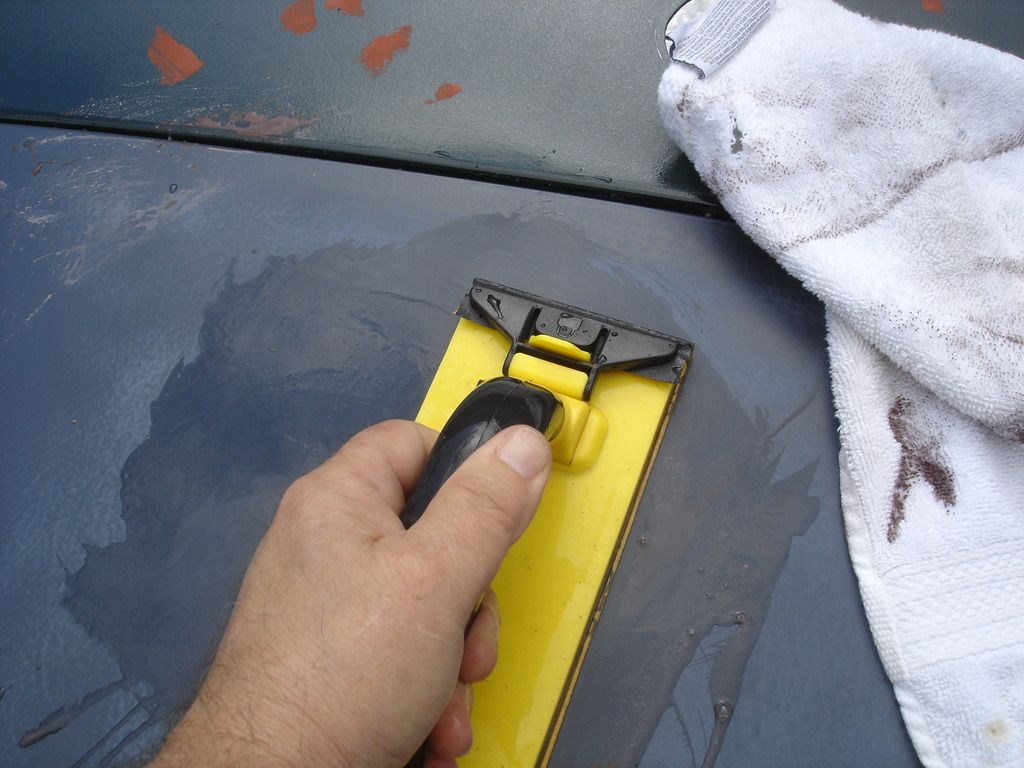
Organize your sanding blocks. You want the longest block you can use, for whatever area of the body you are working on. This is very important! Use the longest block you can! The blocks you see on the right use a full length of standard sand paper. The ones on the left used the same paper, only sliced short side instead of long. The shorter blocks are only for curved sections and areas too small to fit a long block.
Our goal from here is to make our large panels...doors, wings, boot lid and bonnet...as straight and smooth as a mirror. You do this by using the flattest, longest sanding block possible. Short blocks will result in waves on large panels. Long blocks cut the highs and straighten everything out.
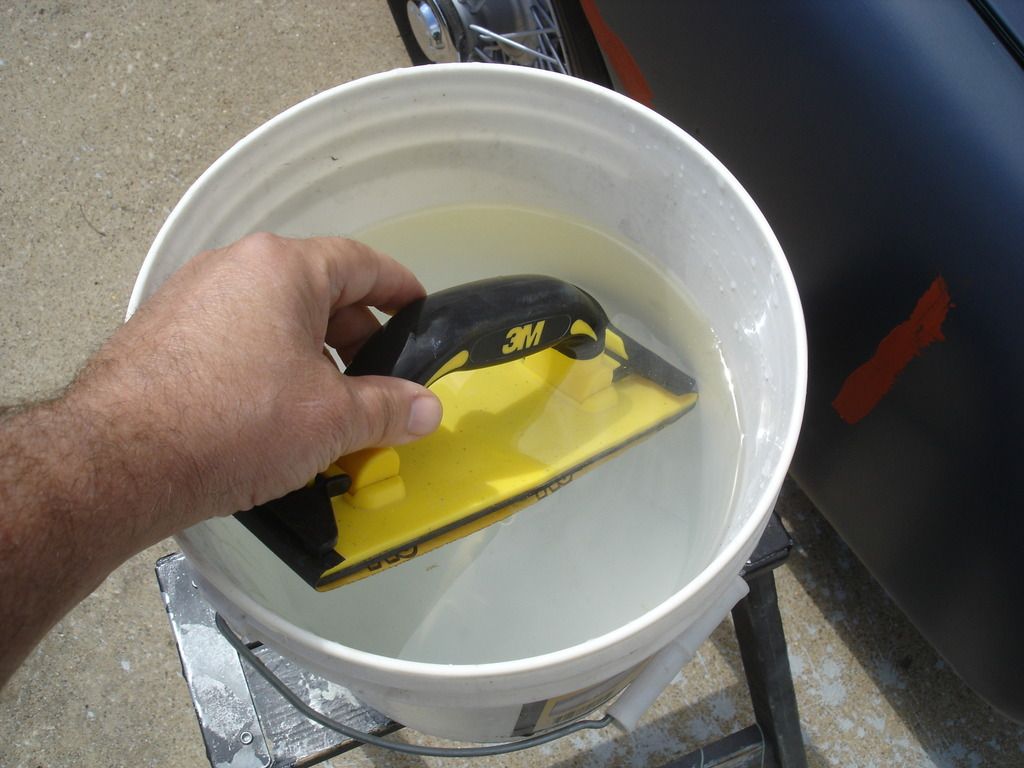
Now we fill a clean bucket with water. You can use a hose, and let water run over the area you are sanding...but that will get water everywhere. Since my interior has a lot of mechanical and electrical parts installed, I will minimize water use by using a bucket. Oh, if you do use a hose, cover the threads of the hose with tape to prevent scratching the paint when the hose end hits the car.

Now we sand! and sand!! and sand !!!
In general you want circular motions. On large panels, you can use back and forth, but only in the cars "lengthwise" direction. Going back and forth cuts grooves, but these are not noticeable if in the lengthwise direction. Don't ask me why...just a tip given to me long ago. The circular motion will minimize grooving.

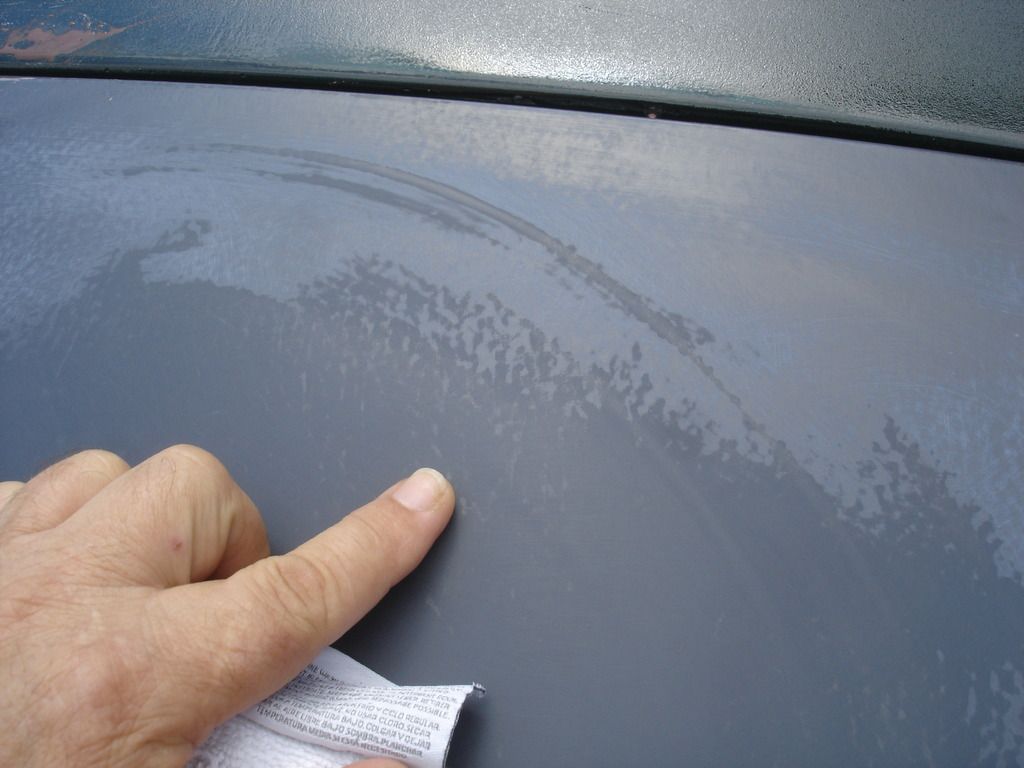
Every few minutes use your hand towel to dry the area you are working on. This gives you an idea of how your progress is going, since you can't see when wet. This is the first time I used this towel...within 15 minutes it is saturated with primer dust, and dark grey. When the rag adds as much dust as it removes, dip it in your bucket and wring it out.
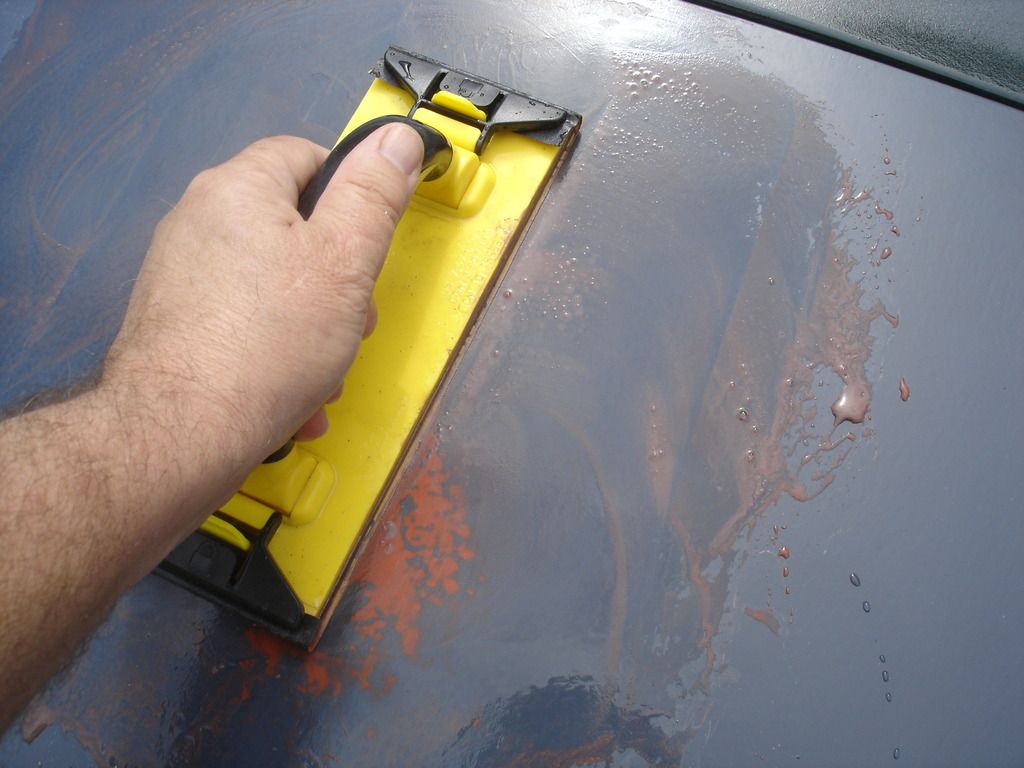
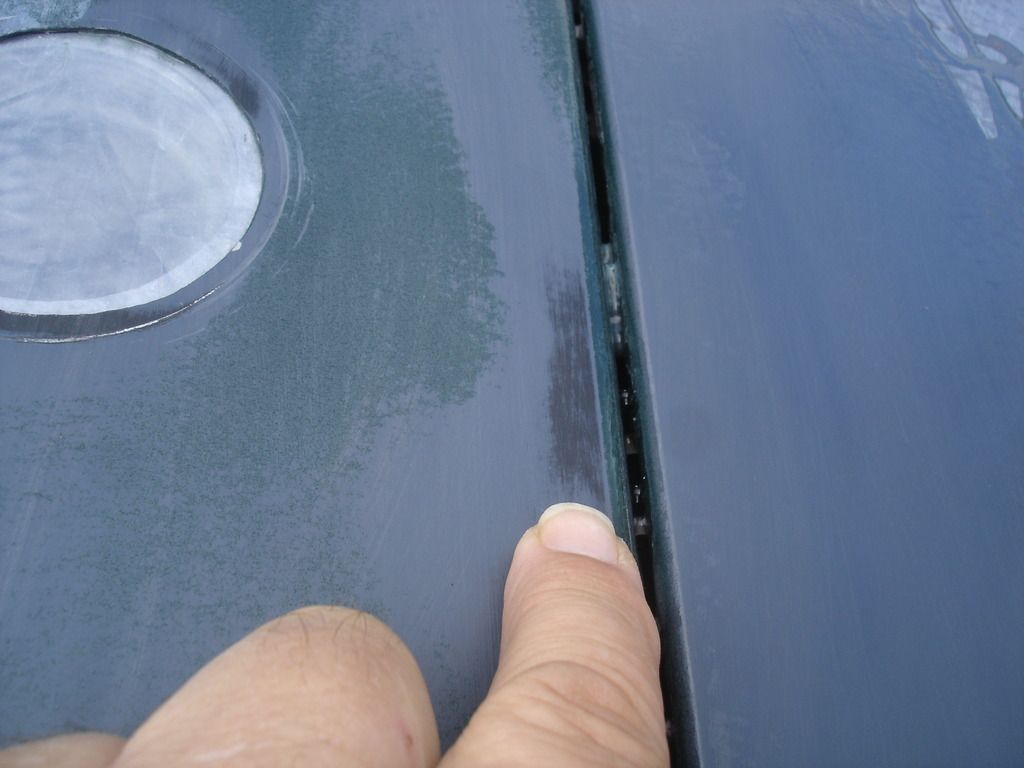
These next series of photos will show you how to read your work. In the above pic you can see dark and light areas. The light is the area that is already sanded...and made perfectly flat like we want it. The dark areas are low spots, where the sanding has not reached yet, and that are NOT flat yet.
Our goal is to sand until the entire area is light colored, with no dark spots...OR, until we break through to our under coat of black.
Read the above line carefully. We are not just mindlessly sanding. We are making a mirror surface for our base color coat. So...we need the sanding to reach the ENTIRE panel, with no exceptions. But, if we hit the black under coat, then we know wee cannot keep going or we will break through to bare metal. So, sand until the area is light, or you break into the black, in my case. We will have to rely on the NEXT layer of primer to reach any dark spots we have after we reach our "stop" tell tale black under coat.
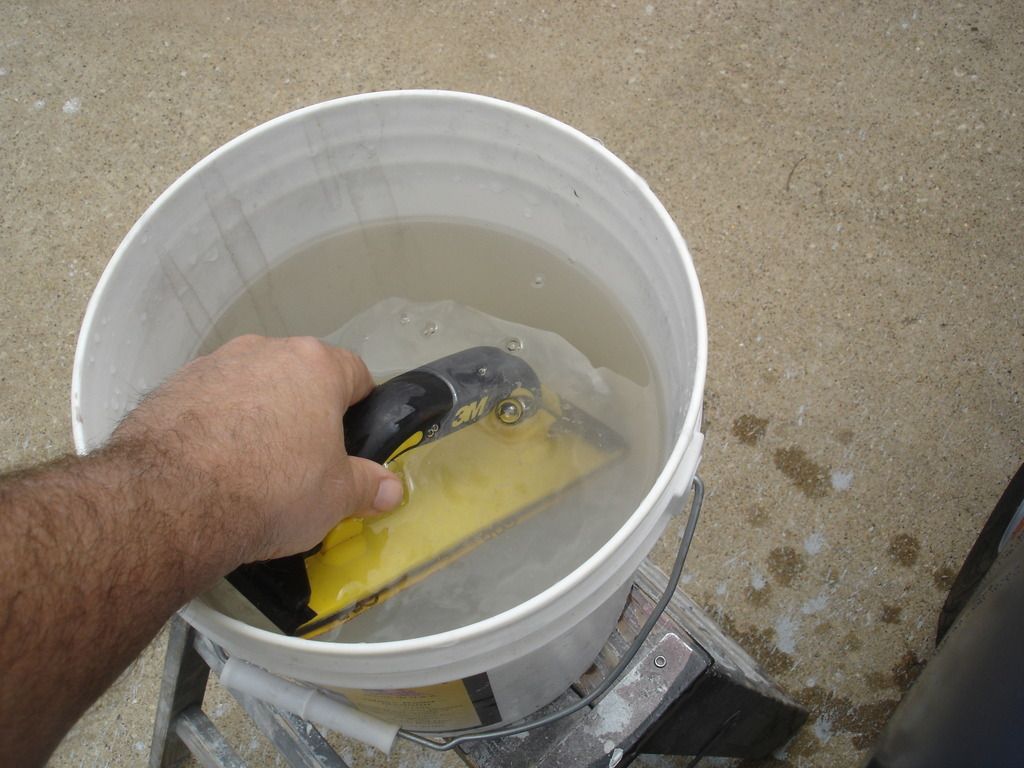
Frequently rinse your paper, so the dust build-up will not mar the paint.
As one area is fully sanded to light color...move slowly to new areas.
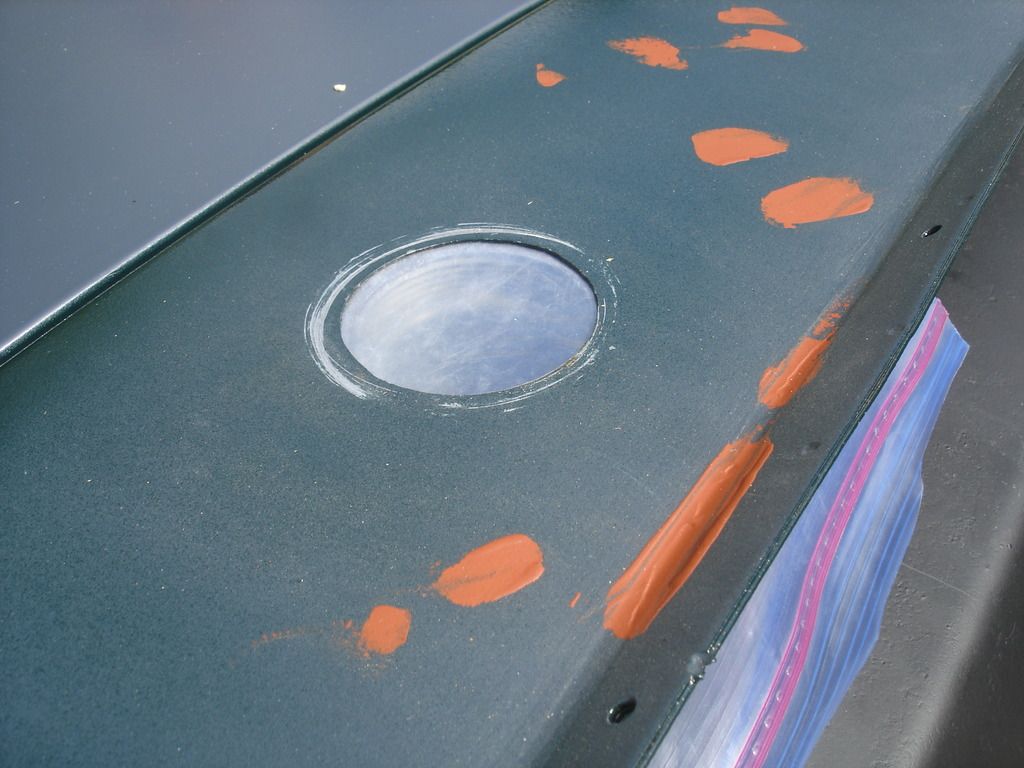
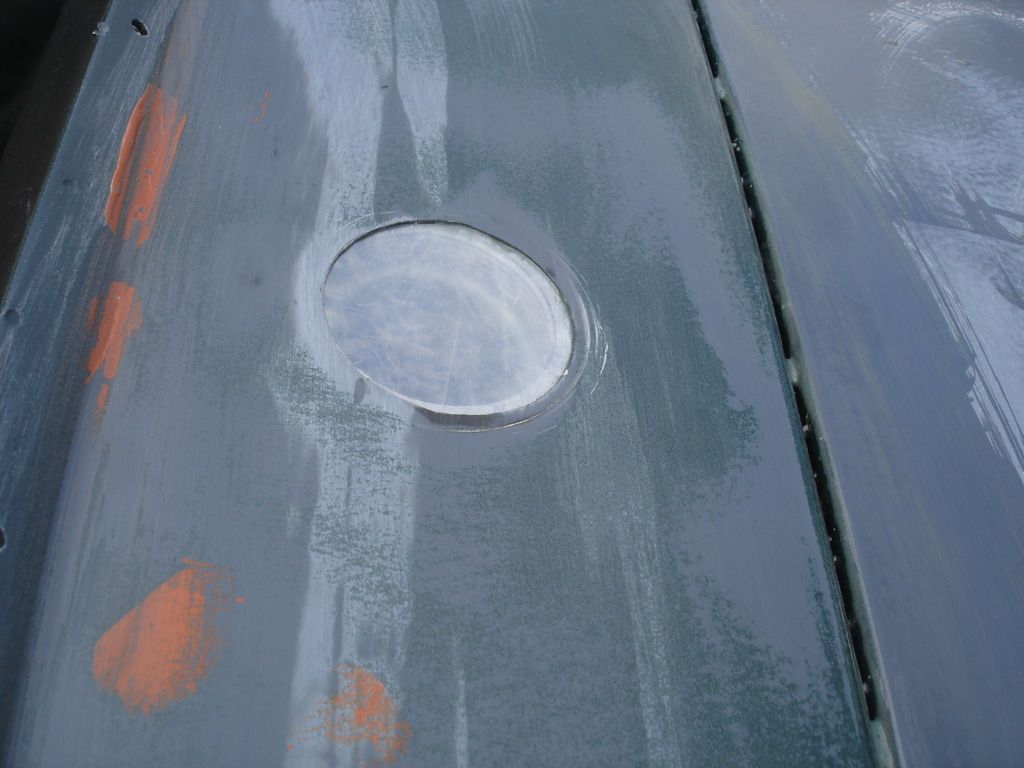
Here is an example of my black undercoat showing through. There are still some low spots nearby...but if I try to reach them I risk cutting into bear metal in this area. This "tell" color lets me know to stop for now. I will build the lows with the next coat of primer...and sand again!
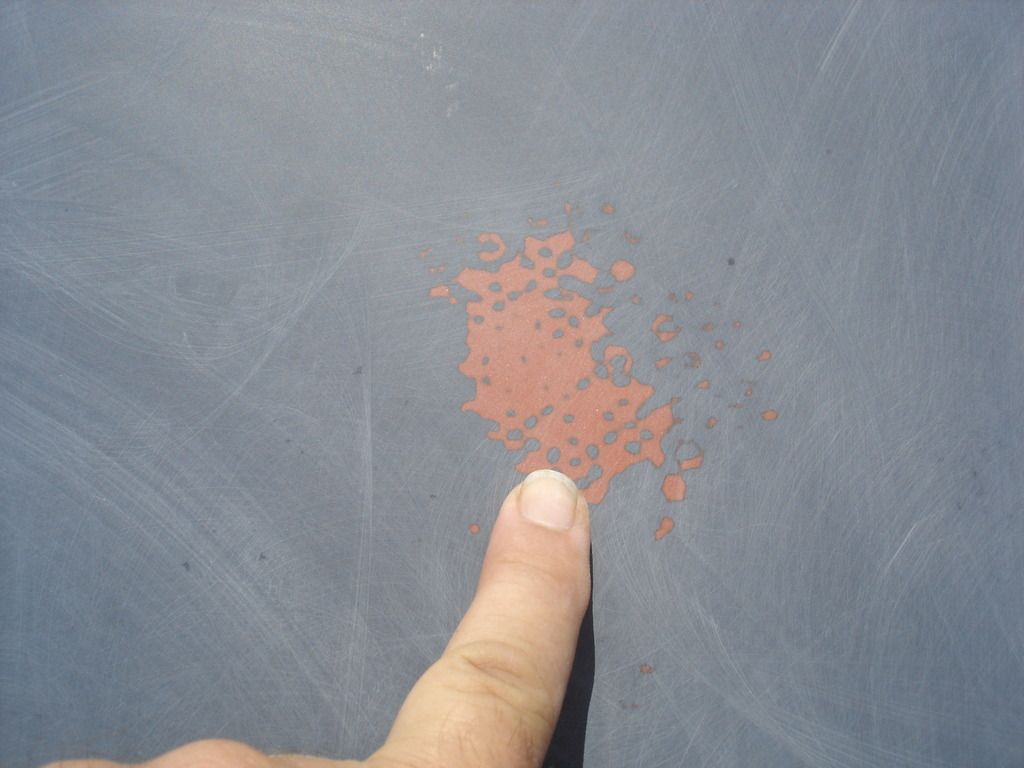
This area is interesting, as it shows how you can use a top coat of thin paint as a tell. Notice that the Racing Green oversprayed onto the grey primer. When you are new to painting, and having trouble "reading" your work, this can be a big help. If I sand until the green it completely gone...then I have a perfectly flat and sanded surface with no low spots. If there is green left, then there are still low spots.
So, let's read the pic above...
The green left on the primer tells me I still have a LOT of low areas...in fact any area that is still green. But, in the lower right you can see a small spot of black showing. that tells me I am near cutting to bear metal in that area. So...I need to continue sanding the green areas until more black shows through or the green is gone...whichever occurs first.
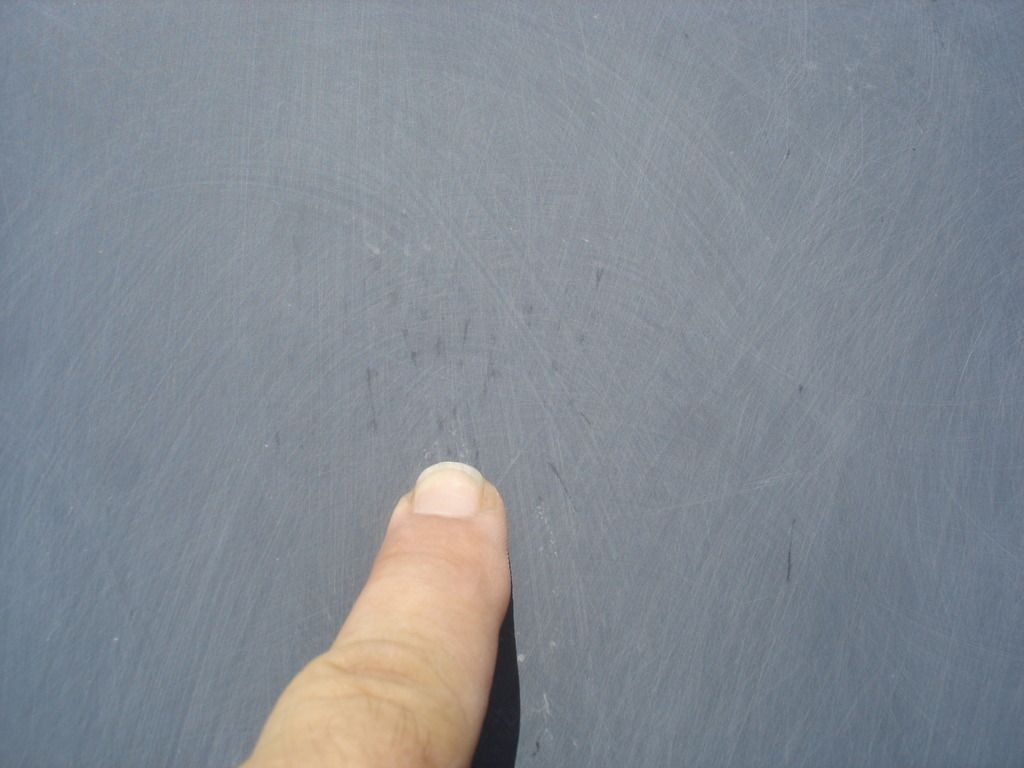
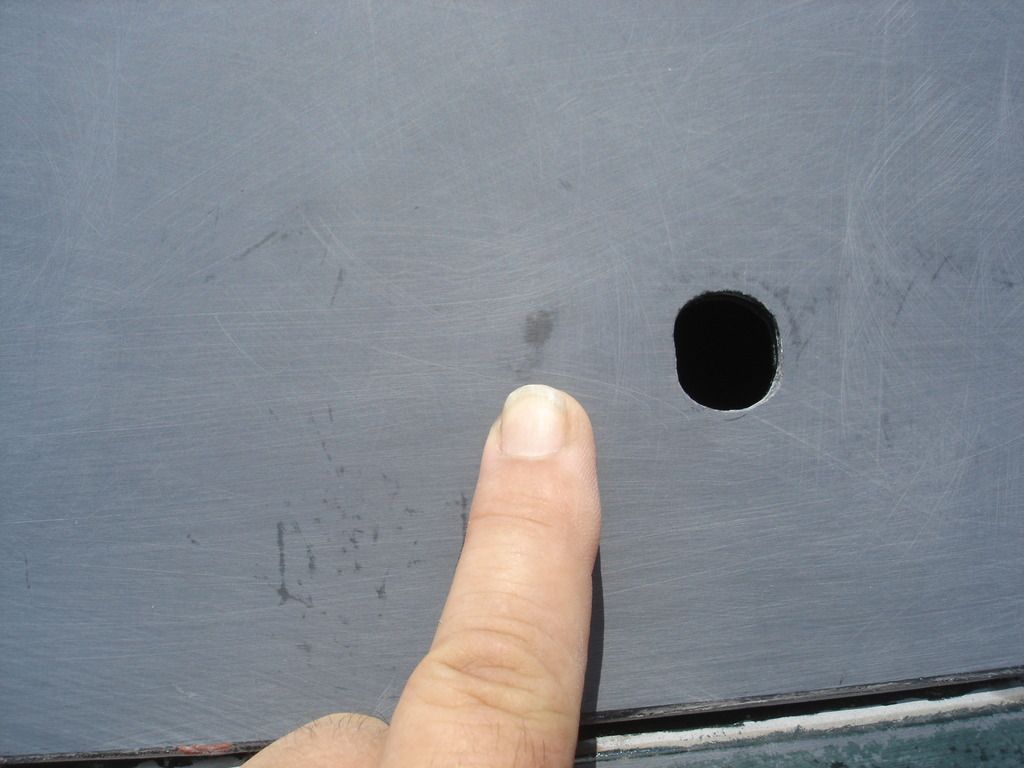
Here is an area without the cover tell coat. As you can see, even without the tell coat you can easily see the little low spots. As you get better at reading the surface, the cover coat is a waste of time. In this pic there is no black showing, so I can keep sanding until these little lows are gone.
Here is the boot lid, after using the long block as much as possible. No dark areas in the middle...so it is good. I will have to switch to a rounded block and a shorter block to get the sides. Never tilt a block to reach a low.
NEVER TILT A BLOCK TO REACH A LOW SPOT!!!
This is one of my spot putty spots. I layed the deck lid on some fabric before it was dry, and got this odd pattern. This area was so low that I could see before I started sanding that it would need "extra" help...so I hit it with spot putty ahead of time. If you look REAL close to the upper right, you can see a little pin hole that is still low. If you can you are getting "the eye"!
More dark low spots...no black so I can work them some more with the block.


We are going to wet sand now, so anything that cannot get wet must be covered. I am placing plastic over the filler neck to keep water out. Other holes just get a towel under them, so the water won't spot my interior work.

I know that I will need at least one more coat of primer after I sand this one, so I will use 220 grit wet or dry paper. 220 will not show under primer, but it will show sanding marks under finish color coats. I am using it now as it will speed the job immensely. For all subsequent primer layers we MAY be spraying color over them, so we will switch to 400 grit for them.

Organize your sanding blocks. You want the longest block you can use, for whatever area of the body you are working on. This is very important! Use the longest block you can! The blocks you see on the right use a full length of standard sand paper. The ones on the left used the same paper, only sliced short side instead of long. The shorter blocks are only for curved sections and areas too small to fit a long block.
Our goal from here is to make our large panels...doors, wings, boot lid and bonnet...as straight and smooth as a mirror. You do this by using the flattest, longest sanding block possible. Short blocks will result in waves on large panels. Long blocks cut the highs and straighten everything out.

Now we fill a clean bucket with water. You can use a hose, and let water run over the area you are sanding...but that will get water everywhere. Since my interior has a lot of mechanical and electrical parts installed, I will minimize water use by using a bucket. Oh, if you do use a hose, cover the threads of the hose with tape to prevent scratching the paint when the hose end hits the car.

Now we sand! and sand!! and sand !!!

In general you want circular motions. On large panels, you can use back and forth, but only in the cars "lengthwise" direction. Going back and forth cuts grooves, but these are not noticeable if in the lengthwise direction. Don't ask me why...just a tip given to me long ago. The circular motion will minimize grooving.

Every few minutes use your hand towel to dry the area you are working on. This gives you an idea of how your progress is going, since you can't see when wet. This is the first time I used this towel...within 15 minutes it is saturated with primer dust, and dark grey. When the rag adds as much dust as it removes, dip it in your bucket and wring it out.

These next series of photos will show you how to read your work. In the above pic you can see dark and light areas. The light is the area that is already sanded...and made perfectly flat like we want it. The dark areas are low spots, where the sanding has not reached yet, and that are NOT flat yet.
Our goal is to sand until the entire area is light colored, with no dark spots...OR, until we break through to our under coat of black.
Read the above line carefully. We are not just mindlessly sanding. We are making a mirror surface for our base color coat. So...we need the sanding to reach the ENTIRE panel, with no exceptions. But, if we hit the black under coat, then we know wee cannot keep going or we will break through to bare metal. So, sand until the area is light, or you break into the black, in my case. We will have to rely on the NEXT layer of primer to reach any dark spots we have after we reach our "stop" tell tale black under coat.

Frequently rinse your paper, so the dust build-up will not mar the paint.

As one area is fully sanded to light color...move slowly to new areas.

Here is an example of my black undercoat showing through. There are still some low spots nearby...but if I try to reach them I risk cutting into bear metal in this area. This "tell" color lets me know to stop for now. I will build the lows with the next coat of primer...and sand again!

This area is interesting, as it shows how you can use a top coat of thin paint as a tell. Notice that the Racing Green oversprayed onto the grey primer. When you are new to painting, and having trouble "reading" your work, this can be a big help. If I sand until the green it completely gone...then I have a perfectly flat and sanded surface with no low spots. If there is green left, then there are still low spots.
So, let's read the pic above...
The green left on the primer tells me I still have a LOT of low areas...in fact any area that is still green. But, in the lower right you can see a small spot of black showing. that tells me I am near cutting to bear metal in that area. So...I need to continue sanding the green areas until more black shows through or the green is gone...whichever occurs first.

Here is an area without the cover tell coat. As you can see, even without the tell coat you can easily see the little low spots. As you get better at reading the surface, the cover coat is a waste of time. In this pic there is no black showing, so I can keep sanding until these little lows are gone.

Here is the boot lid, after using the long block as much as possible. No dark areas in the middle...so it is good. I will have to switch to a rounded block and a shorter block to get the sides. Never tilt a block to reach a low.
NEVER TILT A BLOCK TO REACH A LOW SPOT!!!

This is one of my spot putty spots. I layed the deck lid on some fabric before it was dry, and got this odd pattern. This area was so low that I could see before I started sanding that it would need "extra" help...so I hit it with spot putty ahead of time. If you look REAL close to the upper right, you can see a little pin hole that is still low. If you can you are getting "the eye"!

More dark low spots...no black so I can work them some more with the block.


")


