• Hi Guest!
    You can help ensure that British Car Forum (BCF) continues to provide a great place to engage in the British car hobby! If you find BCF a beneficial community, please consider supporting our efforts with a subscription.

    There are some perks with a member upgrade!
    **Upgrade Now**
    (PS: Subscribers don't see this gawd-aweful banner
Tips
Tips

TR2/3/3A Beginning the TR2 Bodywork

Michael, the car was originally BRG. I even tried running the Lemans scheme past the wife...no go on that!?! My thought right now is taking the BRG only darkening it to almost black. It's about time to decide, as I can be spraying in a couple weeks.

I enjoy watching those TV shows...but have often reaffirmed while watching that I would never buy a car from them! I cringe half the time at what they get away with. I have heard of the technique of priming prior to filling. Although I see an advantage of sealing the metal...it just seems like a needless step to me. It also seems to me like you will get a lot of cut through to bare metal anyway when working the filler. I prefer to start with the coarsest Work and transition to the more fine work. Starting with a primer and going backwards to rough fill work seems, like...well...more work! The filler will get sealed by at least several coats of primer and finish. The car will never be allowed to run with chips through to the filler.

I'm always open to be convinced with reasons for a new technique, though...
 
Hello John
Thank you. It is looking great.
As always you provide a wealth of information. Never thought of covering all the panels in filler but it makes so much sense. It will be a while till I get to that stage. Work has got in the way at the moment.

Is that air sander an Air Hog? Looks like it would save a lot of the hard work.

Will be following your progress.

David
 
Yeah, lots of different opinions on the subject that's for sure. I have sprayed epoxy before as my first coat on bare metal. I'm like John though, I tend to want to do my filler work on nicely prepped bare metal so I generally will sand away the epoxy in the repair area to do this. I do like the idea of polyester primer followed by a high build primer. On the last project, I used a different Evercoat product. Instead of slicksand, I used featherfill G2.

Cheers
Tush
 
I can appreciate your thoughts regarding your process. However, you should understand that today's epoxy's have and contain rust inhibitors which naturalizes as well encapsulates the metal. Epoxy's have a huge advantage as well for their molecular bonding strength. If your metal is close you only need to scuff the epoxy with 80 grit non-directional before applying filler. The epoxy should have enough build to allow this process without cutting through. Also the metal prep should have a non-directional cut for greater bond. Very important! Clean metal with Transstar 9784 Acry Solvent with new white towels, wipe metal surfaace until you don't see any metal gray resdue on the towels before appllying your sealer. Wish you the best!

Cheers
[h=1][/h]
 
The 3A I had in the 70's was '69 Sting Ray very dark green and I always thought it an excellent color. It had a touch of metal flake which was not a mortal sin back then....

Michael
 
David...I hate it when work gets in the way! The 16" air sander is an Ingersoll Rand model they had at Northern Hydraulic. I have been watching the shops on History and Discovery channels using them for years, and finally decided to spend the money on one. I have to say, it is absolutely worth every penny! In addition to not having my wrists ache after every work session, it is about 4 inches longer than you can get with standard blocks and paper sheets. When it comes to body work, the longer the block you use, the less the chance of waves in the finished panel.

Tush, once again, glad to hear we think alike. It's a real shame our garages aren't a few thousand miles closer together...I'd be over frequently to hold your beer can... and camera!

Dan...that is EXACTLY what I was thinking! It would look black at night, and more "racing green" during the day. I wish I could get away with either pearl or small metalic flake, but the desire for originality has made it to the British world too. I got a lot of comments on the TR3 about how the original silver had no metalic in it. I don't want to listen to the comments on this car, so no pearl or flake. Bummer. Even though the color will be on the "dark side", it's hard to argue what the original BRG tint really was!?! I need to find a color chip in that shade...you wouldn't have any idea what car and year that color is from, would you?

Blue...I don't worry about cutting through on the filler application, but on the filler levelling. I agree completely with the quality of the epoxy primers today. So much better than the laquer based!

Michael, I like that "mortal sin" comment! I used to restore mid year Vettes, and by the mid '90's they were completely out of hand with the quest for "originality". I understand the desire to preserve the breed, but it's a shame it puts all the beautiful colors that are available out of reach for the purists. Every judge knows we are no longer using the original enamel paints. It shouldn't be that hard for them to admit that since it's OK to use base/clear system urethanes, why not allow variation on the colors?!?

Thanks to you all for your great comments and interest. I can't emphasize enough that you guys kept me going through the dismal months that I couldn't see the end to this project!
 
Very cool John, I figured something like the filler had to be put on the car because I saw a lot of rust pits on your tub. In my very unexperienced body work, I figured the paint would fill in the pits on my car, NO. Anyways the polyester stuff you used is that like the glazing they sell or something else? I hope I do not fall apart from old age and construction work before I learn some of these skills. The good thing is it gives me passion for learning something new, and gathering patients.

I probably missed something when you were commenting on the BRG, but I think Piggot says the early BRG was lighter than the later. The one early BRG he shows in the book a 1957 almost looks Apple green.
Steve
 
Hey John. Glad you liked that BRG color - I thought it was quite nice as well after being referred to that Healey by a club member over here. I sent a message to the seller to see if they will divulge the paint code for it, but perhaps not likely. I do know that the Jaguar racing team from about the 1958 time period used a very dark BRG that may suit . . . .

Dan

Here is a fairly well-done analysis by a fellow in California, but possibly more than you want as it covers the lighter shades as well:

Ray Feeney, California, USA

I have spent the last six months gathering a fair amount of information on British Racing Green from a variety of sources and I thought I should summarize it here for the benefit of all. I do have quite a bit more information if anyone feels that they want some of the more obscure mythology.

First, it is well documented that BRG is a range of colors – both for aesthetic reasons and because it visually varies significantly with small changes of formulation. Before the advent of repeatable paint mixing methodologies and more stringent controls on factory colors, the variations often occurred within the same brand and automotive model. In addition, painting techniques and base/pigment choices have evolved or become obsolete. Lead based pigments are no longer an option – therefore formulations exist for many of the variants, but the ingredients do not.

My painter uses PPG paints exclusively and prefers the DCC single stage Acrylic Urethane. Specifically PPG Deltron Concept 2K Urethane so all of these formulations listed here are for one quart quantities of PPG DCC. And I should acknowledge the help of the people in the Color Science Lab at PPG for their responsiveness as I went through this lengthy exercise.

I started off by gathering samples of BRG painted metal items and by accumulating as much of the history as I could gather. I had the computer system read about 15 metal samples (the underside of boot lids seemed the best candidates) and then I selected a few formulations and had these mixed up for testing. Once I had a candidate formulation, I had a sample sprayed onto a 6” x 9” primed metal sheet. These were then color sanded and waxed so that the entire process truly emulated the intended restoration approach. As I started changing the formulations, I learned a few things. Removing some of the black in the formulation, really gave a good insight into what kind of underlying green any particular approach to BRG was based on. When a percentage of the black is removed from the typical GN25 MG green formulation it shifts towards a very earthy muddy look -- trending towards a military type green. Perhaps there is something to the apocryphal story that after WWII the motor vehicle industry in England was well stocked with ingredients for military green paint formulations and that black was added to create a new family of colors that became known as British Racing Green.

In addition to using the computer paint system to read (and attempt to understand) the colorimetry of surviving period painted automobiles, I gathered information about what people have been using for BRG on the typical bulletin boards and forums. While there have been many different approaches used to pick a BRG for individual projects, there do seem to be a couple of trends. Mike Goodman (who recently retired after almost 50 years of MG repairs and restorations) painted many MGTC and MGTD cars in a BRG formulation that was felt to be close to GN25. This PPG code was 44644 (which is called Cypress Green) and it was a Volvo P1800 sports car color with a Volvo color code of 110. Later on, the PPG code for MG GN25 (which was 43342) was switched to the same pigments and sometimes the exact same formulation is used. If one requests the formulations for 43342 and/or for 44644 from PPG you are never quite sure what you will get -- but they can both result in:

DMC900 Strong White 88.6
DMC936 Blue Shade Phthalo Green 668.0
DMC902 Carbon Black 217.5
DMC905 Lemon Chrome Yellow 172.1

Unfortunately, DMC905 is a lead based pigment and is no longer available (at least in California). This above formula is what Mike Goodman used for years. To my eye, it is a very slight bit too yellow green and not quite dark enough.

The other most common BRG formulation is Jaguar HEN or Jaguar color code 701. (Used on 1987-1990 Jaguars) This is PPG color code 46169 and results in a formulation:

DMC937 Green 605.1
DMC901 Strong Black 341.5
DMC908 Yellow 115.7
DMC904 Blue 31.4
DMC900 Strong White 24.9

This is a very dark BRG with a strong blueish tint. It can require a second look to not think it is black – particularly if it is not in direct sunlight. This is a true Jaguar color and quite popular on XKE’s and on XK120 and XK140 cars. To my eye, on cars like an Austin Healey or an MGA it looks too dark.

In 1991 Mazda built a commemorative edition of the Miata and it was painted British Racing Green. It is Mazda paint code HU. Since it is a more recent automobile, the color formulation is available from many manufacturers. The PPG code is 47037 (called Neo Green) and the DCC formulation is:

DMC937 Green 671.2
DMC901 Strong Black 396.9
DMC900 Strong White 41.4
DMC919 Yellow 5.7
DMC918 Yellow 1.0

This is a gorgeous dark BRG and it looks great on more modern British sports cars. For instance, I believe it is the best choice for a British Racing Green colored Jensen Healey. (Be careful not to end up with the 2001 special edition Mazda Miata British Racing Green. The 2001 version is a modern metallic color and not appropriate for anything.)

One thing to notice is that the more commonly chosen BRG formulations listed above have either four or five pigment tints used in their formulas. It appears that with BRG this is critical. When I used the computer to “match” the period painted samples of BRG that I had collected, I often got a suggested formulation with 12 or more tint ingredients. The color may have come out a match, but the paint was dull and lifeless with no kick. I gave up on the computer system and set about adapting the PPG codes 44644 and 43342 into a modern lead free formulation. In the course of all this testing, we mixed up 19 different formulations. Each was mixed with the hardeners, sprayed, sanded, waxed and evaluated.

A few observations. BRG covers a very subtle range of acceptability. It is easy for the colors to get muddy, lifeless and drift towards military olive drab. It is easy for them to slide into a blue black that is almost not a green at all except under very direct sunlight. All of these colors are attempting to emulate obsolete formulations that are in turn revised as the laws governing paint continue to change. The revised formulas that target the BMC and British Leyland colors tend to go too yellow or they go dull. The revised Jaguar type colors tend to go too blue.


Wow Dan...that's perfect! I think either the Jag chip or the Mazda chip is what I'm looking for. I'll run to the PPG dealer here and look at the chips in person, but one of those should do it. You have to hand it to Ray's perseverance in researching the color. It's also nice to see that the "dark" interpretation is not that far off his findings. I never thought about why the lighter BRG's never impressed me...but his theory that the color may have been a darkened olive drab from left over war surplus paint may explain it. I spent 11 years in the military with olive drab everything. OD was a color to hide vehicles instead of showing them off. You likely saved me hours of rummaging through color chip pages. Thanks also for going to the trouble of contacting the Healy seller...whether he responds or not!

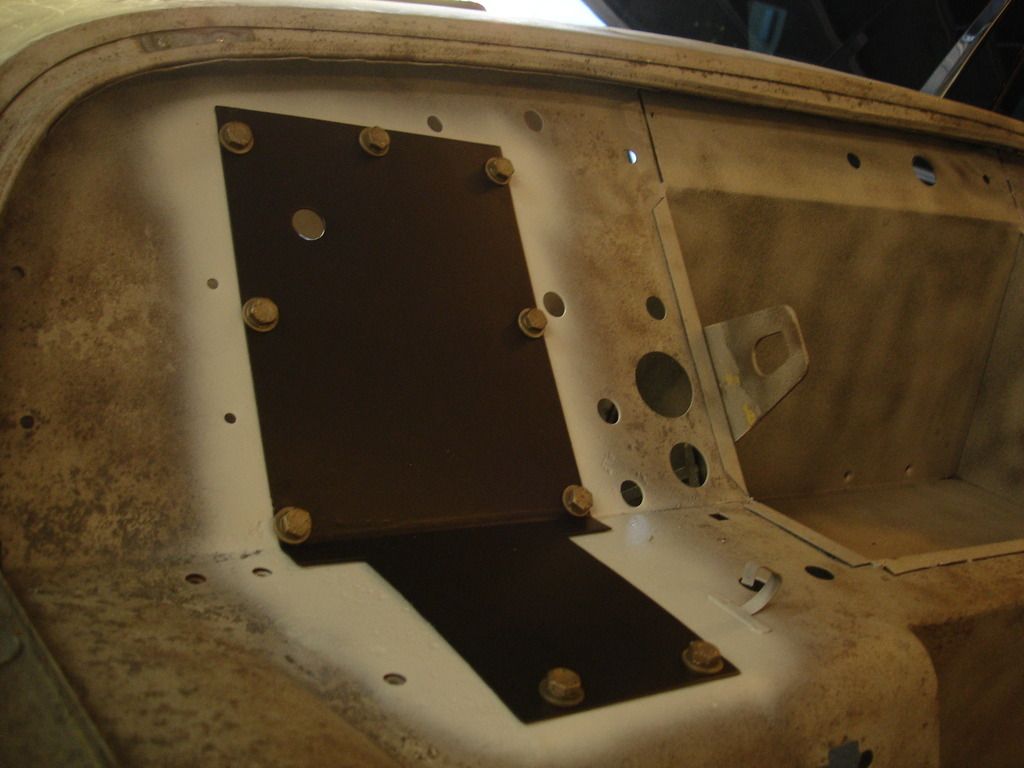
Steve, thick coats of primer followed by sanding would also get rid of my tub pits. It's easier, and cheaper with the price of epoxy primer, to lay a layer of glaze and sand it down to the metal. It doesn't show now, but the firewall blanking plate was a pitted mess. One layer of glaze and a quick sanding smoothed it right out for the primer coat. You are also correct...the only difference between filler and glaze is the consistency. Glaze is thinner...which allows it to spread easier to lay a thinner layer. The filler is thicker, and will not sag if layed in a thicker layer. So filler is preferred if you have minor waves in the metal. Glaze would be the choice if the metal feels perfectly straight, but has pitting to fill.


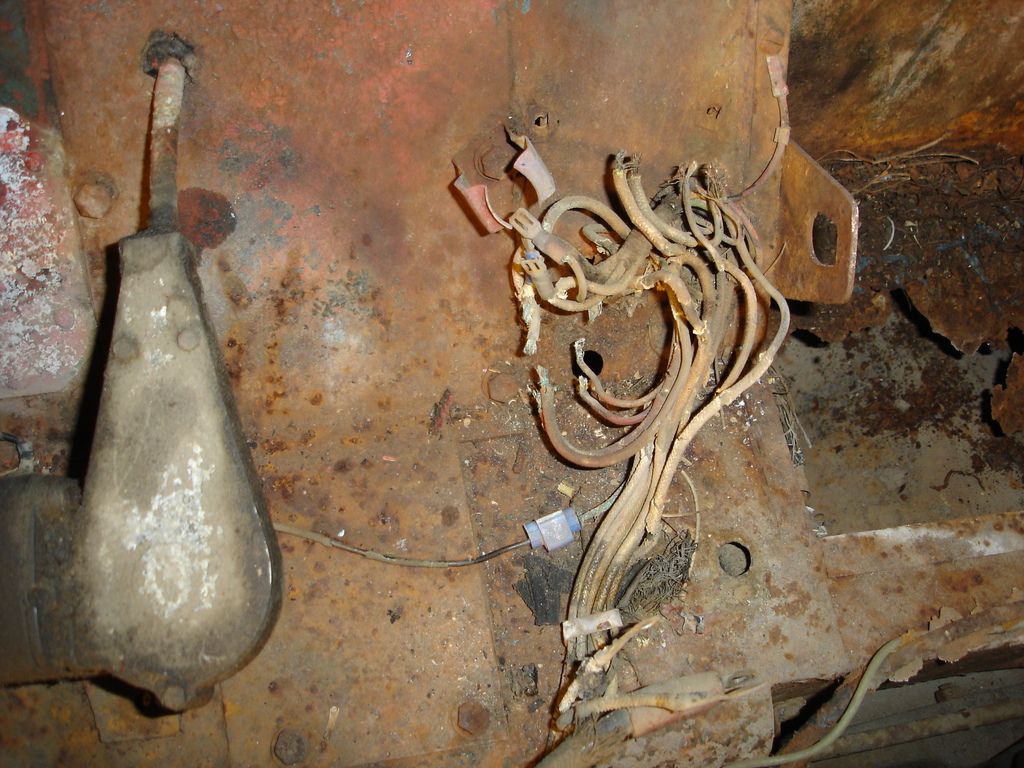
This is the before.


And after, with one spread of glaze, then sanded back to bare metal before the one coat of primer. Now I have to glaze the rest of the firewall to match!
 
Week 66

Happy New Year to all!

I'd love to be out working on the Triumph, but I'm sitting at the computer doing all my quarterly memory backups. If I leave for even a minute it'll hold for me to answer an obvious question...so good time to post the update.

This week I have been (slowly) working my way around the body. The next up was the bonnet:
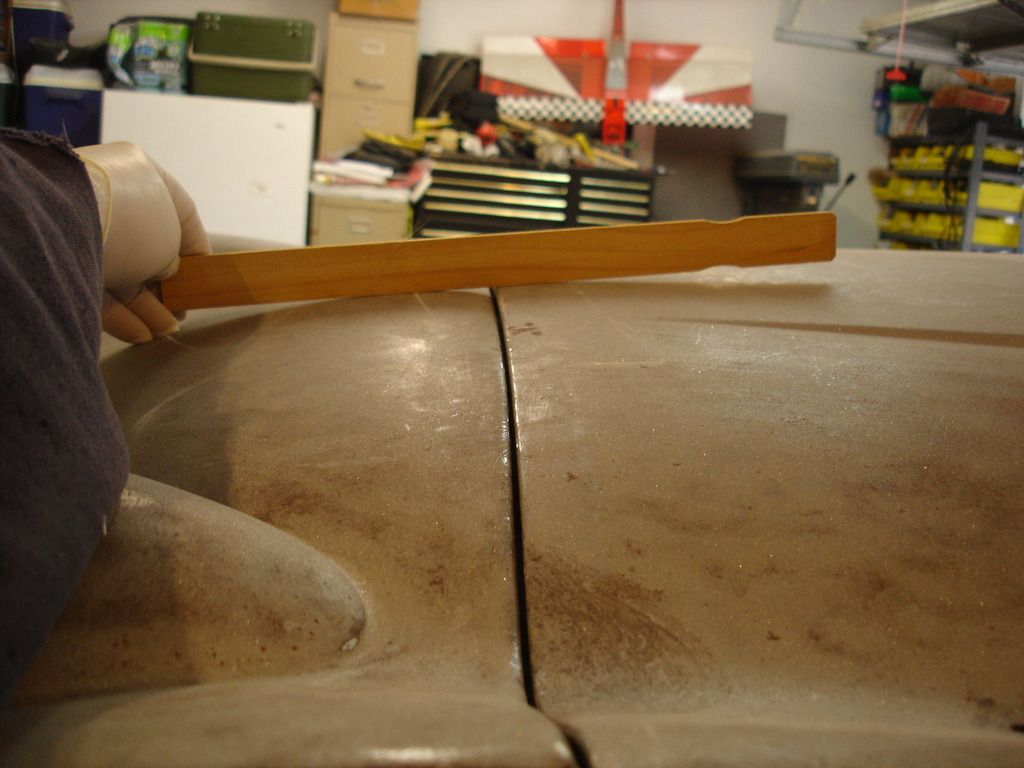


This shot shows the meeting line of the front apron and the bonnet. You will note that the gap is aligned, but the angle of the metal of each is not correct. This is very common, even with new cars, and the eye tends to overlook it. I should say "most" eyes! It bothers the heck out of me when I see it on finished cars. Anyway, you can probably guess that the bonnet cannot be altered without disrupting it's lines, so the adjustment must be applied to the apron. THEN, the apron has a flange welded to it, and opening that weld will also open a real Pandora's box of issues. This is the case where a bit of filler is at it's finest.

In the pic you can see that I could lower the bonnet, but then the "bump" on the apron will be higher than the bonnet line...and that would mean adding a foot or so of filler to the bonnet to fair the line back into shape. The lesson here is to always minimize any high spots. This applies to any bodywork. If you work a panel and leave a high spot, then you must fill the entire area around the high spot to fair it in. Whereas, if you work a panel and eliminate the highs, but leave low spots...then all you have to fill are the lows. That means MUCH less filler!

So, always err bodywork on the low side to minimize filler blend work later.
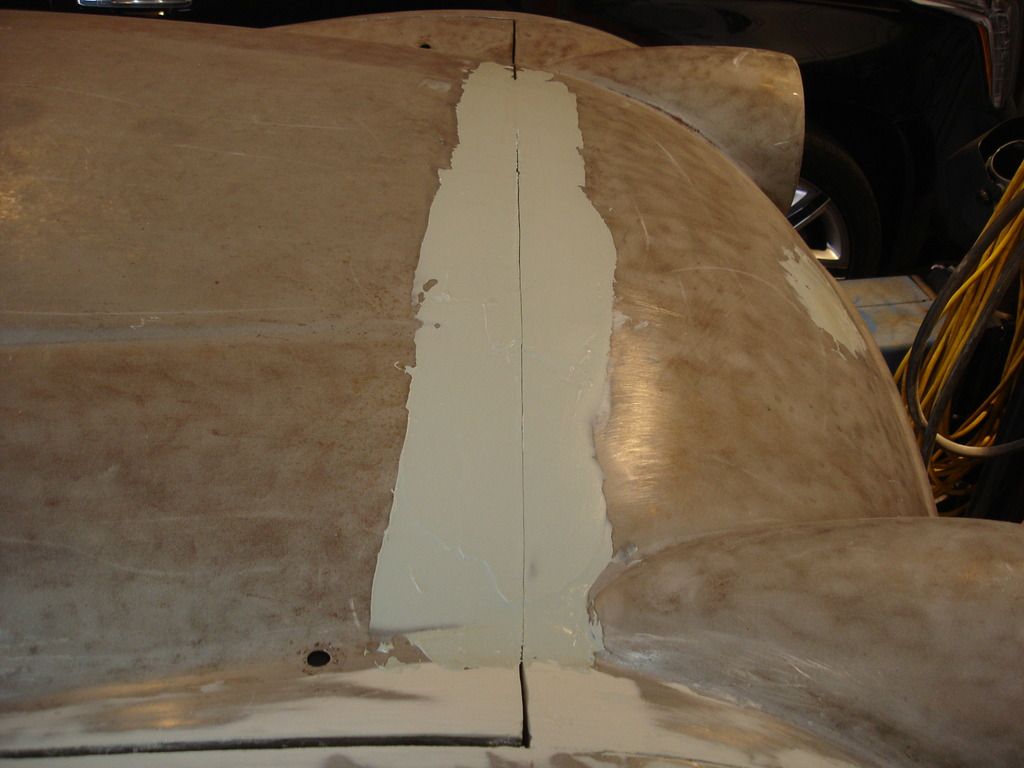


Here I am starting on the bonnet blending. Only mix filler in small batches, rather than trying to mix the entire bonnet in one. This is because the greater the amount of filler you mix, the higher the chemical heat generated. This reaches a point that I have started fires by mixing too much filler at one time. Important safety tip!! Even if you don't get that much heat, the extra heat generated reduces your working time for the batch to zero. You do not even have enough time to mix it before it lights off.

So, keep filler batches relatively small...like what you can spread in a minute or two.
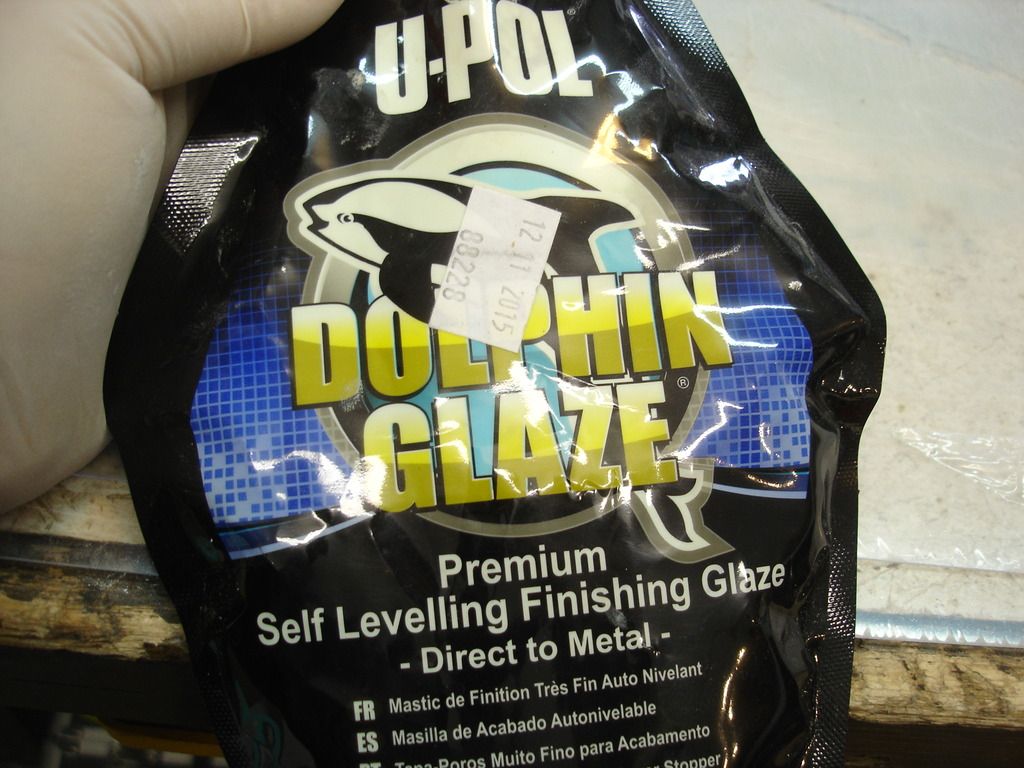


If you remember from last year, I actually spent 2 full weeks bodyworking the bonnet, so it is pretty smooth. Because of that, and the fact the bonnet it horizontal and will not get sags or runs, I will use the glaze for the rest. of the work. I used filler for the bonnet to apron seam, since I needed more build in this area. I am now using the glaze to get a smooth, even, and thin spread across the bonnet.
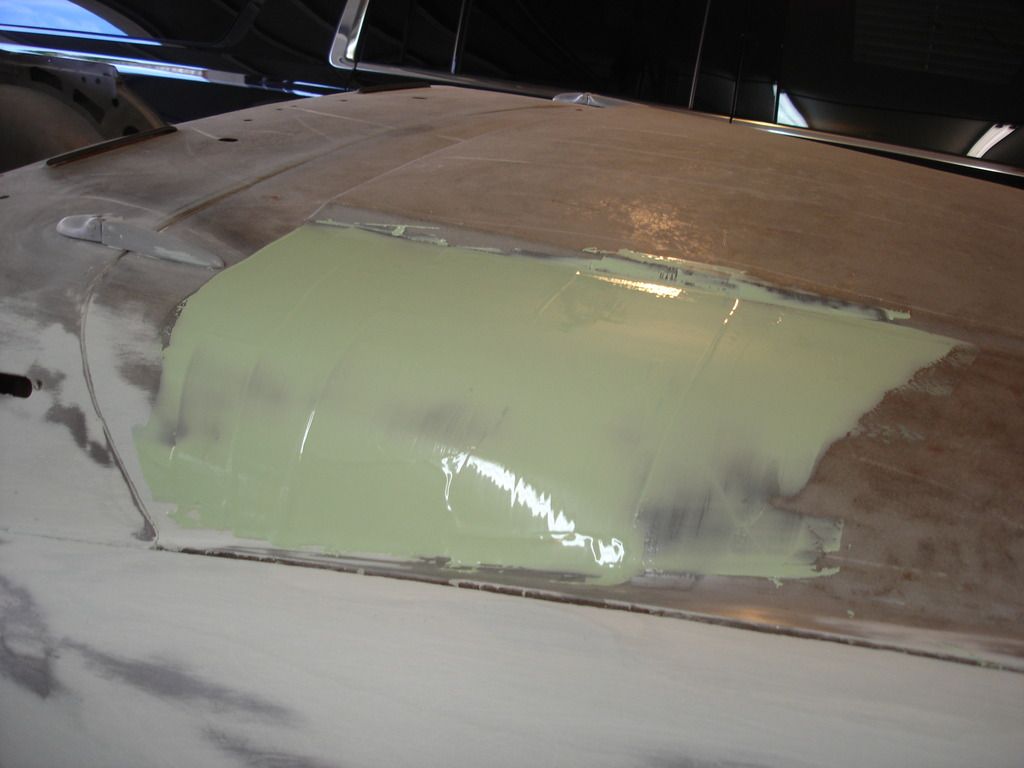


This is about how much I mix in one batch.
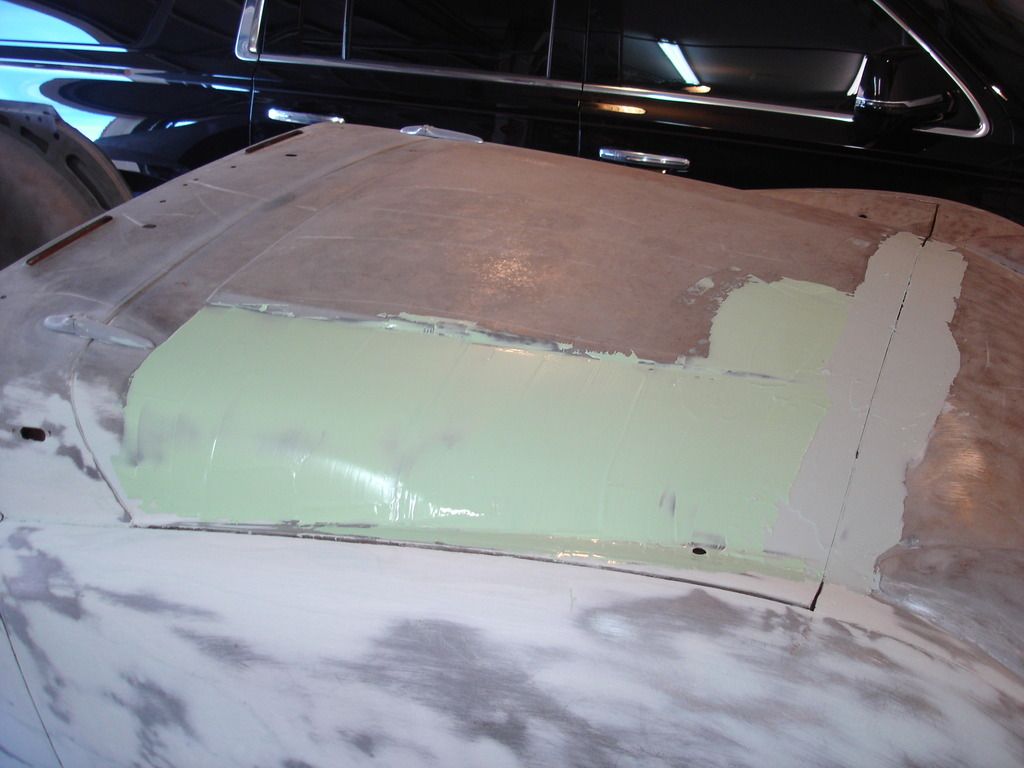


Since I can spread the glaze very consistently compared to the filler, I do not need to pause to cheese grate the first batch. So I am laying down the second batch right away.
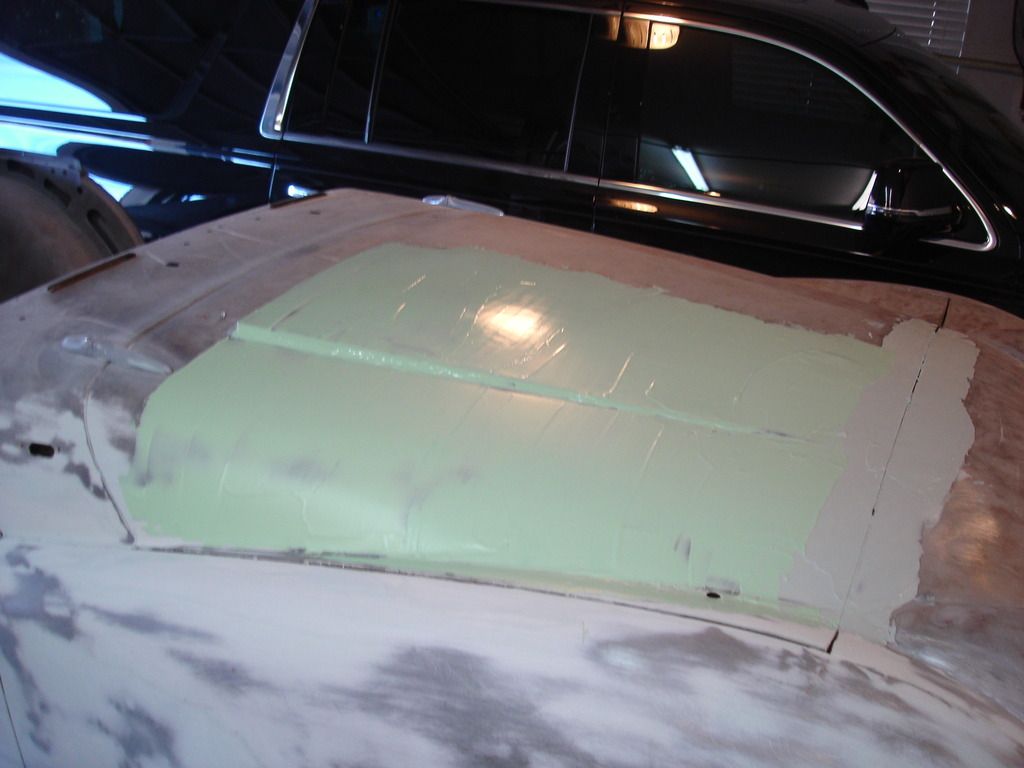


And the 3rd batch.


While I am waiting for those batches to full harden (no sticky feel to the surface), here are a couple tips...

Tip 1) If you try to sand your filler too soon, like while it still has a sticky feel to it, you will find you get build up on your sand paper, like the little white dots you see in this pic above. The clumps hold the paper off your surface, which both gouges the surface AND prevents much useful sanding from occurring. No problem!
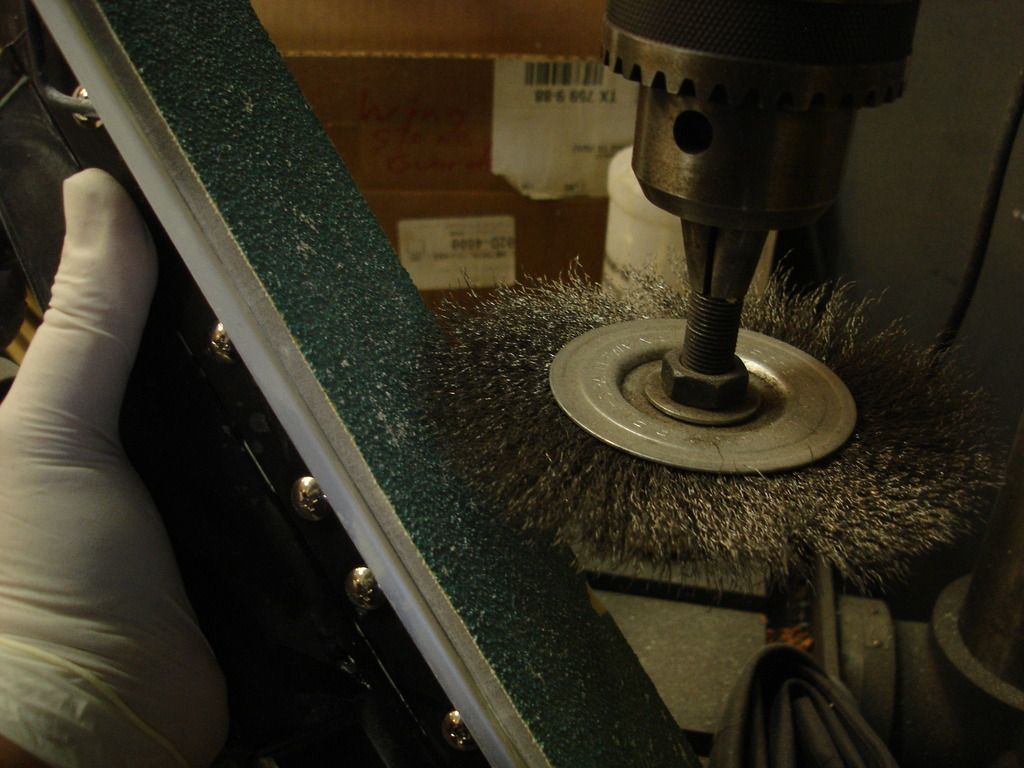


The sand paper can be easily cleared of filler clumps by brushing it with a wire brush. A hand brush is fine...I use the power brush for convenience. So you can extend the life of your paper for a good while!

Tip 2) Well, actually more of a fun fact?!? You may wonder about the "sticky" feel to the filler, that sometimes never fully goes away. Here's the story behind it:

Polyester will not cure when exposed to air. Seems like a funny statement, seeing as it always DOES cure in the air!?! Polyester resin was designed, first and foremost, to build fiberglass structures. Picture trying to lay down the fiberglass for a 50 foot boat...it can take a week or more. Well, so the workers can go home at night, the top layer of polyester is exposed to air...and it does not cure. The next day the workers can come back and just pick up where they left off, and still have the fresh layers chemically bond to the previous days work just fine.

So, the question is "WHY" does our filler cure all the way through?? The answer is that the filler has a wax compound added to it. Once laid out, the wax migrates to the surface and blocks the resin from the surrounding air. The slight sticky feel left on some batches is from not having the can of filler mixed well, so the correct amount of wax was not present in that batch...or to much wax migrated up. Either way, the result is a tacky feel to the surface. Either way, you can't do anything about it...other than stirring your filler or glaze before each use. The good news is that it really doesn't hurt anything, except maybe to gumm up your sand paper when you first start to sand a fresh batch. But then you know how to clear that quickly now!

To follow up the story, when laying out a boat hull, the crew will lay out the final layer of glass using polyester having the wax included. If you ever do repair work to a fiberglass hull, you need to pay attention to the resin you buy. Layout resin has NO wax, so you can go to lunch between layer layups. If you buy "finishing" resin, (as available at most parts houses) then you must lay down all your layers at one time, as finishing resin has wax and WILL harden completely if you go to lunch in the middle. Once finishing resin cures, you MUST roughen the surface before laying down more glass, in order to achieve a mechanical bond. When you lay on an uncured surface you get a chemical bond. Chemical bonds are far more reliable than mechanical bonds.

Enough history lessons...


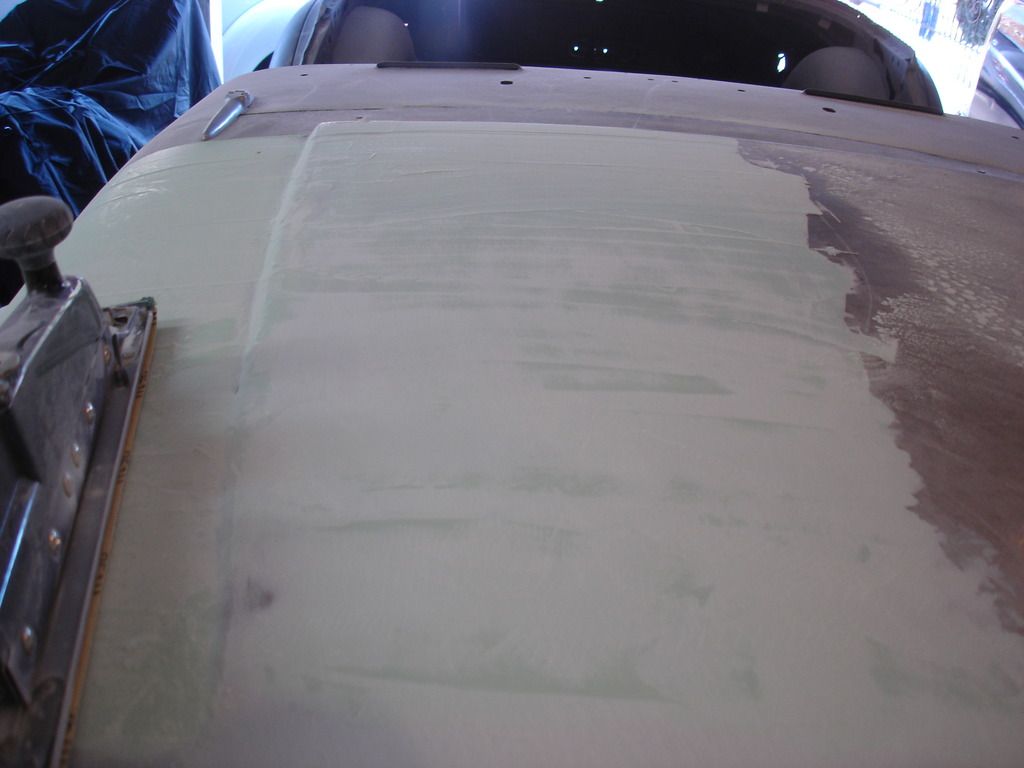
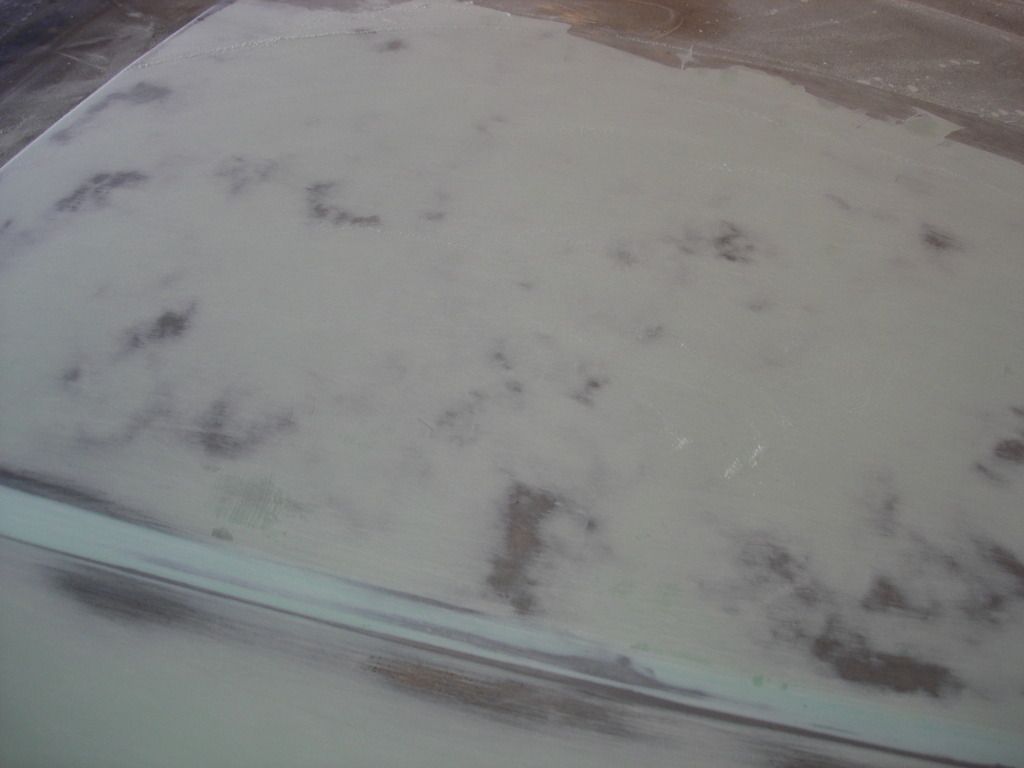
Here I have started the sanding. The bonnet is very important, as it is the most obvious panel on the car, so great time must be spent to make sure it's right!


As I sand, you can see where the sander has cut the high spots, as they turn lighter color. The lows are still seen as darker in color...and you can easily feel them with your hand. Keep the sander flat...do not attempt to angle it to reach the lows. Doing so will cause "waves" in the finished surface. We want a flat, undistorted mirror surface. No funhouse mirrors on our cars!


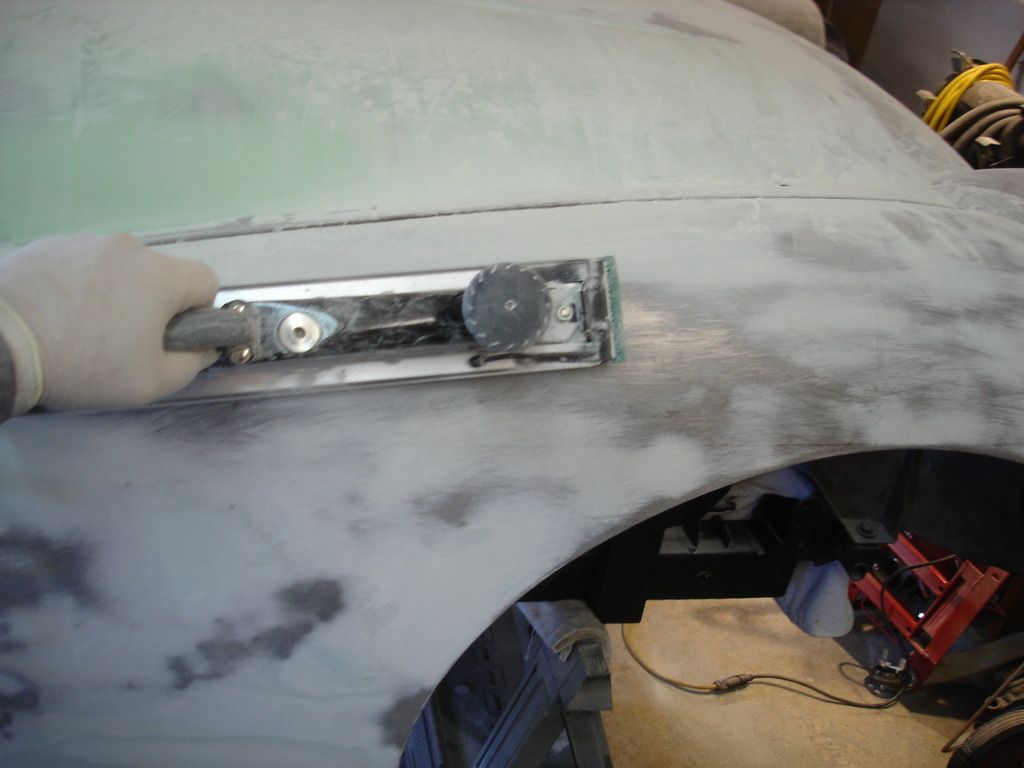
I mentioned earlier that you want the longest sanding block you can get. Here it is important to use that length correctly. Notice that on a surface that is curved in one plane, you hold the sander as shown. As you sand keep it moving, turning it to match the angle of the surface you are working on.


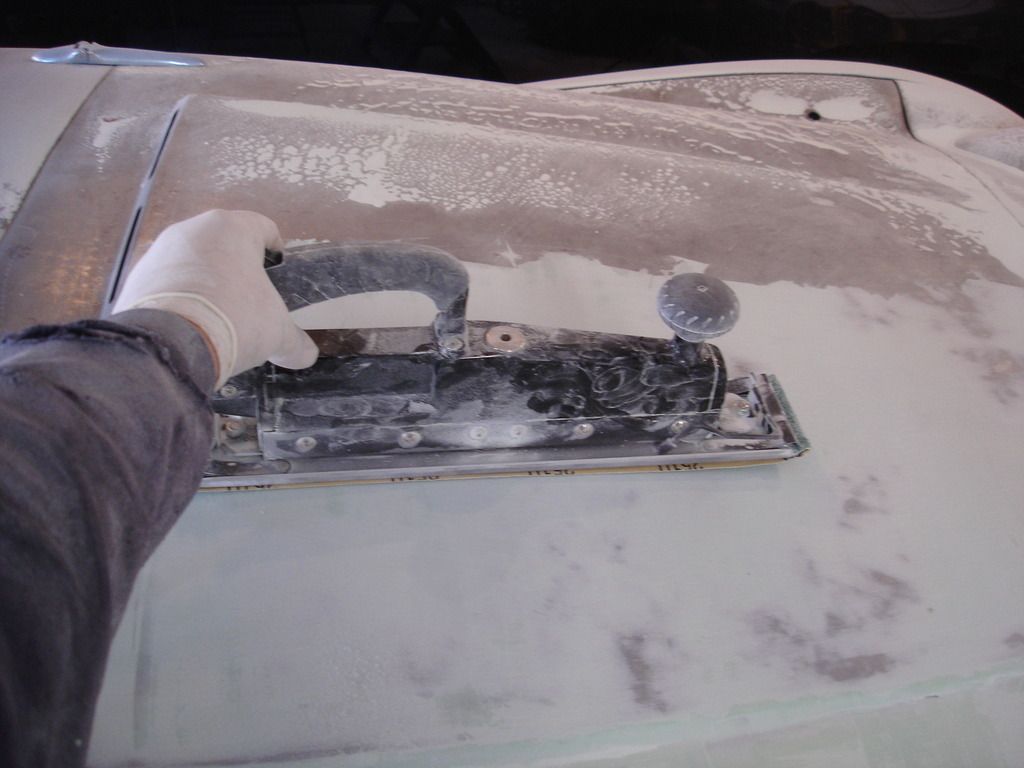
The bonnet is more of a "flat" surface. Most of the sanding is done on a flat surface holding the sander lengthwise, as shown. But!::


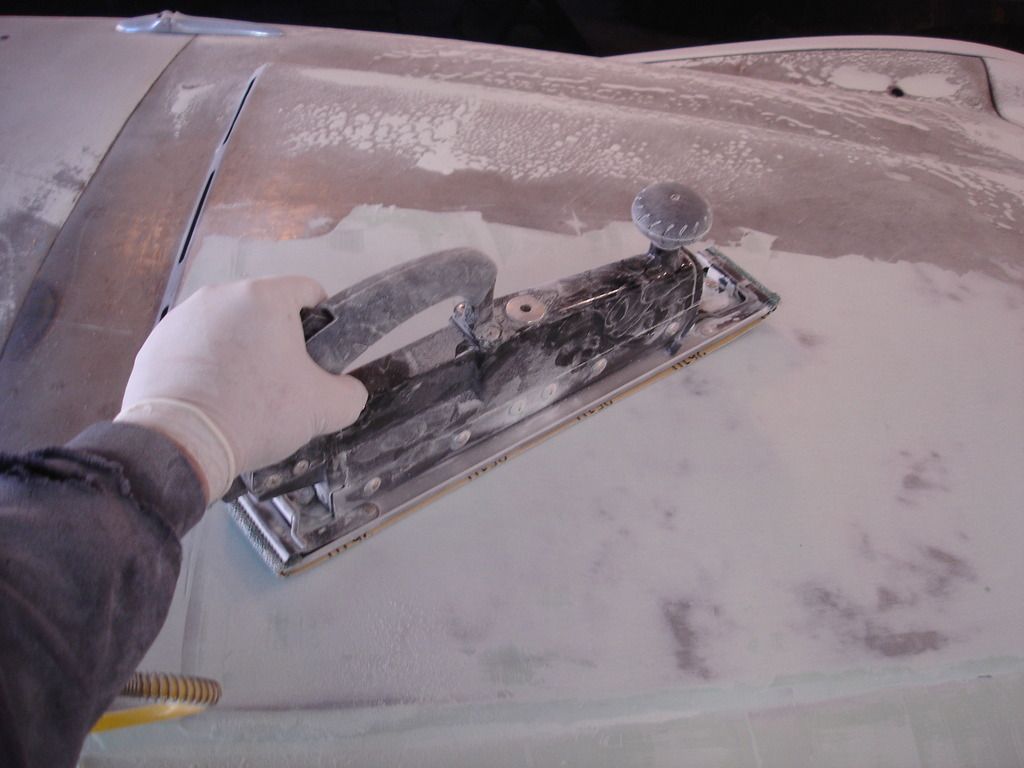
For about half of the sanding, angle the sander about 30 degrees in either direction. ALWAYs keep the sander moving, so you do not cut a ridge into the filler. By angling, you will make the surface gently rounded as it should be.


Here you can see I continued the sanding as described above until you have cut through to the metal. When you have cut through so the sander is now "bridging" between 2 high metal spots...STOP! At this point the surface is flat. If you attempt to reach any low spots once the sander is bridging, you will make waves in the surface. We are using the long sanding block to eliminate waves. We do not want to do anything that will cause them!


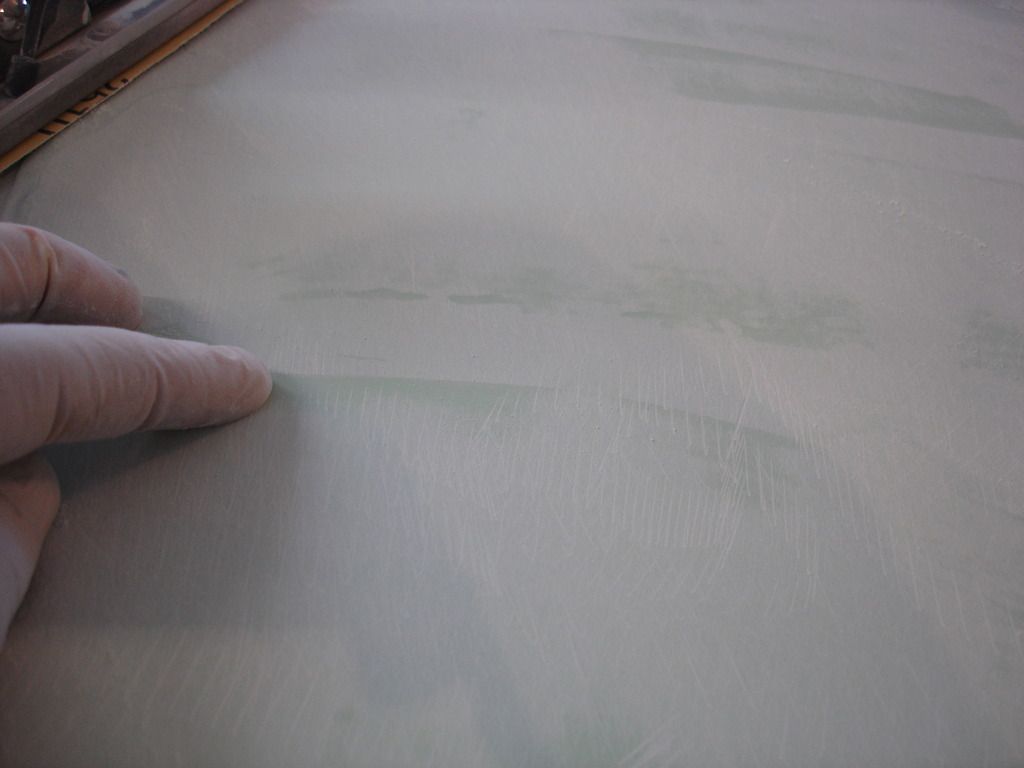
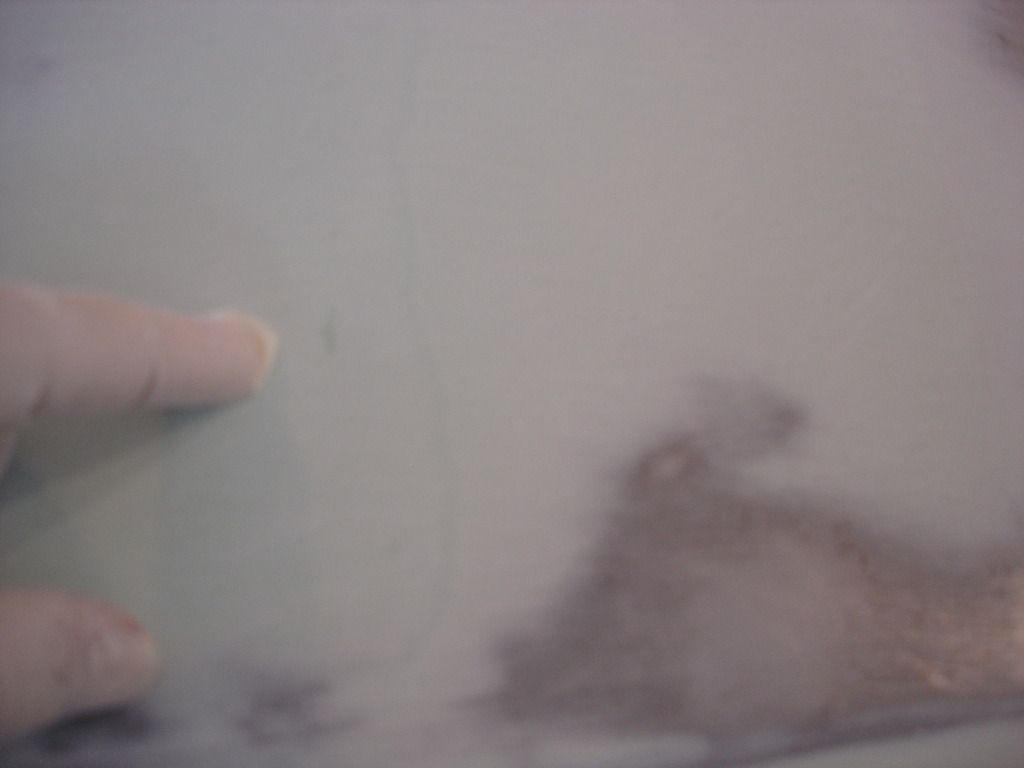
Just past the tip of my finger you can see a spot that is darker. This is a small low spot. We will fix this by applying another layer of glaze...but only around that one area. There is no need to re-glaze the entire bonnet.


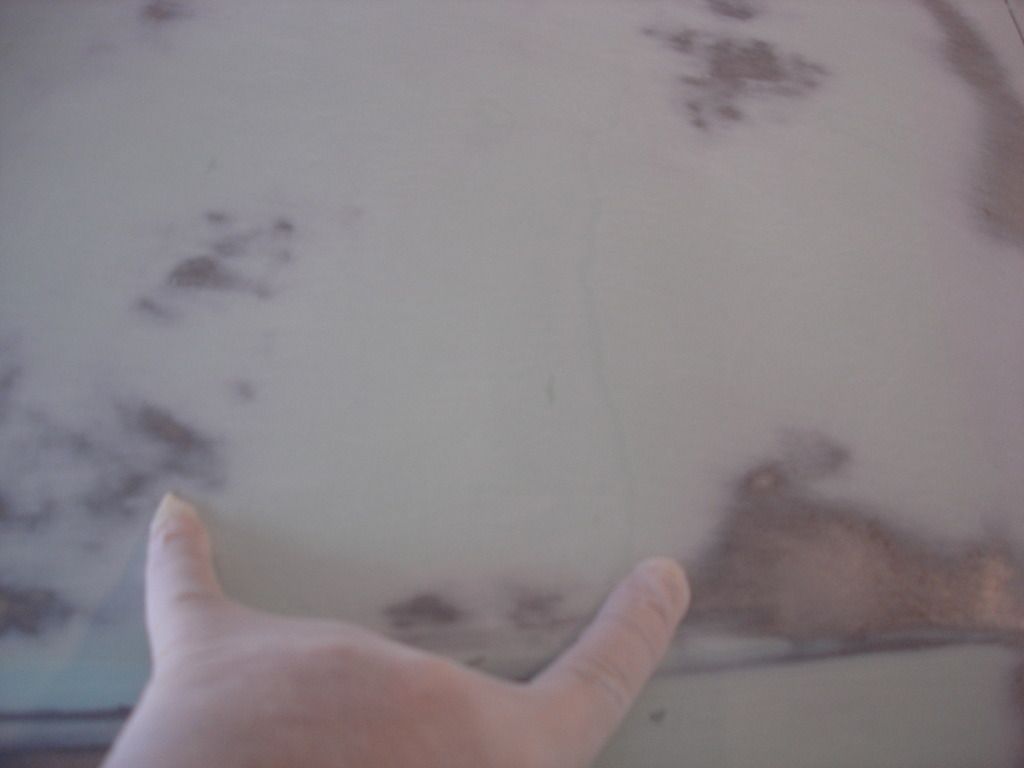
Here I am pointing to the 2 high spots that have cut through to metal. The low spot is between them. I do NOT want to keep sanding at this point. To remove the low spot more filler must be used!


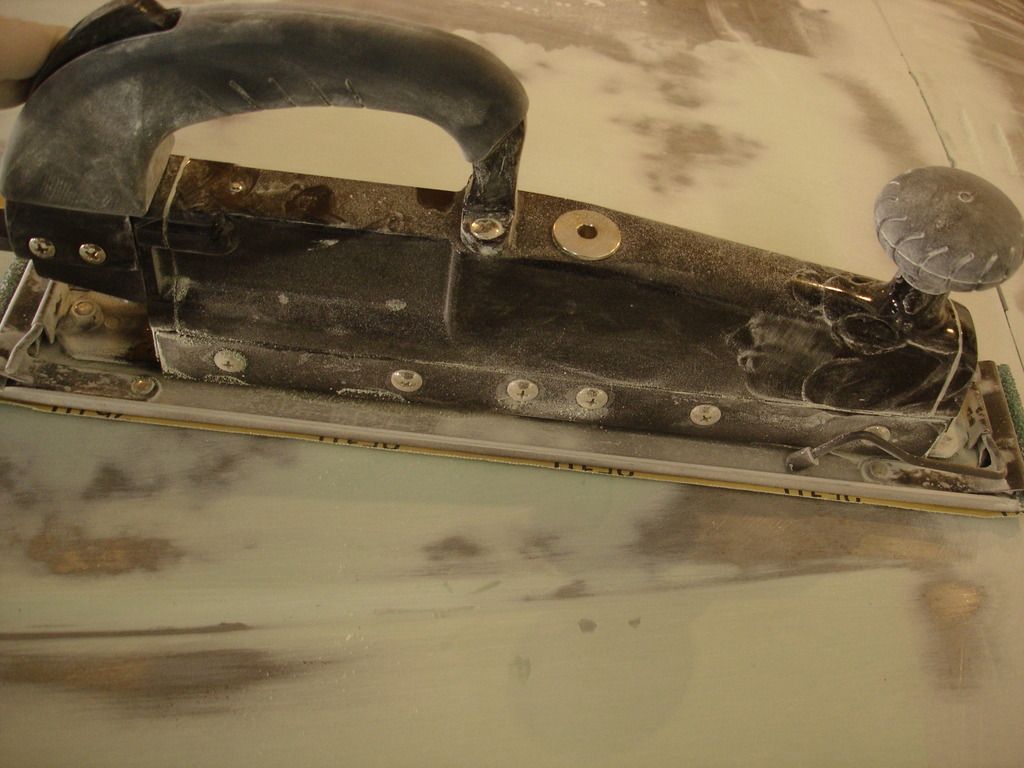
This is the sander over the same spot...showing that the sander block surface is "bridging" the high spots and cannot..."Nay"...should not!...reach the low spot shown earlier.


Here are a few more low spots. In this area, near the bonnet dzeus fasteners, I could not use the power sander. I used a 16 inch dowel to sand in the concave shape needed. When using improvised sanding blocks...the rule is to still use the longest block that is feasible for the area you are working.


Here is a re-visit to the bonnet to apron seam. Much better!


Here is the bonnet top after the first glaze. If you look, you can still see some low spots, but all areas are being bridged, so that is all that can be done for this round.


Second round we apply glaze to only the low spots, as shown. After this round, there will likely be only 1 or 2 spots that need a 3rd layer...or 4th...5th!?!

So that's it. Looking forward to going into 2017. I figure 3 more full days of sanding and the car body will be ready to prime. I can't wait...as every square inch of the garage is covered in fine powder right now!

Cheers...
 
Looking great John! I take it you don't like using a guide coat when sanding?

Cheers
Tush
 
Hi John,
As you may recall from one of my few posts I'm working on a 62 Tr3b. And it will probably be a year or two before I get to each step you've been detailing. But I really appreciate the details you've been providing, especially welding techniques and now body filling. One question - you describe using a LONG sanding block and bridging high spots and filling the low spots. How about the outer sill under the door where you need to introduce a high spot, the slight bowing. Any techniques to get a nice consistent bow at the point.

Tush, and others, thanks as well for your tips and videos. All being "processed" for future use.

Happy New Year,

Kerry
62 TR3b, all in pieces
 
Hey Tush! I've always used lighting to take the place of a top guide coat. In other words I have enough light on the work so the lows stand out well. So I haven't needed to spray a guide coat...but it may help others when they are getting a feel for "highs" and "lows" on the surface. For those following, I am pretty sure what Tush is talking about is the technique of spraying a thin coat of paint over the top of the filler, immediately after you spread it. Then, when you sand it is completely obvious where the low spots are, as they remain the color of the paint, and the surrounding area turns the color of the filler. If you are having any trouble detecting the low spots, this is a very helpful technique! It even helps more when we get to the primer and wet sanding, as that can be very tricky when the "lows" are really not very low, and they don't show up at all when wet.

Kerry, for the outer sill I used the technique of turning the sander about 30-45 degrees from side to side as I cut the sill contour. That allowed me to use the bottom of the door as a guide that transferred down to the sills. You can even turn it a full 90 degrees, or completely vertical...so long as you are very careful not do so for very long before you turn back to the angled sanding.

I have not really been showing it, but once an area is getting very close to shape using the power sander, I usually switch to the simple hand sanding block to finish it off. Sanding by hand slows everything down, so you have time to check frequently by gliding your flat hand across the surface...much as I described when working the metal with the hammer and dolly. When you are dealing with a lot of color variations on a panel...like you get as you are sanding several layouts of filler with metal showing through...then using your hand is often very telling on where the remaining "high's" are.

I'm close to getting to the sill on the driver's side...so I'll spend more time showing that...
 
John that is going to be one stunning car when you finish! I admire the dedication it took to suffer through the long process of all the parts to get it back to this point. You do have a gift!
 
I've decided that it's a fine line between a gift and a curse. Try to document the club work getting your "new" Triumph started. Getting one going after a long storage is a topic that comes up frequently.. once you and the kids can ride in that one it'll motivate you to get going on the family car!
 
Hi John:

Here is the response from the seller of the Healey on the dark brg:

"The best wishes for 2017! Sorry for my late reply, I am on holiday and not working... The dark BRG question is being asked a lot. I cannot give a clue on specific cars because they all have been painted at different shops and at different periods in time. I never get the exact codes. The colour you mean is really DARK British Racing Green. It is used a lot on Jaguar cars. Please have a look at this page, it may give you some useful information. https://paintref.com/cgi-bin/colorcodedisplay.cgi?color=British Racing Green"

Good luck John, your work is inspiring!

Cheers
Dan
 
Thanks, Dan. I ordered the 46169 this morning. I am having 3 qts mixed in PPG brand "DCC", which is the one part urethane line of PPG paints to do all the under and insides. Later I will have the same mixed in DBC/2002, base/clear coat to do the outsides. I appreciate all the help tracking down the right color!
 
Looking forward to forward to seeing the colour. I like the idea of the single stage for the under and insides and the base/clear for the exterior. I'll be doing the same on my 59.

Cheers
Tush
 
Back
Top