 Hey there Guest!
 Hey - did you know if you click on the title of a thread it will take you to the first unread post since you last visited that thread?
 but were afraid to ask:
  STOP!! Never post your email address in open forums. Bots can "harvest" your email! If you must share your email use a Private Message or use the
  smilie in place of the real @
 Pretty Please - add it to our Events forum(s) and add to the calendar! >>
CJD
Yoda
Offline
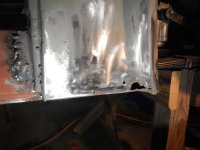
Nice looking patch!
+1 to actually hang the door...at least until you have the post tacked. For door gaps 1/8 to 3/16" would be good. Less than 1/8 and the front of the door starts to rub. More than 3/16" starts to look too wide. The key is to get the gap even along any one entire edge. It's not that noticeable if the edges vary slightly between each other. For example, if the lower gap is 3/16", but the front and rear gaps are 1/8", it is not noticeable to the eye. But, if the rear gap starts at 3/16" at the top and ends up 1/8" at the bottom...then the eye really pics that discrepancy out easily.
Keep the pics coming...I like watching others work much more than I like doing it!


 A friendly reminder - be careful what links you click on here. If a link is posted by someone you don't know, or the URL looks fishy, DON'T CLICK. Spammers sometimes post links that lead to sites that can infect your computer, so be mindful what you click.