but were afraid to ask:
 Marvin Gruber
Yoda
Offline
Hook goes thru rectangle plate, thru body tub, then body packing (maybe 1/2" thick) then thru frame pipe, add washer and nut. Don't overtighten and bend body metal.
Marv
Marv

 Hey Guest!

 Hey - did you know if you click on the title of a thread it will take you to the first unread post since you last visited that thread?
 STOP!! Never post your email address in open forums. Bots can "harvest" your email! If you must share your email use a Private Message or use the
  smilie in place of the real @
 Pretty Please - add it to our Events forum(s) and add to the calendar! >> Here's How <<
  Change the look and feel of the forum to fit your taste. Check it out

What a great looking TR250! I've never seen it over here in Carmichael. And, the black license plates, it started its life in California. Eat your hearts out, those of you in salt country.


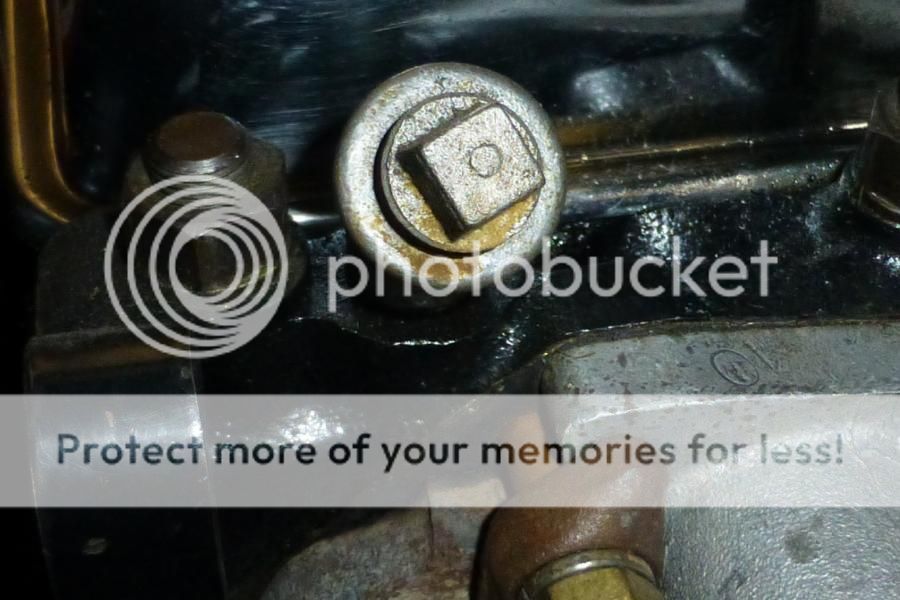
While you have the gearbox out you might want to add some back-up for that vulnerable clutch fork pin - they are prone to breaking at the most inconvenient times. Many use a grade eight 1/4" bolt through the fork at a right angle to the pin:
Or perhaps yours has this - couldn't see in the pic.