
-
 Hey Guest!
British Car Forum has been supporting enthusiasts for over 25 years by providing a great place to share our love for British cars. You can support our efforts by upgrading your membership for less than the dues of most car clubs. There are some perks with a member upgrade!**Upgrade Now**
(PS: Upgraded members don't see this banner, nor will you see the Google ads that appear on the site.)
You are using an out of date browser. It may not display this or other websites correctly.
You should upgrade or use an alternative browser.
You should upgrade or use an alternative browser.
TR2/3/3A Recipe for a TR2
- Thread starter CJD
- Start date

OP
CJD
Yoda
Online
Back to assembly for a while...

I had to wait for the dash to be covered before I could do any more mechanical items...and THAT is because of the long capillary tube on the temp gage! But, the dash is in now, so we can move forward...
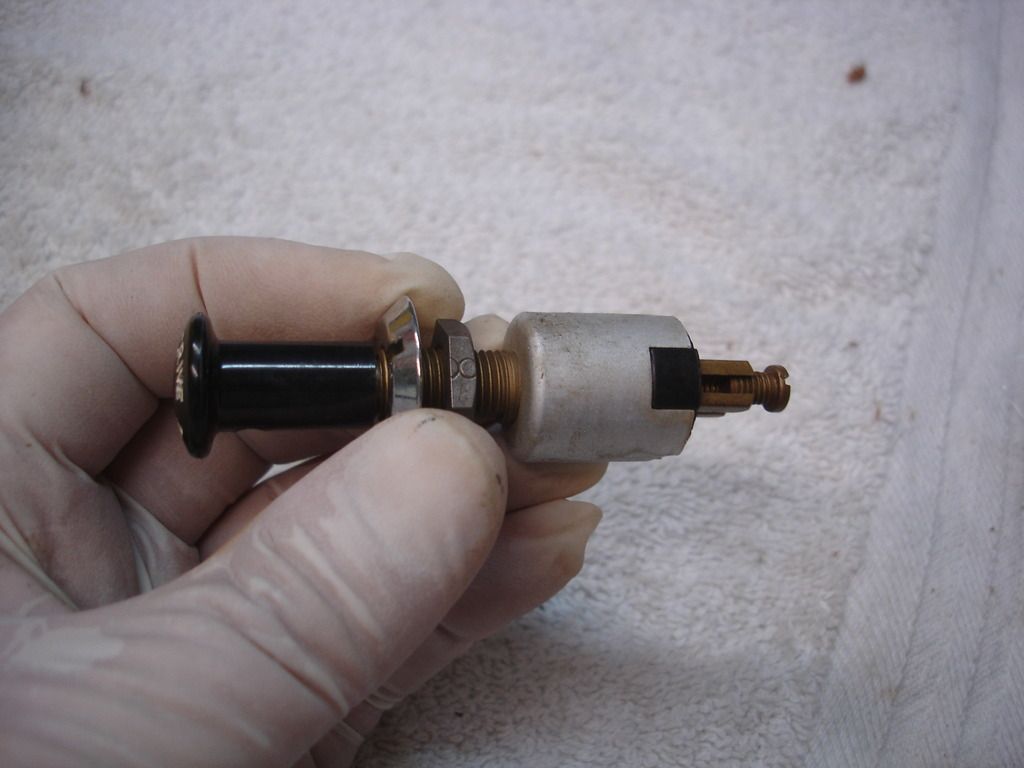
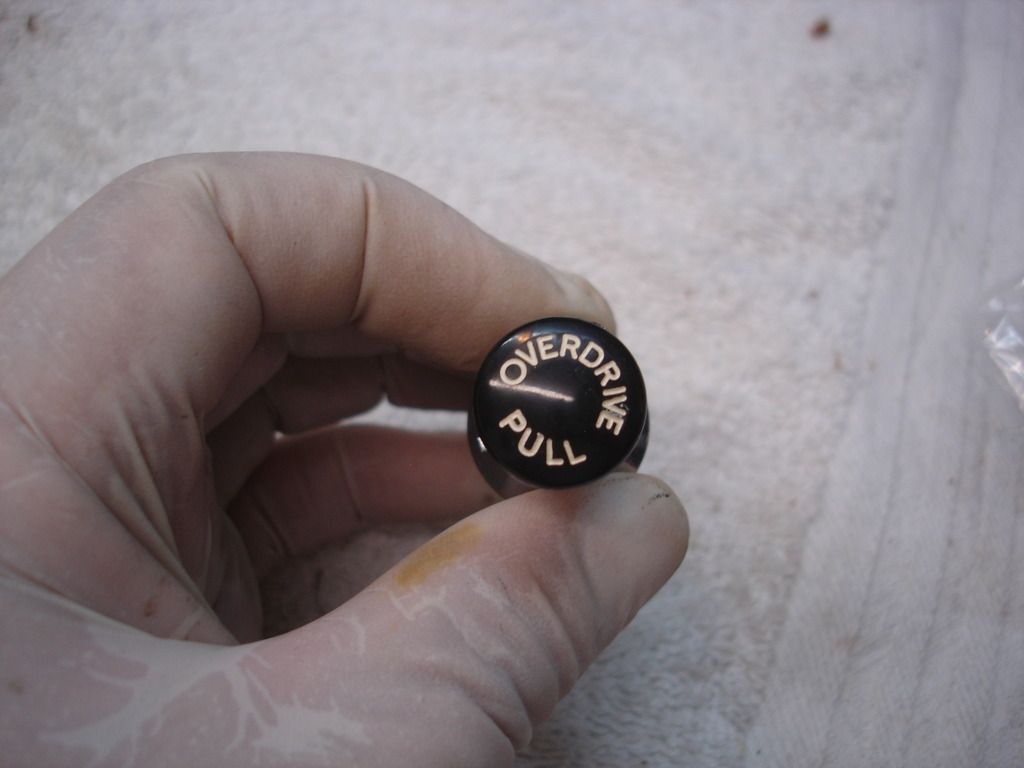
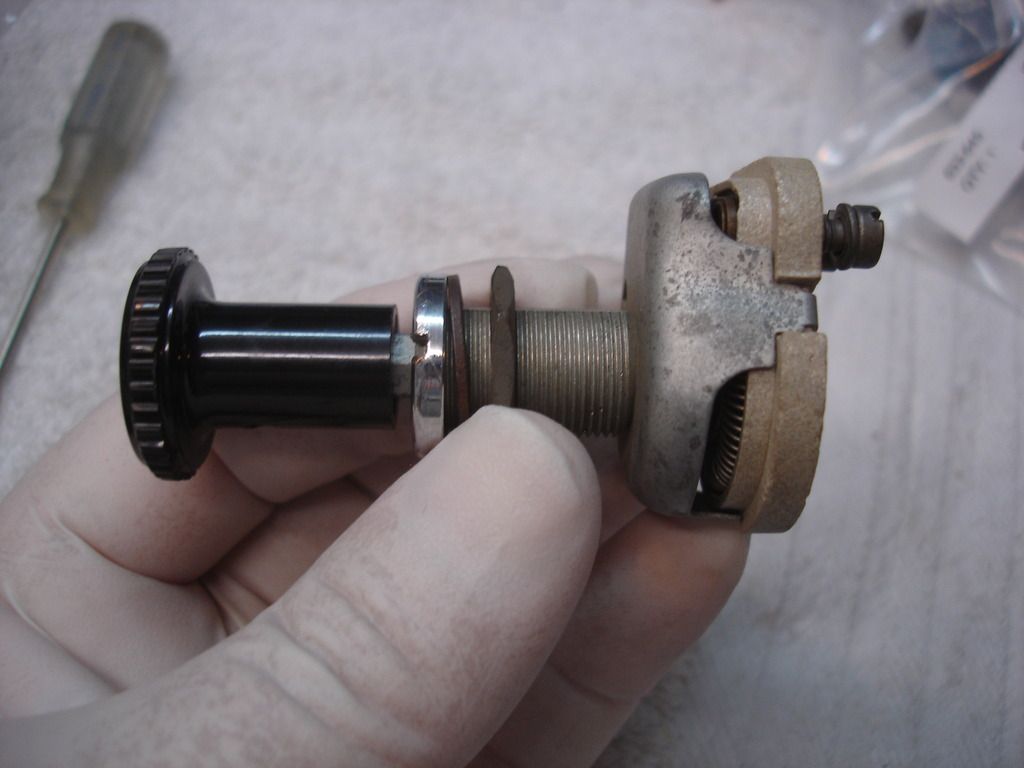
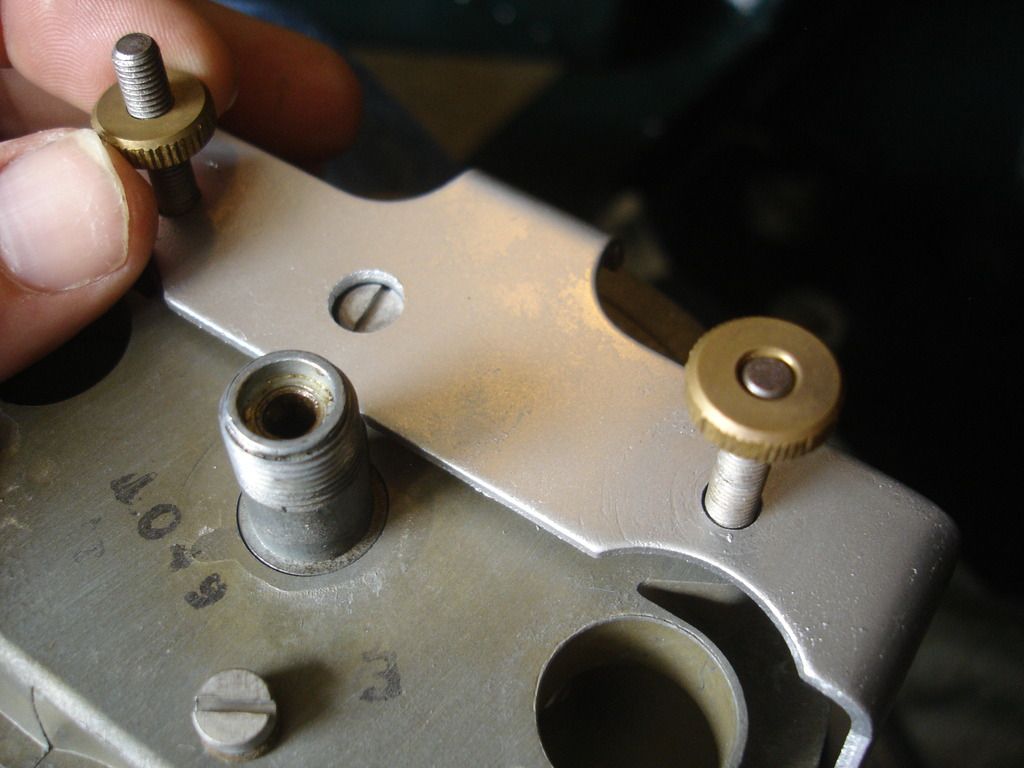
This is the early overdrive switch, that goes on the far left of the dash.
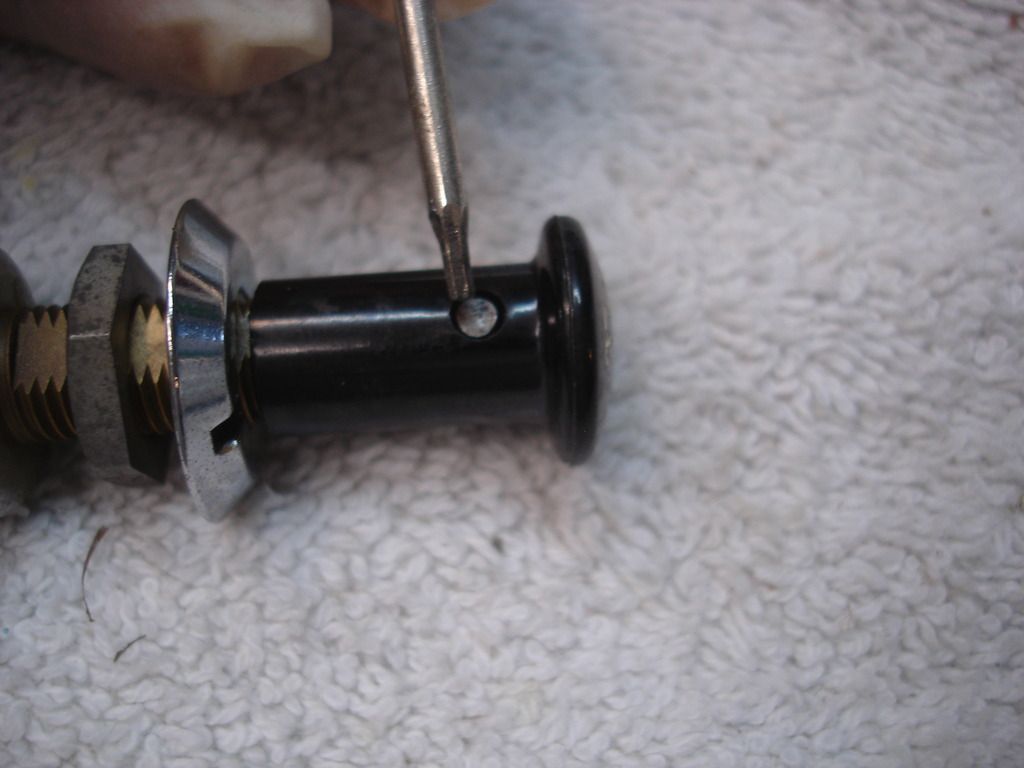
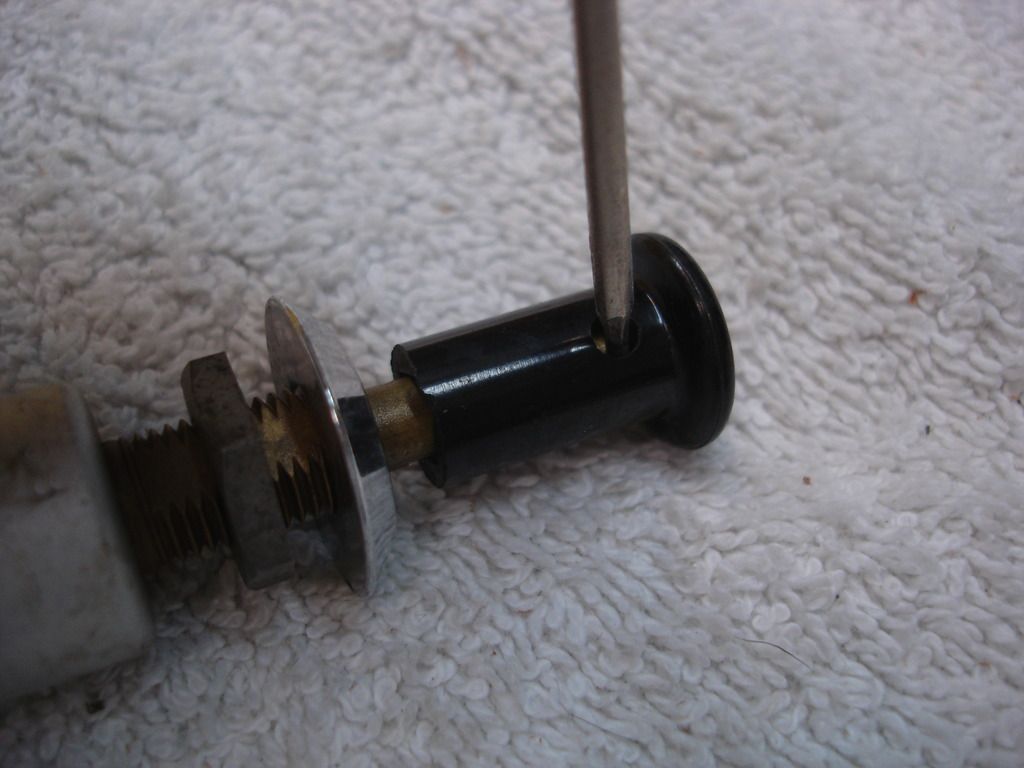
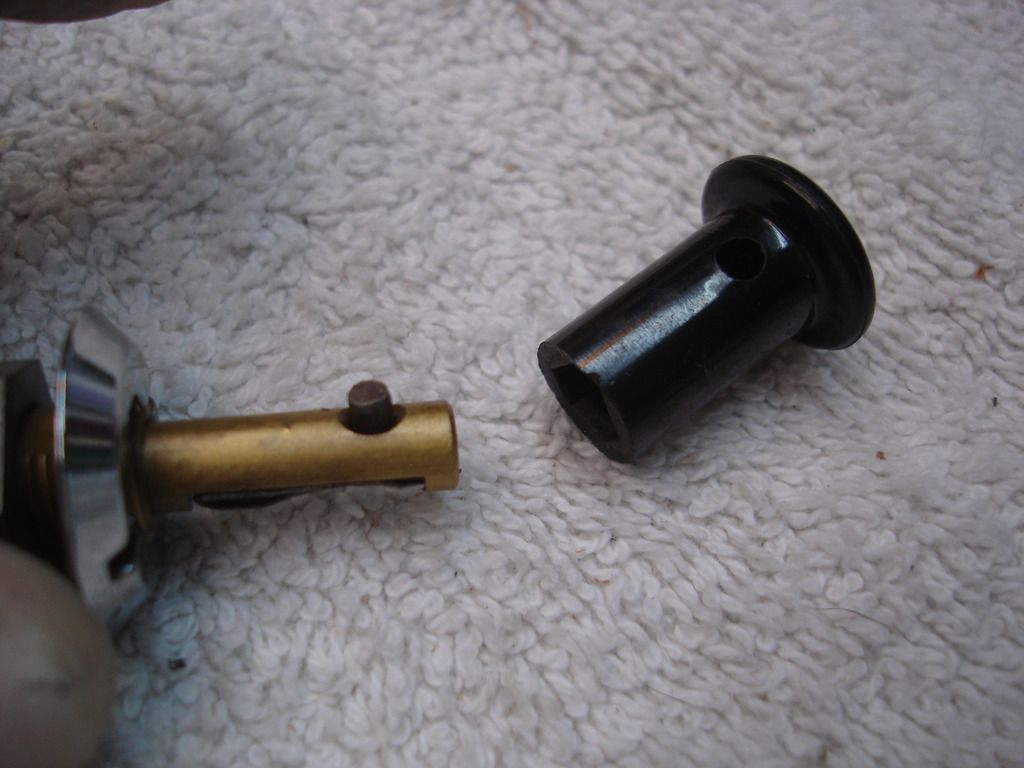
We see more threads started about "how do I remove the knob off my switch. Well, these 3 pics need to be archived!!!!
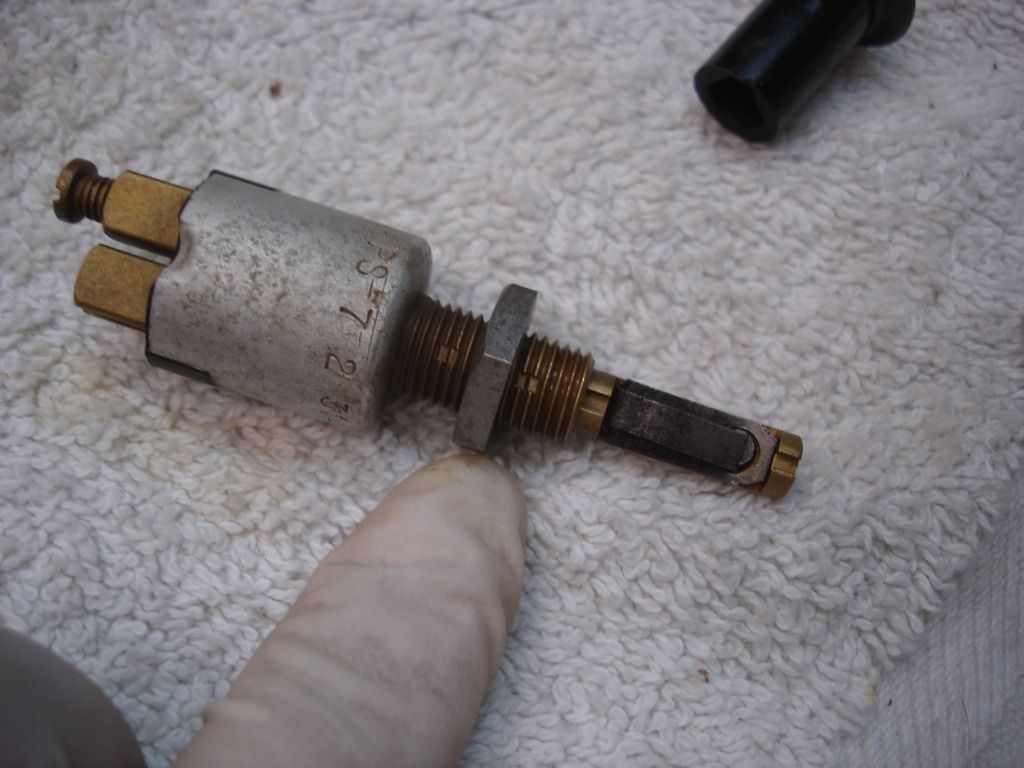
The nut at the back of the switch post sets the depth of the switch in the dash. I strive for 0 threads showing in the front once the switch is installed.
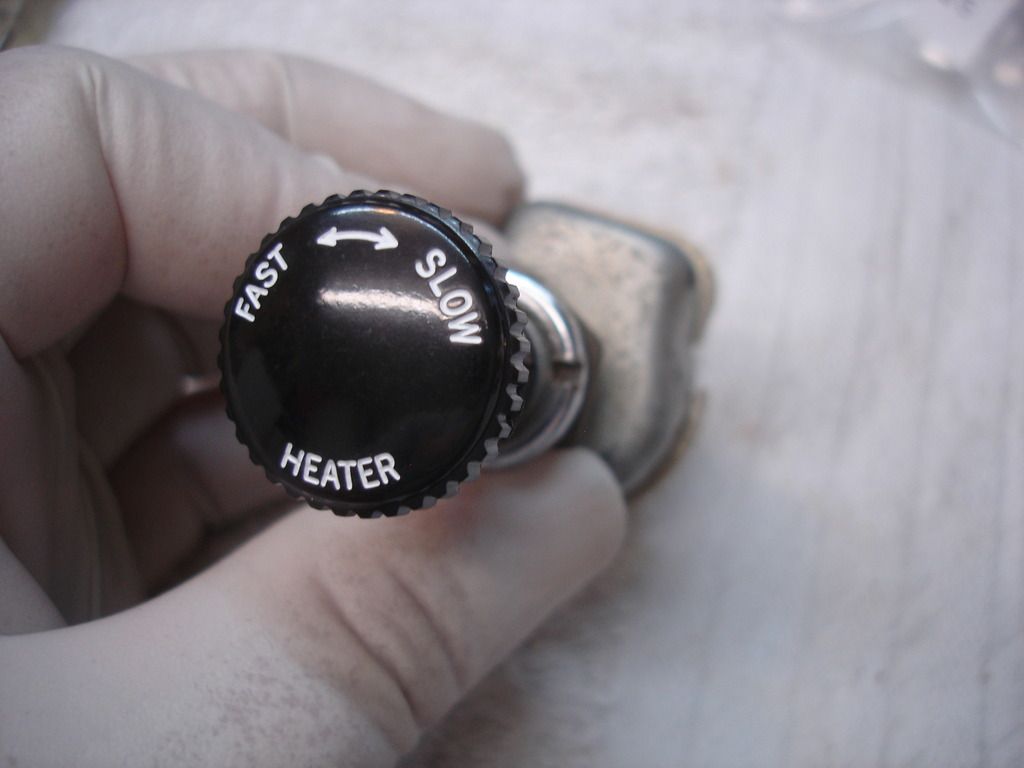
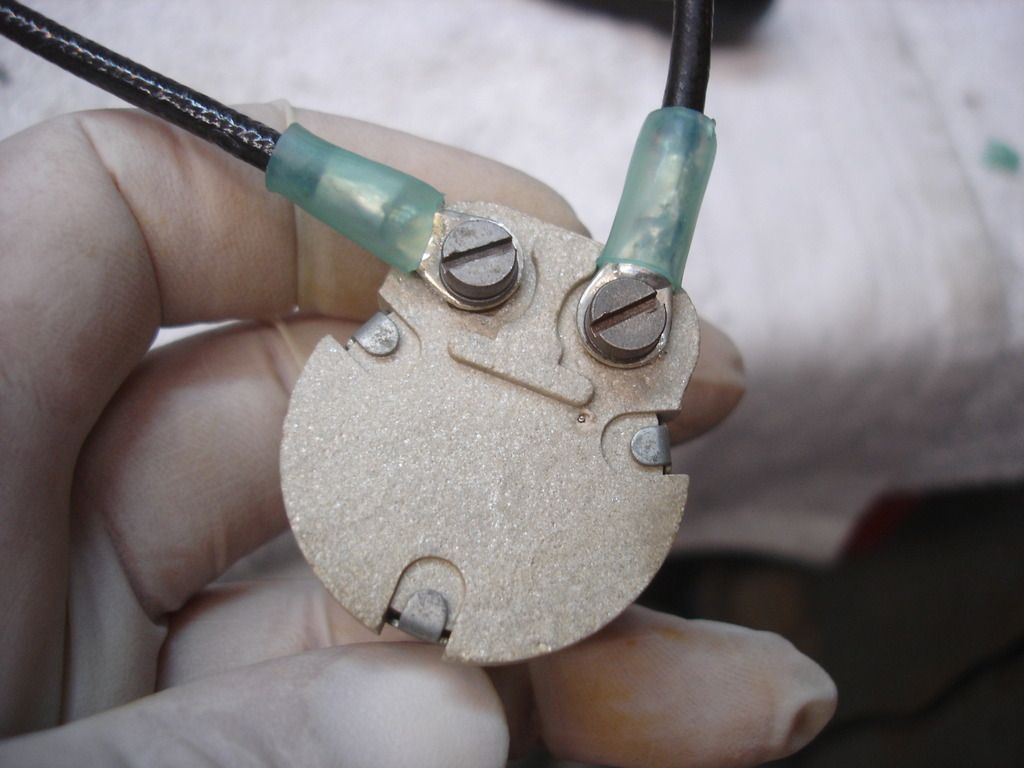
The heater rheostat switch. The heat shrink is not original, but they add a bit of safety to the installation.
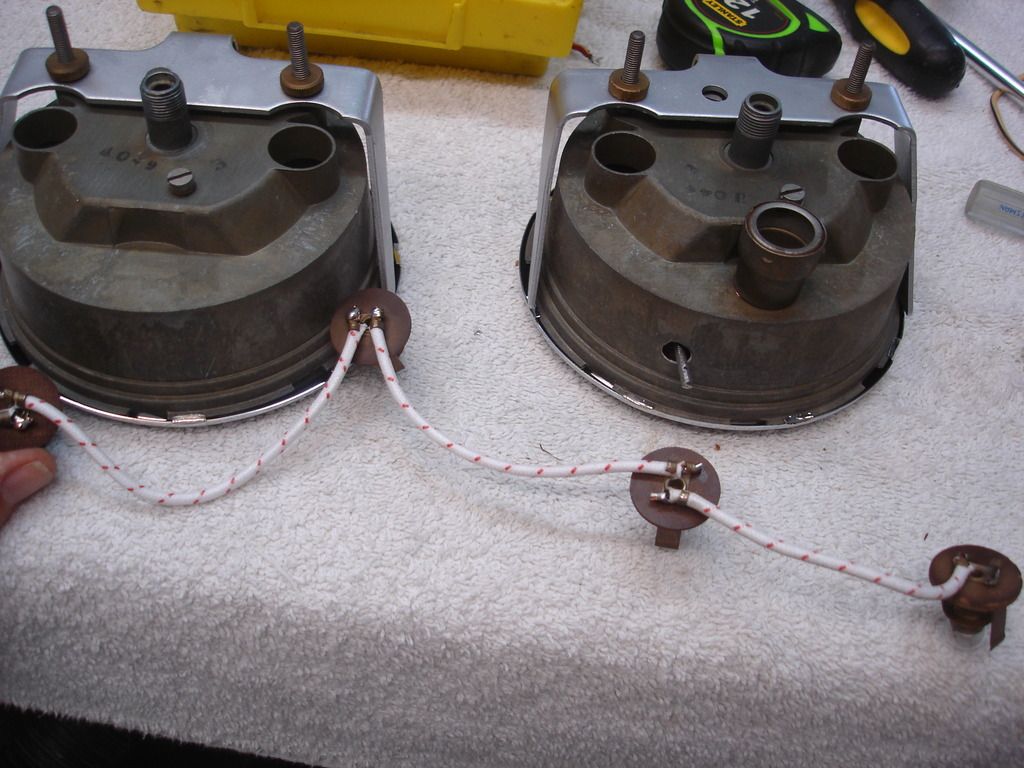
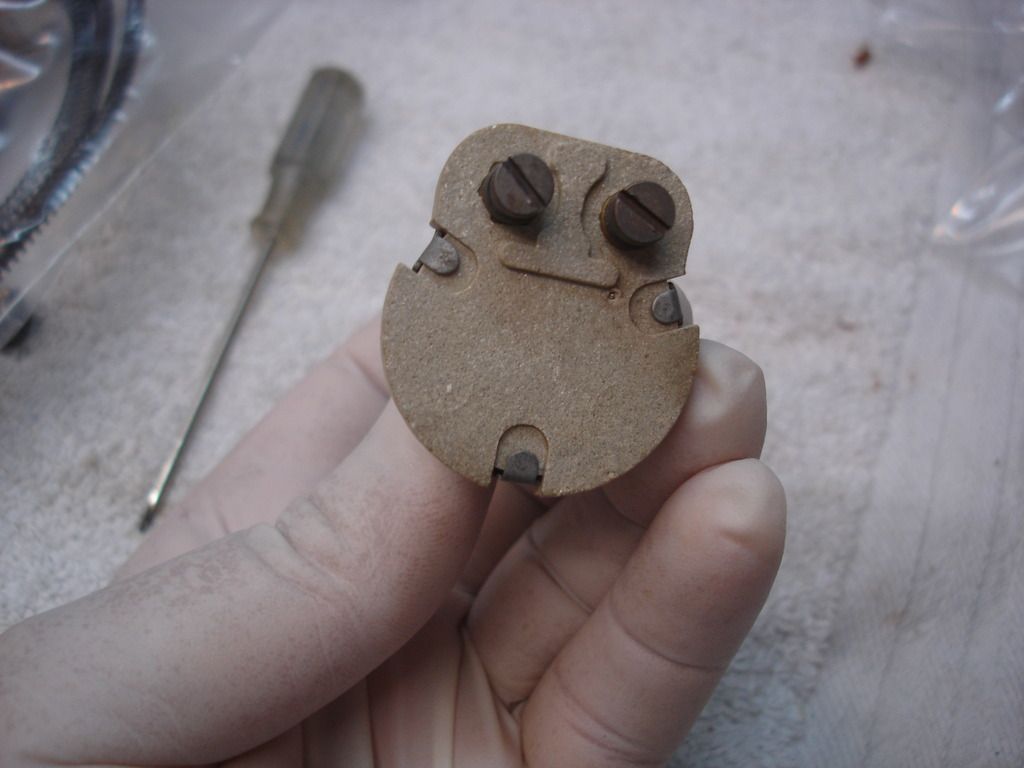
These are the 4 lights for the speedo and tach.. Notice I am working from the outside of the dash inward to the center cluster. That makes feeding wires easier to see what you are doing vs the other way around.
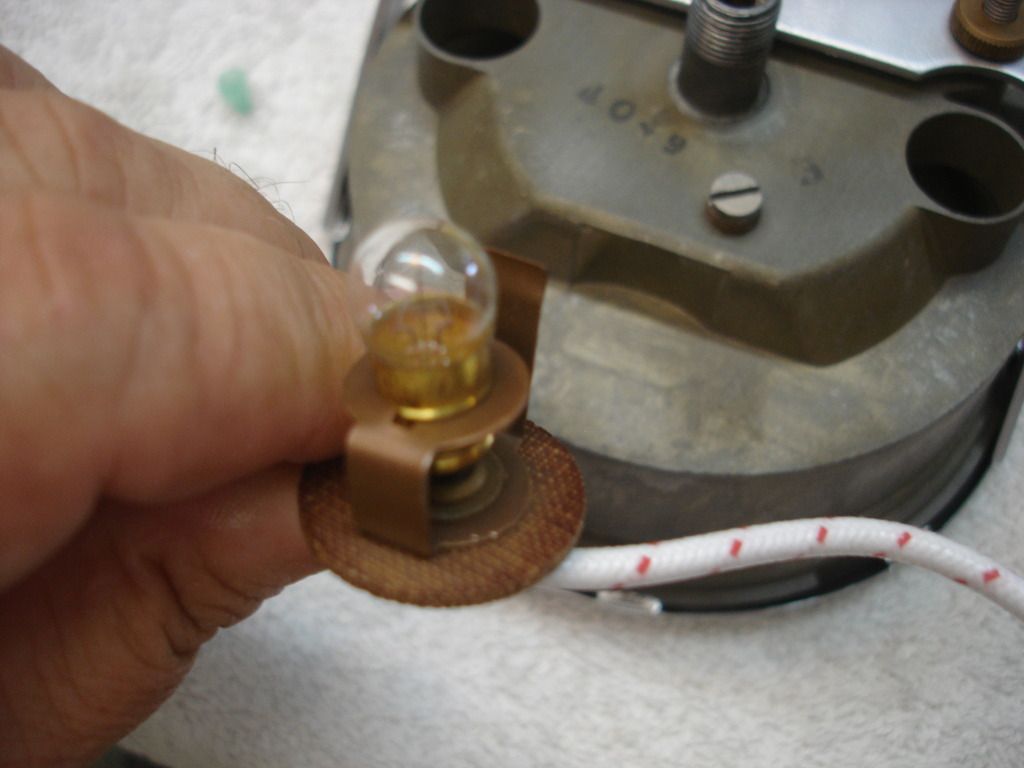
These little light sockets are a true PITA. They loose there connections from vibration, so have to be jiggled from time to time.

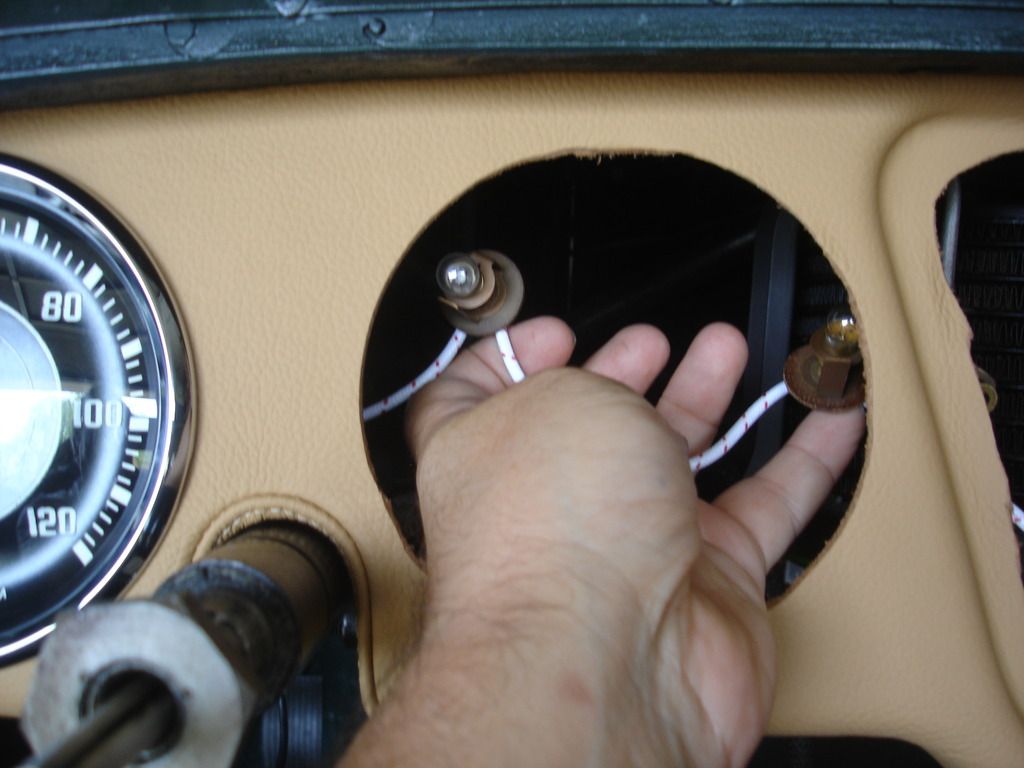
Here the light hot wire for the tach and speedo trails out the center hole, with the other wiring.
All the instrument nuts are not standard threads, so never toss a nut you get off of one! One day you'll need it.

I had to wait for the dash to be covered before I could do any more mechanical items...and THAT is because of the long capillary tube on the temp gage! But, the dash is in now, so we can move forward...


This is the early overdrive switch, that goes on the far left of the dash.


We see more threads started about "how do I remove the knob off my switch. Well, these 3 pics need to be archived!!!!

The nut at the back of the switch post sets the depth of the switch in the dash. I strive for 0 threads showing in the front once the switch is installed.


The heater rheostat switch. The heat shrink is not original, but they add a bit of safety to the installation.

These are the 4 lights for the speedo and tach.. Notice I am working from the outside of the dash inward to the center cluster. That makes feeding wires easier to see what you are doing vs the other way around.

These little light sockets are a true PITA. They loose there connections from vibration, so have to be jiggled from time to time.


Here the light hot wire for the tach and speedo trails out the center hole, with the other wiring.

All the instrument nuts are not standard threads, so never toss a nut you get off of one! One day you'll need it.
OP
CJD
Yoda
Online


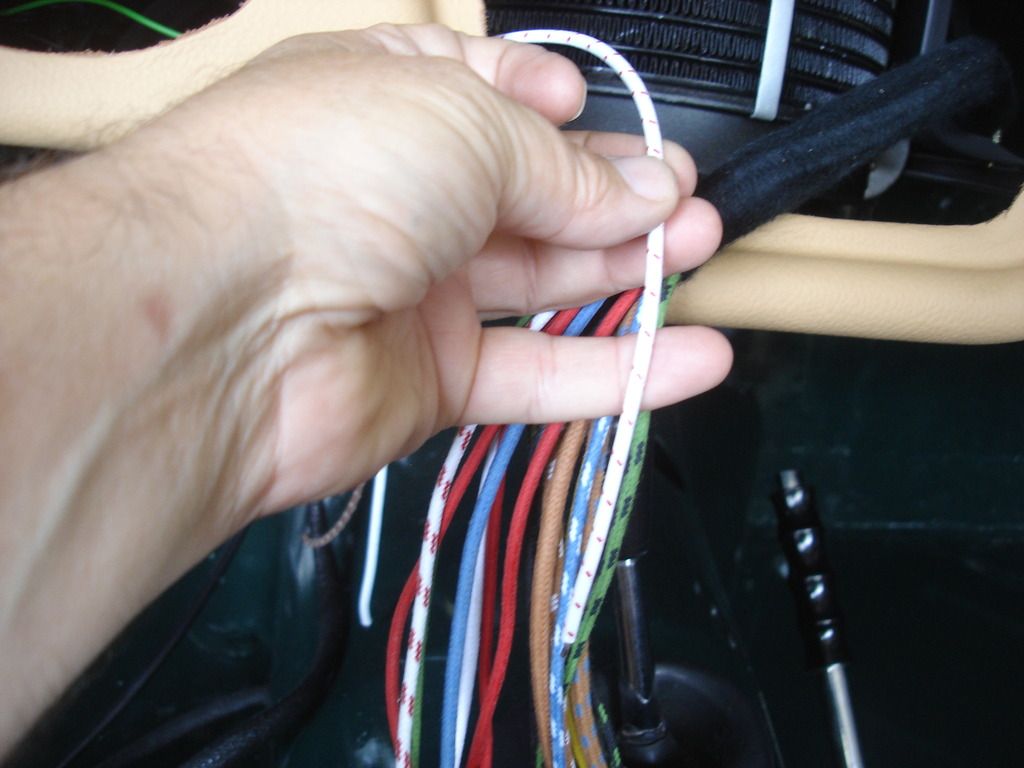
Plan your wires carefully, to minimize the "rat's nest" look, and make it easier to work on instruments later.

Now it's time to dive into the wiring! Fun fun!!
Notice I have the schematic on the dash to guide me. I have propped the center cluster up with a car cover to protect it while I add wires.
The TR2 does not use the Lucar style spade connector, but rather set screws to hold the wires. I take the time to tin every wire end with solder to minimize bad connections from the set screws from vibration over time. Tinning also makes inserting the wires easier.
Note: You may notice the tach and speedo are reversed! This is the original way they did it. Later they decided that the passenger needed to see the speedo, so they reversed the speedo to the right side hole.

This is the fuel gage. On the back it is labelled with a "B" and "T" B is battery (all fused power is solid green). T is tank connection (green and black).

Now we're feeding in the lighting wire from earlier.

Hmmm. Rat's nest anyway!?!

Ready to install the capillary temp gage.

The oil gage uses a leather seal. I am going to try an "O" ring this time around. It's easier to source and easy to change out if it fails to work. I'll let you know how it does...


It's time to hook up the battery...key the Jaws music!!
Here I am testing the resistance across the battery cables before I hook any power up. It needs to read open circuit, or something is wrong.

This is a 20 gage wire. I am connecting the battery using this tiny 20 gage...that way, as I check out the wiring, if some system is shorted, the 20 gage will burn up before the 16 gage car wiring. This is an important step!!!
Another "insurance" step I take is to replace the fuses with 5 ampers for the testing. Again...I want to blow something cheap instead of a newly rebuilt wiper motor or such.

For testing, remove the hot wire to the ignition coil. If you don't you could burn the points and coil over time.

"She's aliiieeve!!"
Issue one...the right running tail light had a bad filament in the brand new bulb. Whew...first issue is an easy one!

This one was a bit more confusing. The fuel gage, heater, and wipers didn't work. I finally followed the problem back to this fuse. It is not blown...it is defective! Never had that happen before...but at least it's another easy one. Now the fuel , wiper and heater work.
Note...this is one for Jerry. The schematic says to draw the heater power from fuse A2 connection. This is the fused side of the always hot fuse. That was a problem for me. If you put the heater to that side of the system, it will run even when the ignition is off and you walk away with the key! The same as the horns. That's just asking for a run down battery.
I switched the heater to the switched side of the system...so the green wire going to the fuel gage.

Power on, the fuel gage goes from left of scale to "E".

No gas in the tank...or I would use a wood stick to prevent sparks. I am hooking the fuel sender float and pulling it up.

Float half up...gage is half.

Float to the top...and gage says full. Test complete.

Here I have hooked up the trafficator to the connection on the left front inner wing. This allows me to test the turn signals and horns. All checked well.
OP
CJD
Yoda
Online

Time for the blasted capillary gage!

Feed it through the dash and into the engine.
Cloth tape and straps hold it to the fuel line in 3 places.

The dash is done!


The steering shaft and wheel are NOT marked. This is not the original wheel...so not my fault!!
To center the wheel, first jack the front wheels off the ground, so you are not fighting the tire friction.

Find center by turning the wheel stop left to stop right. Then count back 1/2 the turns to center. Double check the center, as there should be a very slight "bump" in effort as you pass center. This, of course, assumes you gear is not worn out and is adjusted correctly.


Trafficator time!

Notice the bullet connectors are stepped, so they will not interfere one another as you stuff them down the stator tube. There is only enough room for the wire bundle...barely!!

Silicone down the tube, and over the wire loom makes pushing MUCH easier!

Feeding them in the top...

Once they come out the bottom, you will need a helper to pull at the bottom while you feed the last of the trafficator into place.
Slot for the stator tube goes down.
Pointer/selector goes up.
Turn plate must be centered before tightening the set screws to the steering wheel.
This is a "fiddly" job.

Bought this cable for the TR3A...after I lost the lock plunger. I carved a new lock plunger from brass welding rod, and it never failed, although this cable was ready to go if it did. Now it is re-tasked to the TR2.

Glove box liner. The original was "buff" color. No luck finding that!


Terrible pic. You can barely see the brass clip holding the choke cable away from the heater box. Without it the cable will foul the heater doors.

Hey, I notice it's looking a lot like a "car" for a change.
OP
CJD
Yoda
Online

Time for the gas check. On a new rebuild, NEVER fill the tank!!!
I added 2 qts of fuel, and found this pinhole in the fuel supply line out of the tank.

I will fix it with Silver solder. This is not soft solder...It is 85% real silver, and hard as steel when it's done.


Here I pressure tested with 130psi in water...and found a second pinhole! Better now than down the road somewhere.

Next...pinhole in my Ebay tank, that was advertised as "excellent shape with no leaks". I swear I gotta swear off Ebay!

I found the pinhole with 5psi of pressure in the tank and soapy water. Do not go higher that 5psi! That actually amounts to hundreds of pounds force on the tank walls, even with that small pressure!

The leak...


Silver soldering a gas tank. Hmmm. Not for the faint of heart. Fortunately, if you have gotten this far, you must have a MIG welder. The mig welder comes with a tank of inert gas AND a nice regulator. Drain the tank, seal all but 1 hole...and blow inert gas from your MIG into it for 15 minutes before taking the torch to the tank.
Even then, I had to pull my underwear back out of my crack when I was done! Very exhilarating.


I apologize for not filming the actual operation. I was busy trying not to blow up at the time.

Isn't it just heart breaking when you have to take a step backwards!
Funny story here. I fixed the tank, put it back in, and blast if it wasn't still dripping under the car. Took it back out, and there were absolutely NO leaks! Huh?? Turns out the felt padding was saturated from the first leak. As I cinched the straps down, it was merely squeazing out the gas from the previous leak. Whew! I had to leave the pads out on the back yard fence for a day to dry out.
Well, that was it for the week!
Well, not quite. I got the kids to help, and we got the motor started for the first time in 28 years...and 3 years since they assembled it under my watch. The start went great. Fired on the first try. Started on the 5th firing...and immediately reved to 2500 rpm. Whoo hoo! Then anti freeze started spraying everywhere...Aaaahhhrrggg!
I suspected the VB water pump seal when I rebuilt the pump 4 years ago. I was hopeful when it held a seal when filling the system. But...it blew out in the first 10 seconds of the engine run. I have to say, I'm done trying to rebuild TR2/3 water pumps. It's not that I can't do it. It's that there are just no reliable parts available to put in them!!
So, success with the mechanical and electrical restoration. A water pump is en route from TRF. We did take a quick video of the first start...but I'll have to talk to Tush about how to post a video...
Going back to the upholstery thread for a bit until the pump arrives.
OP
CJD
Yoda
Online

Here's one of those little white hole plugs that go under the sills and rear valence panels.


This is a little detail that bothers me. The bolts for the rear bumperettes are always too long. Cutting 3/4" off prevents a long threaded section from sticking out. I told you...I need counselling after that Bonnet paint job!?!

Here is the bolt installed...sorta' hard to pick out of all the shinyness. Is that a word?

The tail is done. What looks like a dent appears to be...well...me! Maybe I need to go on a diet.
Well, speaking of weaning off ebay and there being no parts for water pump rebuild:
https://www.ebay.com/itm/232369896390?item=232369896390&rmvSB=true
Dan
https://www.ebay.com/itm/232369896390?item=232369896390&rmvSB=true
Dan
OP
CJD
Yoda
Online
A friend of mine would fill a fuel tank with water if he had to do any welding on the tank. Don't remember if he left it full or emptied a little out first.
David
I considered the water. I was concerned about drying the tank out without causing any more corrosion than it already has. I still have the REALLy bad original tank. At some point I may repair the original, as the TR2 tanks are very hard to find. 4 years ago I would not have considered patching the tank, but after all the patching practice, it may be feasible??
OP
CJD
Yoda
Online
Well, speaking of weaning off ebay and there being no parts for water pump rebuild:
https://www.ebay.com/itm/232369896390?item=232369896390&rmvSB=true
Dan
Dan, I actually have been watching that kit! What I like about it is it has the shaft. When I rebuilt this pump, I took the best parts from 4 old pumps I had laying around. I learned that the shaft is one of the first parts to corrode, but most kits do not have a replacement shaft. I've still got like 3 bad pumps. I just have to decide if I feel like messing with rebuilding them.
OP
CJD
Yoda
Online
No pics, but a quick follow-up of the last few days work...
I got the TRF water pump installed. It was not quite up to par for TRF, in that I had to drill the mounting holes larger so it would install with the weep hole down and the grease fitting boss up. Got that all taken care of, so the car can be run without spraying antifreeze across the garage!
Got the carbs tuned, so the motor will tick along at 700rpm. It starts cold after the second spin now, and on the first pop of the starter when hot.
I cooked the temp gage when I changed the water pump after coming home off an all night flight with no sleep for 30 hours. I forgot to top up the coolant after installing the new pump. Fortunately I caught the mistake before any significant damage was done to the motor...but the temp gage was not as fortunate. When I shut it down the diaphragm topped out and popped off the needle arm. Bummer! I shouldn't do anything that requires thinking after working all night.
I got the gage fixed and calibrated in place, which saved me having to remove the entire capillary tube. So that crisis was solved.
Then I tried to tackle the leaking OD control shaft. It turns out I put the left side o-ring on the outside of the case...like all the manual diagrams show. It goes on the inside! Thank you Dave, Berry and Craig for pointing out my blunder. Then I could not get the OD to cycle. After pulling the tunnel and checking pressures and adjustments, it turned out it was cycling fine. The problem is the drum tends to stick to the cone barrel. I am assuming that issue will gradually repair itself after a few miles and a couple fluid changes. Remember the tar this OD had?!?
So...the car is mechanically ready to drive. Back to finishing out the interior!
OP
CJD
Yoda
Online
Photobucket discontinued all my picture links for the last 7 years!
Took the car for it's first outing in 28 years. Here's how it looks so far...


Drives great! I was expecting a noticeable loss of power compared to the TR3A, which has the later high port heads and a few more cubic inches. Honestly...it feels peppier than the TR3! I decided the narrower ports gives it better low end torque, which is what you feel off the line the most.
I may have lost the car, though. I'm not sure my 17 year old son is going to bring it back?!?

Took the car for it's first outing in 28 years. Here's how it looks so far...
Drives great! I was expecting a noticeable loss of power compared to the TR3A, which has the later high port heads and a few more cubic inches. Honestly...it feels peppier than the TR3! I decided the narrower ports gives it better low end torque, which is what you feel off the line the most.
I may have lost the car, though. I'm not sure my 17 year old son is going to bring it back?!?
Last edited:
M_Pied_Lourd
Darth Vader
Offline
Stunning John! I'm amazed that there was no handle to lift the boot lid on the TR2.
Cheers
Tush
Cheers
Tush
I have a headache of envy,-- not jealousy because jealousy is the fear of losing something you have and envy is a wanting. Nice nice nice you have changed my life John and it is for the better. And thank you, but are you are saying no bootlegging pirate on this forum did not make a CD or I am not getting a CD or something like that?
steve
steve
OP
CJD
Yoda
Online
Thanks for the kind words. Tush, you're right. You have to turn the key half way between lock and unlock and use it to pull the lid up. Funny it took 4 years to add a handle. Steve, it's too well documented to let photobucket ruin it. Once I'm done I'll compile the journey into a PDF I can share with anyone interested. These old cars need all the help we can give their owners to keep the fun alive!
Marvin Gruber
Yoda
Offline
Looks fantastic! We on the forum will now start placing bets on how long it will be before you start another TR project.
Marv
Marv
So beautiful! That is the nicest short-door TR2 I have ever seen, and I've seen a few. I love the panel fit, the smooth reflective surfaces, the correct TR2 details, and the overall effect. To see the car now so happy and proud is awesome. The color is deep, lovely and so British. Maybe even a touch above the ordinary TR level of sophistication! Thanks for the extra effort of documentation - I am definitely in line for a pdf summary. Your son now has a fine example to use and carry on the hobby. Youthful interest is really key to me.
Dan
I think this is the same TR2 I have seen bouncing around for so long, and another guy (Bazzano?) had it before you and tried to do a rebuild, which petered out. Every car has a story, and this one's really cool!
Dan
I think this is the same TR2 I have seen bouncing around for so long, and another guy (Bazzano?) had it before you and tried to do a rebuild, which petered out. Every car has a story, and this one's really cool!
TexasKnucklehead
Jedi Knight
Offline
Wow.
Nicely almost done.
Nicely almost done.