• Hi Guest!
    You can help ensure that British Car Forum (BCF) continues to provide a great place to engage in the British car hobby! If you find BCF a beneficial community, please consider supporting our efforts with a subscription.

    There are some perks with a member upgrade!
    **Upgrade Now**
    (PS: Subscribers don't see this gawd-aweful banner
Tips
Tips

TR2/3/3A Beginning the TR2 Bodywork

John This was one of your reply's.
How's that, huh?? Notice the gap is the same 1/8" as a cutting wheel? Pretty cool...

I should be working and not reading your posts over and over again. I also find as you are getting to the more detail work preparing for smoothing out the body it is making me rework some areas on my build. As a side note I saw on a hot rod shop site almost all the gaps are almost filled and then cut out to get that tight show car seam. This would have to triple the hours to work even a small section.

John, I am really enjoying your body work chronology. I have had so many of the same experiences: grinding door gaps or adding weld bead to build up areas. It is a lot of work but extremely rewarding when everything fits together well and you know it is as close to perfect as you can get. Congrats on such great progress!

Pat
 
Steve, I'd love to have a decent bending brake. I just don't have the room for it in the garage...maybe one day I'll have a dedicated shop to get one. In the mean time, I am doing similar to David's technique. I use the edge of the iron table on my drill press and clamp a bar to it. I then use a board to distribute the force as i pound the sheet to the angle I need. Very crude...but it works to get a straight bend. I found if I use sheet metal vice grips to do a long bend it stretches the edge, so the bend has a "bow" to it. Sometimes adding a bow can be useful, though!?!

JP, for most of our work even a 110V welder will do fine. Mine rarely comes off the lowest setting. As long as it reliably feeds the wire, it'll get the job done.

HC, you're right. This week I spent an entire day on each door. As it all gets close, you find the desire to get it even closer! I spent the week working around the car in circles, fine tuning all the hinges, gaps, and panels. Very slow, but the closer it all is, the easier the final painting will go. Plus, it's been too cold here to even try to mix glaze, so I might as well keep working the metal until it warms up. Below about 50 degrees it's hard to get polyester to harden right.
 
Week 63

Compared to last week I got nothing obvious done. The weather was cold, and although I spent a ton of time fine tuning, it doesn't show much. The fine tuning of panel fit is probably the most important part of the build...it just doesn't look like anything is happening. So just a few pics...


This is a shot of the technique I have been using on the door gaps. I can use the 1/8" cutoff wheels to first slice the gaps to 1/8", and then they can be used to carefully open them up to about 3/16". Works great, but most of the gaps that I opened resulted in the door skin being cut through, so then I had to remove the doors, weld the edges closed, and then start over from scratch...only without the "cut-through" on the second (or 3rd) try.


This shot is with the bonnet up. Notice how closely it comes to the top of the scuttle. I had to work on the bonnet hinges, the height of the scuttle (by hammering from under the dash), and the length/curvature of the bonnet to ensure this will never hit after all is painted.


During the bonnet fitting I had to remove the hinges to trim the little bit of edge that was covered...that I could not adjust with my cut-off disc technique. This constant removal and re-installing of the body parts is most of why this week seems so slow. I must have removed the doors and bonnet 3 dozen times each. Notice that I got tired of trying to find the same location for the hinges...so I finally painted the location on!


I am going to call this done on the rear edge of the bonnet. The rear of the bonnet is still about 1/16" higher than the scuttle, but I have too much metal in the bonnet to lower it further. If I lower the middle, the sides pop out. I have raised the scuttle as much as it seems to want to "hammer" upward. I can live with 1/16" of glaze to even this edge...at least that's my feeling now. Later in the week I may change my mind and work it some more?!?

I didn't take any pics during the 2 days I did nothing but doors, because, frankly, they look about the same when I finished!?! I got the hinges perfected so the rear latches would not hit the strikers wrong in the back. I then adjusted the latches to fit without binding or being too loose. Then I had to fix the door gaps to match...again!

One note: I did learn that front door edge is designed so you can tap it inward or outward to match the front wing curvature. It works great, but the down side is that the door has to come off to do it. The middle of the door has about 1 full inch of range in adjustment. Pretty cool. Of course, if you hammer it out, you will have to use a hammer/dolly to flatten the door skin when you're done. This is necessary since the front wing has almost no in/outward adjustability. If you recall, the wing bolts directly to the "A" post, with only the size of the bolt holes to adjust it. Being able to contour the front of the door becomes important. I only wish there were more at the rear of the door to work with...

I am now close enough that less than 1/16" of bondo/glaze will level everything out. If it warms I'll start to spread glaze this week. If it doesn't warm enough to mix polyester...then I'll keep fine tuning all around.

Until then!
 
Hello John

I presume the trick is to know when to quit circling and adjusting and move on. I have gone back to areas that I thought were finished and found things that needed work.

Looking at your last photo is the paint line on the scuttle the witness line from the bonnet and you had to cut that much off. Did I understand correctly that the TR2 bonnet has no lip on the rear edge unlike on the TR3A.

On the door gaps would gas welding rod or coat hanger make good filler material? I have some gaps that will need something to fill them.

David
 
Yes, that paint witness mark is where the bonnet originally reached. It averaged about 1/4 to 3/8" that I trimmed. You're also correct, the rear edge on the TR2 stays just like you see it...a raw edge!! I couldn't believe it was actually done that way, and I was sure someone had butchered the rear edge over the years. But I posted a couple years ago and the response was that is how Standard did it on the early cars. That's why the TR2/3 was so cheap compared to the XKE's!

You can fill with whatever steel you have. I used gas to heat and fill the TR3...and it causes a LOT of warpage that has to be worked back out of the door skin. Here is an example of how far the heat spread on the TR3 using oxi-acetalyne:


Vs. this job just using the wire feed on my MIG turned up on the high side:


You can see the heat distortion from adding the edge is MUCH less using the MIG set up.

I have gas welded for many more years than I have MIG welded, so on the TR3 I used the gas because I felt I had more confidence with control. Since then I welded a boat dock and an entire iron fence around the house using MIG...so I am equally comfortable with the MIG unit now. Either will work, with the MIG requiring the least "clean-up" straightening afterward.
 
Wow...looking at the pic above of the TR3A...I had no idea at the time how good I had it on that body! The only rust through were the outer sills. What a difference...
 
Hello John

Thank you.

I would only try MIG as I am out of practice with gas welding and it was never very good at it.

Hoping to get back to the TR after Christmas. This job is keeping me away from home and the TR but could not pass up the cash. Can buy needed tools and parts.

David
 
Re: Beginning the TR2 Bodywork Week 63, page 383

Week 63 Afraid I did not quite understand the paragraph where you indicated there was almost an inch of adjustment in the front of the doors to help match the fender curvature. Did you mean front to back or in and out and if either could you send or post a photo of the area where the adjustment takes place? On a seam of the door frame or what???
Thanks,
Dan C


Compared to last week I got nothing obvious done. The weather was cold, and although I spent a ton of time fine tuning, it doesn't show much. The fine tuning of panel fit is probably the most important part of the build...it just doesn't look like anything is happening. So just a few pics...


This is a shot of the technique I have been using on the door gaps. I can use the 1/8" cutoff wheels to first slice the gaps to 1/8", and then they can be used to carefully open them up to about 3/16". Works great, but most of the gaps that I opened resulted in the door skin being cut through, so then I had to remove the doors, weld the edges closed, and then start over from scratch...only without the "cut-through" on the second (or 3rd) try.


This shot is with the bonnet up. Notice how closely it comes to the top of the scuttle. I had to work on the bonnet hinges, the height of the scuttle (by hammering from under the dash), and the length/curvature of the bonnet to ensure this will never hit after all is painted.


During the bonnet fitting I had to remove the hinges to trim the little bit of edge that was covered...that I could not adjust with my cut-off disc technique. This constant removal and re-installing of the body parts is most of why this week seems so slow. I must have removed the doors and bonnet 3 dozen times each. Notice that I got tired of trying to find the same location for the hinges...so I finally painted the location on!


I am going to call this done on the rear edge of the bonnet. The rear of the bonnet is still about 1/16" higher than the scuttle, but I have too much metal in the bonnet to lower it further. If I lower the middle, the sides pop out. I have raised the scuttle as much as it seems to want to "hammer" upward. I can live with 1/16" of glaze to even this edge...at least that's my feeling now. Later in the week I may change my mind and work it some more?!?

I didn't take any pics during the 2 days I did nothing but doors, because, frankly, they look about the same when I finished!?! I got the hinges perfected so the rear latches would not hit the strikers wrong in the back. I then adjusted the latches to fit without binding or being too loose. Then I had to fix the door gaps to match...again!

One note: I did learn that front door edge is designed so you can tap it inward or outward to match the front wing curvature. It works great, but the down side is that the door has to come off to do it. The middle of the door has about 1 full inch of range in adjustment. Pretty cool. Of course, if you hammer it out, you will have to use a hammer/dolly to flatten the door skin when you're done. This is necessary since the front wing has almost no in/outward adjustability. If you recall, the wing bolts directly to the "A" post, with only the size of the bolt holes to adjust it. Being able to contour the front of the door becomes important. I only wish there were more at the rear of the door to work with...

I am now close enough that less than 1/16" of bondo/glaze will level everything out. If it warms I'll start to spread glaze this week. If it doesn't warm enough to mix polyester...then I'll keep fine tuning all around.

Until then!
Where does the adjustment happen what seam photo?
Dan C
 
It is the contour inward and outward that can be adjusted:


If you look in this pic, the frame has a section at the front, behind the hinges, that runs parallel to the door skin. By tapping the front edge of the skin/frame, this frame section can be angled out. That allows you to adjust the door skin in or out to match the in/out contour of the front wing. Of course the hinges get in your way when they are installed, so it is easiest to remove the door and hinges, and then hammer the front edge of the door outward farther than it needs to be. Then you can re-install the door and hinges and tap the edge inward to match the wing.

Once you study the shape of the front edge of the door frame, it makes sense...
 
Week 64

Didn't get a thing done this week. 6 days out of town at work to pay my dues for getting Xmas day off.

After 4 years searching, and 7 months converting a "wrong" tub, this turns up today on ebay for a fraction of what I paid for the donor:

https://www.ebay.com/itm/Triumph-TR...ash=item43fb19d3dc:g:aawAAOSwo4pYTD7~&vxp=mtr

It figures. No matter how long/hard you look...what you need will turn up as soon as you no longer need it!?!

Oh...this shell has the wrong, i.e. "new" style split column steering gear, which reminds me of something I needed to ask you "long shaft" steering guys out there. On the TR3, the shaft was split, so I could assemble the frame and drop the tub over it. I assume you have to leave the long steering gear off to drop the tub on a long shaft car? Will the tub feed down over the steering shaft if it is already mounted on the frame??
 
John,
might have to call about that tub. I've sold all my long doors, durn it. On the steering tube. Short tube didn't come until 58 or 59, don't remember. It can be done with tube in place but highly recommend installing steering tube and box later.
Marv
 
John, it's my understanding that the shell is set on the frame and the steering column fed from under the front nose into the car. Possibly it was installed before the front nose was bolted to the car but I also feel that the bodies were assembled prior to paint.
 
Thanks guys...that's what I was thinking. That the steering gear is best installed after the tub is on the frame. I can see why they later changed to a split tube, as it gives more flexibility.
 
Week 65

Posting early this week, as the family is taking me out of town for the holidays.

This is the week of transition. I have beat the body until I am sick of it, and refuse to beat any more. That means it is time to switch to filling...Yes...Bondo! Of course I haven't actually used Bondo in 30 years. It still remains the generic name for body filler (like a Kleenex for tissues), since it was the first filler on the market.

Let's get started.


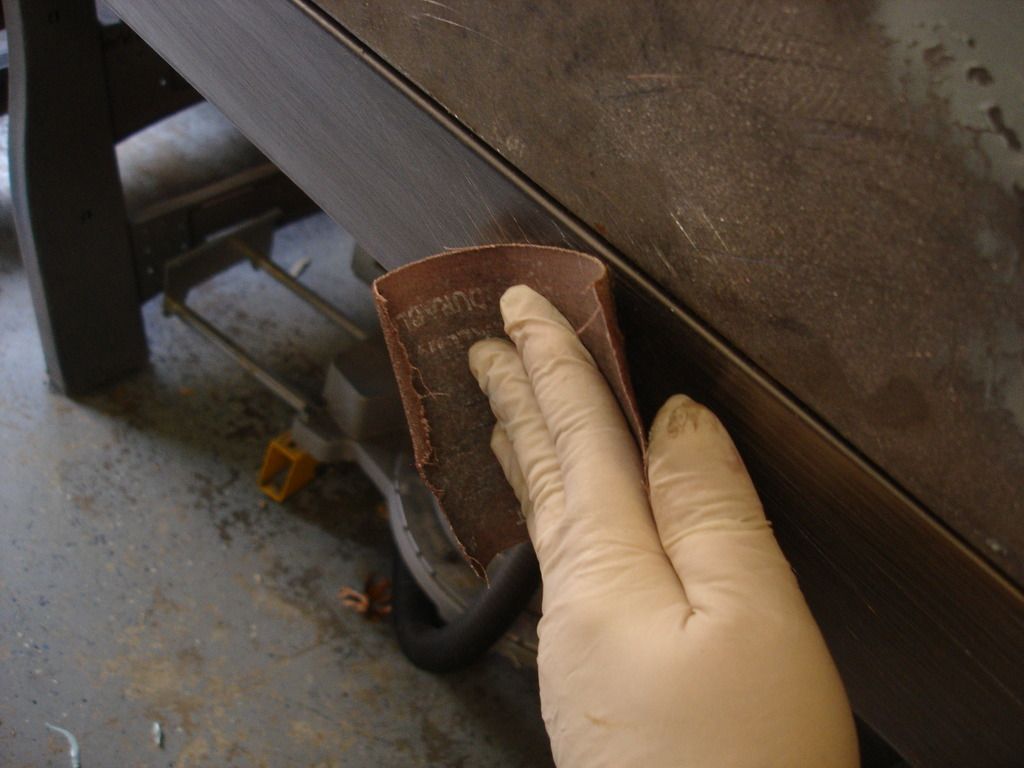
The final body prep for starting the filler is to roughen any and all surfaces that have not been sand blasted. Bondo is a polyester product, and does not "bond" chemically to metal. It depends on a "mechanical" bond. In other words, it must have small scratches in the metal to grab hold to. I used the roughest sand paper that I can find for a reasonable price.


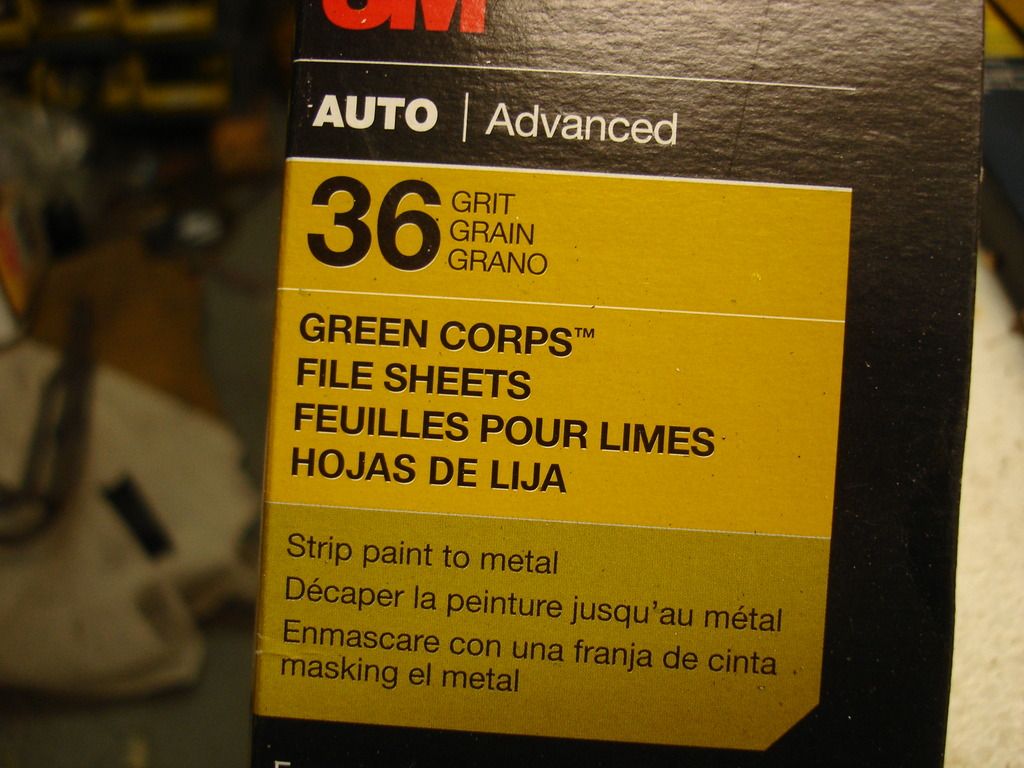
For this job I am using 36 grit. The rougher the grit, the faster the filler work goes. One of the big things to learn in body work is when to use rough, and then when to cut back to the fine papers. For now, I'd use 1 grit if I could!

The following is a list of tools that we will need for filling:


Filler. This is the latest greatest in filler. Filler is a polyester base with a sandable filler material in suspension. The polyester hasn't changed in 70 years, but there is constant improvement in the filler medium. The better filler spreads smoothly and yet sands easily. This Rage product I am using is very thick, so it works well on the vertical and horizontal surfaces without running too much. It cautions not to apply more than 1/4" thick. I never apply thicker than about 1/16" at a time. I allow several coats if needed to build. And, I never plan to use more than about 1/8" total thickness when finished and sanded. If you have to plan more than that, you can get the metal closer to begin with...we are smoothing the body, not shaping it with filler.


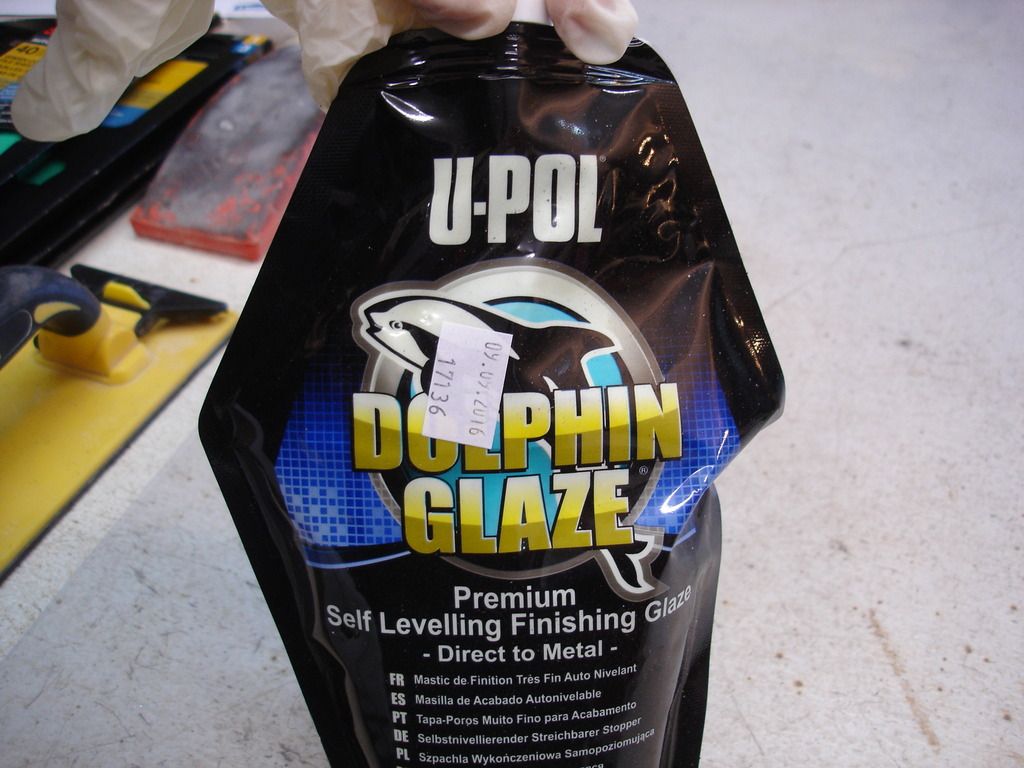
Here is a glazing compound I will also use. Glaze is the same polyester base, but the filler is thinner...which allows the glaze to spread extremely smoothly over a surface. Glaze is used when you are finish filling before the primer coat. I will switch to 80 grit when I switch to the glaze. But first the work will envolve the thicker filler.


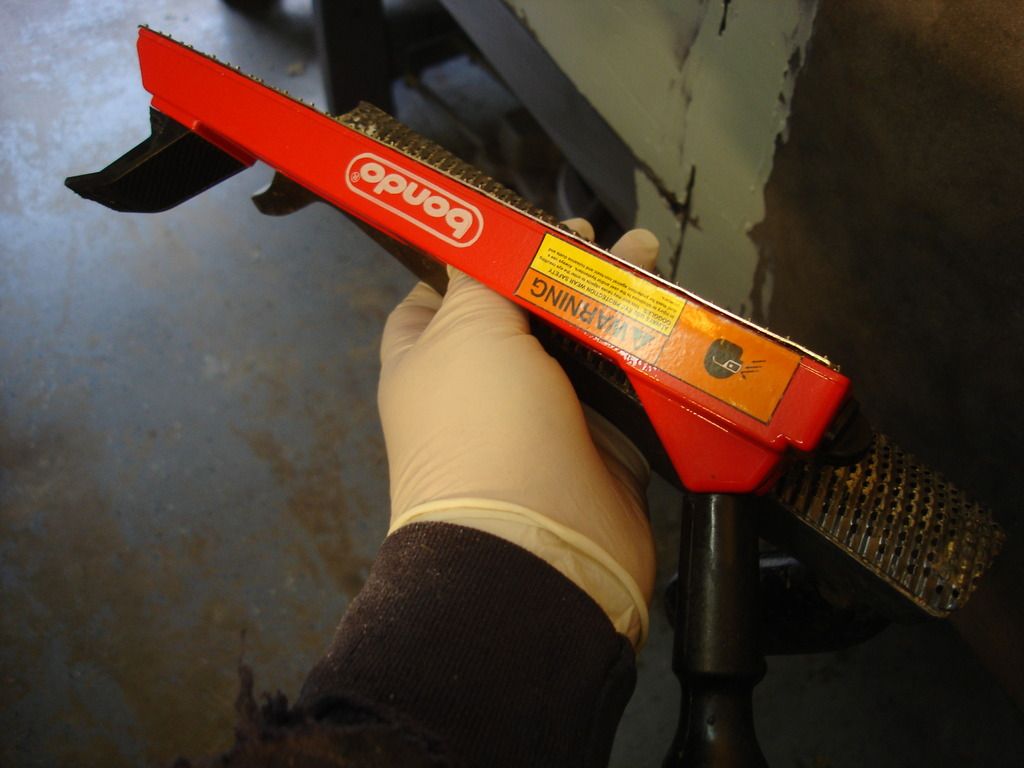
These are the cheese graders. Filler lights off in a consistent and predictable manner. First it is in liquid form, during which you can spread it. depending on the outside temp AND the amount of hardener you use, you control the amount of time you have to work the filler before it "lights off". Once it lights off, if you try to spread it, it will simply crumble and gob. Once it lights, you are done spreading that batch. Don't even try to spread filler that has lit. So, after it lights, it becomes rubbery, but is also very sticky. Do not try to do anything at this stage, as it will lift and loose it's bond with the metal.

As soon as the surface of the filler has lost the "sticky" feeling, you should have at least 2 minutes to rough the shape using these cheese graters. They cut extremely fast, and it reduces the amount of sanding you will need to do once the filler is fully hard. You have a choice of flat and rounded. Each has it's use.


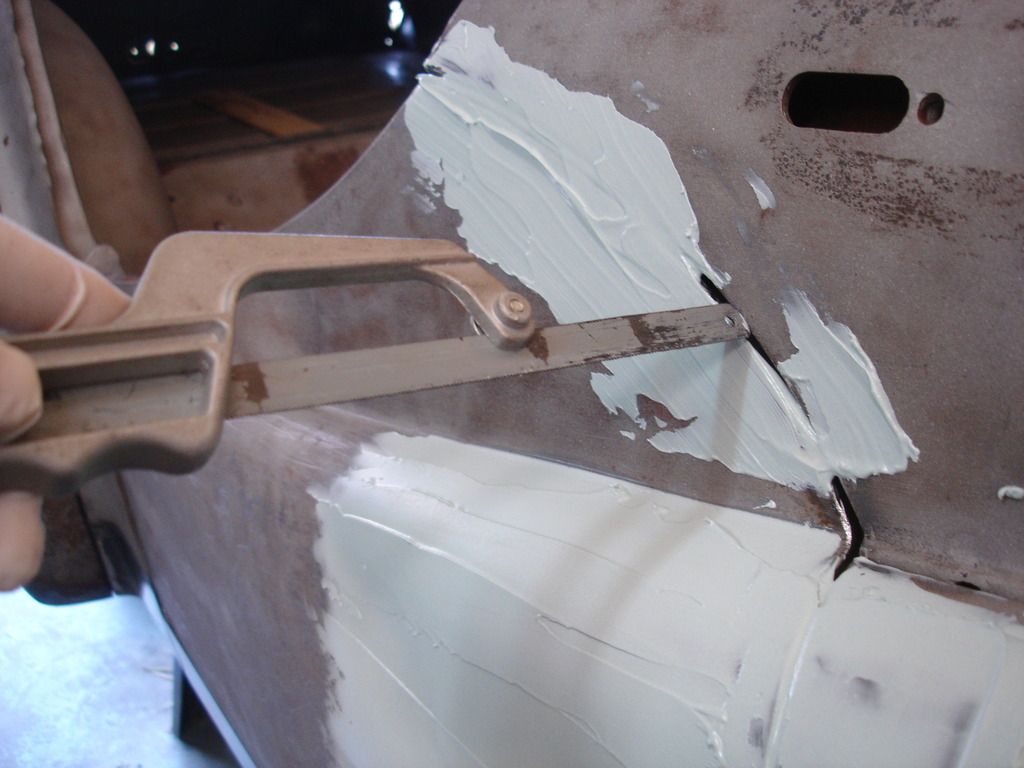
I use a hacksaw blade to open the edges that get covered during the spreading. This operation should be done somewhere between the sticky phase of the cure and when the filler just reaches the rubbery but NOT sticky.

Not shown, I also use an exacto #11 knife and/or a disposable box cutter for the same job. If you catch the filler at the rubbery and sticky phase, it can be easily sliced with the knife. Once past the sticky phase you will have to switch to the hacksaw.


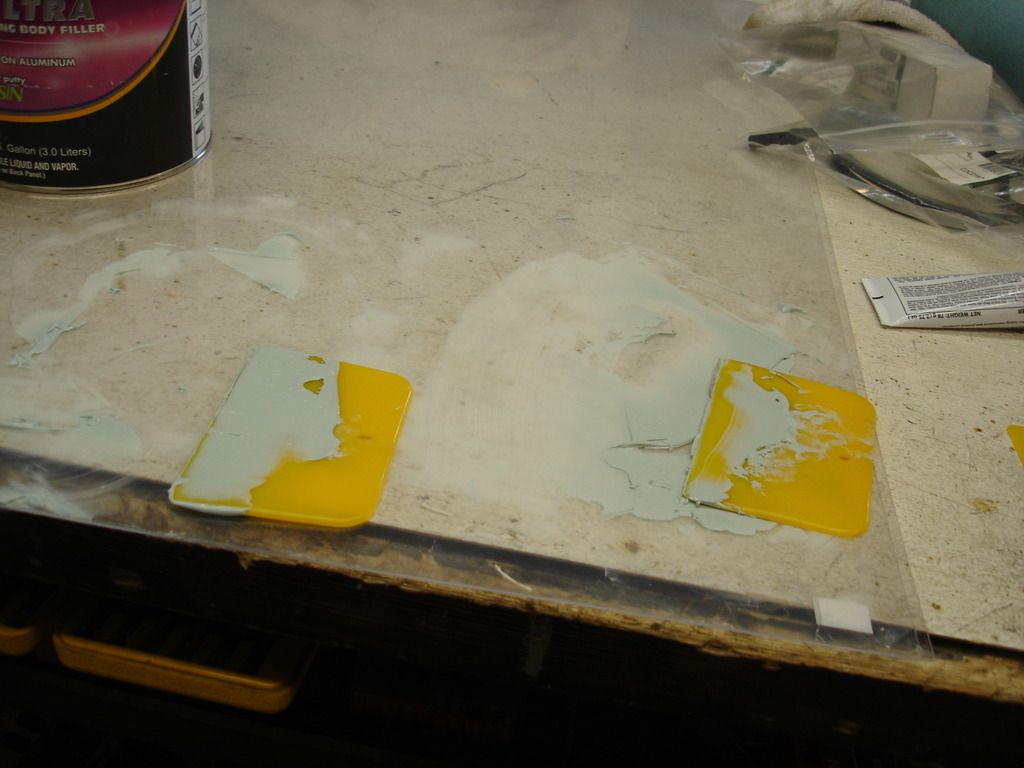
Here I have a clear acetate sheet from Micheal's or Hobby Lobby. The sheet comes with a protective film on each side. I can mix on one side, remove the film, and use it all over again. After that, I can flip it over and start again. Sometimes you can keep using it over and over, by flexing the acetate after the filler hardens, so the filler just snaps off. Don't try to re-use it unless all the old hardened fill has been removed...or it will come off in your fresh mix, and make a mess when you try to spread it with "chunks" in it!

The little spreaders are available...almost everywhere that sells paint supplies. The cost about $.20 each. I buy at least 6 at a time. If you notice in the pic, I use one to mix and spread a batch of filler...and then just leave it on the acetate to harden fully. I then grab a new spreader and mix the next batch on a clean area next to it.


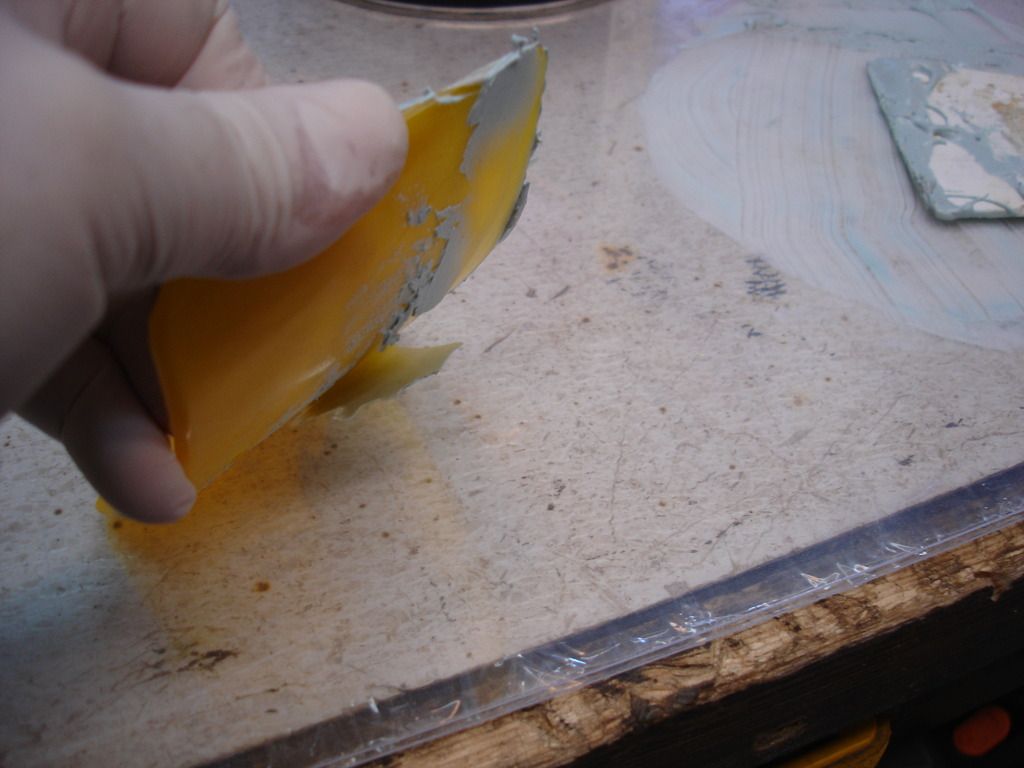
When all my spreaders are used up, I pull them all off and "flex" them. The filler is not as flexible as the spreaders are, so it snaps right off. Now I have clean spreaders to start all over with! Pay special attention to the spreading edge when cleaning. It must be perfect or the next spread will show the ridges from filler that did not come off. If rough, you can run a sanding block along the edge to "true" it. If that doesn't fix it...toss it!


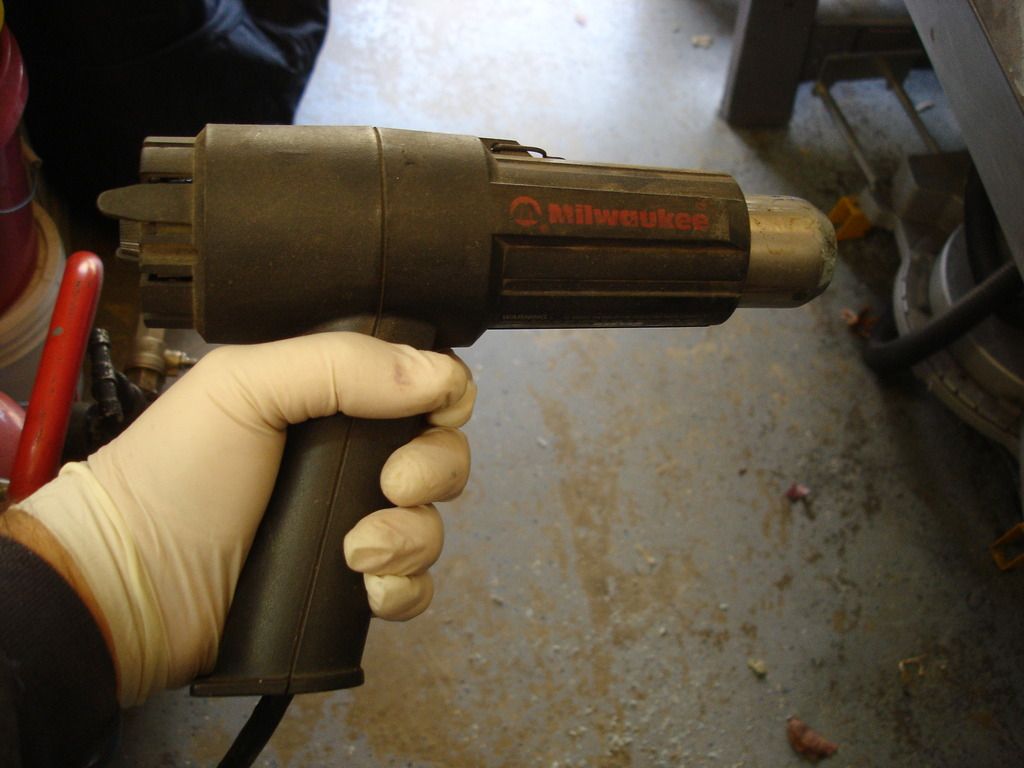
This is a paint stripper. Do not attempt to work with filler if the temp is less than about 60 degrees. The way polyester cures is by heat. We normally chemically induce the light off temp chemically, using a tube of methyl ethyl ketone peroxide. This is added to the filler, and after a short time, causes a reaction to heat the filler and start the cure, or light off. If the temp is below 60 degrees, you have to use a lot of the hardener AND add outside heat...or the light off never happens. THAT makes a huge mess that has to be scraped off. Ask me how I know!

The temp in my garage was about 50 degrees...so after I spread the filler, I hit it with the heat gun to light it off. Once the light off occurs, the filler will harden just fine. We just have to coax the light! If you have a heater in your shop, shoot for 70 degrees for optimum cure rates. If it is 100+, like summer here in Texas, you can start the light off with only a small dot of hardener!


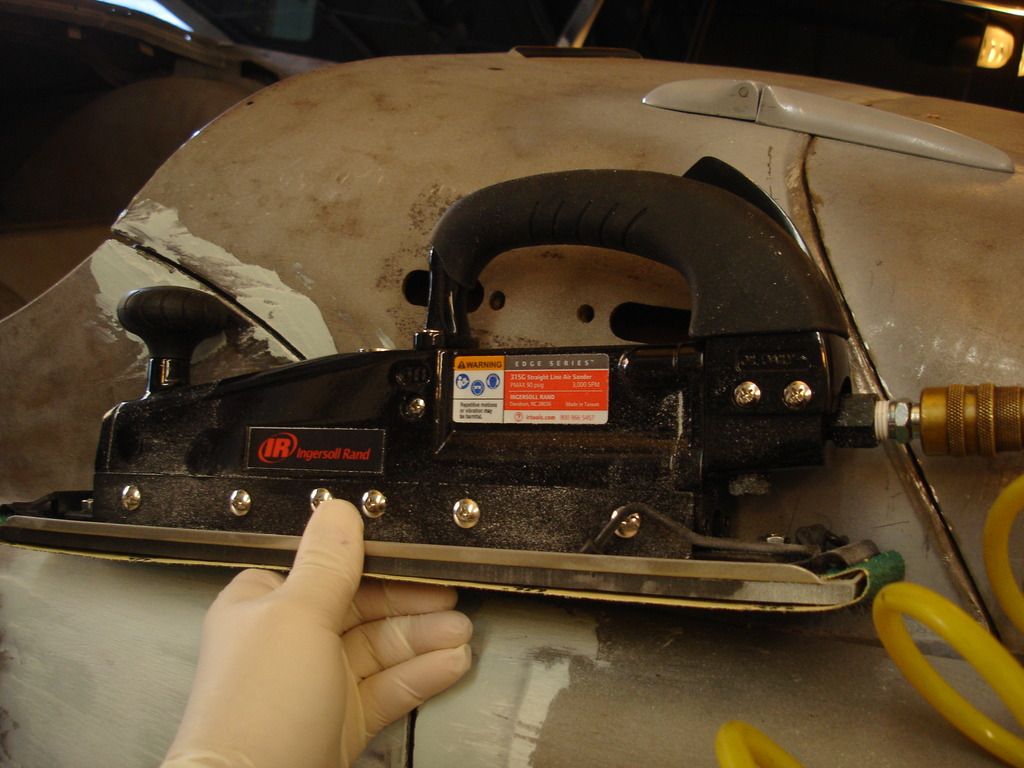
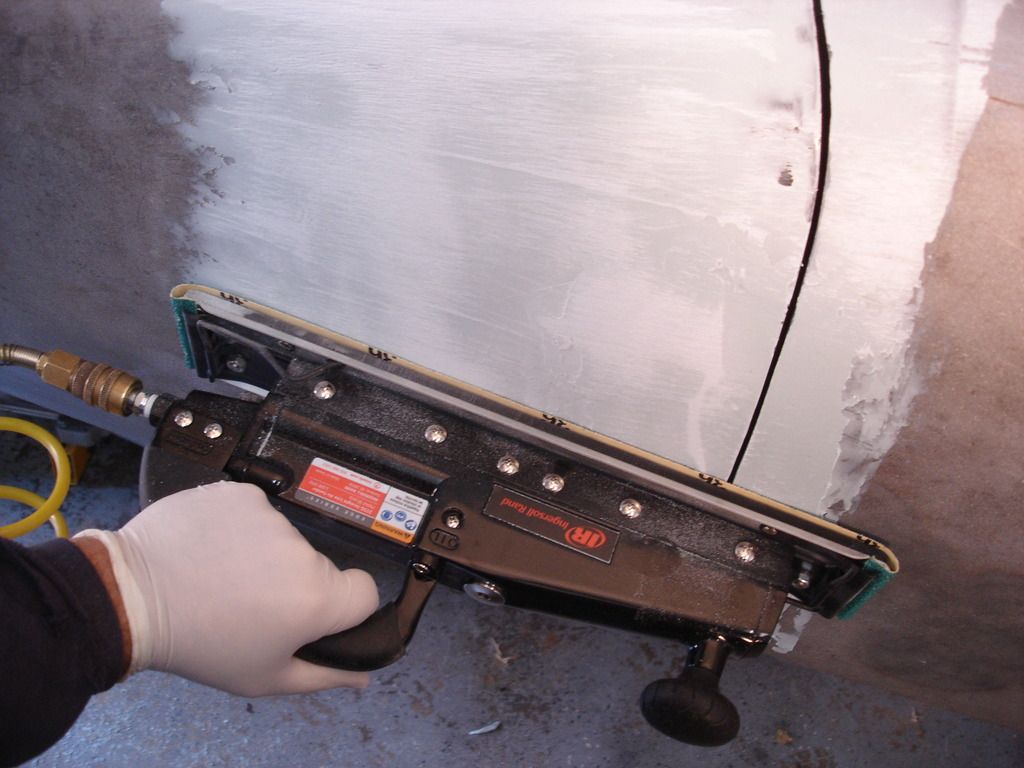
Here is my latest toy. The filling stage envolves endless sanding. You want the longest sanding block you can find. I'll repeat this, as it is VERY important.

For all body work, you want the longest sanding block you can get on the job!!

This toy uses 16" sanding sheets. The reason you want a long block is you are filling the low areas between the high spots on your body. You want the sanding block to bridge the space between the high spots. We are trying to level the surface. If the block is too short, it will cut into the valleys...so you get waves between the highs. Longer the better!!! Of course some tight areas cannot be sanded with a long block, but fortunately tight areas do not show big waves!


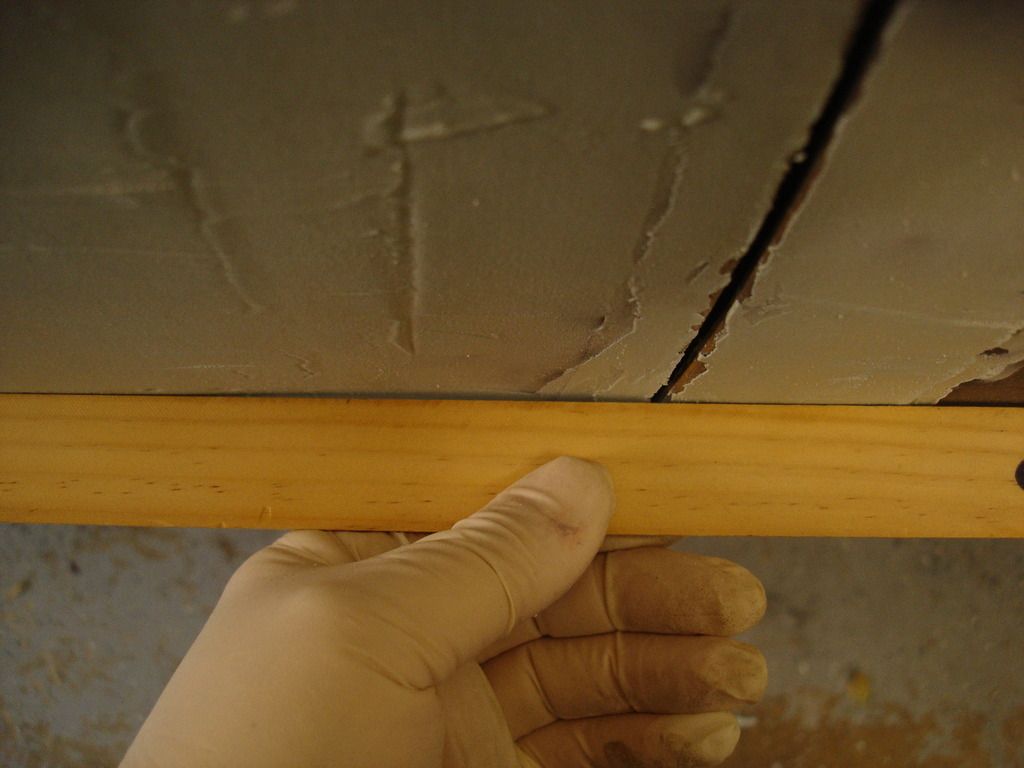
Speaking of waves...we need a straight edge. This can be used anytime you are having trouble "reading" the high or low areas on your body. If the spot is high, the straight edge will "rock" over the little hill. If a low spot...like shown above...you see light under the edge.


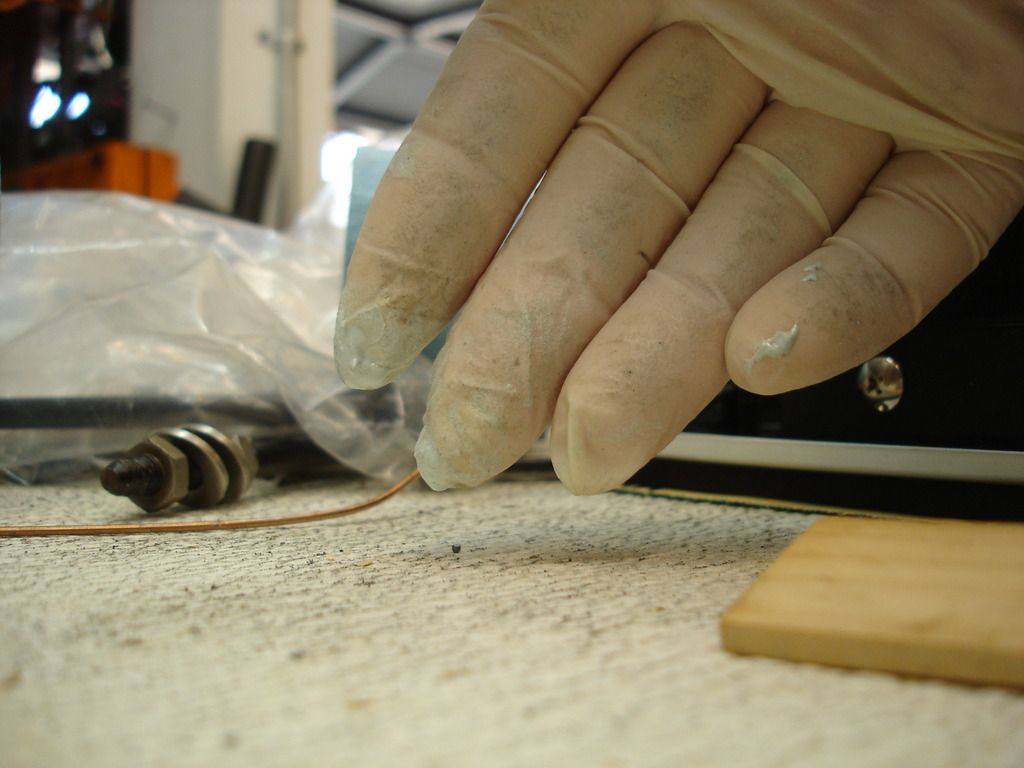
Latex (or other cheap) gloves. Every time you spread you WILL get this nasty goo on your fingers...and from there all over all your tools. Use latex gloves, and when you get filler on them, toss them and re-glove immediately. Don't hesitate...just do it!

When you get filler on you or tools, there are 3 ways to remove it. These are:

1) Heat. If you use metal spreaders, you can heat the tools with a torch and the polyester can be easily scraped right off.

2) Uncured polyester can be wiped off with laquer thinner or acetone.

3) Hardened filler can be flexed off...so long as it is on a flexible surface, of course.
 
Now that the tools are lined up, let's get started.

One absolute cardinal rule when working with any polyester product is to never use any tool that has touched hardener from getting anywhere near the un-used filler. Even if it is fully cured filler on a mixing stick, on a hot day it can often be enough to light of the can. So keep anything related to hardener away from the can.


I like to use the end of a mixing stick to scoop out the filler. It doesn't poor well, and these sticks are free from the paint supply. I scoop out 3-4 blobs onto my acetate mixing surface.


Now we add the hardener.

This simple act is probably THE MOST IMPORTANT part of filling. The amount of hardener you use controls the time you have before the mix lights off. Remember...once the mix lights, spreading is over. No arguing about it...it's decided for you!

The amount I have in the pic above is at least double the usual amount you would need at 70 degrees. Remember, I am working well below the recommended shop temp, so I am almost tripling the hardener AND still adding heat from my stripper gun. I bought 2 hardener tubes to allow for my working temp.

If you used this amount of hardener at 70 degrees, you would likely not have any work time at all before the light off. The time it would take to mix the hardener in would be about all she wrote!

So, if you learn nothing else...learn to control your work time using the amount of hardener you add. Run a line like I did above, and remember how long the line was...and note how long you had to work the mix. Your goal is to give yourself enough time to spread it...at least 2 minutes AFTER fully mixing the filler. If you shoot for too much working time...like more than about 4 minutes...then you run the chance of it not lighting off at all.


Now it's time to mix. Make sure all your work is prepped, you have planned where this batch will go, and all your tools are at hand. Then mix the batch using your spreader.


Mixing may sound easy, but it must be done so as NOT to introduce any bubbles. Bubbles will leave small holes in your work after you sand. Holes are not good!

In the series of pics above I am showing one technique. First, you scrape the hardener into the filler. Then you do a series of spreading the filler out over a larger area, and then scraping the spread back into a large blob. Just continue spreading and consolidating until the entire mixture is one color...no stripes or even any change in color at all. Completely solid.

Once Completely mixed...no time to revel in you good work! Scoop some up and start to spread it immediately. You are working against the clock before it lights.


Here I have started at the meeting lines around the door. Just spread a smooth, even layer. I will eventually cover the entire body surface. I hope you caught that...I will not only cover the areas I can see that need filler...I will cover the entire car will filler. That way I will not miss ANY low spots that may be hiding.


As soon as the filler lights, cut/saw the gaps back open as necessary.


As soon as the mix reaches the next curing phase, i.e. rubbery but not sticky, rough the shape using the cheese graders.

Then stand back and allow the filler to completely harden...no feeling of rubbery at all. We are going to sand next, and it will gum the sand paper if there is any rubbery feeling to the filler at all. It must be fully hard. I frequently lay down more than one batch, so I can be sure the first is fully hard before I start to sand it.


And of course...the last step is sanding with a long block. This new reciprocating sander is $70-120 at Northern...and well worth the wear and tear on your body while sanding. It also cuts the sanding time by a factor of 10. Just remember...sand until you are bridging the high spots (metal that shows once you sand through to it). Then stop!! Do not attempt to get rid of the rough low spots by angling the sander to reach them. Once you are bridging high spots you are done sanding that filler batch. Mix another batch and do it again over the same area...until you both bridge the highs and have eliminated the lows.

Once you have done that, you have a perfectly straight and flat surface. You are well on the way to getting a mirror smooth body.


Here is my first days work. Funny...the body looked smooth before the filling and sanding!?!

Notice the thickest areas are the outer sill and the front wing at the bottom. I estimate i have about 1/8" filler in those areas. The sill is thick because the latest replacements are flat, whereas the TR2/3 body is bowed in that area. The lower wing is thick becasue I had to bend the lower mounting tab downward. I could have worked that more to reduce to even less than the 1/8". Coulda' shoulda', woulda'?!?


That is still not enough filler to prevent my little magnet from sticking.


Here I have cleaned up where the wing front meets the apron. Again, not much, but enough filler is left to make a perfectly contoured surface for painting.


This is an interesting shot, as it shows the gentle bend or "boat shape" to the side of the body. If you take time to look at the body from different angles, like this one as an example, you can see where and how much you need to work.

One last thing worth mentioning. All fillers are porous. They do not seem that way, but they actually are. All filler must be completely primed and painted, or moisture can wick through the filler and corrode the underlying steel body. If you get a ding into the filler later on, be sure to seal it before it gets too wet.

Anyway...I'm on my way to the initial primer. Maybe next week?..!...?

Hope everyone has a great Christmas!
 
Looking really great. One thing I like to do is use short strand fiberglass filler over any area that I have welded seams as the first coat. I them sand that to 80 grit and put my first smear of "bondo" on top of that.

Merry Christmas!

Ho! Ho! Ho!

Cheers
Tush
 
Thanks, JP! That's a great idea, Tush. That long strand cures, like, rock hard. It'd definitely prevent any filler cracking!

I finally organized my paint plan...at least for now. I think i will double prime all the outer panels as they sit on the saw horses, fully assembled. By double prime, I mean I will prime them in light grey, and then immediately cover the grey with black primer...all in one step. That will give me the dark outer primer to sand, with the "tell tail" light color under to signal when to stop sanding for all subsequent layers of primer that are needed.

Once the outer panels are primed, I will take the entire body apart and remove the tub from the frame. I will then prime the insides, back sides, and underside of every panel with black primer followed by a one part finish coat, again in one step.

Then I can assemble the frame, suspension and drive train, and reinstall the tub back on it, followed by all the panels...and do the finish prep and base/clear finish as a whole.

I think that sequence will give me the factory style paint and oversprays where needed, and envolve the minimum amount of work. Panel fit will be set before the final primer and finish coats, so no chance of dinging the panels during re-assembly or monkeying with alignment on the finished panels.

If anyone has suggestions for an improvement on the plan, I'm all ears!

It also dawned on me that I have not allowed for the thickness of the beading on the front wings. (It should not matter at the rear wings). The SS beading uses tabs that have almost no thickness. The plastic beading has a definite thickness to it. Bummer. I'll have to figure out a way to duplicate it before finalizing the fill work. It will move the top of the front wings out about 1/16"?? Enough to throw off the work...or maybe the idea of painting SS beading would work
 
John,


11124052703_94dfe78c84_b.jpg


Have you decided on a color yet? My vote:


Michael
 
Being that fillers are porous and exothermic from the chemical reaction, why not like Foose, Kindig, and Coddington epoxy seal bare metal before fillers are applied? If your looking for a show finish before build primer is applied use Evercoat’s Slick Sand polyester primer after filler. You can 180 cut for a smooth finish before you apply the expensive build primer. The third photo is primed with Slick Sand.

P1030425.jpgP1030433.jpgCopy%20of%20P1030469.jpg
 

Attachments

  • ca32681e-f2c8-471d-a615-efbb82d2fc6b.jpg
    ca32681e-f2c8-471d-a615-efbb82d2fc6b.jpg
    64.3 KB · Views: 88
Back
Top