• The Roadster Factory Recovery Fund - Friends, as you may have heard, The Roadster Factory, a respected British Car Parts business in PA, suffered a total loss in a fire on Christmas Day. Read about it, discuss or ask questions >> HERE. The Triumph Register of America is sponsoring a fund raiser to help TRF get back on their feet. If you can help, vist >> their GoFundMe page.
  • Hey there Guest!
    If you enjoy BCF and find our forum a useful resource, if you appreciate not having ads pop up all over the place and you want to ensure we can stay online - Please consider supporting with an "optional" low-cost annual subscription.
    **Upgrade Now**
    (PS: Subscribers don't see this UGLY banner)
Tips
Tips

TR2/3/3A 1960 TR 3A Fender bead question

Tinkerman

Darth Vader
Offline
The front fender beading has a longish galvanized sheet metal tab that gets screwed to the interior of the front fenders. What size and head type screw did any of you use to install them?

Thanks, Tinkerman
 

Geo Hahn

Yoda
Country flag
Offline
I used slotted panhead sheet metal screws -- but if correctness is critical do not rely on me. I just went with what looked right.
 

bobhustead

Senior Member
Gold
Country flag
Offline
# 4 slotted sheet metal screws were, I believe, original. I used 1/8 pop rivets putting mine back together. You may find that the fastening tab needs to be cut in a couple places to get conformity to the shape of the fender.
Bob
 

charleyf

Luke Skywalker
Country flag
Offline
Oval head slotted sheet metal screws were what came off of my TR3. As to putting back on, I used the same head but I recall trying to reuse the same holes in the body. This caused me to have to use two different sizes to get the screws to hold, as the body holes on a few of them were enlarged. The length was about 5/16 to 3/8 inch. If you are drilling new holes in the body you won't have that problem.
Charley
 
OP
Tinkerman

Tinkerman

Darth Vader
Offline
Thanks folks. I had kinda thought that slotted panhead would be the item.
Gotta love the BCF!
Dick
 

martx-5

Yoda
Country flag
Offline
Being that you're messing with the fender beads, a little trick that I leaned from the forum is to pop rivet the those sliding tabs onto the outer wings. I makes it much easier to get fenders and apron into position without having to fight the fender beads. You will have to leave the screws loose holding the fenders in place onto the inner wings so you can spread the outer wings (fenders) enough to put the apron in place. Push them back into position after the apron is in place and tighten up the screws. I've had my apron off twice since the resto was finished, and this mod made the job very easy...along with putting never-sieze on all the screws.

IMG_0639.JPG
 
OP
Tinkerman

Tinkerman

Darth Vader
Offline
Thanks Art, is it worth taking the fenders back off to do that. I understand the reasoning behind but I hate do overs, heh.
Dick
 
Country flag
Offline
Dick
I wouldn't do it. You can get a better "bead coverage" of the fender/apron crack by having the beading slip fit in, you can work the beading over a little if its needed. It does help by having the hood/fender area fixed, you can put a spacer inbetween to move the beading out the close up the gap between the hood and fender.

Marv
 

martx-5

Yoda
Country flag
Offline
Thanks Art, is it worth taking the fenders back off to do that. I understand the reasoning behind but I hate do overs, heh.
Dick

I pop-riveted the beading while the fenders were in place before I put the apron on. Like I said, just leave the fender screws loose up to where you are putting in those oval head screws. Even with the beading pop-riveted on, it still can be shifted some if needed, but I didn't find it necessary.
 

TS66693

Freshman Member
Offline
Anyone have any pictures of the pop-riveted fender bead installation? Are pop rivets installed on ALL of the finger tabs of the beading? This installation sounds like the way to go, like you said, to prevent fighting the wing, body and bonnet alignments all at the same time!
 

TS66693

Freshman Member
Offline
Is the fender beading installed before or after the fender is painted? So, fit & drill where you want to install the pop rivets, then paint the fender, then put on the beading with pop rivets?
 

martx-5

Yoda
Country flag
Offline
Anyone have any pictures of the pop-riveted fender bead installation? Are pop rivets installed on ALL of the finger tabs of the beading? This installation sounds like the way to go, like you said, to prevent fighting the wing, body and bonnet alignments all at the same time!

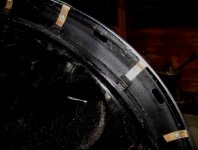
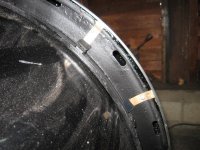
I pop riveted the beading to the fenders. Best thing I ever did concerning those. I've had the front apron off twice since, and it's been a very easy, one man job. You have to loosen the screws up along the upper part of the front wings so you can spread them enough to allow the beads to clear the apron during removal and installation. I riveted all of the tabs to the wing spacing them fairly evenly. Not a great picture, but you can see whats going on. I put some tape on the ends of the tabs so the wouldn't scratch the paint with them...just in case, but probably unnecessary.

I painted the wings before hand. I put the wings loosely on the car without the apron on. Then I put the beading in place starting fom the top under the hood. I then drilled and pop riveted the tabs on one at a time, starting from the top tab, while you're pushing the bead against the wing. Piece of cake.

IMG_0635C.jpg

Disregard the attached thumbnail...I was having trouble uploading the image.
 

Attachments

  • IMG_0635CC.JPG
    IMG_0635CC.JPG
    46.8 KB · Views: 68
Last edited:

DornTRoriginal

Jedi Hopeful
Gold
Country flag
Offline
That's interesting, non of the bead trim was ever fastened with screws or rivets on my dad's car when I took it all apart. Seemed to me that the fender held them in place. Go figure?
 

Don Elliott

Obi Wan
Offline
Bob - If your strip needed to be cut (notched with tin-snips) to fit the roundness of the fender curve on your TR3A, it's because the ones you bought were for a TR4. I changed one of my beadings last year and the one I got was from Moss. The curve was correct for my TR3A.

BTW, my 1958 TR3A had 4 round head #4 screws to secure that strip to the fender. It's been like that since I bought it brand new in May, 1958.
 

martx-5

Yoda
Country flag
Offline
That's interesting, non of the bead trim was ever fastened with screws or rivets on my dad's car when I took it all apart. Seemed to me that the fender held them in place. Go figure?

That's true, but some of us rebels decided to make assembly and dis-assembly easier by pop riveting the beading in place. I know, absolute heresy. :playful:
 
Similar threads
Thread starter Title Forum Replies Date
Tinkerman TR2/3/3A Sealing fender to body 1960 TR3A Triumph 15
R For Sale 1960 Healey BN7 Oil Pan For Sale Austin Healey Classifieds 0
W For Sale 1960 TR3A for sale Triumph Classifieds 0
J Wanted Hood (Bonnet) for a 1960 BT7 Austin Healey Classifieds 0
G For Sale 1960 TR3 A Triumph Classifieds 0
G For Sale 1960 TR3A for sale $11,999 Triumph Classifieds 0
W TR2/3/3A 1960 TR3A Radiator replacement recommendations Triumph 11
dougie 1960 Austin Healey 3000 Works Lightweight vs. 1962 Ferrari GTO Austin Healey 6
G For Sale 1960 BugEye..Very Good..$20,500 Austin Healey Classifieds 0
5 Sold My 1960 Bugeye Spridgets 10
M TR2/3/3A 1960 TR3A--intake manifold-to-SUH6 carbs studs Triumph 3
B Fluctuating Fuel Gauge 1960 Bugeye Spridgets 4
J Wanted 1960 Sprite Bonnet Spridgets Classified 3
KellyRob BMC GEARBOX 1960 British Motor Corp 2
Pool Dad 1960 TR3 engine serial number Triumph 14
Fanch00 My 1960 BT7 History Search Austin Healey 1
poolboy General TR LeMans 1960 Triumph 8
jlaird 1960 AH Sprite Spridgets 96
O For Sale New Member from NJ 1960 TR3 Triumph Classifieds 1
C 1960 BT7 Thoughts Austin Healey 14
L For Sale 1960 Austin Healey steel oem wheels Austin Healey Classifieds 0
F Installing AC in my 1960 Healey Austin Healey 14
G 1960 3000 BN7 Top Help Austin Healey 0
M TR2/3/3A 1960 TR3A turn signal harness Triumph 6
J 1960 Bugeye Paint Codes Austin Healey 1
K MGA 1960 MGA Vin MG 3
F 1960 FriskySport Barn Find Other British Cars 6
5 Proud of my 1960 Bugeye Spridgets 5
F Three worn hubs and wire wheel centers - What to do next? 1960 BT7 Austin Healey 6
R TR3 1960 refurbish Triumph 14
B Wanted Wanted: Trailer hitch for 1960 TR3-A Triumph Classifieds 7
A TR2/3/3A 1960 TR3A front brake dust covers Triumph 5
F TR2/3/3A 1960 TR3A starting chassis work Triumph 81
P 1960 Lancia Appia coupe Other Cars 1
F Wanted 1960 Triumph TR3A fuel tank Triumph Classifieds 5
Nugget 1960 Bugeye "Patents" inherited reconstitution Spridgets 12
6 For Sale 1960 Bugeye Survivor for Sale with Original Rubber Mats Spridgets Classified 0
T Wanted 1960 Jaguar MK2 front door wood trim, both right and left. Jaguar Classifieds 0
D Great Gas Mileage in Southern California [Circa 1960!] Austin Healey 3
M Wanted 1960 Bug eye sprite 1275 ! Austin Healey Classifieds 0
red57 1960 BT7 top mounting brackets Austin Healey 4
T TR2/3/3A Accelerator Say 1960 TR3 Triumph 11
B 1960 TR3 With rust in cylinders Triumph 7
busybrit For Sale 1960 MGA 1500 Restoration Project for sale. MG Classifieds 2
T needed 1960 bugeye parts Spridgets 4
Tinkerman TR2/3/3A 1960 3A post 60,000 top installation Triumph 6
Tinkerman TR2/3/3A Hood stick assembly 1960 tr3a Triumph 7
Tinkerman TR2/3/3A 1960 TR3A engine compression question. Triumph 7
Tinkerman TR2/3/3A Rebuilding SU carbs 1960 TR3A Triumph 3
Tinkerman TR2/3/3A 1960 TR3A post 60000. WON"T START ???????????????? Triumph 8

Similar threads

Top