It's been a while!
I have been working, but it's all the same stuff. Laying primer and sanding it back off, so I have been sparing the details. Here is a little break down of where I am at:
I decided I prefer to remove the bolt on panels to paint them separately. I decided this after dealing with the near-black colored paint and trying to lay the paint outdoors. I have decided that all dust is light colored! It is impossible to paint an entire car and avoid the dust and bugs outdoors. I will paint one panel at a time and do so in the garage. I hate painting in the garage, as everything you own gets a layer of overspray...but the car will thank me for it.
The other reason for painting the car in pieces is the beading. No matter how I tried to work it out in my head...having to install the plastic beading just screwed it up. I would still have to loosen the painted bolts and mar everything up anyway. So all the advantages of painting as a whole is negated by having to undo it all to install the beads.
Here is an issue that some will appreciate:
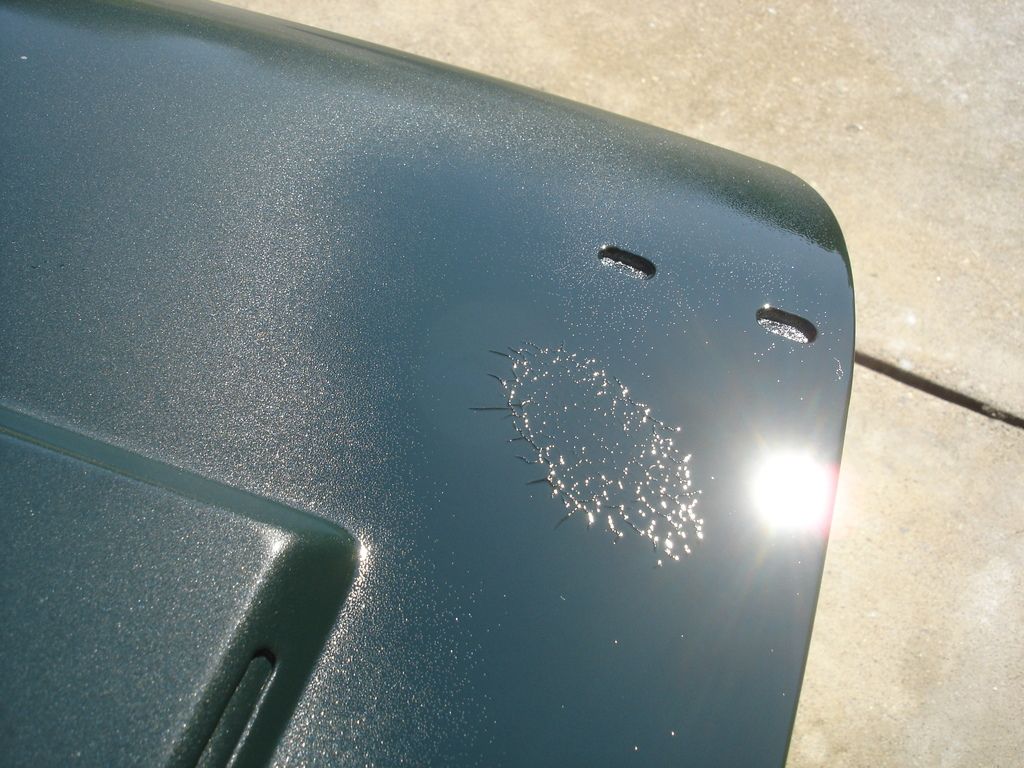
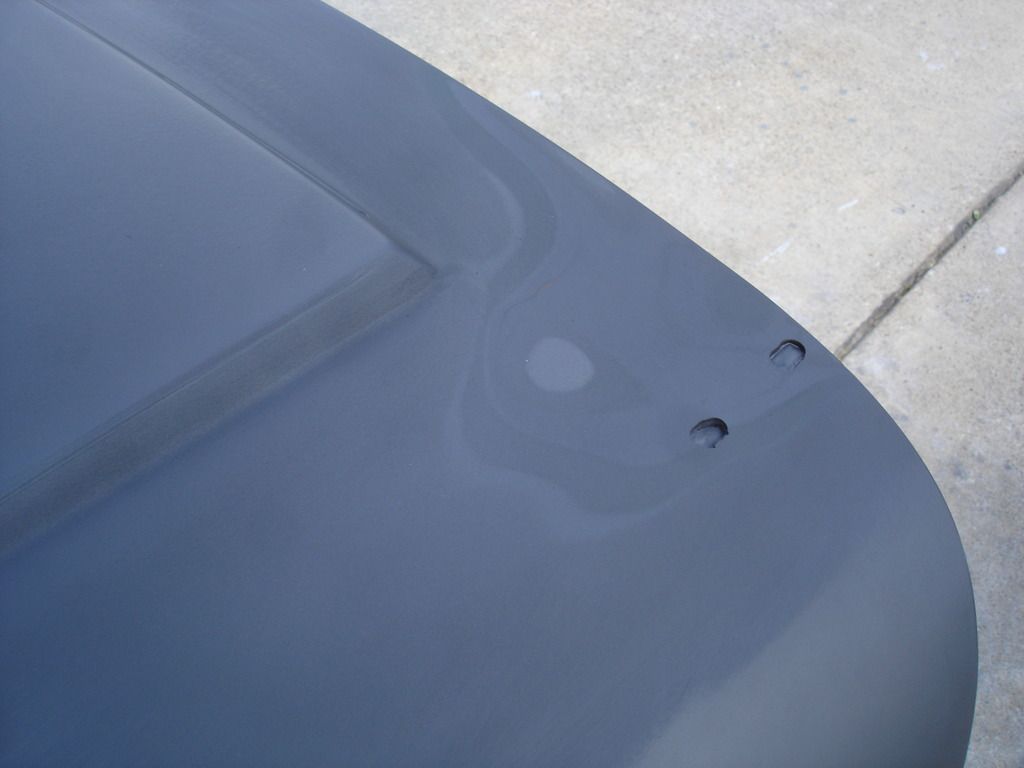
This shows how some panels are just plain cursed! I painted the bonnet, and it looked absolutely perfect. Then, Texas saw fit to drop about 2 dozen raindrops on the freshly cleared bonnet!! Uhhhgggg!!
So, I sanded down the little water craters. Now, with clear, if you can sand and not cut into the color, all you have to do is re=spray the clear and you're good. Of course the sanding cut through in a handful of places.
In the places the sanding cut through, I decided to re-spray just a touch of primer. "Hey...look at that, the primer I put in the refrigerator is still a liquid...I'll use that!" Bad idea. Most 2 part paint is sprayable until it "lights off" and starts to congeal. Even though this primer I used looked good, it was well past it's pot life. It went down well and sanded fine...
...but the picture above shows all was not well. Everywhere I used the expired primer, I got wrinkles. Bummer!
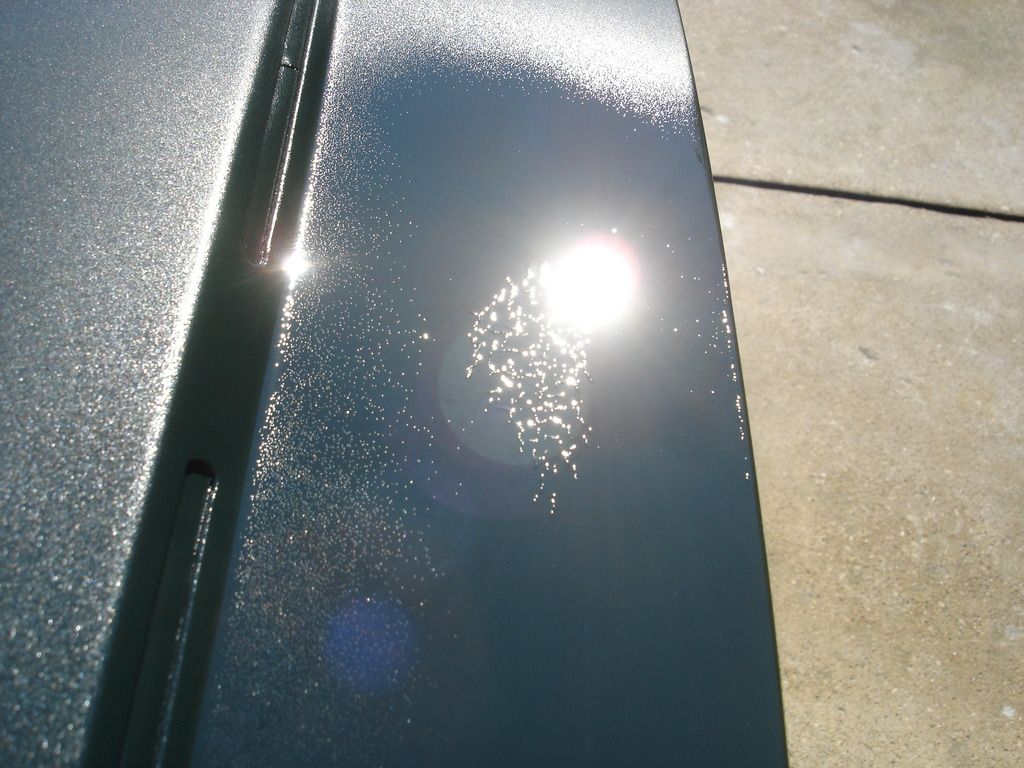

Well, my first attempt was to sand the wrinkles down to nothing, and re-seal with the epoxy primer.

No go...the wrinkles just came right back through.
Now, although my cause was expired paint, what you see in the pics is classic of a compatibility issue between paints. If you have an enamel paint job, and attempt to lay lacquer over it...this is what you will get, only over the entire panel. The fix is usually to strip the panel to bare and start over.
I am too stubborn for that. World class stubborn, in fact.
See, the bonnet is absolutely perfect, were it not for the expired primer. There is another technique for compatibility issues. That is, never lay a wet coat over the incompatible paint. This is a risky technique...but I'm just a risky kinda' guy!
So, here we go...
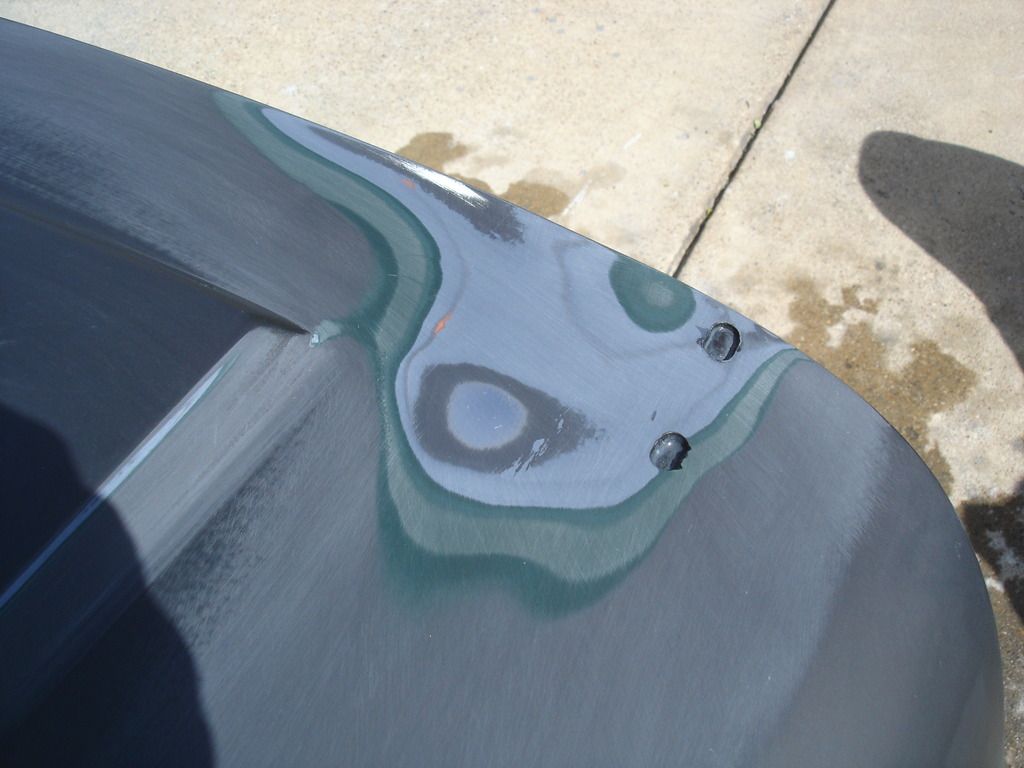
Step one is to sand the wrinkles down to nothing. You must use a block and sand the entire area, so as to prevent getting a low spot. Notice the number of layers of primer and paint so far. That is mainly why I decided to try to save the job, as starting from scratch would mean laying at least 2 -3 fresh coats of primer, with the mandatory sanding between.
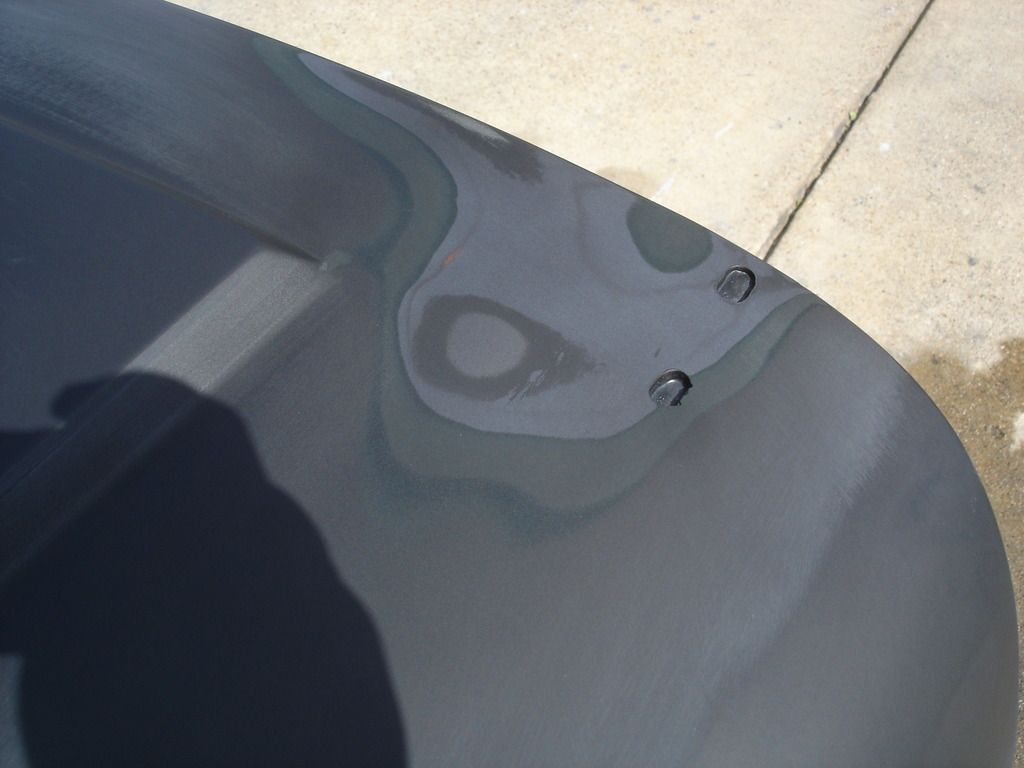
In this pic I have layed the 1st dry coat of sealing primer. You will note that it is barely noticeable. I will now wait at least 10 minutes for this coat to fully dry before laying the next.
Coat 3. We're starting to finally get some coverage now. By laying dry, the solvents in the new paint do not attack the under-paint to cause the wrinkling.
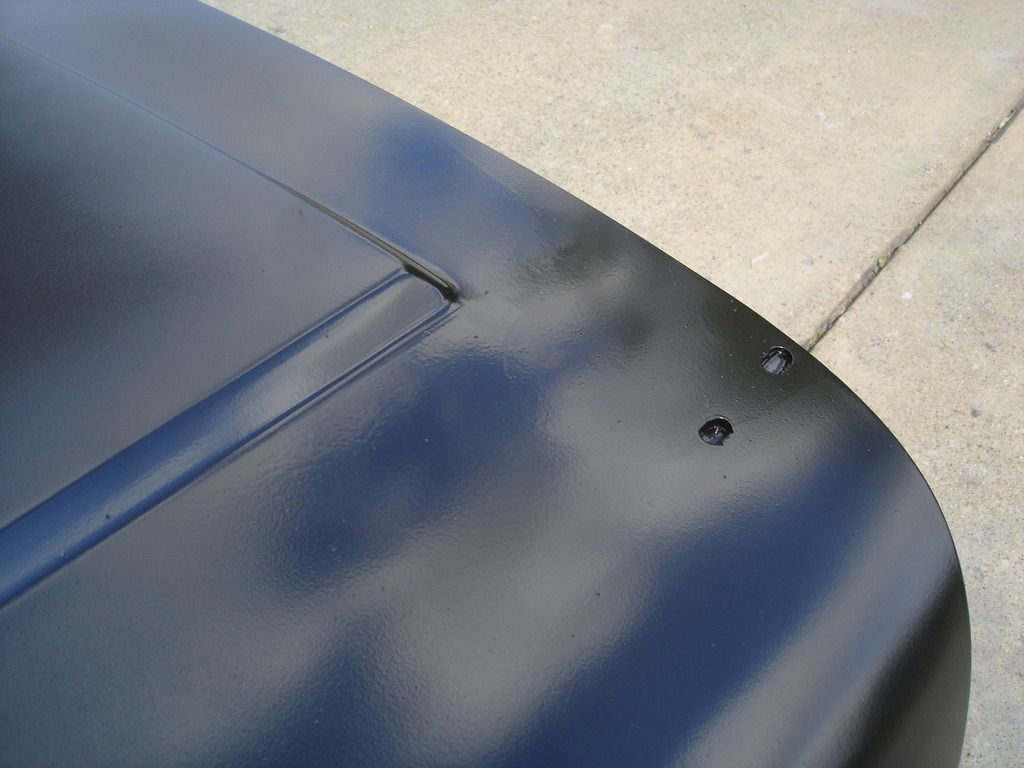
After about 5 or so dry coats...the panel is (hopefully) sealed. So here is the first of the wet coats. If this one goes on without wrinkling, I wait a full 30 minutes before the second wet coat.
And that's that!
Well, not really. Remember I said this bonnet is cursed!
I fully sanded the bonnet again, and sprayed the color again. All went well, until, after spraying the final coat of clear...again...a blasted single puff from a cottonwood tree landed slap in the middle of the bonnet! I mean ...really?? Any small specs in your clear can be picked out when wet, or sanded out and buffed when dry. But a cottonwood seed is both white AND about 2 inches around. Uhhhggg!
So, the bonnet got sanded ...again. Wanna guess what happened this time around?
Another technique for painting is to wet your floor to hold down any errant dust. this works indoors or out. Any dust that blows loose from the paint gun will fall on the wet floor and stick there. So...after the cotton ball incident, I decided to hose down the driveway before re-spraying the bonnet a third time. All went great...beautiful color. Slick flowed clear.
So, I started to clean up the paint rig. Cleaned the gun. Rolled the air hose. Started to real in the water hose. And THAT is where all went south again. The water nozzle that looked so good at Lowes has a design flaw. When you go to pull the hose in the valve tends to catch on the ground and turns the water spray back on all by itself. That's exactly what happened. And. Where did is spray, of all the 360 degrees that it could have sprayed??
RIGHT ON MY FRESHLY CLEARED BONNET!
I have set the bonnet aside, after realizing that I could spend the rest of my life on just this one panel. The good news is that any paint, whether primer or color, ads to the final finish. Every time you sand the panel gets that much flatter. Can you tell I am trying to rationalize to keep from crying?
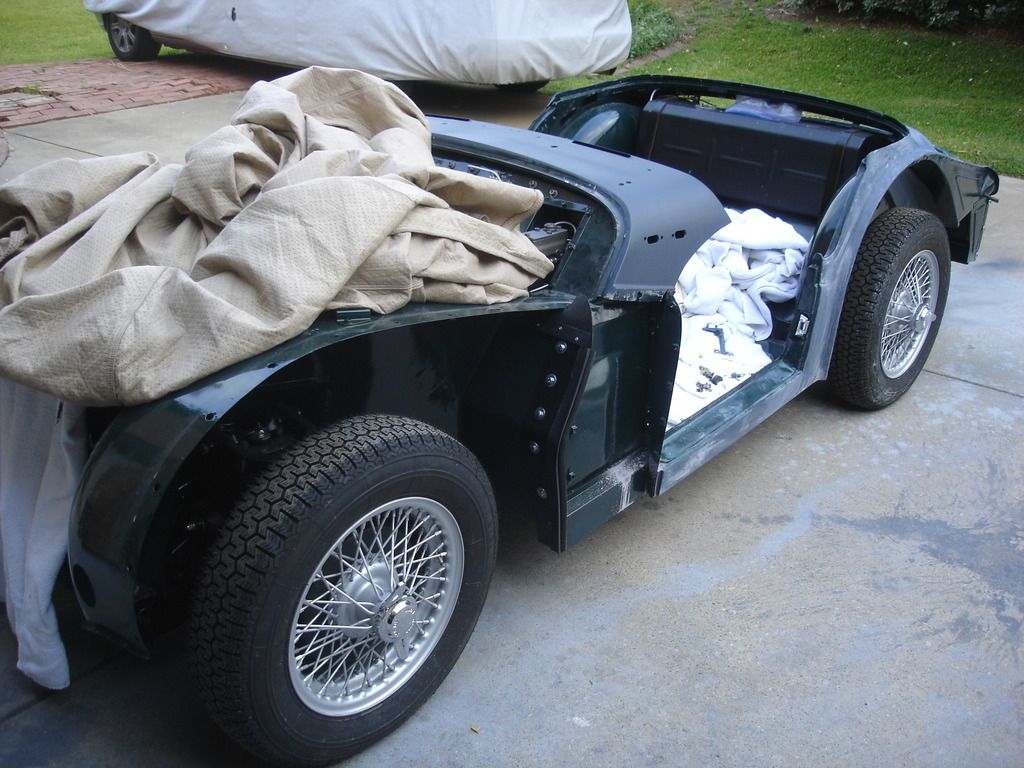
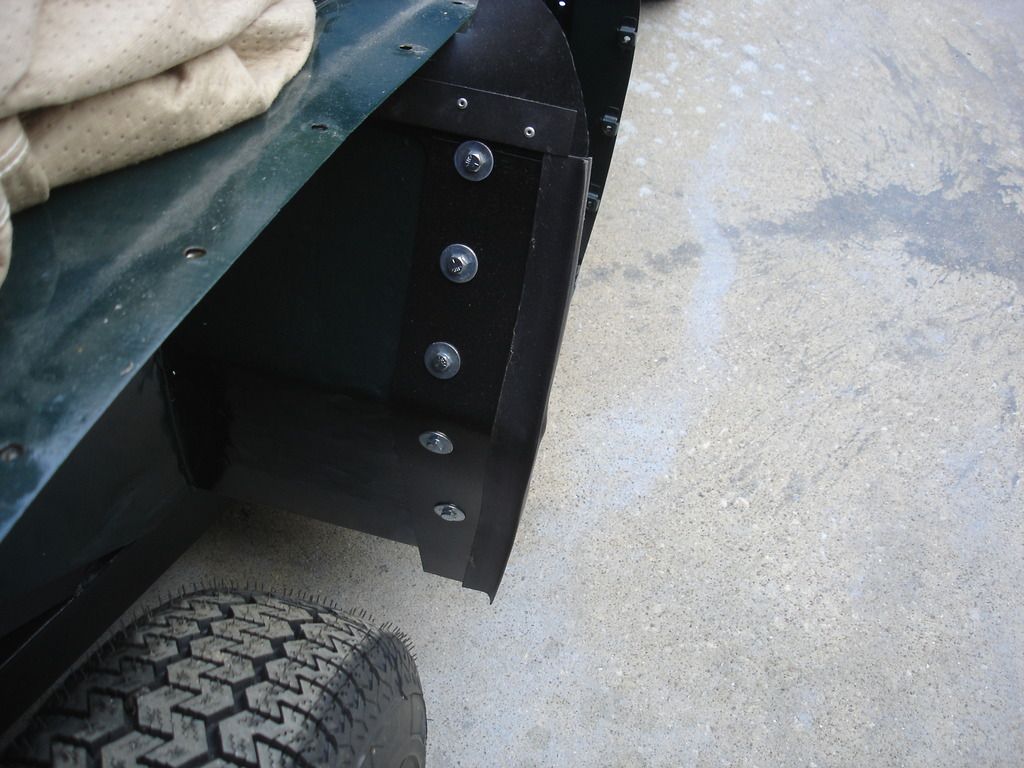
So, here is the car all apart again. The inner splash deflectors are set and ready to get painted body color like the factory did. And that's it for another week or so. Hope you guys are having better luck than I am!!

 Hey Guest!


")