-
 Hey Guest!
British Car Forum has been supporting enthusiasts for over 25 years by providing a great place to share our love for British cars. You can support our efforts by upgrading your membership for less than the dues of most car clubs. There are some perks with a member upgrade!**Upgrade Now**
(PS: Upgraded members don't see this banner, nor will you see the Google ads that appear on the site.)

Tips
- We have a special forum called "Member Articles" where you can submit actual articles for consideration for publication. Learn More
- Don't have an Avatar? If not, your avatar will default to the 1st character in your username. Go into "Account Details" to change your Avatar.
- Some basic forum navigation info: click
 Hey - did you know if you click on the title of a thread it will take you to the first unread post since you last visited that thread?
- Hey Guest - Is your British Car Club in our Clubs database? If not, send me a PM - Basil

- Looking for a local club? Click the "Clubs" tab above and browse hundreds of clubs world-wide.
- Add Android or iPhone APP: click
- Did you know - any picture or video you add in your posts in any marque-specific forum will also get added to the Media Gallery automatically.
- A few more tips about posting and replying: click
- Hey there Guest - be sure to keep your profile page up to date with interesting info about yourself: learn more
- More tips and tricks on Posting and Replying: click
 but were afraid to ask:
  STOP!! Never post your email address in open forums. Bots can "harvest" your email! If you must share your email use a Private Message or use the
  smilie in place of the real @
- Want to mention another member in a post & get their attention? WATCH THIS

- So, you created a "Group" here at BCF and would like to invite other members to join? Watch this!
- Hey Guest - A post a day keeps Basil from visiting you in the small hours and putting a bat up your nightdress!
- Hey Guest - do you know of an upcoming British car event?
 Pretty Please - add it to our Events forum(s) and add to the calendar! >> Here's How <<
- Hey Guest - you be stylin' Change the look and feel of the forum to fit your taste. Check it out
- If you run across an inappropriate post, for example a post that breaks our rules or looks like it might be spam, you can report the post to the moderators: Learn More
- If you would like to try some different "looks" or styles for the site, scroll to the very bottom, on the left and click the Style Selector.
You are using an out of date browser. It may not display this or other websites correctly.
You should upgrade or use an alternative browser.
You should upgrade or use an alternative browser.
Richmond VA 1960 Bugeye Bringing Miss Eva back to life.
- Thread starter hcallaway
- Start date


I wanted to bake on the finish so I created my Rubbermaid Trashcan Oven. LOL
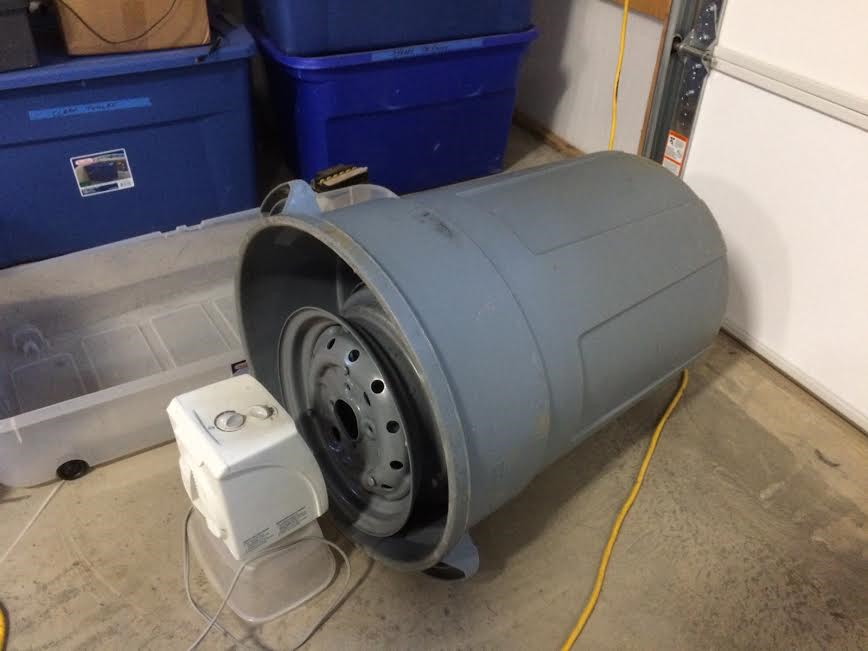
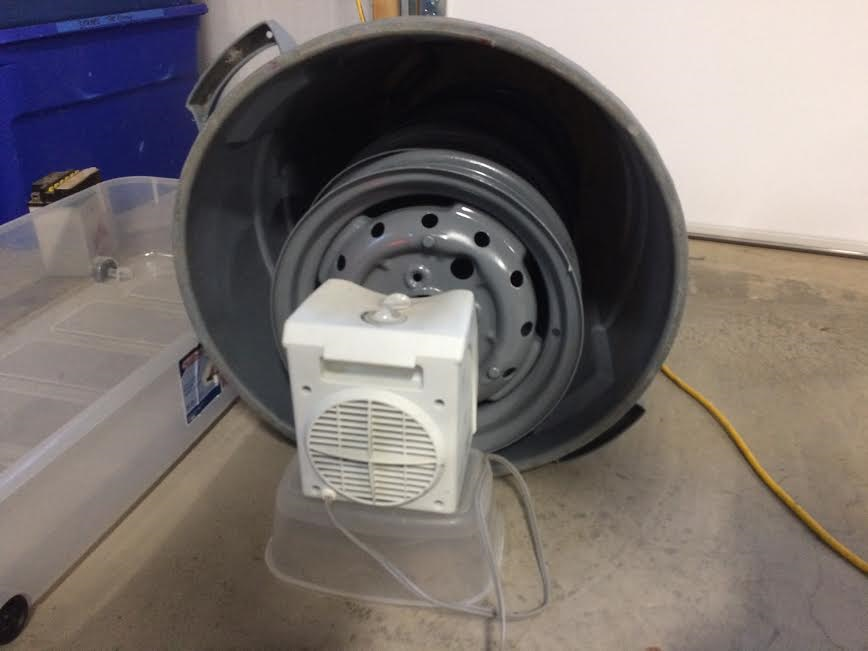
The first wheel was super hot to the touch. The wheels in the rear were very warm. I left them in there over night to cure. I covered the top and sides. It was not a tight seal but just enough to keep it hot and not overheat.


The first wheel was super hot to the touch. The wheels in the rear were very warm. I left them in there over night to cure. I covered the top and sides. It was not a tight seal but just enough to keep it hot and not overheat.
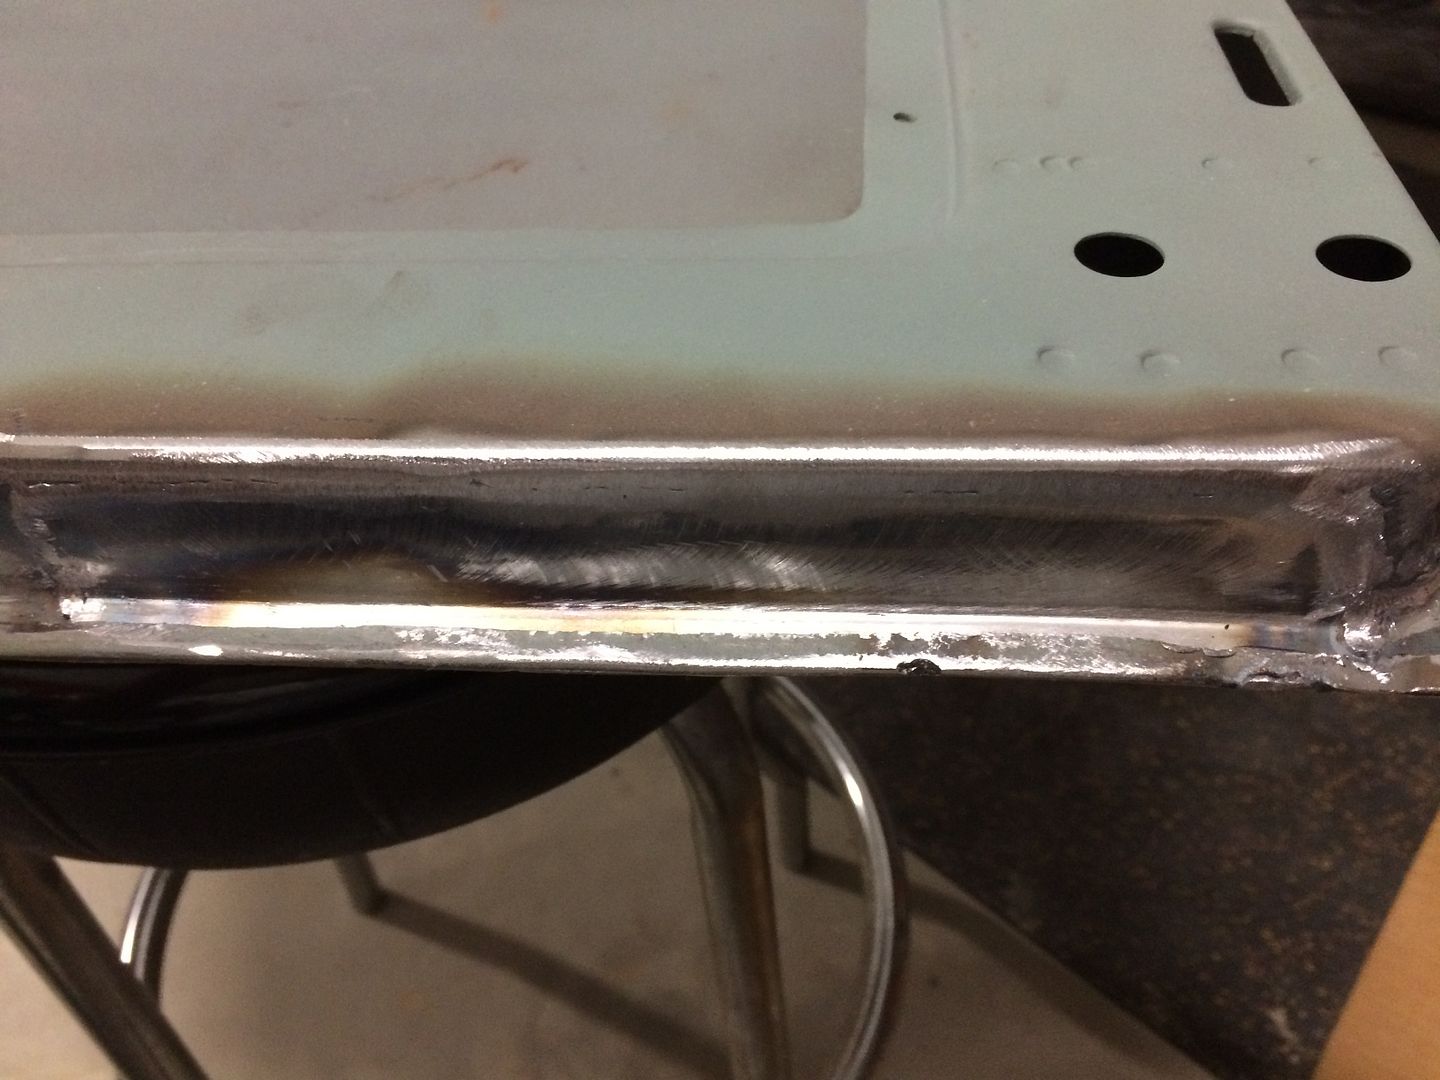
Took bad door to my friends shop for the small rust in the bottom corner and where the door skin wraps over the front bottom edge.
Tight area to try and repair so I know my limitations.
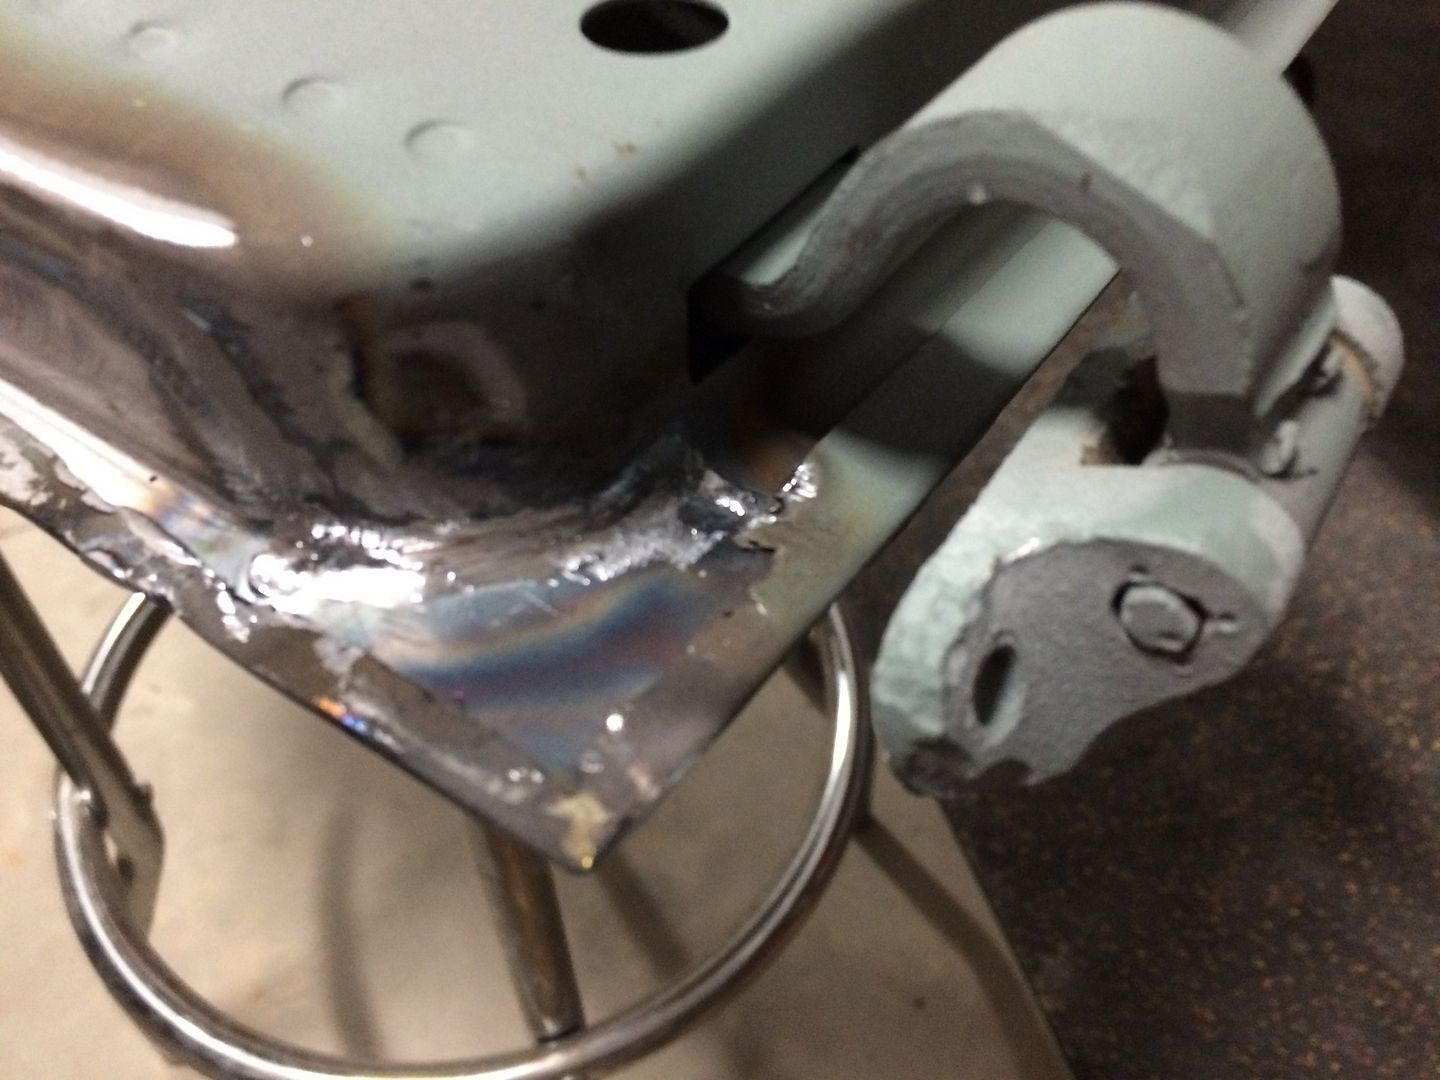
This was such a tight spot and he was able to cut out and replace almost seamlessly. One more area that would have been easy to grind and putty, but I would have known the shortcut.
Tight area to try and repair so I know my limitations.

This was such a tight spot and he was able to cut out and replace almost seamlessly. One more area that would have been easy to grind and putty, but I would have known the shortcut.


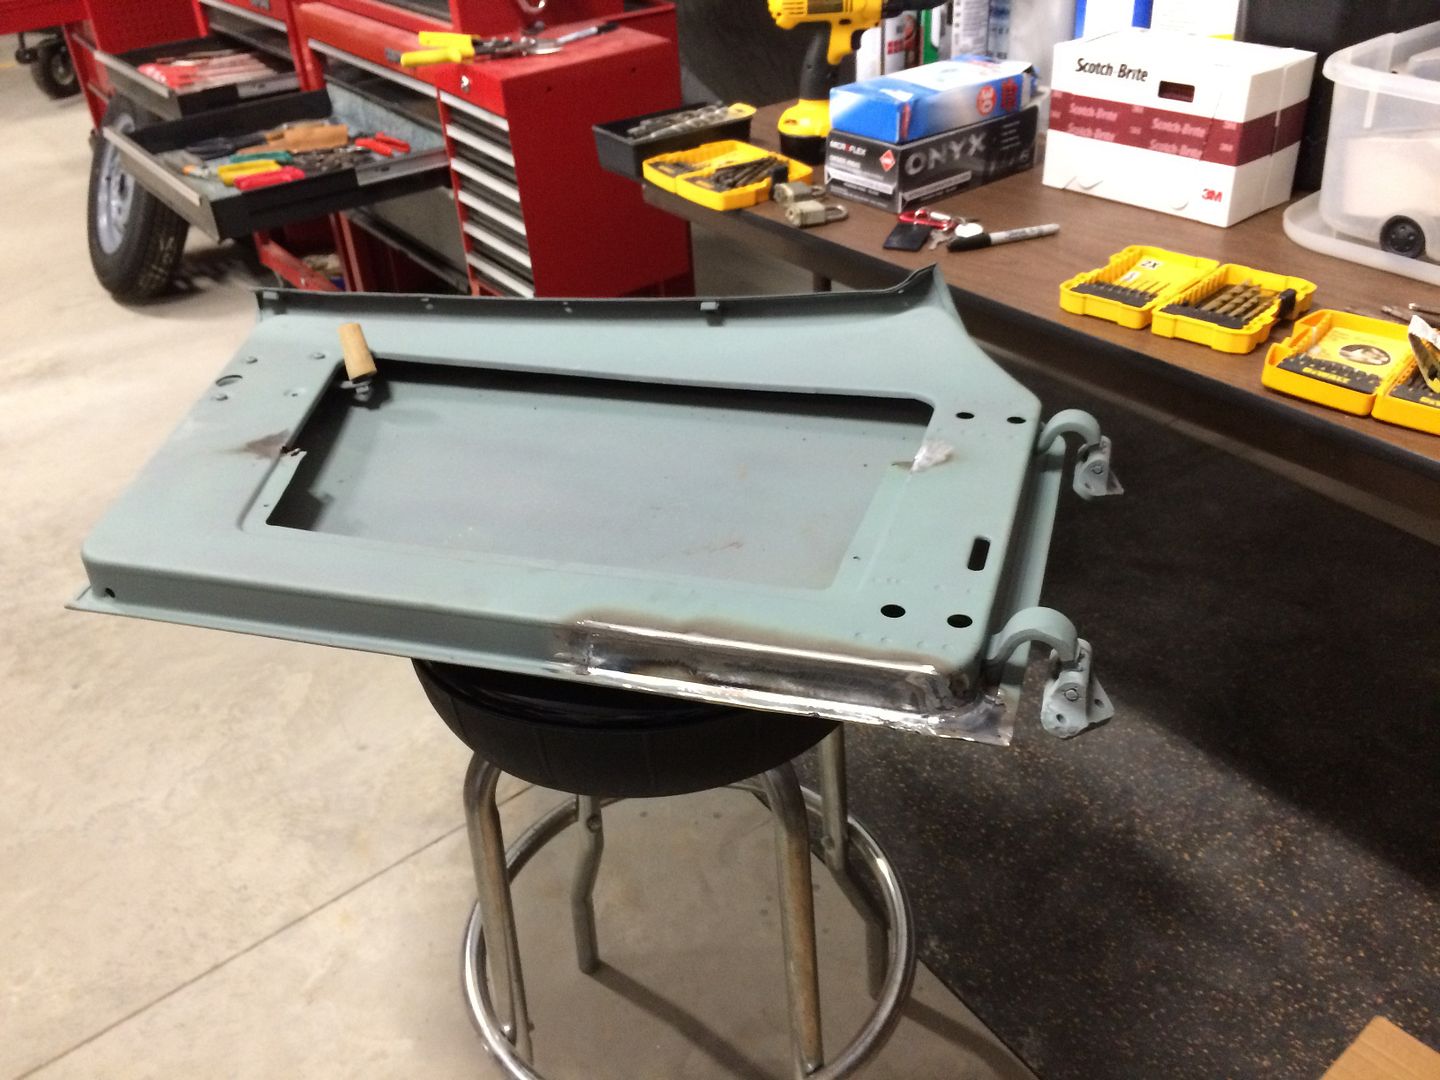
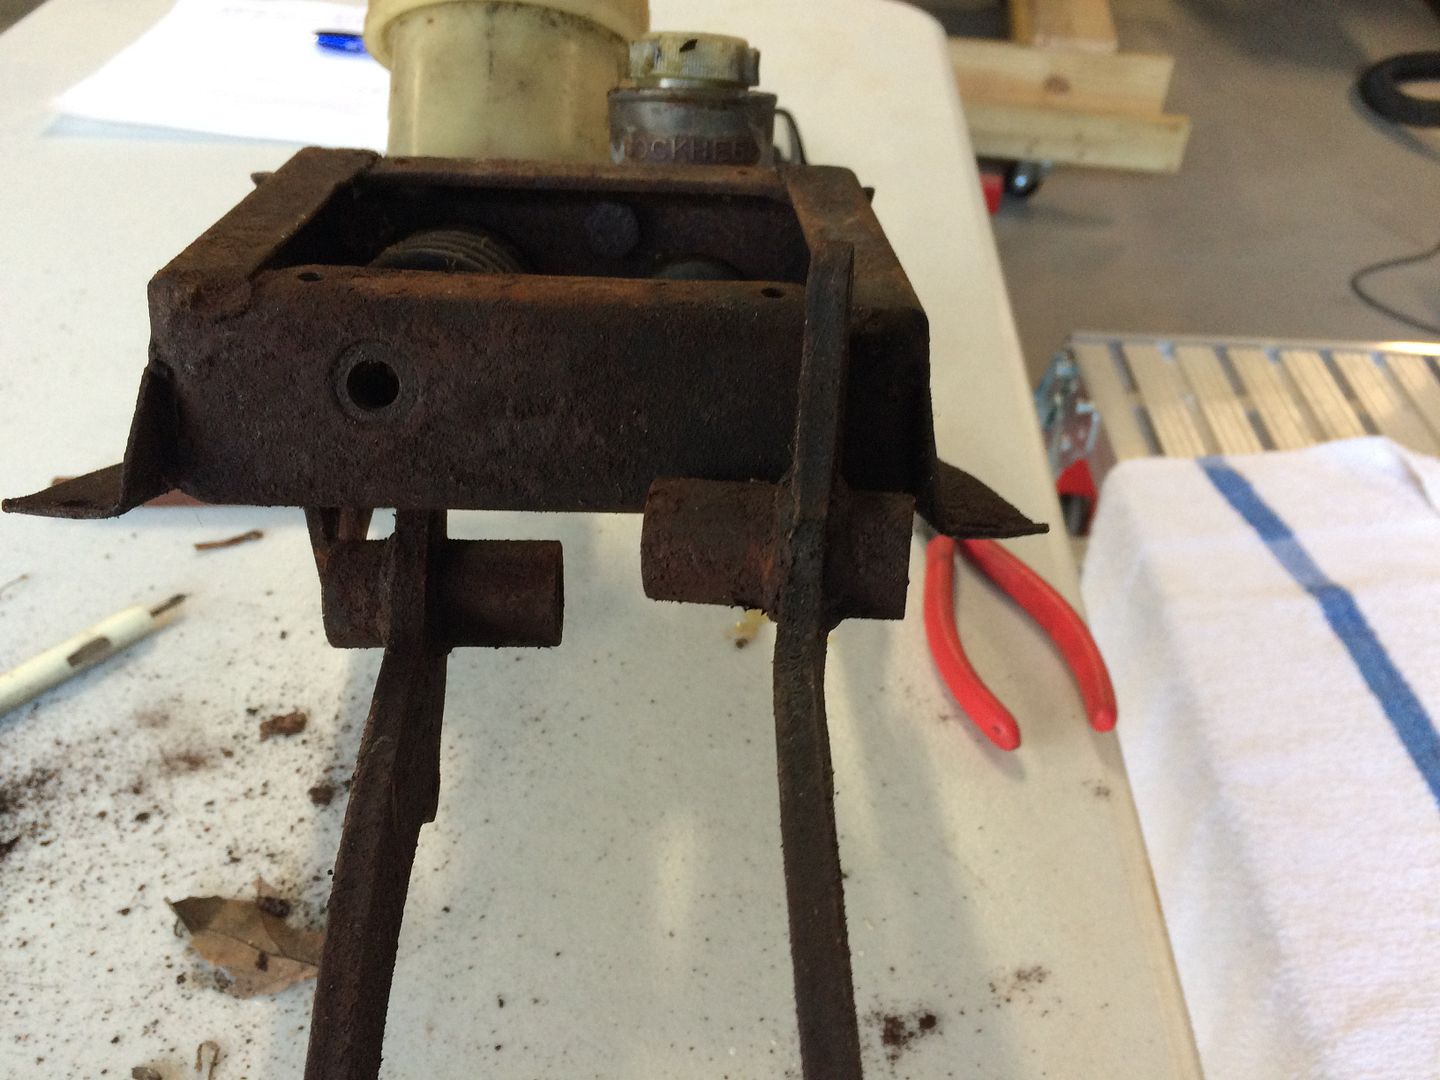
Cut out for the MC and Clutch Cylinder for the Dual Circuit Brake system.
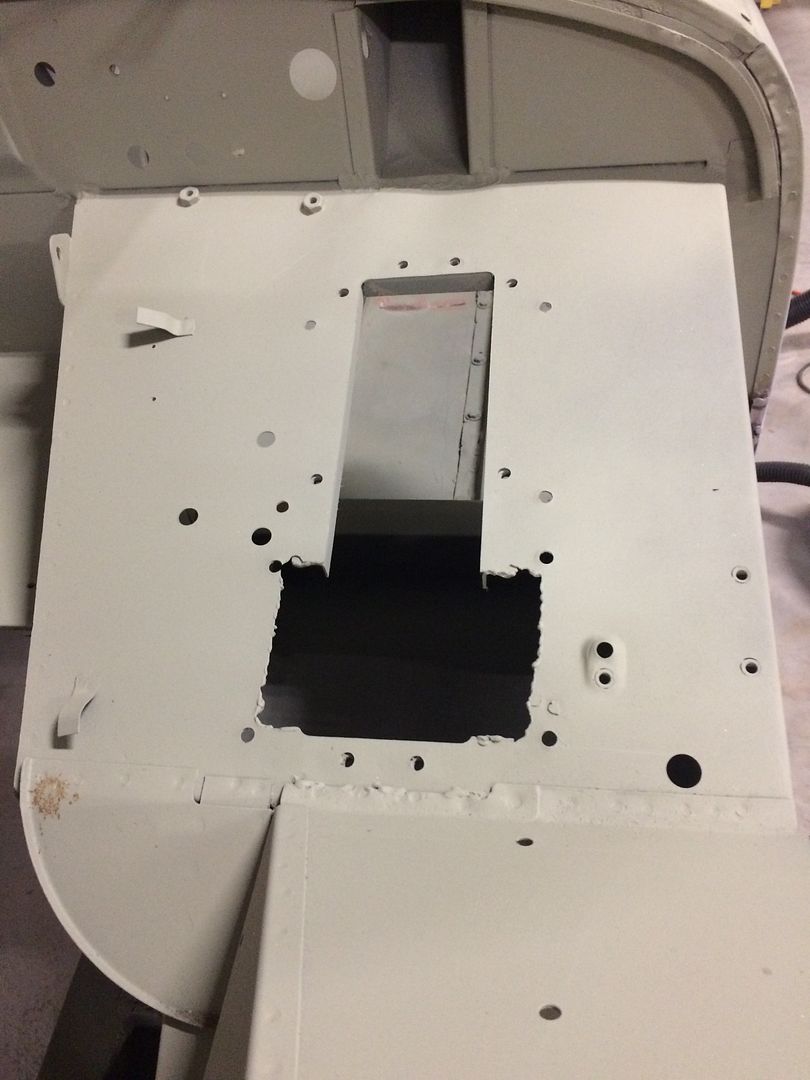
Has to be cut out for the pedal assembly to fit. Leave a pretty big hole from the original Bugeye set up.
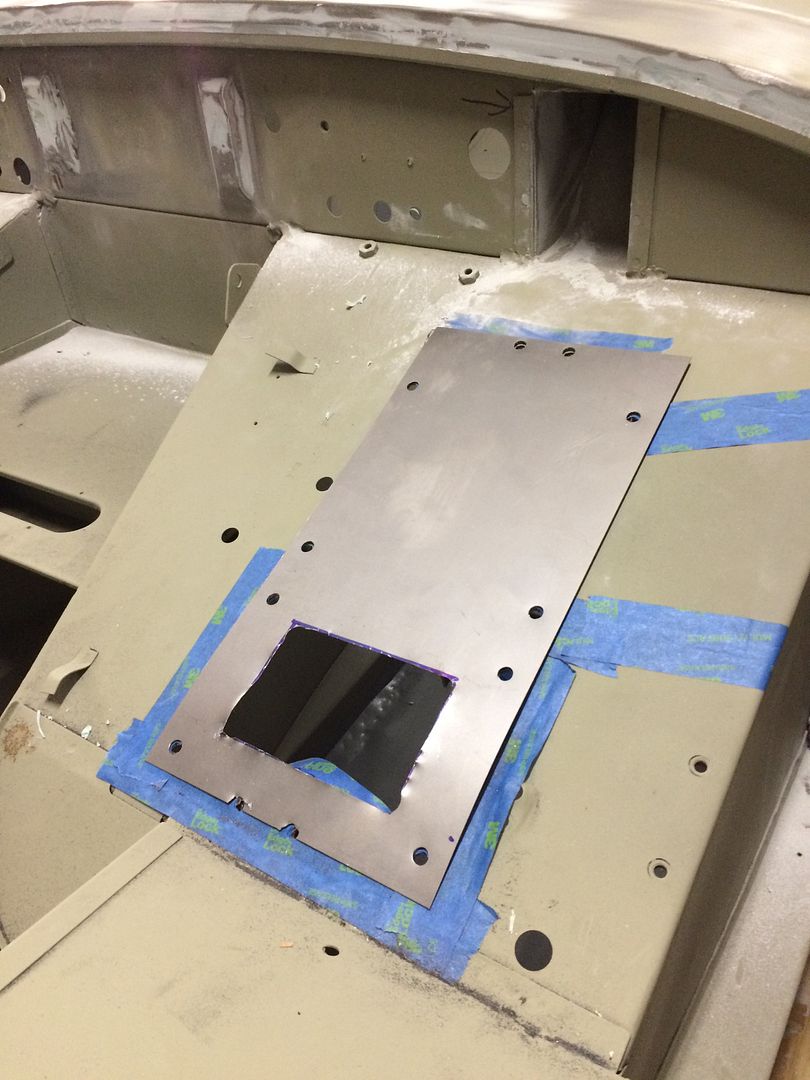
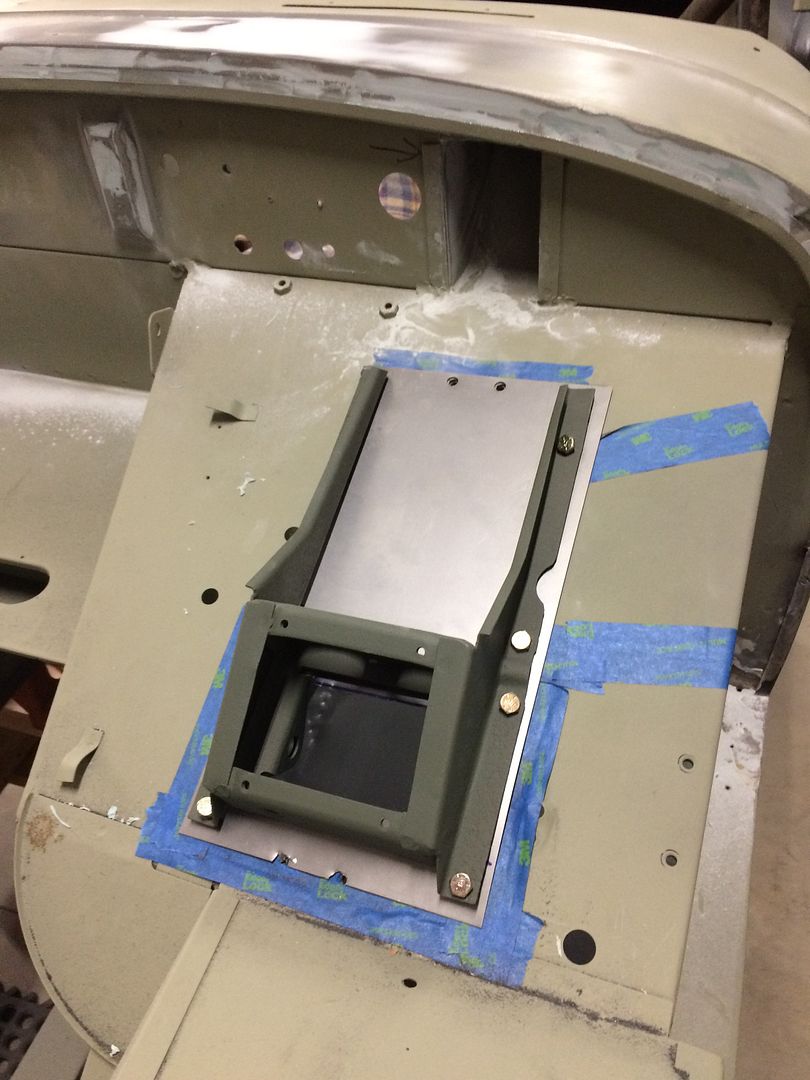
Transition Panel with cut out for new pedal assembly.
 c
c
Looks a lot cleaner and quicker to fabricate than a patch panel.

Has to be cut out for the pedal assembly to fit. Leave a pretty big hole from the original Bugeye set up.


Transition Panel with cut out for new pedal assembly.
 c
cLooks a lot cleaner and quicker to fabricate than a patch panel.
I had to grind it down to bare metal.
Found the metal to be sound.
We are going to try and rework it to see if we can reduce the skim coat.
It had an old patch that was brazed. Old work that has held up pretty well over time.
There is not any rust in the door. After I had it blasted, I saw the putty. I was surprised to see the patches as you can feel inside the door and the patch was seamless and not the least bid visible. Someone took pride in their work. Methods have changed but this was holding up extremely well given that is was done probably 30 years ago.

Found the metal to be sound.

We are going to try and rework it to see if we can reduce the skim coat.

It had an old patch that was brazed. Old work that has held up pretty well over time.
There is not any rust in the door. After I had it blasted, I saw the putty. I was surprised to see the patches as you can feel inside the door and the patch was seamless and not the least bid visible. Someone took pride in their work. Methods have changed but this was holding up extremely well given that is was done probably 30 years ago.
Jim_Gruber
Yoda
Offline
Yes surprises abound in these old cars. After $3,500 on new panels being welded in on Bugsy III back in 1982, Bugsy III was still not put back together when I purchased him from a guy in Burlington, ON 3 years ago. Discovered that Seam from Floorpan to Rear Bulkhead right by Spring Box had a 1/2" gap about 6" long covered with Seam Sealer. Made the decision then and there I did not want to fix, bought Bugsy IV instead, and sold Bugsy III to a guy in Detroit area losing about $300 on the entire transaction. And we won't even go into State of OH not wanting to issue me a title on a Canadian BE. Glad that Bugsy III went to a new home in MI where a Bill of Sale works just fine. Happy working on a car with no rust!!! Discovered some dents that will take some minor Bondo work to smooth out but work progresses. Front suspension all out so Front Discs can get installed.
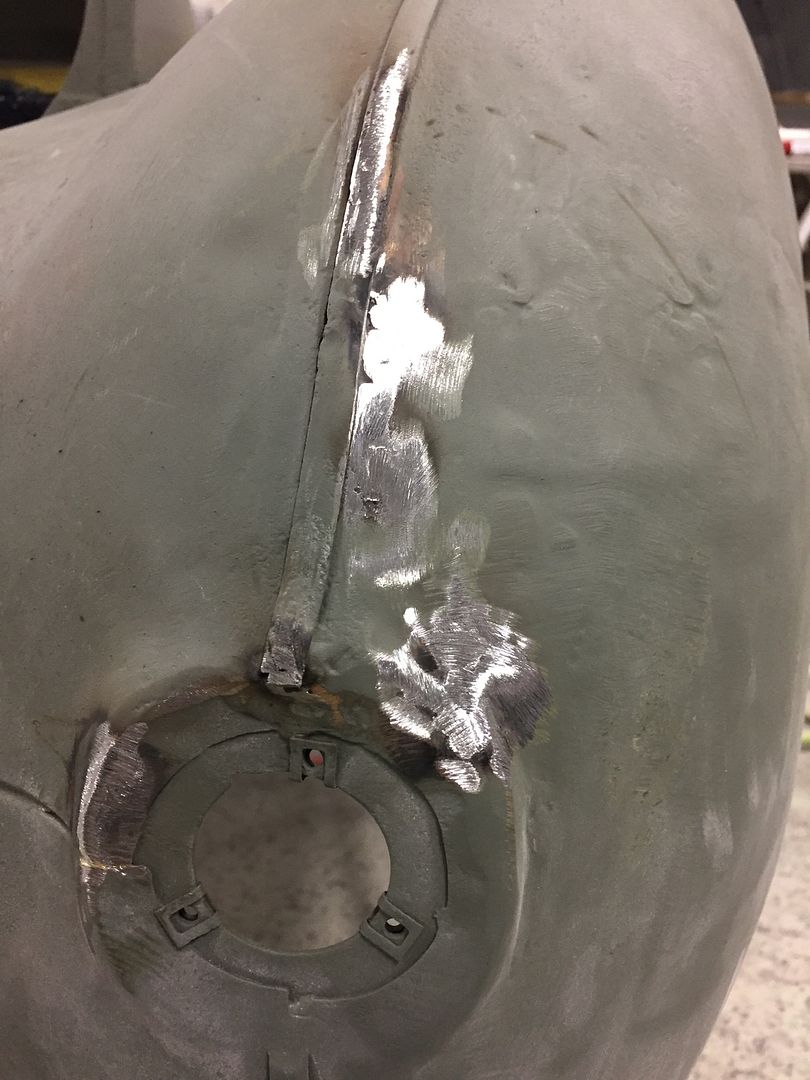
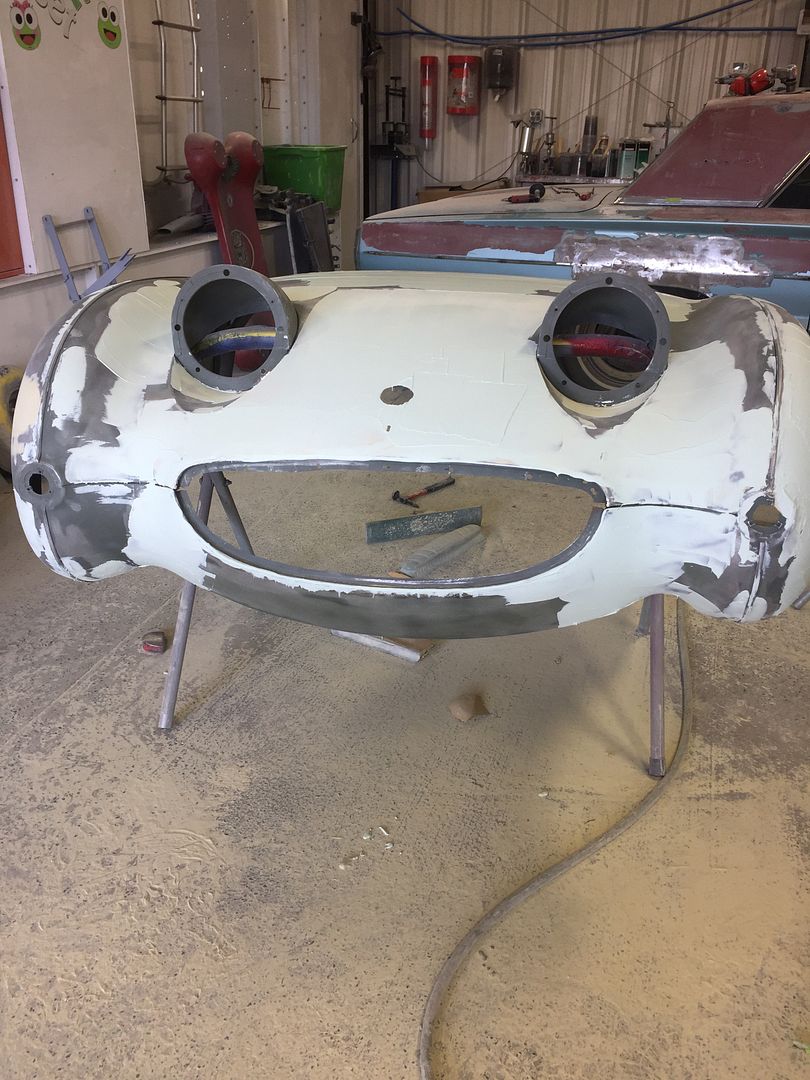
Bonnet is now at the paint shop. Sean is starting to finish the final body work. He is welding up any pin holes and completing stitch welds.
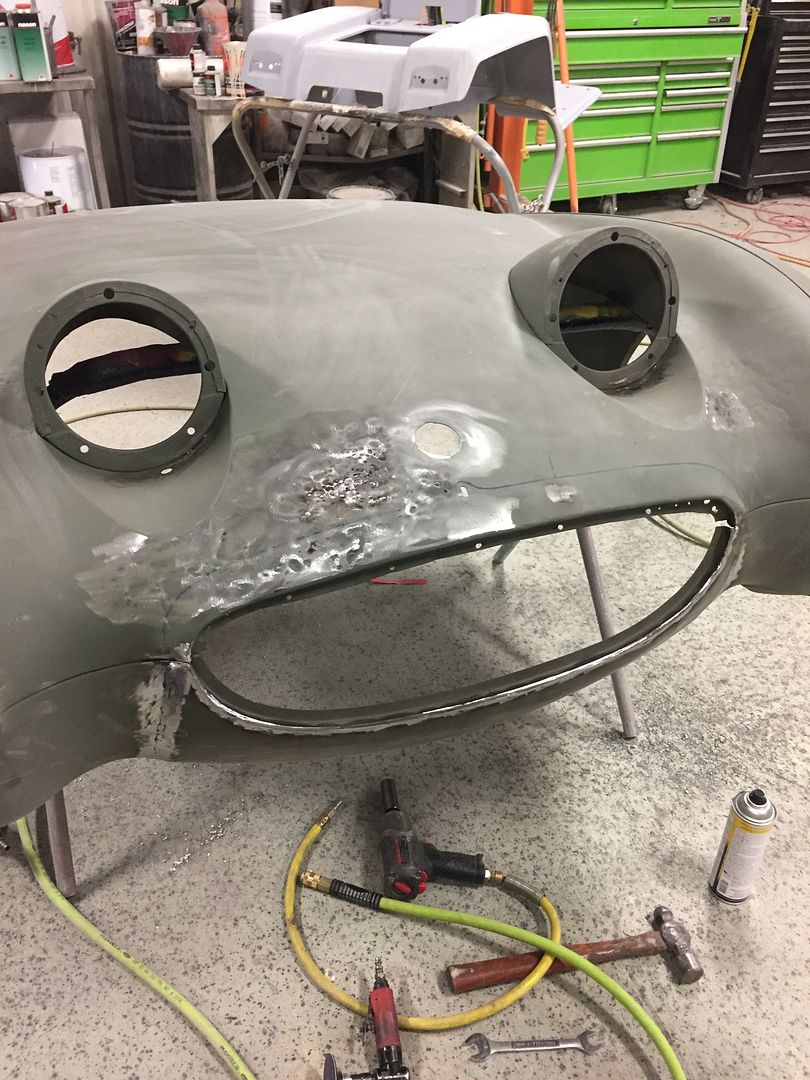
Additional dolly work.
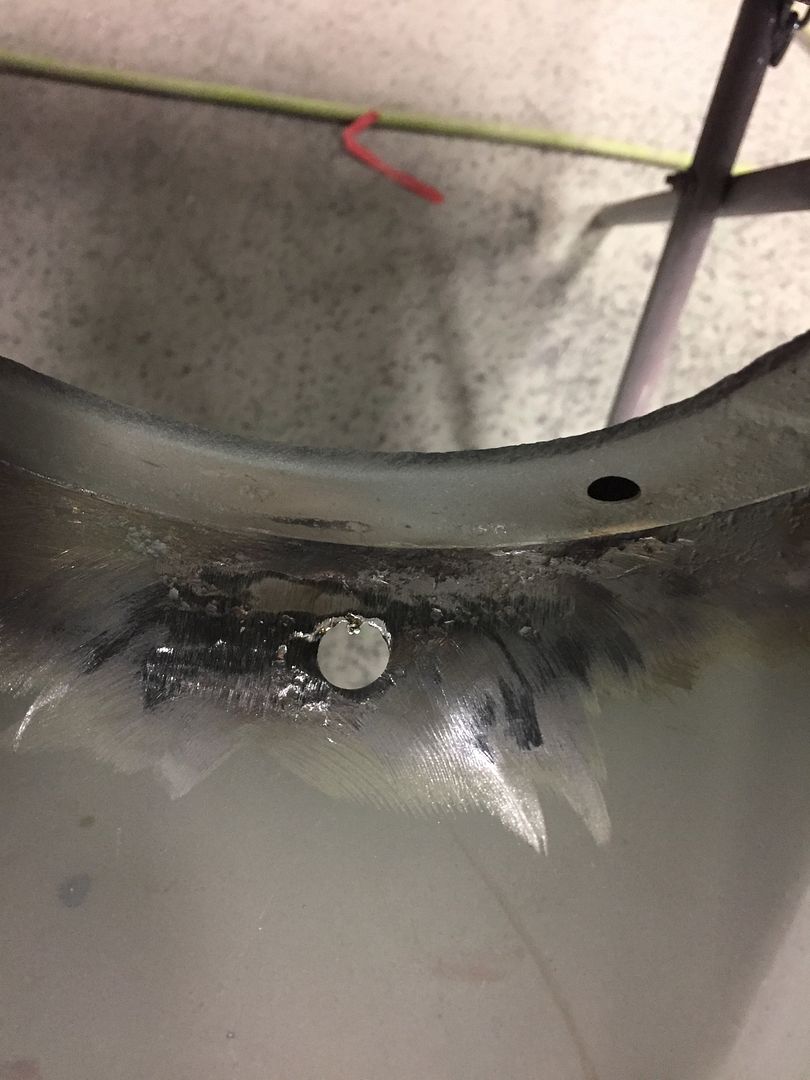
Rebuild or build up the headlight bucket weep hole.
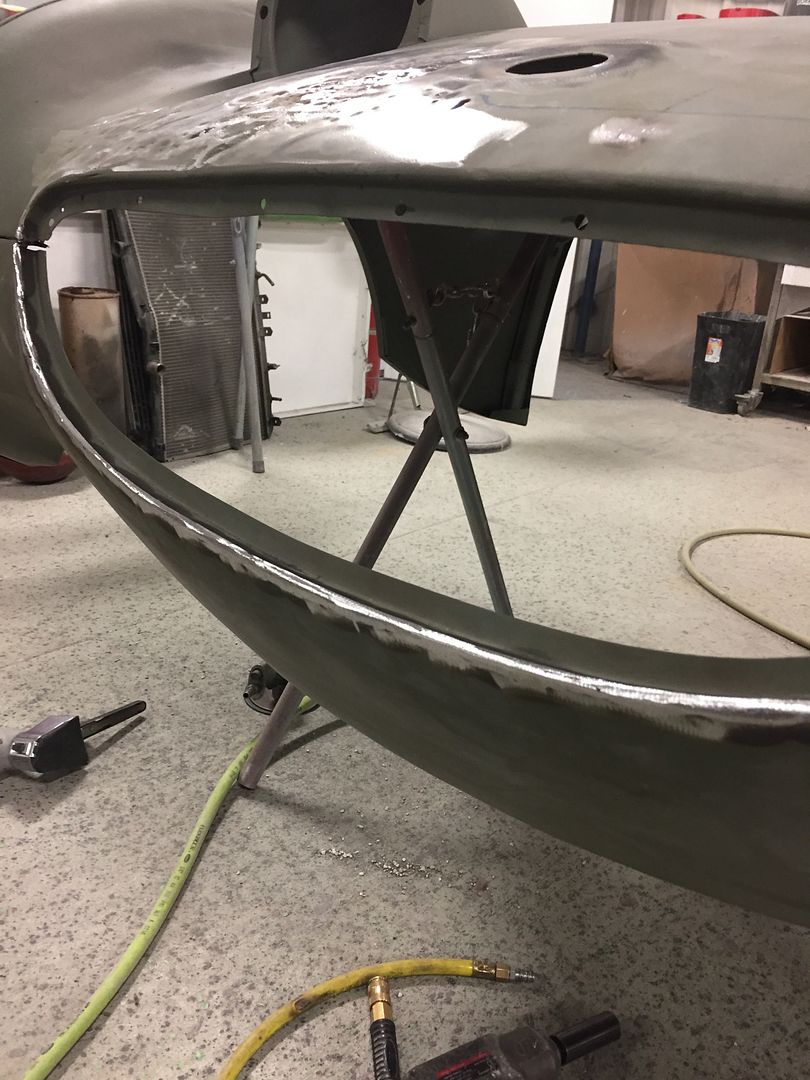

Not many pristine bonnets on the East Coast to choose from. I think in the end it will be worth the effort. When I picked it out
it looked very solid. It was solid but beat to death. Lower corners had to be rebuilt and the front valance replaced. You will never know what you have until you strip it. You can buy a car and think you have a winner, many times you are just buying someone else's problems.
I know in the end what I have and how it was repaired. Lots of effort but worth it in the end.

Additional dolly work.


Rebuild or build up the headlight bucket weep hole.


Not many pristine bonnets on the East Coast to choose from. I think in the end it will be worth the effort. When I picked it out
it looked very solid. It was solid but beat to death. Lower corners had to be rebuilt and the front valance replaced. You will never know what you have until you strip it. You can buy a car and think you have a winner, many times you are just buying someone else's problems.
I know in the end what I have and how it was repaired. Lots of effort but worth it in the end.

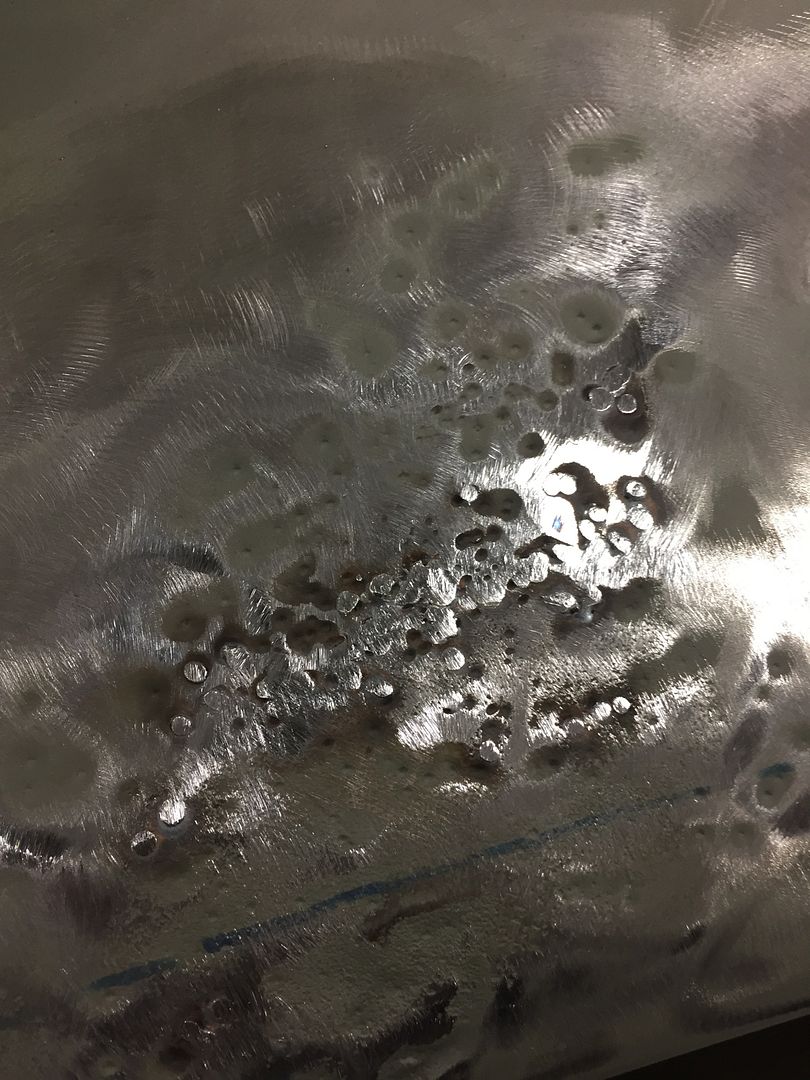
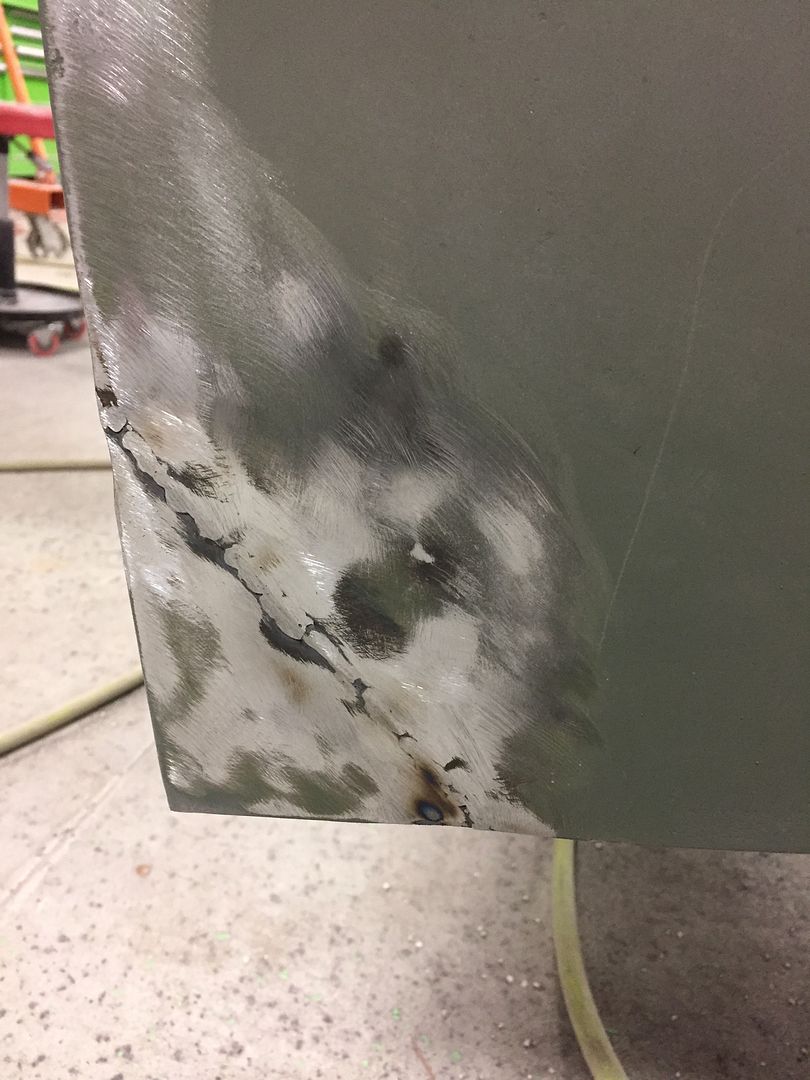
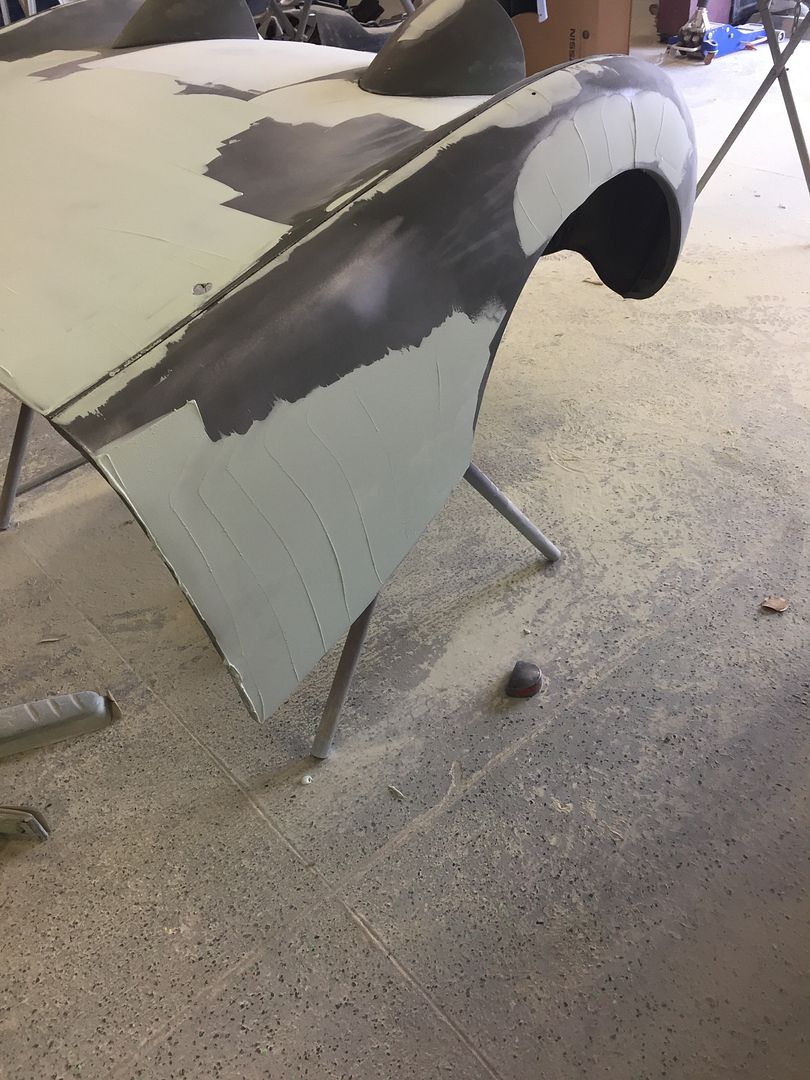
First Round of Filler
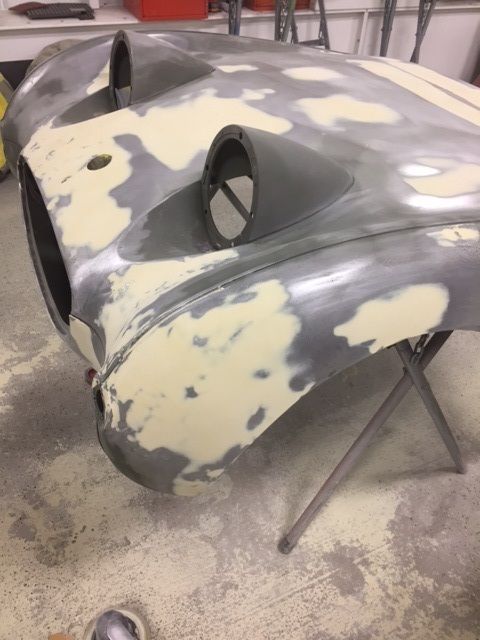
Notice the body work on the tops of both wheel arches because of stress cracks. I put a rolled angle inside of both arches to strengthen them.
Nice to see some more progress. I wish I knew the total hours from start to finish on the bonnet alone. Many more still to come.


Notice the body work on the tops of both wheel arches because of stress cracks. I put a rolled angle inside of both arches to strengthen them.

Nice to see some more progress. I wish I knew the total hours from start to finish on the bonnet alone. Many more still to come.


twas_brillig
Jedi Knight
Offline
Amazing! The documentation and commentary is superb - I've got a lot more posts, but you sure beat the heck out of mine in terms of content. A few questions, and one comment:
- have a look at https://www.peterrenn.clara.net/midget.html#legroom for what he did to fit his feet, legs, and pedals- - what pressure did you sand blast at? I've been terror stricken to sandblast anything other than structural due to warping worries.
- where did you source your roll bar from? Do you expect to lose seat movement? I want to add one for protection against getting t-boned. Advice requested.
- what are you using for undercoating?
-and which dune buggy? We've got a Meyers Manx clone on a 62 chassis with a 1600, and dual kadrons and a SuperTrapp type down facing muffler on an 'off-road competition exhaust system - with the exhaust and kadrons only for the 'ooh - shiny!' factor
Thanks, Doug
twas_brillig
Jedi Knight
Offline
I tried weighing our BE body shell a couple of years back, but can't find my records. Even an estimate from what it feels like to move the body around would be helpful for the forum - I remember running a 2x4 through the front body work so two of us could try hefting the shell, etc., but can't find any records. Thanks, Doug
When I had Ms Triss stripped, IIRC it felt like about 300 - 350 lbs. Two people could carry it a short distance. I suspect a BE would be at the lower end of that as it doesn't have the later bracing of Rubber Bumper Cars.
You are very kind. I am a vertically challenged guy; however, I can fit in any car and as part of my Irish Heritage, I would have been valued for being able to work in a mine or pick potatoes so my height is OK. The link for legroom is great for all of the information he shared. I have never seen that before. I was thinking about cutting the pedals down if I find them to not be comfortable. I have shortened pedals in my Dune Buggy and it created much needed foot room.
I have a sandblaster, I have sandblasted. It is miserable work. I gladly paid to have this work done. I went over where he needed to be careful to not create too much heat and warp the flat panels. There are two ways at least to reduce heat, actually many more. If you are using sand, how course (fine vs rough) can generate various levels of heat. Air pressure has a real effect. Reduce it on the parts you are worried about. I am not sure on actual pressures. Also you can keep the pressures the same and just back off the work piece to reduce the cleaning. Also a whole other discussion is the media you use. At $85 an hour he does 5 x's what I can do in the same hour.
The roll bar is NOS from Alabama bought 30 years ago. It may not be used as the seat travel is killed with the seats I am planning on using. We are going to see if we can modify them when I get the bonnet back and we do a mock fit and it is back at the fabrication shop. I think the car needs one. I am almost sure this one can be changed, but my buddy can fabricate faster than he can modify.
I think I used a 3 M product on the bottom. I applied it only to the bottom of the tub and right inside the fender arches. I will paint over undercoating, I have tested some area and it seems to hold pretty good. The car will see limited usage so wear and tear should not be too bad.
I built a Berrien Dune Buggy with an Orange gel coat. It is a Manx clone. It has a tube chassis with a fiberglass pan that looks like a stock floor. I have a complete build on it as well on the SAMBA website. The motor is a stock 1600 with a single carb. It is slow but reliable. I have a Tri Mil jet coated exhaust that is fairly quiet. I really love my DB. My grown kids even enjoy it and the grand-kids think it is a toy.
When I am at a car show it is always popular with everyone but the street rod guys. (Most of them bought what they drive so I don't know why they look down on it. LOL)
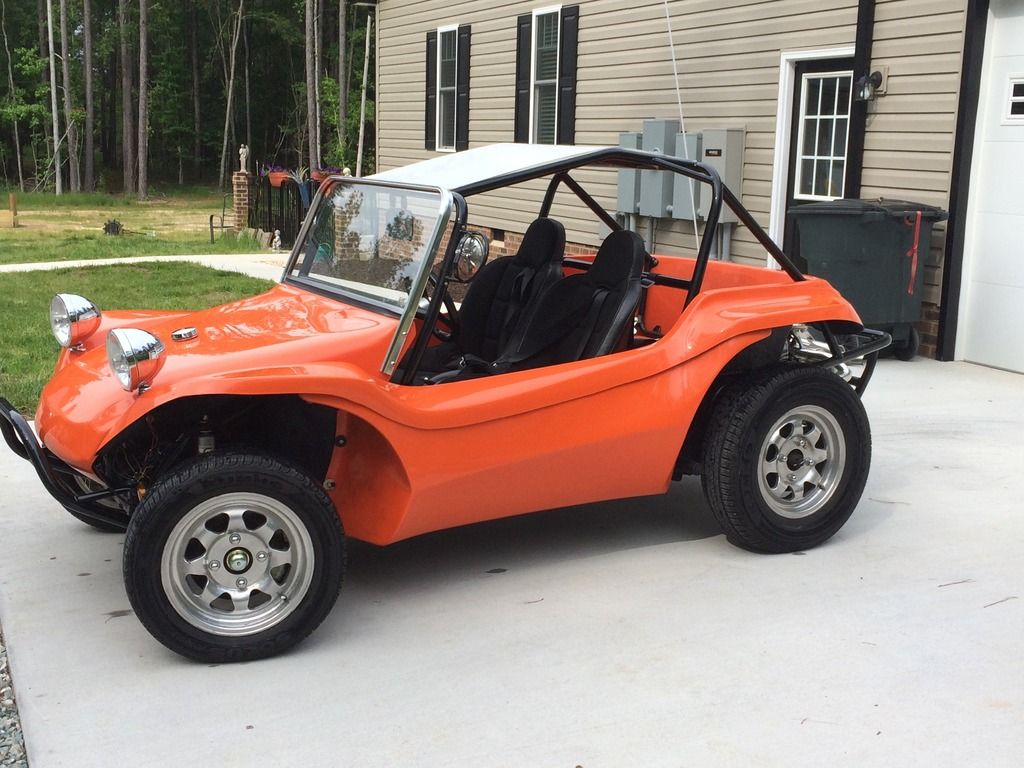
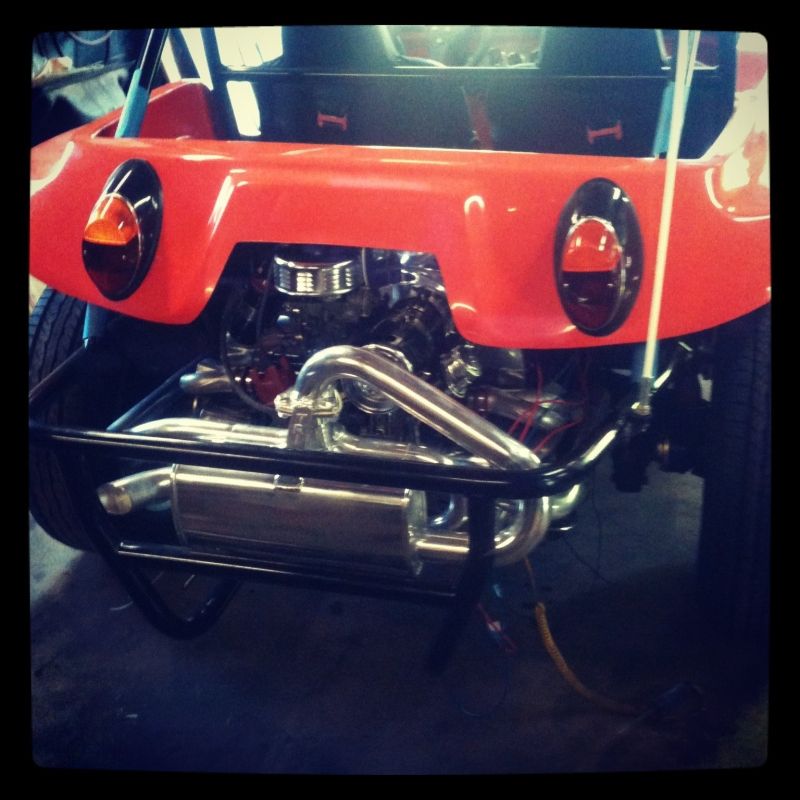
This is my photo site for the Berrien Dune Buggy.
https://s83.photobucket.com/user/hcallaway/library/berrien dune buggy
It is as close as I will ever come to building and designing my own car. I hope you like the pictures if you check it out.
Amazing! The documentation and commentary is superb - I've got a lot more posts, but you sure beat the heck out of mine in terms of content. A few questions, and one comment:
- have a look at https://www.peterrenn.clara.net/midget.html#legroom for what he did to fit his feet, legs, and pedals- - what pressure did you sand blast at? I've been terror stricken to sandblast anything other than structural due to warping worries.
- where did you source your roll bar from? Do you expect to lose seat movement? I want to add one for protection against getting t-boned. Advice requested.
- what are you using for undercoating?
-and which dune buggy? We've got a Meyers Manx clone on a 62 chassis with a 1600, and dual kadrons and a SuperTrapp type down facing muffler on an 'off-road competition exhaust system - with the exhaust and kadrons only for the 'ooh - shiny!' factor
Thanks, Doug
I actually took the new grille to the body shop for a trial fit. Pretty good fit especially on the top. I never knew the opening was called the orbit. Nice to know. Your body looks like an Aluminum 427 AC Cobra. If mine can be a 4 on a scale next to your car I would be happy. As always great suggestions.
Have you fitted the grille? They are suppose to fit snug around outside and inside of the orbit. I enlarged my holes a little after re-chroming to get a perfect fit. Let you grille be your guide, it will show you if you need to work the metal more. Looking great!!
View attachment 46563View attachment 46564
2nd Round of mud. High spots and low spots located. Trouble areas are known.
Let the fun begin.
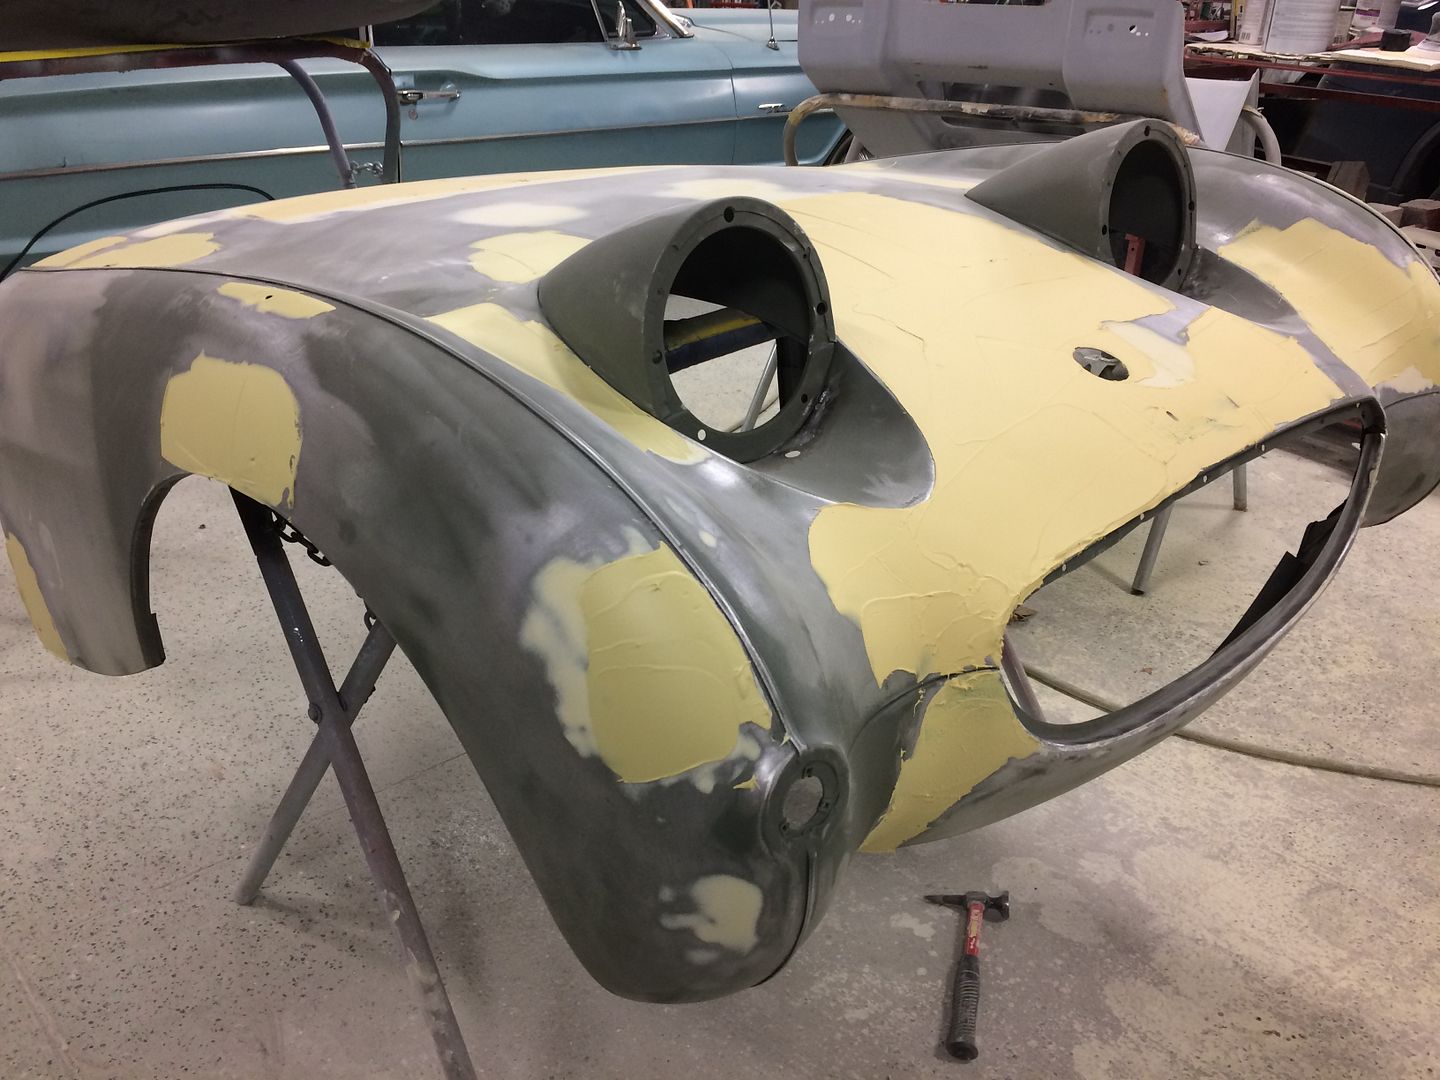
It will be primed by the weekend and I will get it back in the shop to fit the bonnet to the body. Final fabrication will be completed. Then the body and bonnet back to the paint shop for blocking and paint.
Let the fun begin.


It will be primed by the weekend and I will get it back in the shop to fit the bonnet to the body. Final fabrication will be completed. Then the body and bonnet back to the paint shop for blocking and paint.
Last edited:
BlueMax
Jedi Warrior
Offline
Looking Great! I agree, fit bonnet to the hinges as well. Install the pegs so that you know that you have everything right, don't forget the rubber seal and your wing braces on too. Fitting the bonnets are such a pain.. I filled the problem areas with lead then skim coated to a smooth finish after I epoxied sealed the bonnet. I like to let the filler set up for several months after the last filler coat is sanded before the build primer goes on so the scratches can settle down before priming. I then give is a very light 220 cut, clean with Transtar and start the build priming. My final cut was 600 before the paint was sprayed.
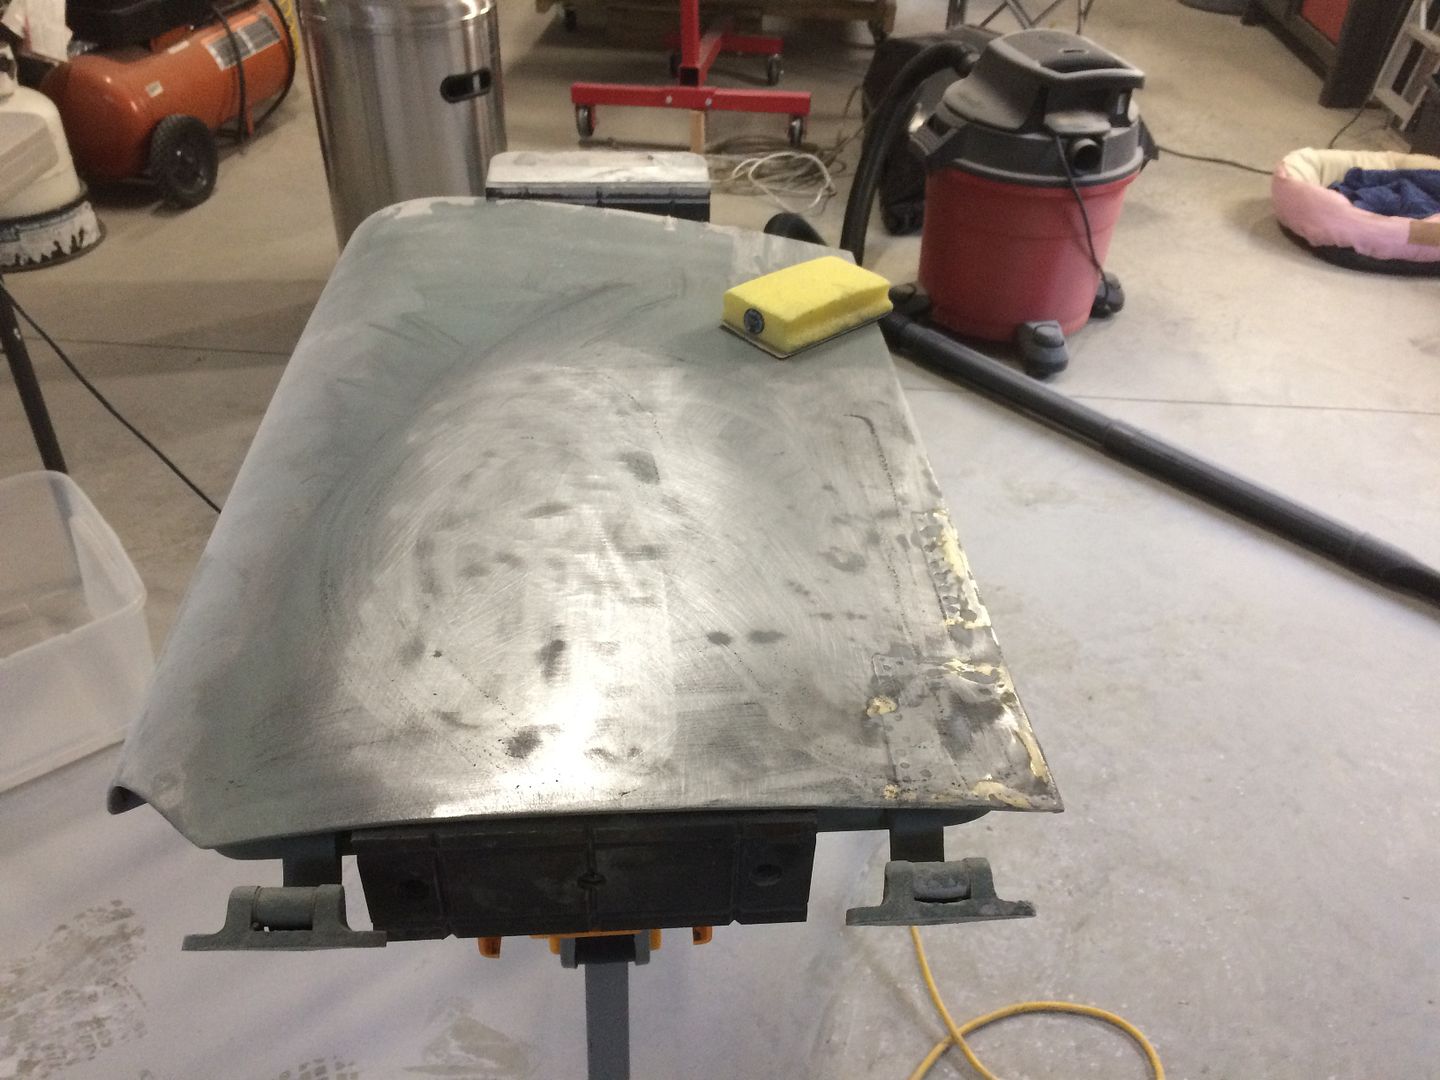
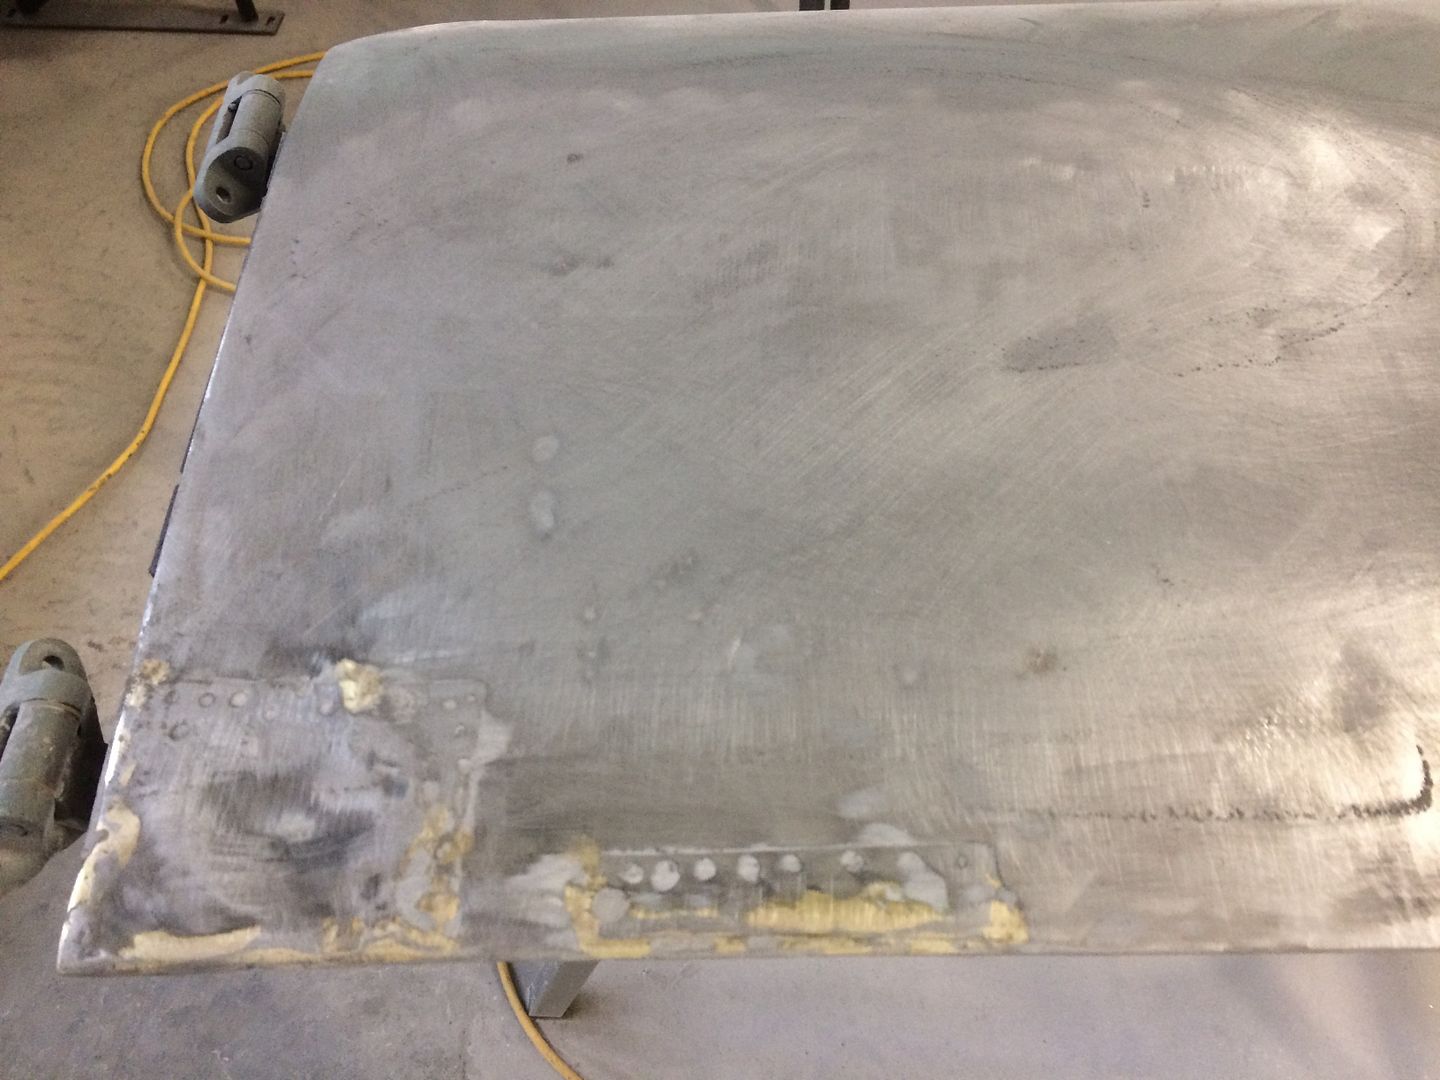
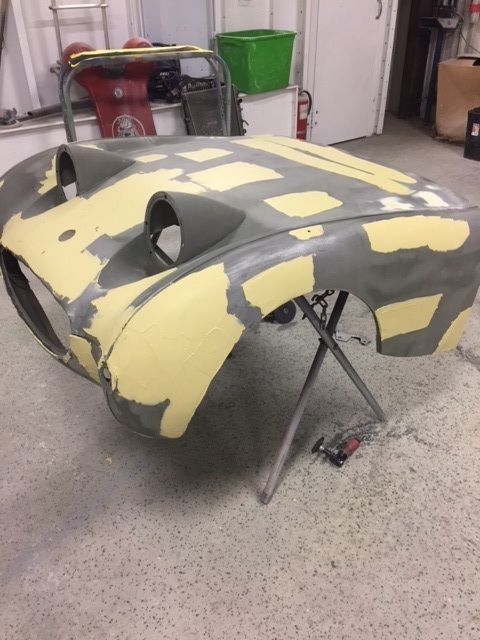
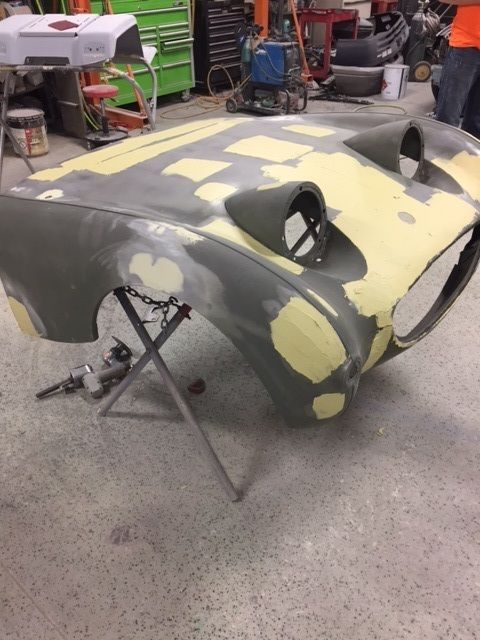
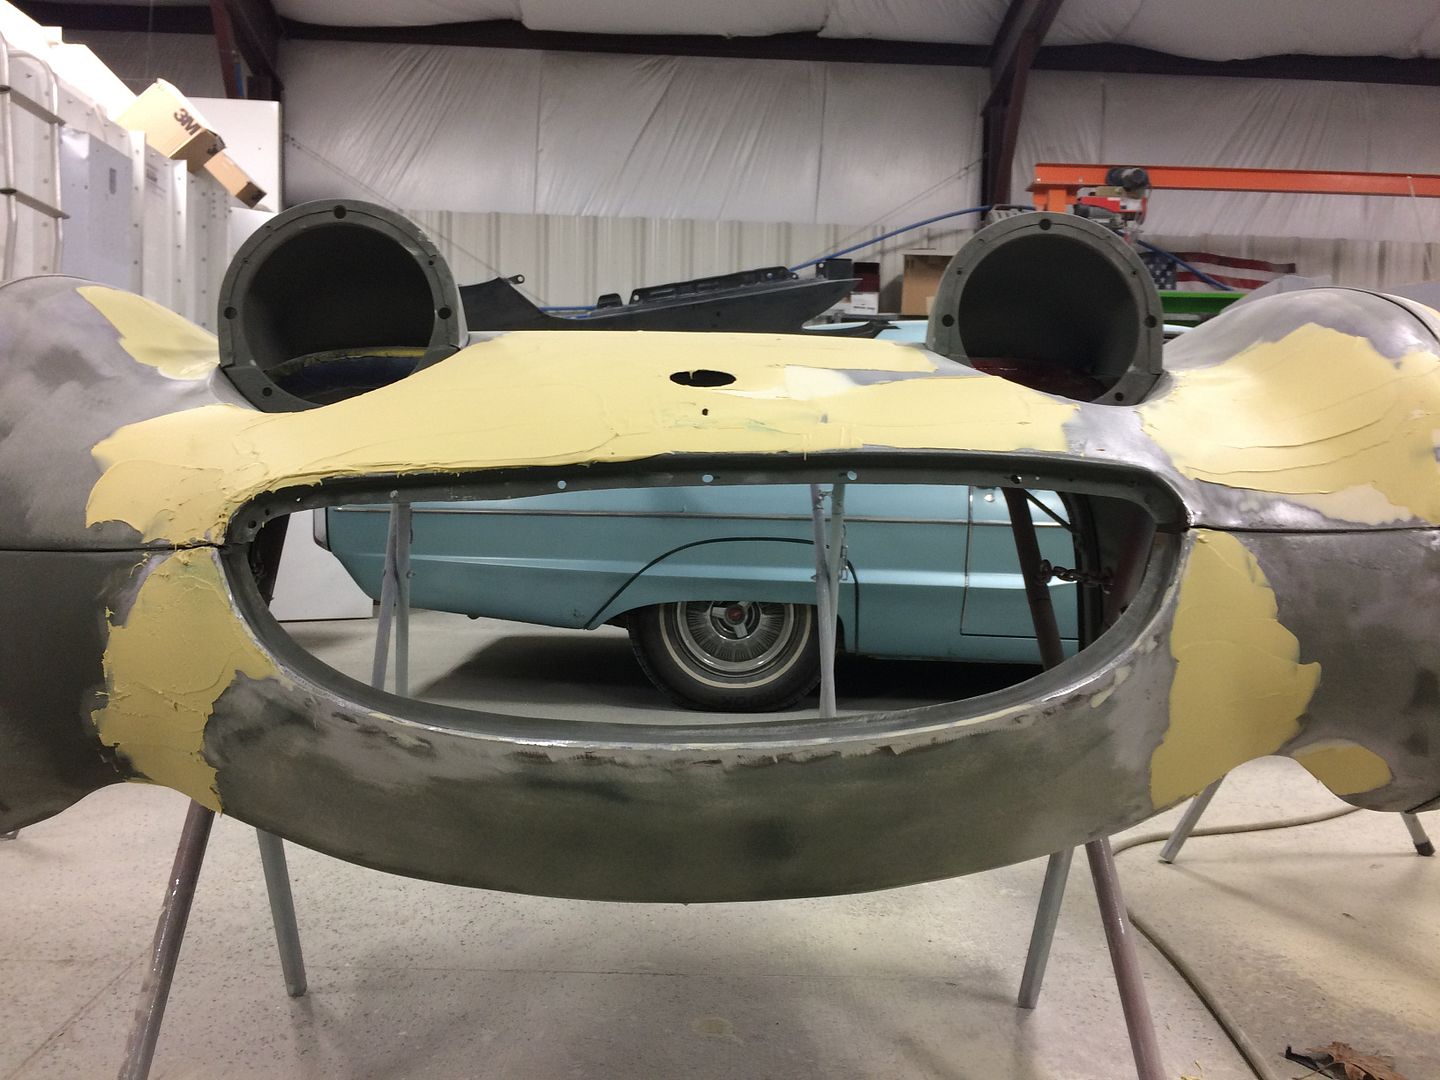
Third round. There is very little filler left when it is blocked. Just getting out the highs and lows.
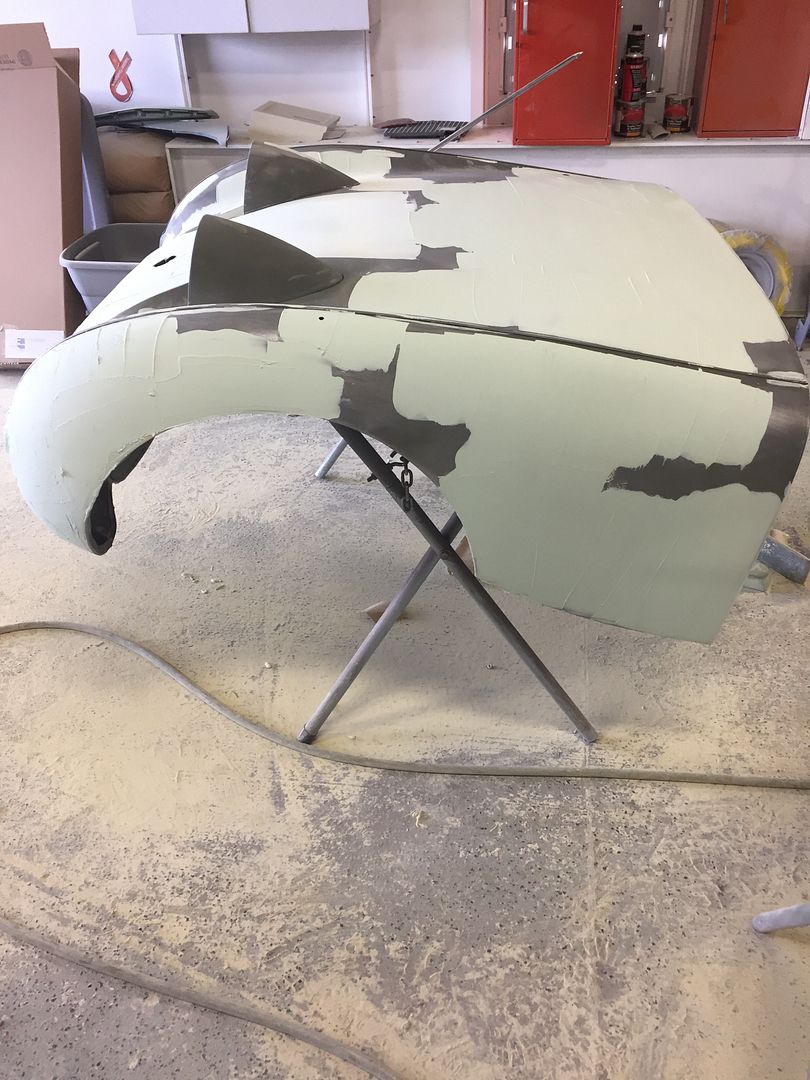
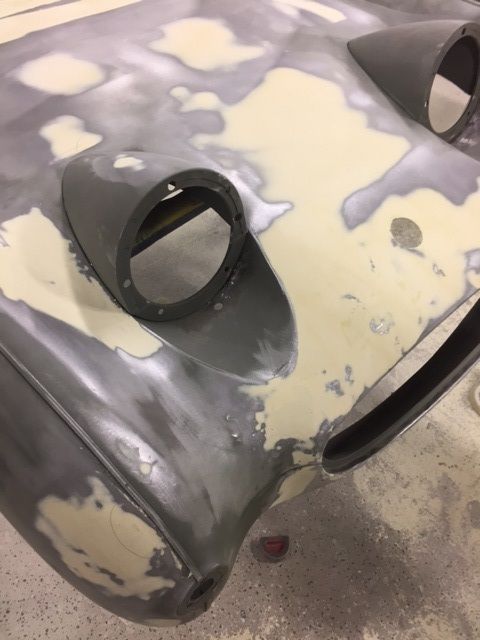
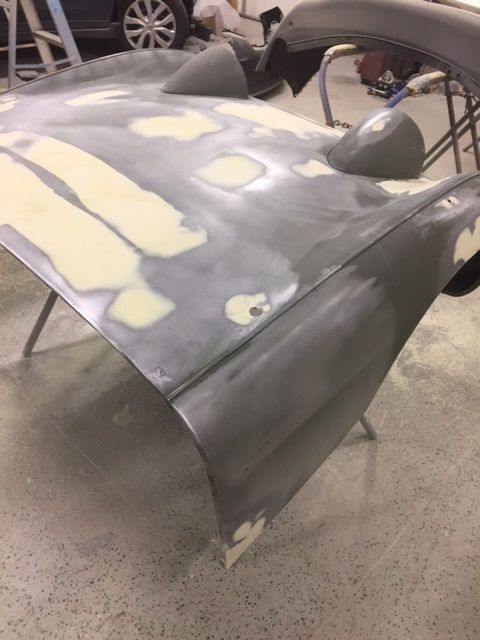
4th Round of Body Work on the Bonnet.
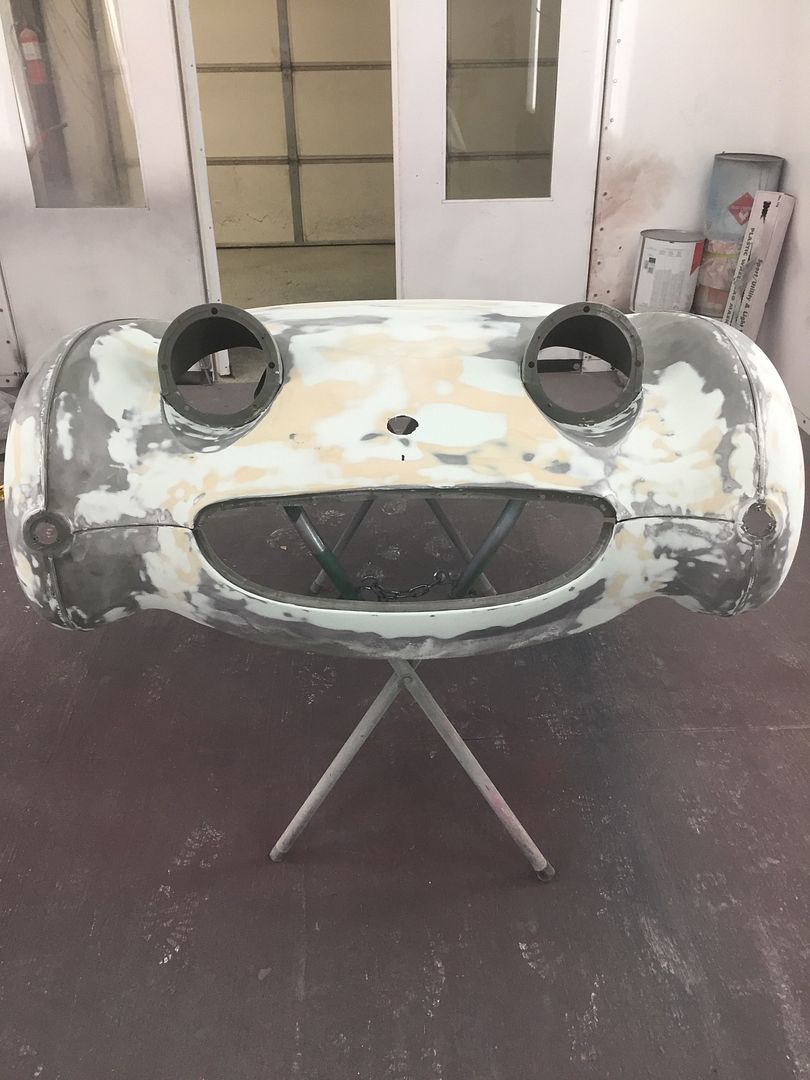
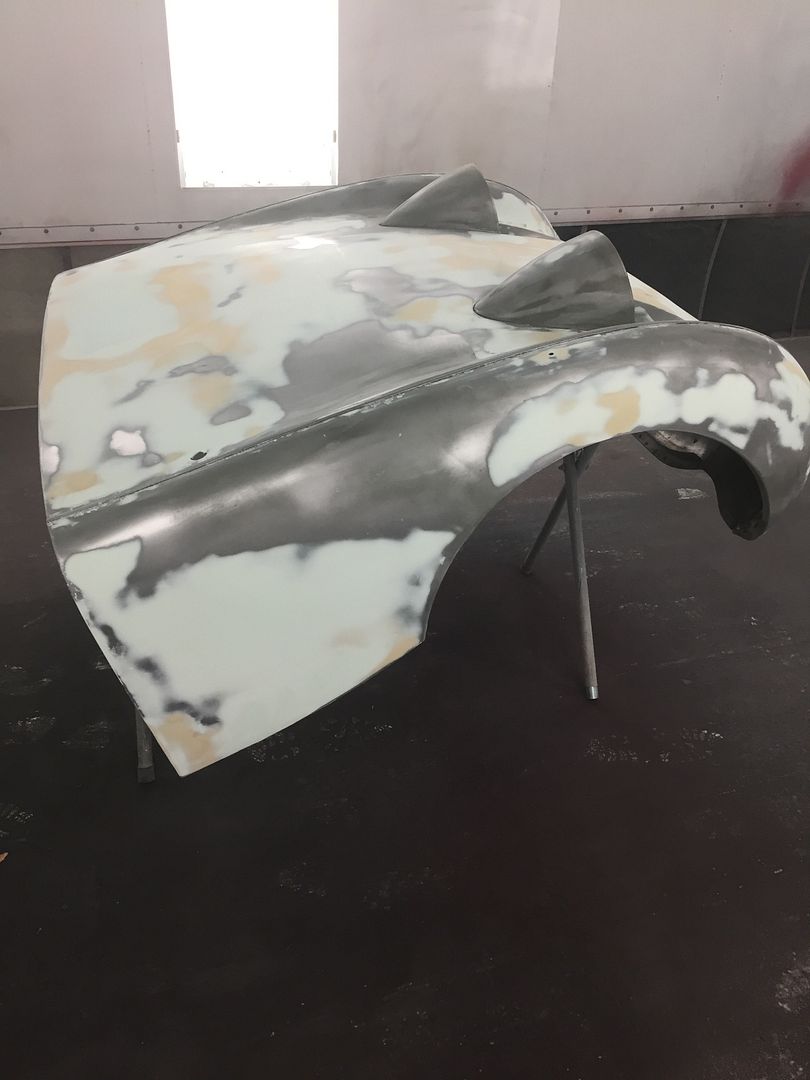
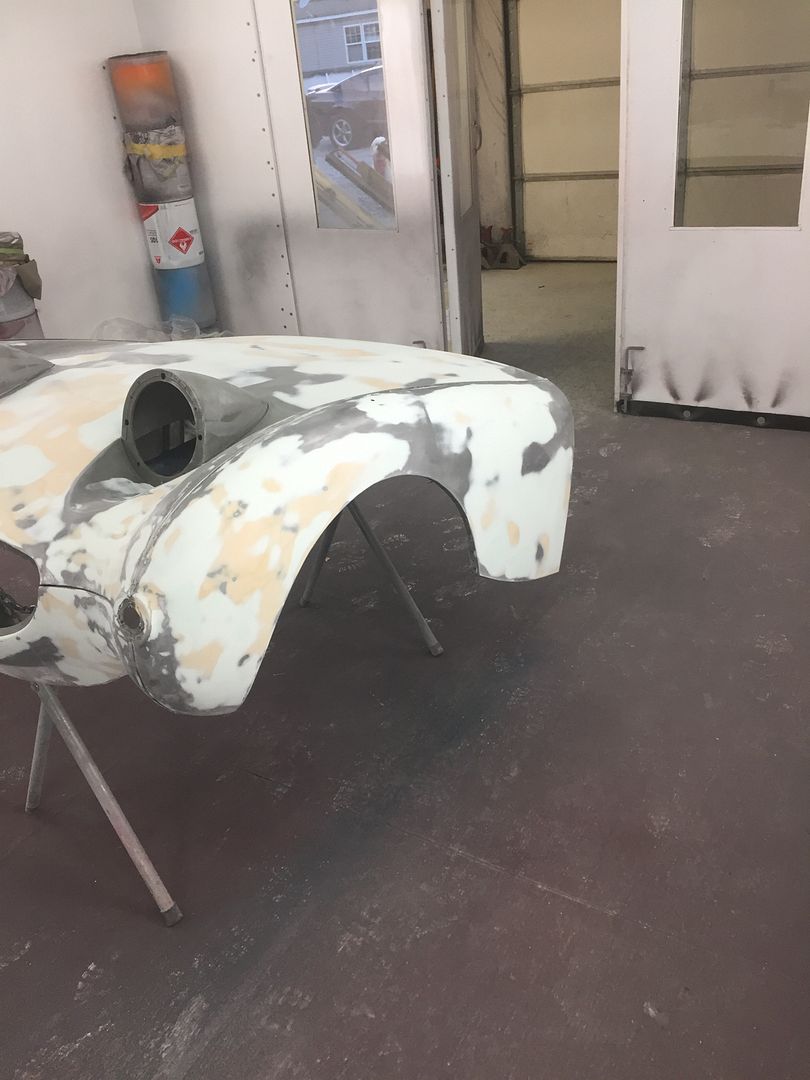
I am still along way from paint. The Bonnet is close to prime to start covering the small imperfections. Once that is done and sanded then it will be covered with a glaze. Then it should be ready for paint. I have some work to do to the bonnet so we will wait before we go to building up the primer for sanding.


4th Round of Body Work on the Bonnet.


I am still along way from paint. The Bonnet is close to prime to start covering the small imperfections. Once that is done and sanded then it will be covered with a glaze. Then it should be ready for paint. I have some work to do to the bonnet so we will wait before we go to building up the primer for sanding.
Last edited:
My modus operandi has been to multi task on any of my projects. Somehow it tends to come together in the end.
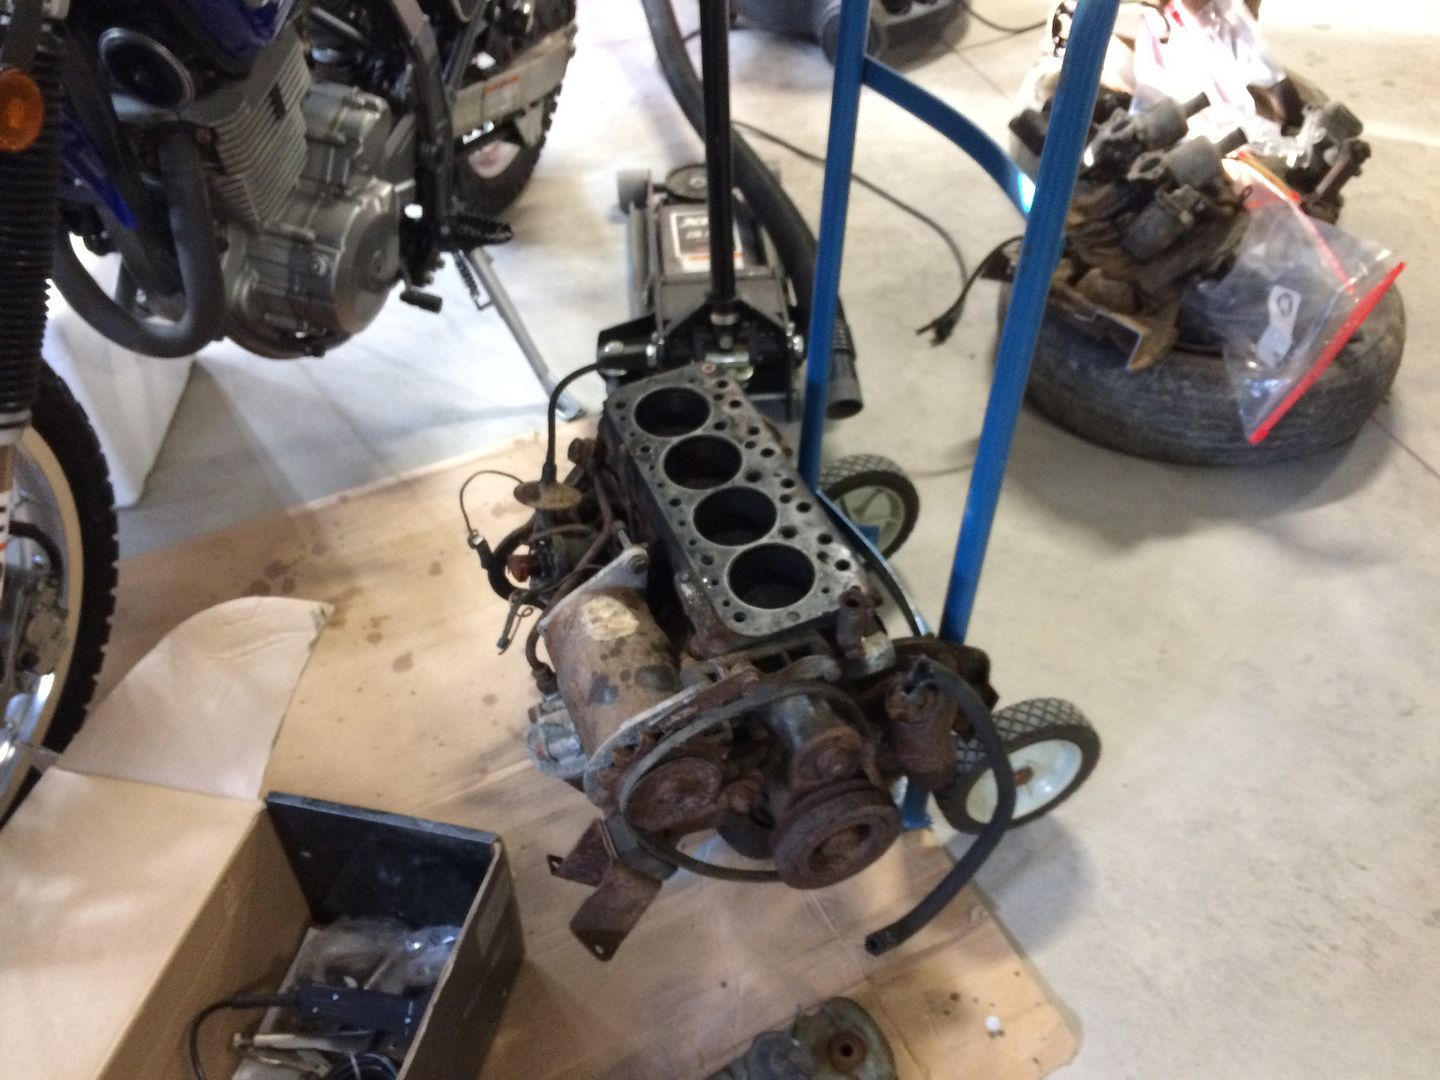
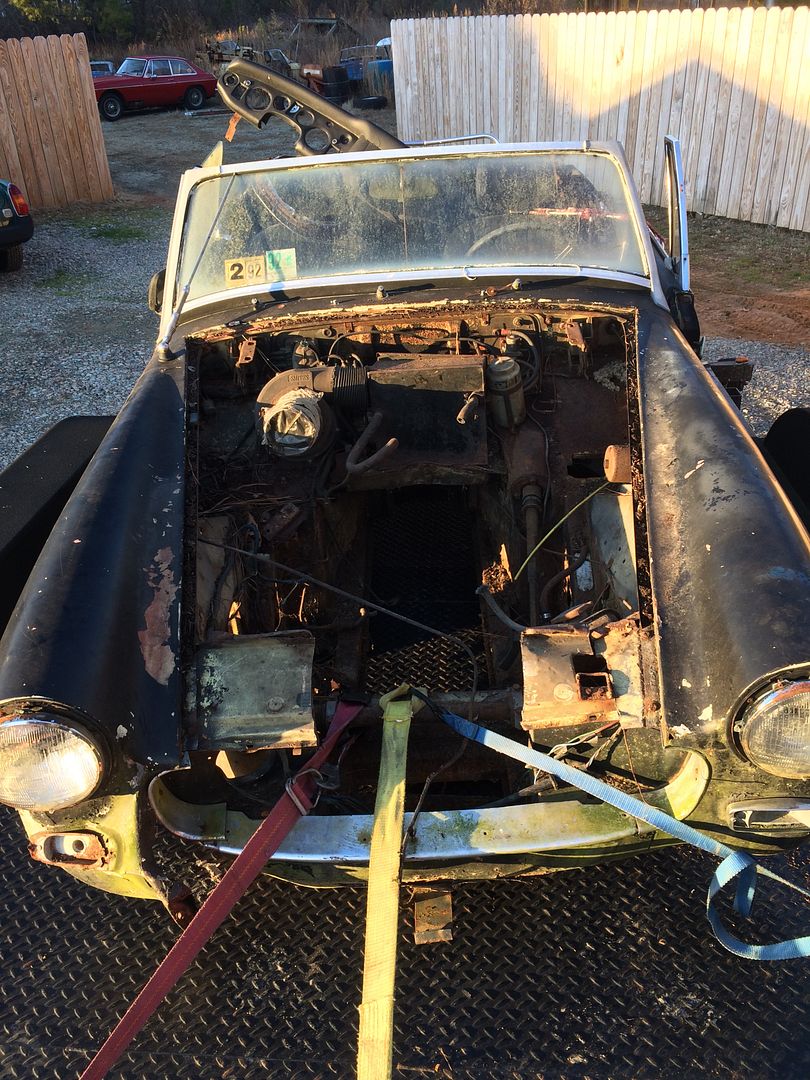
In that tradition, we pulled the motor out of the 1969 MG Midget donner car, so I can head in another direction before I finish the body.
We pulled it as one unit with the carbs, motor, transmission and drive shaft. I could not get the shaft to release out the back of the transmission.
Notice the cheating on the body. It was pulled in about 2 hours start to finish, so we were not a NASCAR team. While we were cutting the A-arms off to get the disc brake spindles, Jim noticed there were drums where we expected disc. Everything I could find would have an original 1275 motored car should have disc brakes. Who would have gone to effort to change to drum?
1275 is not stuck, it was very easy to turn over.
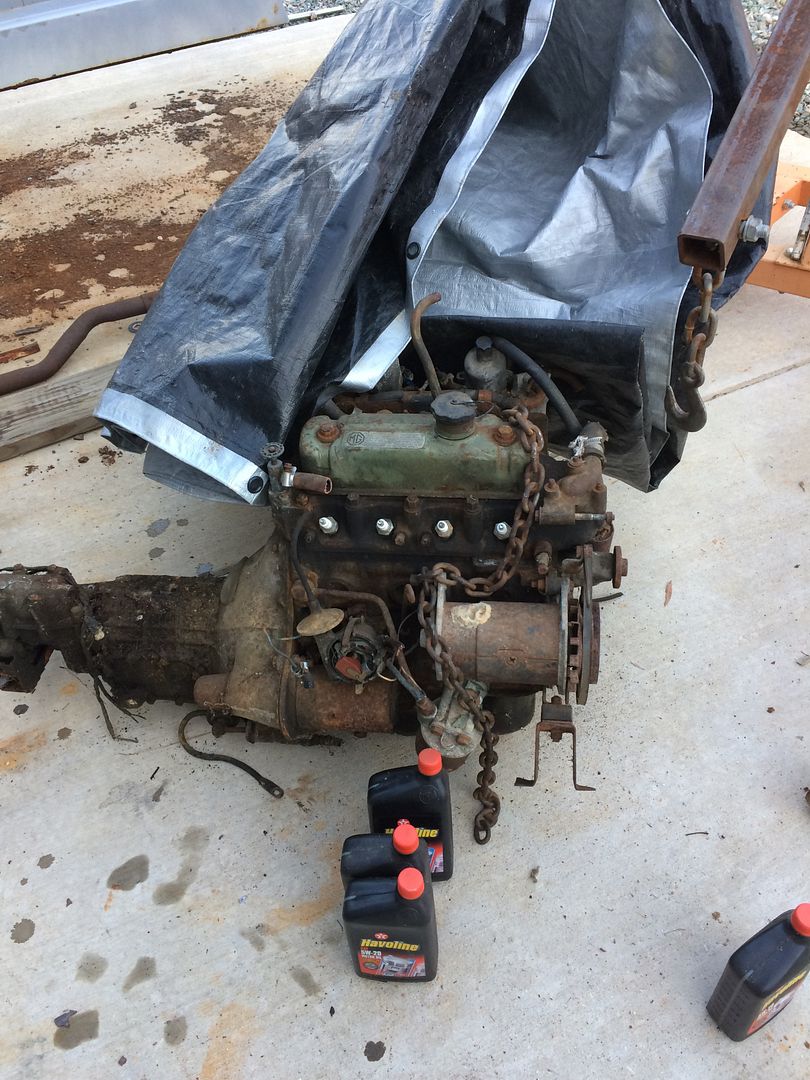
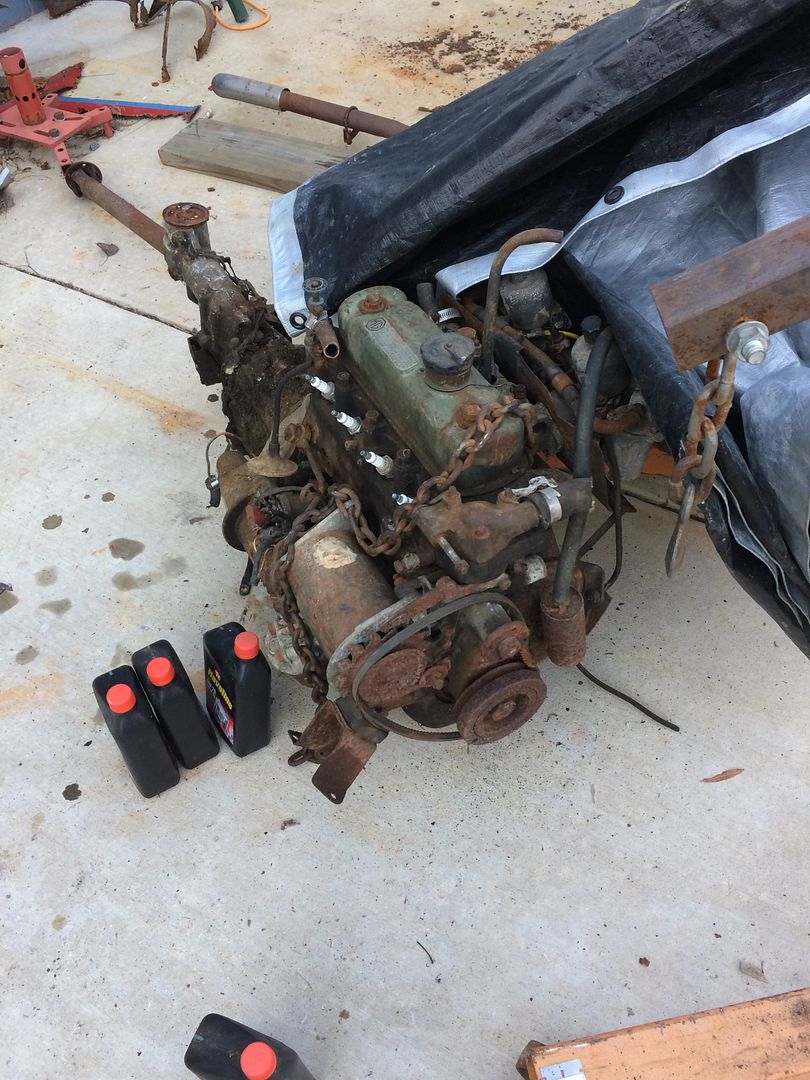
We pulled the plugs, jumped the starter and it spun really fast.
Cables went out before we could do a compression test.
We should have some readings in 24 hours.
In that tradition, we pulled the motor out of the 1969 MG Midget donner car, so I can head in another direction before I finish the body.
We pulled it as one unit with the carbs, motor, transmission and drive shaft. I could not get the shaft to release out the back of the transmission.
Notice the cheating on the body. It was pulled in about 2 hours start to finish, so we were not a NASCAR team. While we were cutting the A-arms off to get the disc brake spindles, Jim noticed there were drums where we expected disc. Everything I could find would have an original 1275 motored car should have disc brakes. Who would have gone to effort to change to drum?

1275 is not stuck, it was very easy to turn over.


We pulled the plugs, jumped the starter and it spun really fast.
Cables went out before we could do a compression test.
We should have some readings in 24 hours.
Last edited:
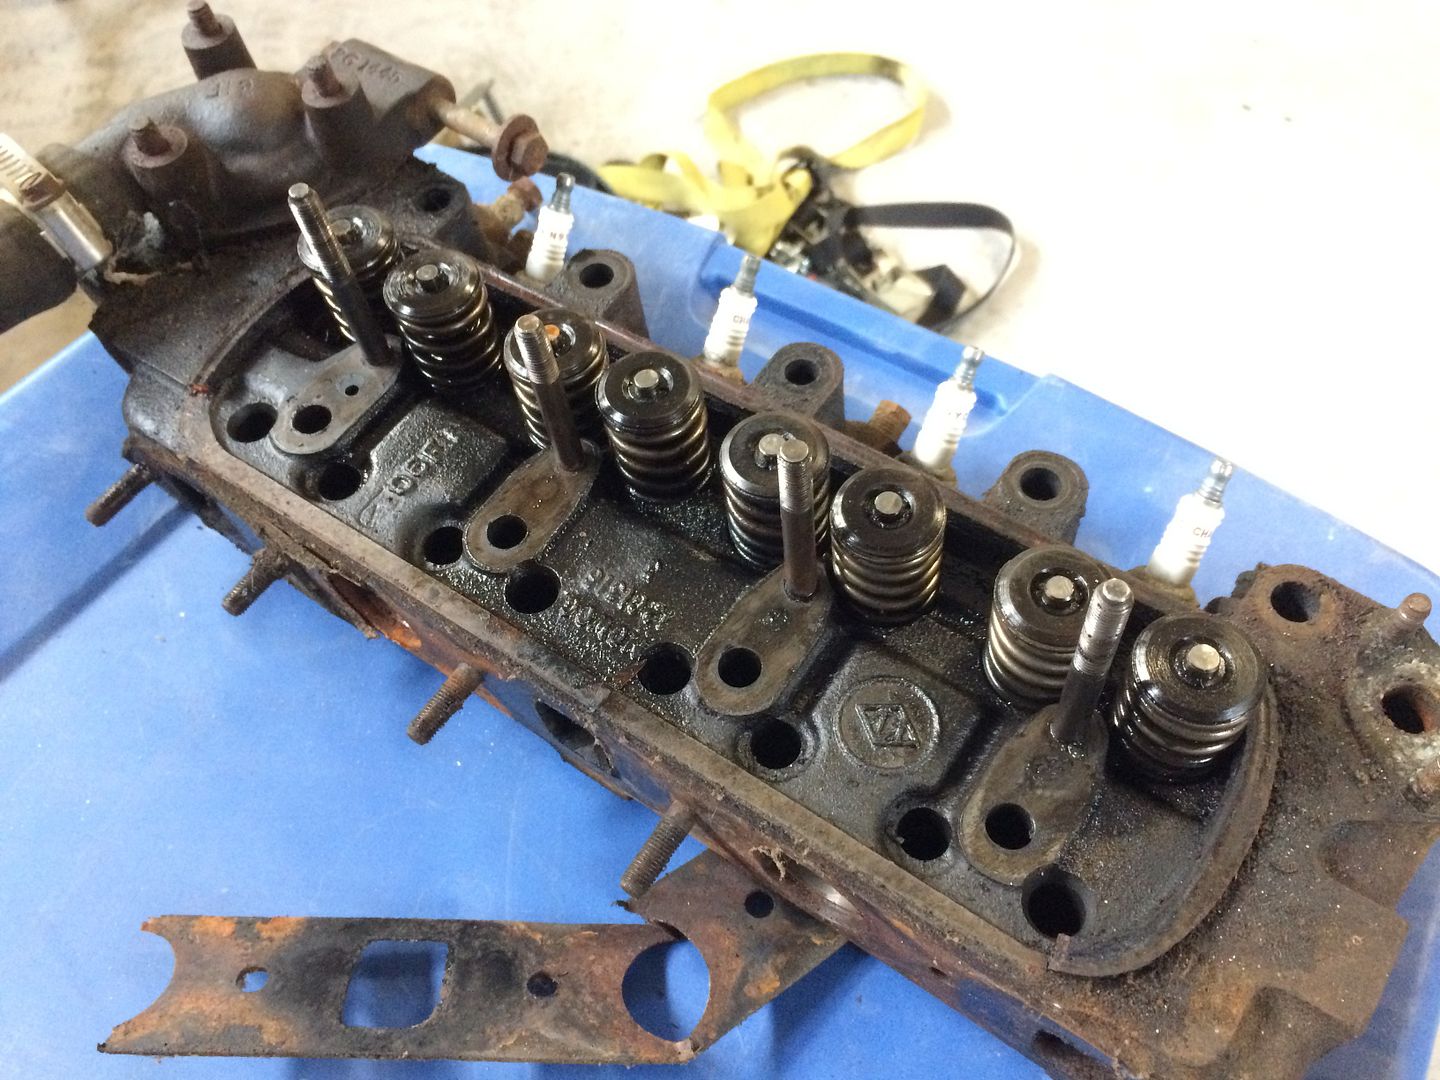
The compression test did not go well. I may have had a stuck valve etc.. Pulled the motor apart and the cylinder head was very clean. The cylinders also look to be in very good shape. I think the donner car was last tagged in 1994. Carbs were complete and screws have not been buggered up. Tags are still intact. I will take the head to a shop that has a pretty good track record on MG's Sprites.