• The Roadster Factory Recovery Fund - Friends, as you may have heard, The Roadster Factory, a respected British Car Parts business in PA, suffered a total loss in a fire on Christmas Day. Read about it, discuss or ask questions >> HERE. The Triumph Register of America is sponsoring a fund raiser to help TRF get back on their feet. If you can help, vist >> their GoFundMe page.
  • Hey there Guest!
    If you enjoy BCF and find our forum a useful resource, if you appreciate not having ads pop up all over the place and you want to ensure we can stay online - Please consider supporting with an "optional" low-cost annual subscription.
    **Upgrade Now**
    (PS: Subscribers don't see this UGLY banner)
Tips
Tips

TR2/3/3A TR3A Timing Chain Seal and Gasket Replacement

Joe1060TR3A

Freshman Member
Offline
I did a search and well I found the following written by -- Great Pumpkin:

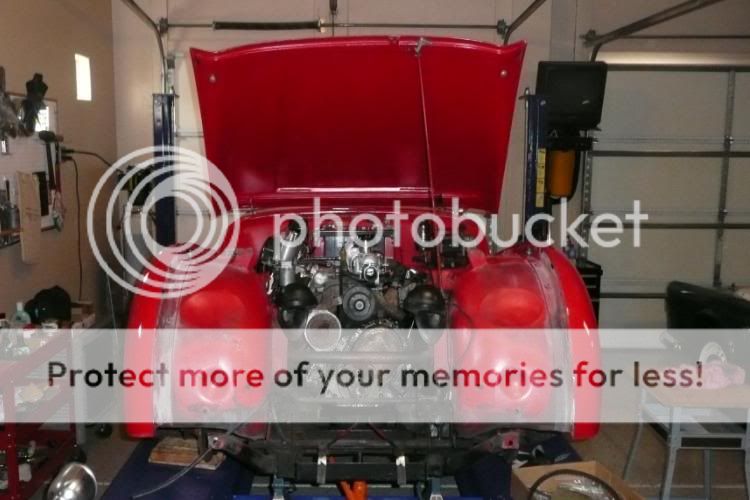
"And if it's any comfort, that job is a whole lot easier on a TR4/A than on a TR2-3B; where you basically start by removing the front bumper and work your way back removing everything until you get to the engine."

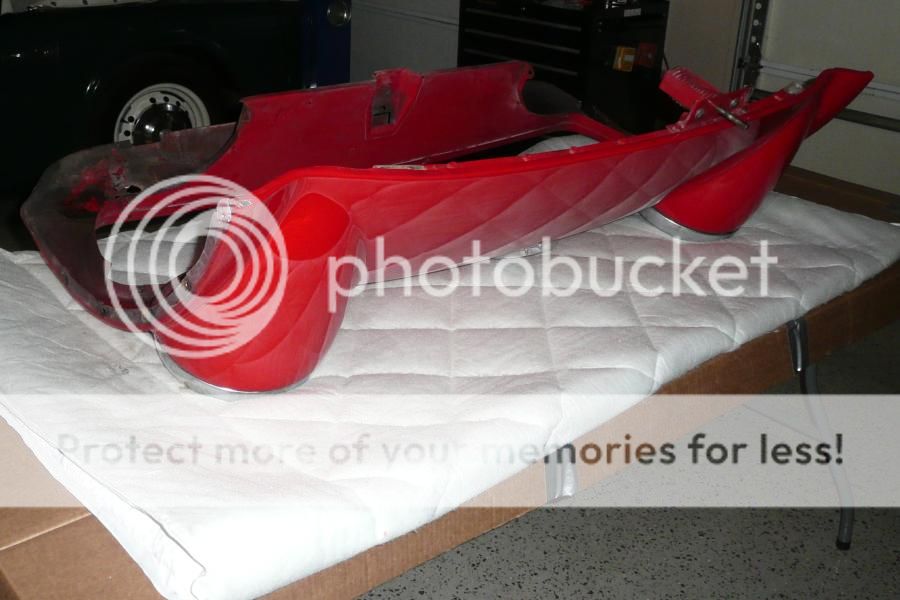
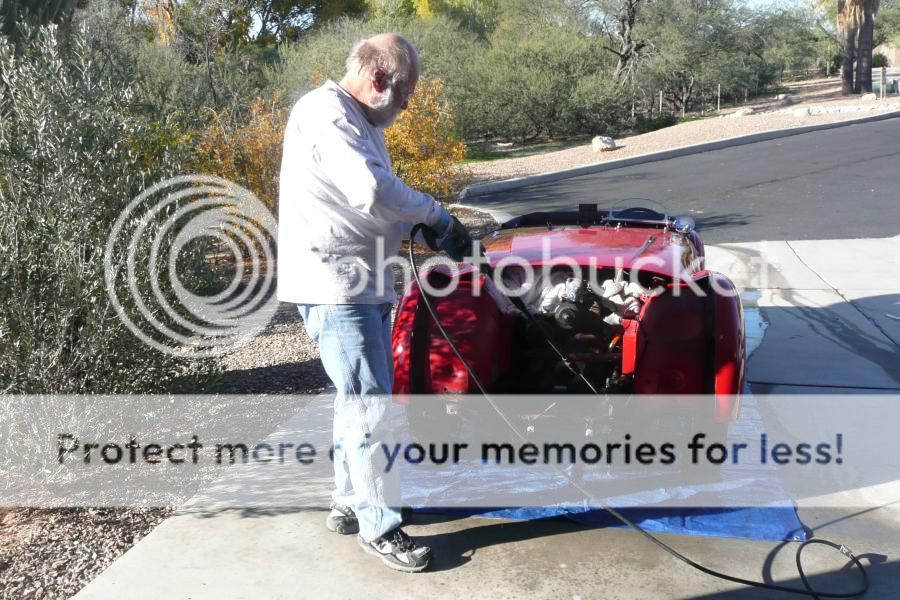
I have a leak and would like to fix it BUT ... I have done the same job on my TR6 and now would like to do it on my new TR3A. When I looked at this yesterday and then searched thru some service manuals and this forum I was blown away by the complexity of this operation. <span style="font-weight: bold">Do you really need to remove the bumper, apron, hood and radiator to get at the timing chain cover</span>or can I get to it on a lift from the underside?

About how long should this job take? <span style="font-weight: bold">While I am in there what else should I do because I only want to do this work once? </span>

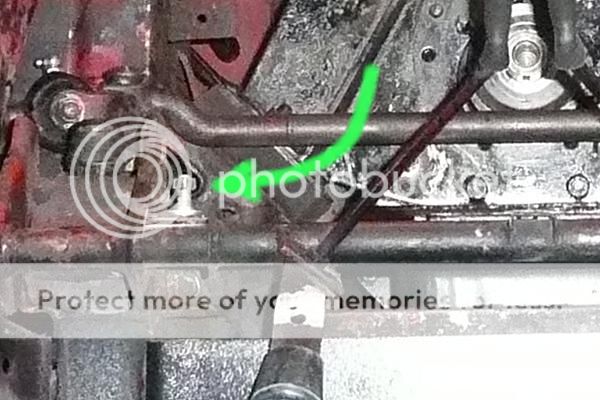
If I need to do all this removal are there <span style="font-weight: bold">any things I should be aware of before I begin.</span> Maybe it will be an ideal winter project.

Thanks

Joe

PS Engine was rebuilt 10 years ago so timing chain, sprokets and cam wear should be OK. I suspect the real issue is hard rubber on the seal.
 
OP
J

Joe1060TR3A

Freshman Member
Offline
Don't know if it matters but I DO NOT have a standard fan. It has been remove and replaced with an electric fan so a rack and pinion steering could be inserted.
 

TR3driver

Great Pumpkin - R.I.P
Offline
Hi Joe,
BCF gives the "Great Pumpkin" handle, based only on number of posts. In other words, it only means I post a lot, not that my posts makes any sense :laugh:

However, yes, on a stock TR3A, that really is what it takes (except for the hood, you can leave that attached and propped up with a board) to get the timing cover off. Sure, you can touch the cover (with difficulty) from underneath the car, but the front hub is attached to the crankshaft through the center of the timing cover and the seal you are trying to replace. On the other end of the hub is the fan, right up against the radiator. You have to get the radiator out of the way to remove the fan, so you can remove the hub, so you can remove the timing cover.

I've heard that it is possible to get the radiator out by removing the cross brace and cylinder head; then pulling the radiator out the top. I'll admit, I've never tried that myself. But removing the cylinder head is a lot of work as well, and introduces lots of potential problems like crud falling down inside the engine and leaks afterwards, not to mention the potential for damage while you are trying to maneuver that heavy radiator past the sharp edge of the engine block. And there isn't a lot of room to work while you are doing things like removing the cross brace with the apron & radiator still in place.

"While you're in there":
. Steering box
. fan
. fan mounting bushings
. motor mounts (can be done with apron in place, but easier without)

Also inspect and polish the sealing surface of the hub. If you can't polish away the mark where the seal rode, consider installing a Speedi-sleeve. My mark was too small to catch a fingernail on (which was previously my standard for needing attention), but the new seal still leaked almost as bad as the old one. A Speedi-sleeve fixed it right up.

Don't overlook the fiber washer that is supposed to seal the timing cover to the support stud. I didn't find one in my gasket set, so I cut a corner off of one of the unused carb gaskets.

IIRC last time I pulled the front apron, I had it off in about 4 hours, but I work slow and take lots of breaks. The factory "Operation Times" manual gives 2.75 hours to R&R the radiator. But as it notes, "Broken studs, seized bolts, etc. are likely to add considerably to the time required for any operation."

One other tip, a 7/16" "GearWrench" is a very handy tool for removing the apron and lots of other jobs. If you don't already have a set, you might seriously consider picking some up. For doing the front apron, I prefer the straight handles, but the "reversible" ones with the 15 degree offset are probably the handiest ones overall (and will work fine here as well).
beautyshot.jpg
 

TR3driver

Great Pumpkin - R.I.P
Offline
Joe1060TR3A said:
Don't know if it matters but I DO NOT have a standard fan. It has been remove and replaced with an electric fan so a rack and pinion steering could be inserted.

Oops, I didn't see this before. If the fan extension has been removed, you do have a shot at getting the cover off without removing the apron & radiator. BTDT but it wasn't a lot of fun.
 

Geo Hahn

Yoda
Country flag
Offline
Yep -- a lot of work to replace a $7 part (timing chain tensioner)...

ApronOff.jpg


You will want to replace that tensioner once you've gone that far. I also took the opportunity to have my radiator refreshed. I went so far as to have a new core installed but what you do will depend on the condition of yours.

I left the headlamps in place on the apron. My removal was 'helped' a bit by a PO who left off more than half the bolts holding the apron to the wings.

All in all, much easier than I had expected. You'll want to have a plan for where to put the apron when you lift it away, esp if you're working alone. I set up a table with an old comforter. After this photo I secured it to the table with bungees. It is a bulky iten, not fragile but vulnerable.

Apron.jpg


Also a good opportunity to pressure wash a lot of hard to get at areas.

PressureWash.jpg
 

TomMull

Darth Vader
Silver
Country flag
Offline
Geo Hahn said:
My removal was 'helped' a bit by a PO who left off more than half the bolts holding the apron to the wings.

Yep, mine too was down to a few on each side and they never got rusted on either.
Tom
 

Scotsman

Jedi Hopeful
Country flag
Offline
Am in the process replacing timing chain cover seal, and gasket as discussed in this thread. What else should I be looking at, and replacing while the cover is off. Joe stated that his engine had been rebuilt earlier so did not feel the need to look at timing chain, sprockets etc. I have no idea the true mileage on my engine (spedo says 89K). Like the tensioner referenced above the timing chain is inexpensive ($15 from Moss).


  • If I do decide to replace timing chain how difficult is it to do?
  • Is there any reason to consider the Moss "heavy duty upgrade" if I do decide to replace timing chain.


Thanks,

Richard
 
Last edited:

Geo Hahn

Yoda
Country flag
Offline
Richard --

I opted to not replace my timing chain when I did the tensioner, radiator, motor mounts, seal and gasket. As I recall there was a spec in the manual for allowable slack in the chain and I was w/I than spec. Harder to judge was the wear on the sprockets w/o removing the chain.

If I had replaced the chain I would have also replaced the sprockets as I'm told the they all wear together and should all be replaced.

If you are still using a starting crank (I do) and you mess with motor mounts &/or the radiator core you will want to confirm that the support, rad hole and dog all still line up when done. Alignment can be achieved with shims on the motor mounts (there are likely some already there).

One other thing to consider is a change to the radiator mounts. The original were a captive nut welded in place and the bolt was threaded in from below. A tricky & tight fit without a lot of wrench clearance. Some (me anyway) put a bolt pointing up through the original hole and weld it in place creating a pair of studs for the radiator ears to fit on -- then a nut from above. You have to use a smaller bolt that original (5/16?) to fit through the old hole. The result is a much easier radiator install for you and the next guy -- pretty much like the radiator mount on a TR4. This wasn't my brilliant idea (I better are recognizing good ideas than having them) -- Bob Schaller gets the credit here.

Here's a couple of photos I found of my 'stud' style radiator mounts...

RadiatorMount2.jpg


RadiatorMount3_zps236e9bfb.jpg
 
Similar threads
Thread starter Title Forum Replies Date
rlandrum TR2/3/3A TR3A Timing Chain Oil Slinger Triumph 3
J TR2/3/3A Sickly starter or timing issue on 1959 tr3a? Triumph 7
D TR2/3/3A Timing TR3A and Overheating Triumph 27
H TR2/3/3A TR3A Timing [Static or Dynamic ?] Triumph 10
NutmegCT TR2/3/3A timing DM2P4 dist, TR3A - vacuum? Triumph 37
trglory TR2/3/3A TR3a spark plugs Triumph 1
P For Sale 61 TR3A Triumph Classifieds 1
D TR2/3/3A 59 TR3A Gearbox lever will not move. Triumph 11
Q TR2/3/3A 61 TR3A Fuel Pump Triumph 4
71TR6 TR2/3/3A TR3A Front Bumper Mount Triumph 11
mctriumph For Sale Project car 61 Tr3a Triumph Classifieds 0
71TR6 For Sale TR3A Nose Triumph Classifieds 0
71TR6 TR2/3/3A A TR3A wiring question Triumph 17
P TR2/3/3A 1958 TR3A missing on cyls 2 & 3 Triumph 8
mctriumph For Sale scrapping two 59 Tr3a's Triumph Classifieds 15
J TR2/3/3A TR3A Finally on the Road! Triumph 6
angelfj1 TR2/3/3A TR3A Boot Millboard Install Triumph 7
G TR2/3/3A TS37903F Is my engine a TR3A engine because my starter says no. Triumph 3
B TR2/3/3A TR3A Gearbox fluid capacity question Triumph 7
Hamish Racing TR2/3/3A Harewood hill climb Yorkshire TR3a Triumph 3
Hamish Racing Harewood Hill Climb Yorkshire TR3a Racing 0
J TR2/3/3A 58 TR3A Coil weak? 9KΩ on the secondary with a 1968 HA12 45208A non-ballasted coil. Triumph 4
J TR2/3/3A 58 TR3A Coil weak? 9KΩ on the secondary with a 1968 HA12 45208A non-ballasted coil. Triumph 1
T TR2/3/3A Looking for a TR3A front bumper Triumph 6
Hamish Racing General TR TR3a hillclimb Thumdrrstorm video uk Triumph 4
Hamish Racing General TR TR3a faster that a Lamborghini Huracan STO ?? Triumph 6
W For Sale 1960 TR3A for sale Triumph Classifieds 0
tr6nitjulius General TR 6/24/23 TRIUMPH TR6 (5) TR8 (2) Spitfire (1 RHD of 2) TR3A (1) Triumph 0
D TR2/3/3A tr3a occasional seat padding Triumph 10
G For Sale 1960 TR3A for sale $11,999 Triumph Classifieds 0
G For Sale NEW PHOTOS: Triumph TR3 Chassis Frame + Front Suspension, Fits TR2,TR3,TR3A,TR3B Triumph Classifieds 1
Hamish Racing TR2/3/3A Greenville TR3a V8 ? Triumph 8
T TR2/3/3A Would like a paper pattern for TR3A hood stick cover Triumph 0
W TR2/3/3A 1960 TR3A Radiator replacement recommendations Triumph 11
T TR2/3/3A TR3A Windshield Question Triumph 4
Hamish Racing TR2/3/3A Anglesey (Wales) TR3a track videos Triumph 3
RonC TR2/3/3A TR3A Hardtop Seals Triumph 7
T TR2/3/3A TR3A Disk Brake Question Triumph 10
G TR2/3/3A TR3A Front Sway Bars - Choice? Triumph 3
Hamish Racing TR2/3/3A TR3a British Hill Climb Shelsley Walsh Triumph 8
T Wanted Working Fuel Gauge for TR3A Triumph Classifieds 5
T For Sale TR3A Original Radiator Triumph Classifieds 3
Hamish Racing TR2/3/3A TR3a Faster Lap Times than a Ferrari F430 ?? Triumph 1
Hamish Racing UK hill climb TR3a Racing 0
Hamish Racing TR2/3/3A TR3a UK hill climb video Triumph 4
Hamish Racing TR2/3/3A 3 sisters fun in a TR3a ! Triumph 5
T TR2/3/3A TR3A Fuel Gauge problem Triumph 10
A SOLD!! TR3A Girling Type A brake caliper for right front Triumph Classifieds 0
M TR2/3/3A 1960 TR3A--intake manifold-to-SUH6 carbs studs Triumph 3
Hamish Racing General TR TR3a and TR7V8 Shelsley Walsh Hill climb action Triumph 0

Similar threads

Top