• The Roadster Factory Recovery Fund - Friends, as you may have heard, The Roadster Factory, a respected British Car Parts business in PA, suffered a total loss in a fire on Christmas Day. Read about it, discuss or ask questions >> HERE. The Triumph Register of America is sponsoring a fund raiser to help TRF get back on their feet. If you can help, vist >> their GoFundMe page.
  • Hey there Guest!
    If you enjoy BCF and find our forum a useful resource, if you appreciate not having ads pop up all over the place and you want to ensure we can stay online - Please consider supporting with an "optional" low-cost annual subscription.
    **Upgrade Now**
    (PS: Subscribers don't see this UGLY banner)
Tips
Tips

steering wheel restoration-from the beginning

mgNOT

Senior Member
Country flag
Offline
As I mentioned in the steering wheel restoration post that Randall helped me with, I wanted to refinish my original steering wheel. To do that, I need to reattach the covering, or somehow redo it. I felt that the original rubber was deteriorating, and regluing it to the steel armature of the wheel would not be a suitable long term solution. So, I searched for information on recasting steering wheels, and came up a little short. Most of what I found were companies that do urethane replacement of steering wheels for American cars or tractors. In a woddworking magazine, I saw an advertisement for a casting urethane that is often used for making molds for plaster casting of replacement details in old homes. In the search for casting rubber, I found a couple that seemed to bwe what I wanted. Devcon is the first company that I found, although I did not use their product. (NFI in any product mentioned or pictured, just relating my choices) So, I built a mold to recast the rim:

steeringwheelriminplasterSmall.jpg


-Dennis
 
OP
M

mgNOT

Senior Member
Country flag
Offline
For those of you who are following this, the picture in the previous post shows an OSB base with scrap wood used to build up a "trough" around the rim of the steering wheel that allows 1/2" or so space all around for pouring in plaster-of-paris, which is the molding material.
Also shown are three 3/8" dowels that have their holes matched to the top half of the mold, which indexes the steering wheel armature to the mold. Essentially, the impressions left in the plaster have to line up with the original, otherwise the spoke reliefs and finger "bumps" on the back of the wheel will be all misaligned.
I would not recommend OSB, I would suggest a high quality plywood, or MDF for the mold halves. I will say here that due to my frugality (thanks Mom!) I tried to used up some of my vast collection of scraps, and it led to some difficulty in getting the mold halves to meet as closely as I wanted. If using a better material, I would set a center, and use a router to rout the depression for the casting material. In this way, the mold halves would be very flat, and would seal together nicely.
I will add one more bit today, and more later.
-Dennis
 
OP
M

mgNOT

Senior Member
Country flag
Offline
So, after making the two mold halves, I checked to see if there was any mold "shift", or misalignment that would result in on half being offset, or "hanging" over the other half. I was going to use "Silly Putty", but the clerk at the Dollar Store didn't know what that was! So, I used Pay Doh instead, and it worked fine:

steeringwheelrimmoldSmall.jpg


The Play Doh showed that the mold halves were centered and would give me a round rim that did not have any offset. You can see in this picture that the plaster has flowed around the spokes enough to give me the impression of the material as it extends up the spokes from the outer rim, just as in the original. There are more details, but next time-I have to leave now.
-Dennis
 

mallard

Luke Skywalker
Country flag
Offline
So far it looks good.
 
OP
M

mgNOT

Senior Member
Country flag
Offline
To continue, attached is a picture of the completed mold half for the back side. Shown are the vent holes I added to vent trapped air from the mold, and also the alrger fill hole. I envisioned using some type of vacuum process to remove the air. The material I expect to use for the casting has a shore 94 hardness, and a vscosity similar to honey-which led me to believe there could be issues with air entrapment. Also, the plugs I will use to close the vents are laying next to the mold half. I am posting only one picture at a time, because every time I try a second, my Comodore 64 drops IE. Bah!
-Dennis

steeringwheelrimmoldwventsSmall.jpg
 
OP
M

mgNOT

Senior Member
Country flag
Offline
Now for the complicated part, attaching a vacuum source to the mold. I devised a series of 1/4" tubes on a common manifold, with a vacuum regualtion device to control the vacuum. I came up with this:

Tr6pictures005.jpg


The idea here is to plug in the small hose from my incredibly noisy shop vac, and through varying of the opening on the end of the manifold, control the vacuum on the mold. The method of contolling the vacuum is a cap with a section removed. This cap fits over the end of the pipe, which has a like sized hole in it. By turning the cap, more or less of the hole is opened, causing the shop vac to pull more opr less vacuum on the manifold. The end where the shop vac attaches is just a 1 1/4" sink drain attachment (where the "P" trap goes into the drain pipe).
-Dennis
 
OP
M

mgNOT

Senior Member
Country flag
Offline
Here is the mold, clamped, and leaning against a saw horse, ready to be filled. I set it on edge to allow gravity to aid in the filling, and also because I was afraid that having it flat on a table or the floor would result in air bubbles all along the rim face. I had originally thought of casting with the mold flat with the front face of the rim down, but that would most likely result in an air void at each finger bump on the back side. So, tilted was the result.

Tr6pictures001.jpg


You can see the three alignment pegs on the face of the plywood, they were drilled all the way through the entire mold at the very beginning, to ensure the mold halves and the armature were aligned.
-Dennis
 
OP
M

mgNOT

Senior Member
Country flag
Offline
This is the mold at the end of the casting process. The fill funnel has material in it, using gravity to help fill any remaining voids. The vacuum lines are showing solid material, whereas they had bubbles in them as the air was vacuumed out. Since each vacuum line din't have it's own control, I just put the end of each one into a hole drilled in a wood block when they were no longer needed. As expected, they filled from the bottom to the top. You can see the alignment pegs that were put in place in the very beginning, to ensure the mold halves and the armature remained in alignment.
-Dennis

Tr6pictures006.jpg
 

Tinkerman

Darth Vader
Offline
What a great, creative job of rigging! My compliments, Tinkerman
 

mallard

Luke Skywalker
Country flag
Offline
Did you re-plate the spokes? Lets see some close-up shots I might want one.
 
OP
M

mgNOT

Senior Member
Country flag
Offline
Thanks very much for the positive comments. I hope the article will interest the "tinkering" types that follow the posts.
I lost the pictures I had of the removal of the casting from the mold, but suffice to say the plaster broke up when the wheel was removed. I didn't plan to use it again, so no harm there. I will mention that I used a combination of beeswax and polyurethane varnish to seal the plaster so the completed part would release from the mold. The use of beeswax was not a choice idea, since it will set up nearly instantly upon contact with the cool plaster. I solved this by using a patternmaker's fillet slicking tool with a 1" diameter steel ball on a handle. I heated the ball with a propane torch, and used it to smooth the wax. I will also mention that the casting urethane will mold every detail of the surface, so much so that when I peeled the hardened material fom the inside of the plastic buket I mixed it in, I could plainly see the scratches on the inside of the bucket transferred to the casting material. So, the newly cast wheel would have been somewhat imperfect in bright light, and barring the leather cover, I would not have used it. Now, on to the covering.
-Dennis
 
OP
M

mgNOT

Senior Member
Country flag
Offline
I wanted a leather covered steering wheel, and thought "can it be that difficult? I went to Tandy Leather, but they wanted me to buy a whole hide, and I didn't think at that time I would need so much. Also, the price was somewhere in the $160 range. (remember-NFI) I called around to upholstery shops and found one that had some scraps. I bought a pile of pieces for $10! Yippee! The seller told me that the extra material I was getting would be useful for practice-which I thought was silly, I'm just going to cut out a pattern and sew it toghether aren't I? As it turns out, no. I made a section of the cover to ensure I had the method of extending up the spoke to cover the rubber down pat. What I found was that there need to be relief cuts made in the curve where the cover transitions from the regular portion of the rim to the spoke. This can be seen in the photo (which is the first cover I made, and was discarded, as the reliefs were not quite right).
-Dennis

steeringwheelcoverseam.jpg
 
OP
M

mgNOT

Senior Member
Country flag
Offline
In the previous post, you can see that the cover has a seam at each spoke, as I didn't have apiece long enouth to go completely around the wheel. I had hoped to utilize only one seam at the bottom spoke. You can also see the folded over edge, which I selected at 3/8". This folded over edge gives a much more finished look to the result. The holes were spaced usaing a plastic protractor that had a series of holes at 1/4" that I transferred to the leather using a small drift and a mallet.

steeringwheelcoverlacing.jpg


The picture also shows some of the holes that have been punched. I think there were somewhere over 300 holes. I had tried to find a marker of some type to mark the hole location, but other than a paint marker, which could have left marks that I couldn't remove, the drift worked. On the back side, which is sueded, a china marking pencil that I had worked fine.
-Dennis
 
OP
M

mgNOT

Senior Member
Country flag
Offline
Here is the material I used: (I suppose it bears repeating, NFI)

moldingurethane.jpg


I originally had found a Devcon product, but this came from McMaster-Carr, and was a little cheaper. I was hedging my bet all along, fearful of having a Nardi priced pile of junk! In the next post, I will summarize my experience, and include another picture of the completed project.
-Dennis
 
OP
M

mgNOT

Senior Member
Country flag
Offline
My final thoughts:
Making a mold requires accuracy, don't underestimate the quality of the mold, as the casting material will reproduce any shortcomings.
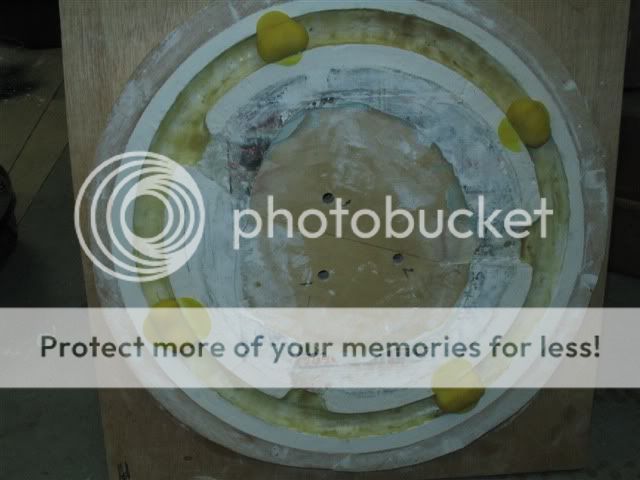
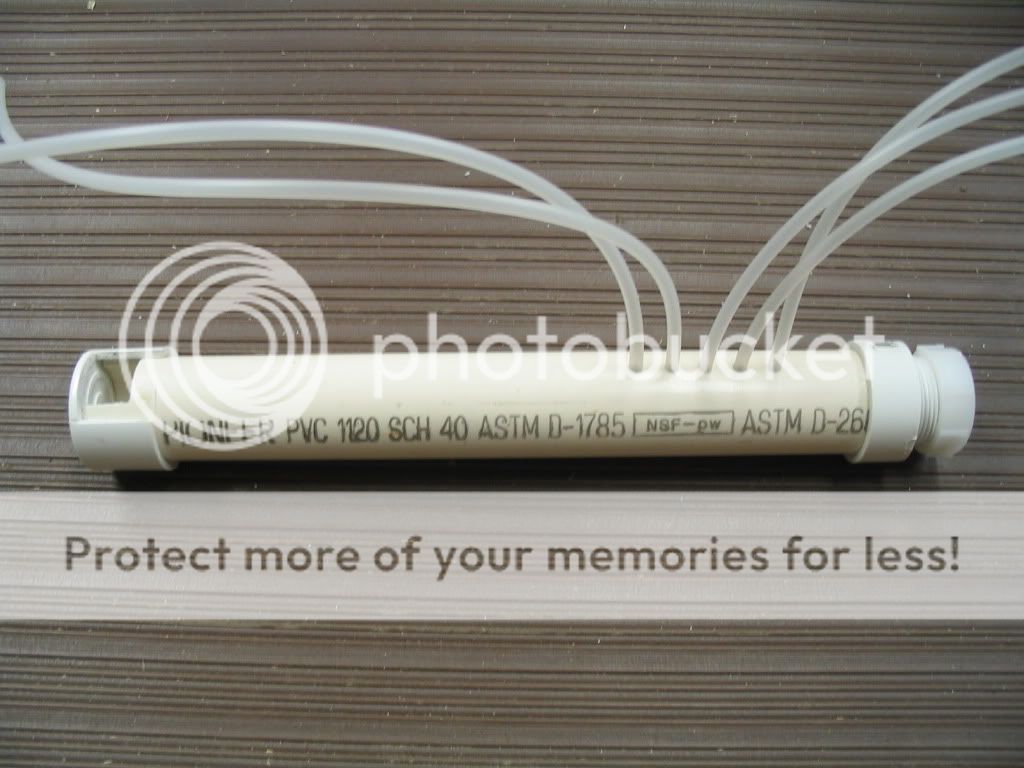
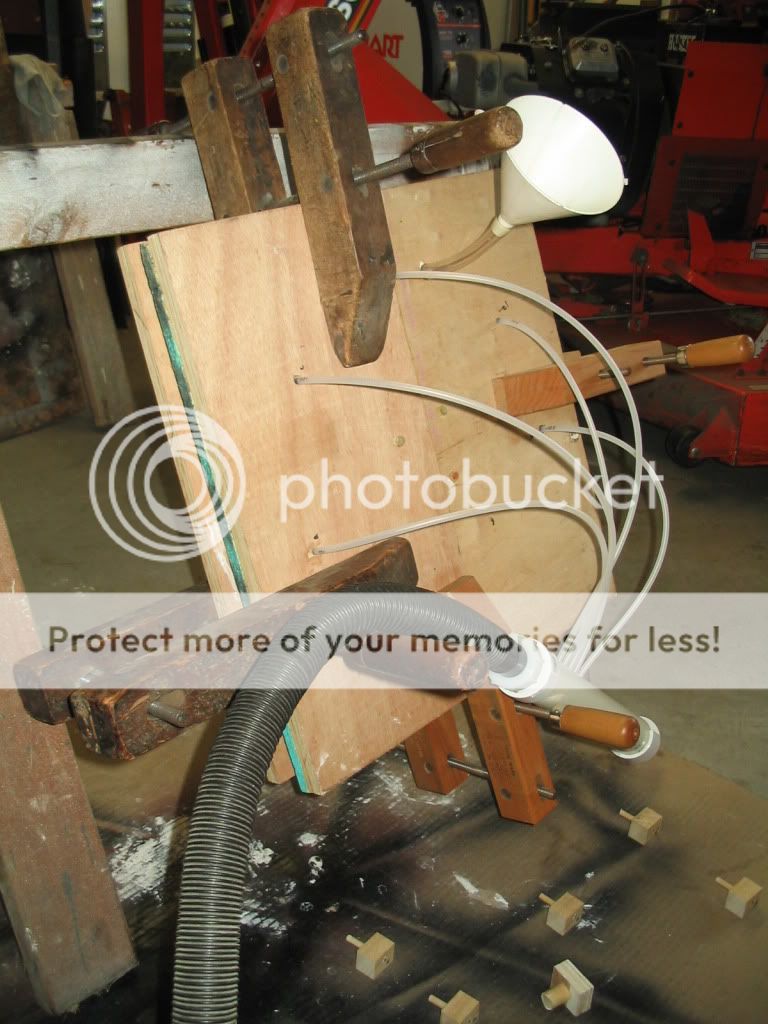
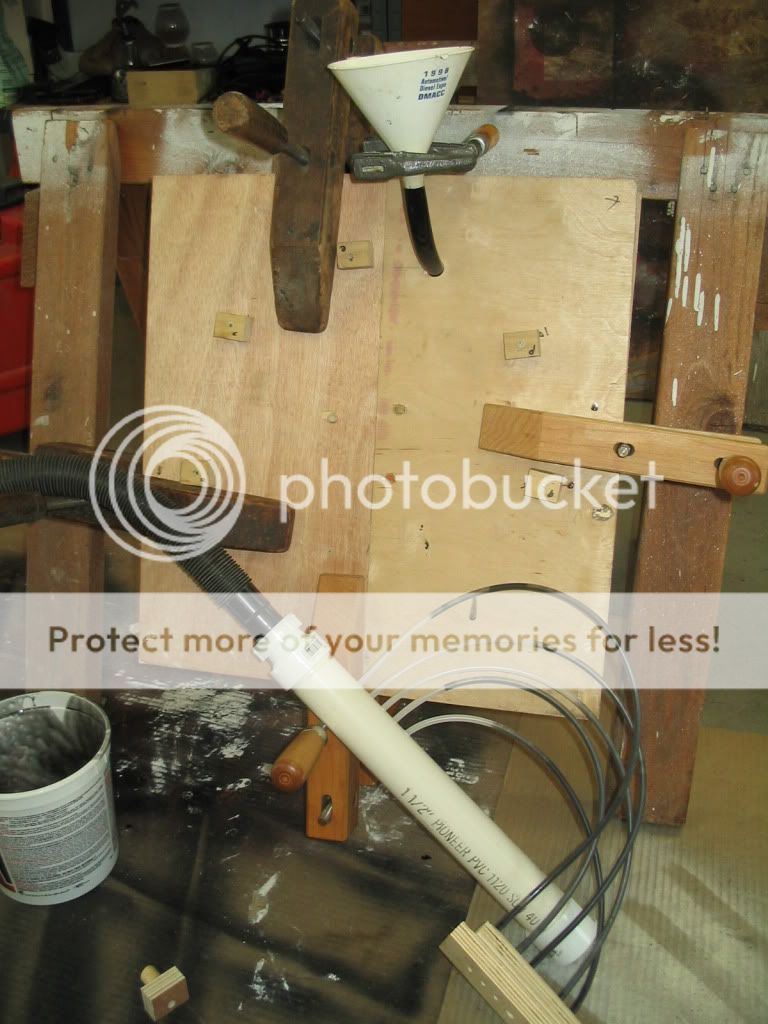
The idea of using vacuum to assist the material in filling the mold was compromised by the slight leakage along the parting line that gave me some small bubbles in the rim. This is not an issue for a covered wheel, but would be unacceptable in an uncovered one. I have thought I would use a pressure delivery method next time (no next time!), but do have some concern on entrained air if pressure were used.
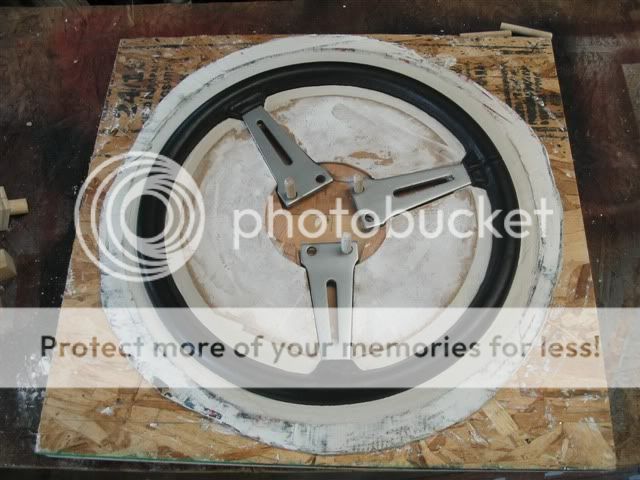
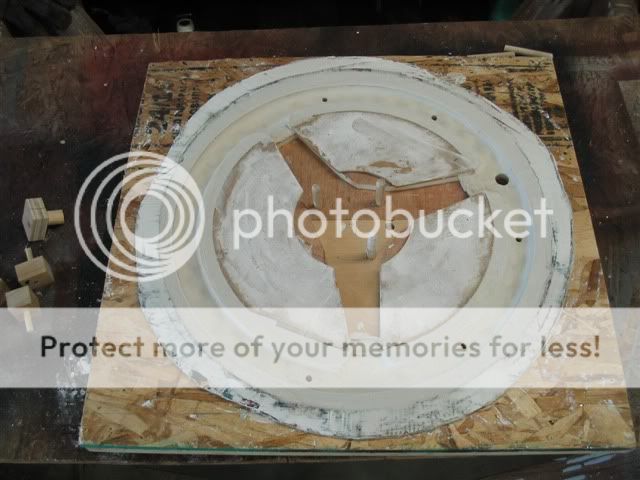
My first mold half was created by mixing the plaster, and pouring it around the wheel rim that was already in place. Never having worked with plaster of paris before, I underestimated the speed with which it goes from soupy to too stiff! Argh! The second half was constructed by mixing the plaster slightly soupy, filling the mold cavity, and immersing the wheel. Then I trimmed the excess plaster, which was a vast imrovement.
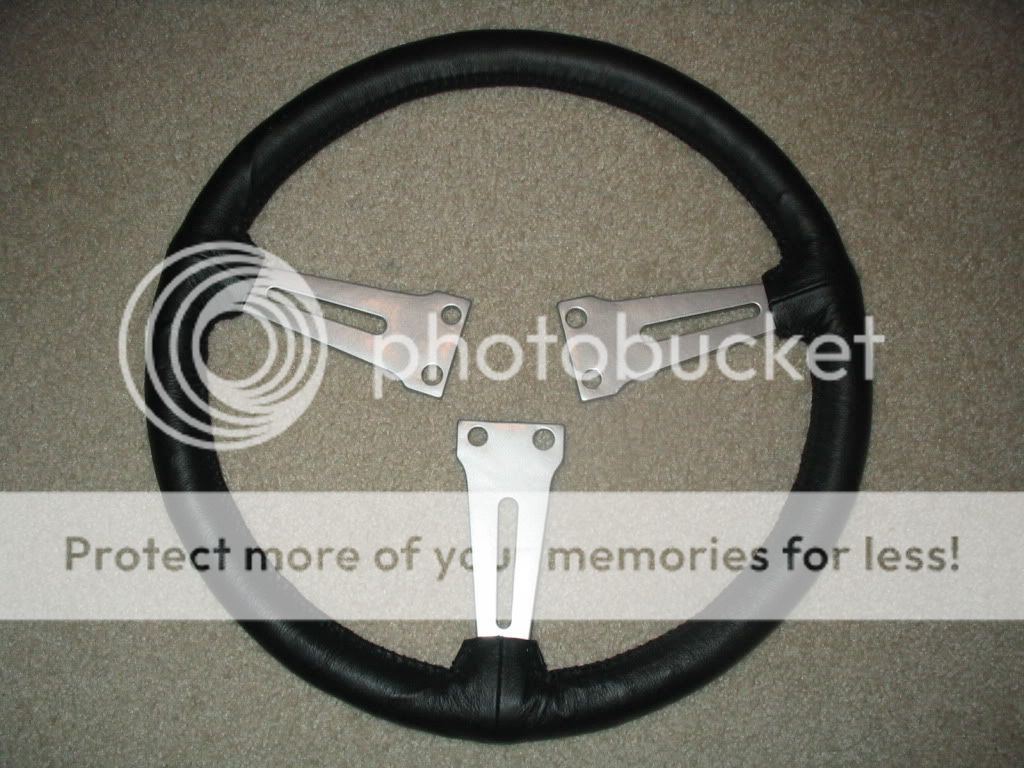
Covering a steering wheel with leather is a job! It reminds me of the joke about "busier than a one-armed paperhanger"! I needed more arms, but when my wife tried to help, there wasn't enough space for both of us. If I had a way to mount it on the steering column, that would have been perfect, but alas, my car is in more pieces than it was made from.
I forgot to mention that I used vaseline as a release agent on the steering wheel rim so it would come out of the mold. It made my hands soft!
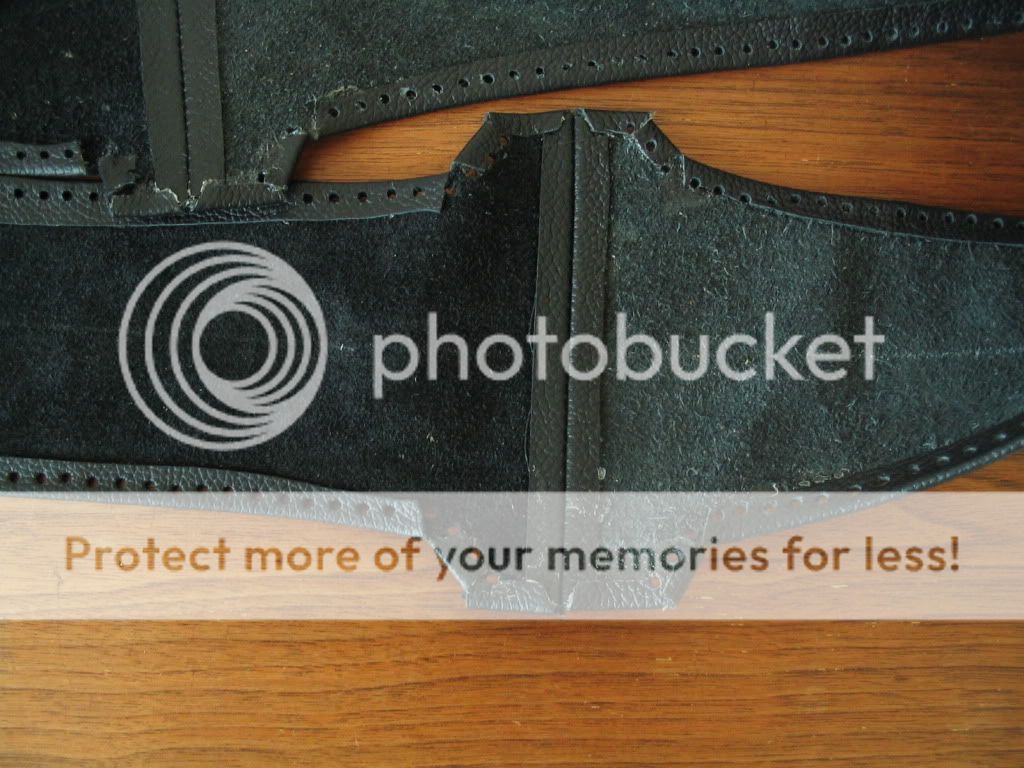
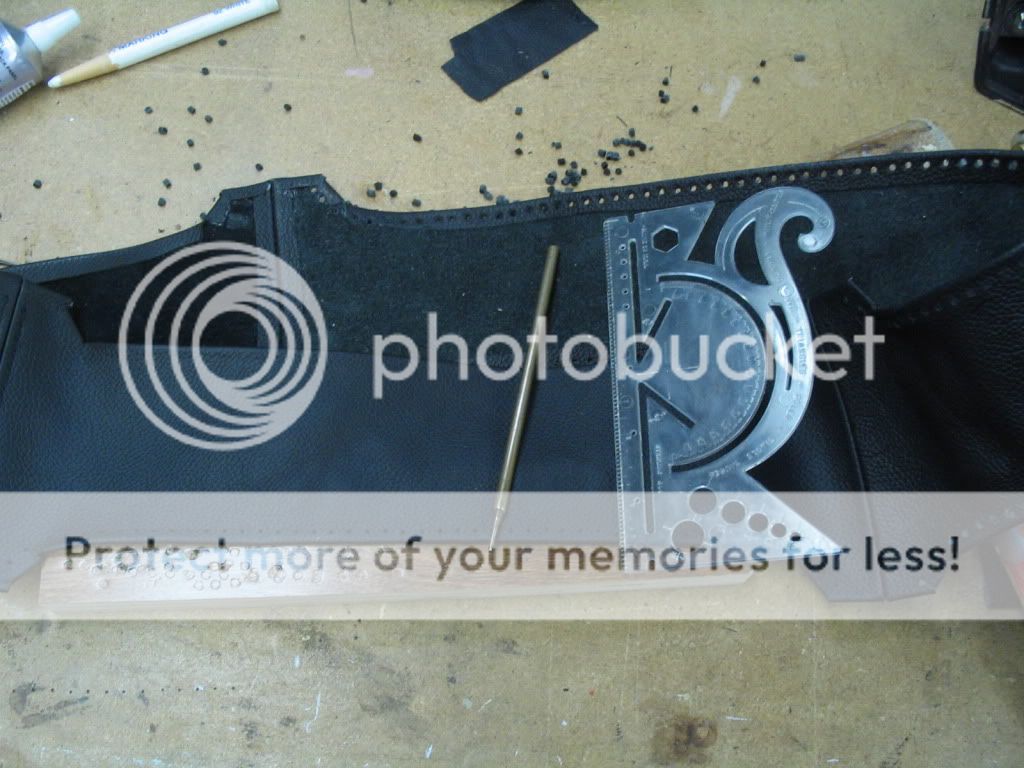
I could not manage a baseball stitch, so used a single line around and around method. This helped me maintain tension on the 40# test fishing line I used as thread.
In the approximately 1" diameter of the wheel rim, I left approx. 1/4" gap in the leather, which was closed by pulling the thread tight. The seams at each spoke were approx. 1/2" short, to ensure the cover wouldn't gather along the rim.
Don't use the family sewing machine to sew the seams, take it to a leather shop! My wife just shot me the "look" when I told her the machine wouldn't sew anymore, but you may not be so lucky!
The leather I used was supposed to be garment grade, but had been part of an upholstery job. I measured it at .035-.045" with a dial indicator (well, I have the dial indicator, and shouldn't I use it?).
Would I do it again, or recommend it? Well, it was fun, and I learned alot about molds etc. but it was a big job, and not for just anyone. I do know something about molding in a limited sense, am mechanically inclined, inquisitive, and apparently patient with things that interest me. Am I interested in doing this for others-no, it was an experiment for me. I just thoght others might like to hear about it, and maybe someone else will try it.
The question on the wheel itself: I assumed the wheel was painted, and when I started buffing the "paint" off, discovered that the original wheel was plated. I don't know what the plating is, it seemed a little too dull to be chrome, but maybe it's a different chrome than I'm used to. I can say that as I removed the plating, in order to remove the rust spiderwebs, it seemed to be a little more yellow than the base metal, whatever that means. I took the bare armature to my local powdercoater, and picked out a suitable silver. I think it looks like it did originally, and that was the goal. Chroming would have been an option, but the number of chrome shops in my area is very limited.
Is it perfect? Nah, but it is pretty good, I did it, and I have that satisfaction. It will be part of the total car that I am doing, again not perfect, but pretty good I hope, and I will have done it-if I live long enogh, which at the rate I'm going could be a challenge!
-Dennis

steeringwheelcompleted.jpg
 
Similar threads
Thread starter Title Forum Replies Date
DornTRoriginal TR2/3/3A Steering Wheel Restoration Triumph 22
S 3000 BT7 Steering Wheel Restoration help needed Austin Healey 3
hutten Wood steering wheel restoration vendors? Triumph 2
B TR2/3/3A TR3 Steering wheel restoration Triumph 4
M steering wheel restoration Triumph 4
Rut steering wheel restoration Restoration & Tools 16
Jim_Stevens Steering Wheel Restoration Triumph 7
PAUL161 T-Series TF Steering Wheel Restoration MG 7
PAUL161 Steering Wheel Restoration. MG 6
PAUL161 Steering Wheel Restoration MG 8
angelfj1 Steering Wheel Restoration - WIKI Restoration & Tools 3
W Momo Steering Wheel Restoration MG 2
healeynut Steering Wheel restoration - advice needed Other British Cars 0
HealeyPilot Steering wheel restoration Austin Healey 4
healeynut Steering Wheel restoration - advice needed Restoration & Tools 7
R Steering Wheel Restoration Kit Austin Healey 5
Tinkerman Steering Wheel Restoration Triumph 3
1965_MGB Steering Wheel Restoration Restoration & Tools 13
Basil Steering Wheel restoration - recommendations? Restoration & Tools 15
T TR6 Steering Wheel Lock Triumph 2
D Removing the steering wheel hub Spridgets 12
K 1968 Midget Steering wheel Spridgets 1
Editor_Reid Wrapped Steering Wheel Austin Healey 9
B TR4/4A Steering Wheel Hub Issues Triumph 0
K TR2/3/3A Who sells steering wheel control head "Allen head'' grub screws? Triumph 5
EWD For Sale ‘74 TR6 original steering wheel Triumph Classifieds 0
S SOLD!! Mike Lempert 15" slotted Derrington Steering Wheel Austin Healey Classifieds 1
kodpkd Leather Steering Wheel Cover Austin Healey 3
S Steering Wheel Brand Austin Healey 5
B TR4/4A What is this Steering Wheel Center? Triumph 6
Martinld123 Steering Wheel Alignment [Lost centering on steering box 1956 Austin Healey, BN2] Austin Healey 14
Celtic 77 MGB Steering wheel fitment MG 11
S TR2/3/3A Steering wheel removal. Triumph 4
LAW75 Derrington Steering Wheel Austin Healey 19
waltesefalcon New steering wheel Other Cars 2
R TR2/3/3A Steering Wheel hitting my belly Triumph 22
bighealeysource T-Series My older Brooklands steering wheel is leaking ! MG 4
A Austin A40 trafficator steering wheel Other British Cars 5
T Steering Wheel Adjustment Range Austin Healey 0
R TR2/3/3A Steering wheel hub removal Triumph 11
K TR2/3/3A Question about installing the steering wheel control head? Triumph 1
J Wanted Adjustable steering wheel circlip Triumph Classifieds 4
E Wanted wanted Austin healey 3000 adjustable steering wheel & dash pad Austin Healey Classifieds 2
Cappy Moto-Lita Steering Wheel Installation Austin Healey 3
K TR2/3/3A Steering Wheel hold down Nut Triumph 6
J Steering Wheel Repair Austin Healey 32
Walter74 Adjustable steering wheel removal Austin Healey 4
D TR2/3/3A Shaking in steering wheel above 50 mph. Triumph 19
G Steering wheel offset Austin Healey 10
D Steering Wheel Repair Austin Healey 2

Similar threads

Top