• The Roadster Factory Recovery Fund - Friends, as you may have heard, The Roadster Factory, a respected British Car Parts business in PA, suffered a total loss in a fire on Christmas Day. Read about it, discuss or ask questions >> HERE. The Triumph Register of America is sponsoring a fund raiser to help TRF get back on their feet. If you can help, vist >> their GoFundMe page.
  • Hey there Guest!
    If you enjoy BCF and find our forum a useful resource, if you appreciate not having ads pop up all over the place and you want to ensure we can stay online - Please consider supporting with an "optional" low-cost annual subscription.
    **Upgrade Now**
    (PS: Subscribers don't see this UGLY banner)
Tips
Tips

TR2/3/3A Electrical

OP
S

SteveBones

Jedi Trainee
Country flag
Offline
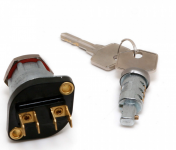
I own a 1958 TR3A. I replaced the original wiring harness and I am now experiencing an issue/problem. In addition I replaced the ignition switch purchased from Moss with the four tab connectors. The other item replaced is the light switch.

My problem or issue occurs when I turn on the ignition switch. The ammeter reading goes to the far end or "pegs" at the maximum reading for negative amps (-30AMPs). I am still able to turn over the starter when I push the starter button. The starter is a reduction gear starter and turns over as expected. Any suggestions on how to figure out what is causing this very high reading on my ammeter is greatly appreciated. Please note the lights work including dash, parking, and head lights. Horn works as well. My TR3A is set up for positive ground. Attached is a copy of the wiring diagram I am using.

Thanks,

Steve
 

Attachments

  • Screen Shot 2022-01-03 at 12.50.39 PM.png
    Screen Shot 2022-01-03 at 12.50.39 PM.png
    430.5 KB · Views: 111

DavidApp

Yoda
Gold
Country flag
Offline
I would start by pulling both fuses ay the fuse block. That will reduce your search area for the issue.
The ignition switch has only 2 connections. Where do the other 2 connections go?
Does it start or just turn over.
With a 30 amp draw something is getting hot.
While testing you may want to use a circuit breaker between the battery and car so it will blow if the load gets too high. This setup will not allow you to turn it over.

David
 
OP
S

SteveBones

Jedi Trainee
Country flag
Offline
I would start by pulling both fuses ay the fuse block. That will reduce your search area for the issue.
The ignition switch has only 2 connections. Where do the other 2 connections go?
Does it start or just turn over.
With a 30 amp draw something is getting hot.
While testing you may want to use a circuit breaker between the battery and car so it will blow if the load gets too high. This setup will not allow you to turn it over.

David
David,

I have pulled the fuse from A1 to A2 and then pulled the second fuse from A3 to A4. I even disconnected wires from the fuses to help isolate. I will try this again. Likely sometime tomorrow and will share my results.

Regarding the new ignition switch, there are only 2 connections as you mentioned. Each has 2 tabs so there are 4 total tabs to connect the wiring. The setup I have currently is with 3 white wires connected and 1 brown with blue wire. I have attached a photo of the new ignition switch. This is different from the original ignition switch as the 2 connections have slots with screws to secure the wires. With the original ignition switch, one connection connects 3 white wires and the 2nd connection connects the brown with blue wire per the wiring diagram. As I write this, I am wondering if the high amp draw is caused by where the 3 white wires are connected on the new ignition switch vs the brown with blue wire. I will look into this tomorrow.

I have another starter solenoid and swapped out. I also removed wires going to the starter solenoid including the black larger wire from the reduction gear starter and the white with red wire that goes to the starter button. Also removed the one white wire that goes from the fuse to the coil. Still getting the over -30 amp draw afterwards with the ignition switch on. Since the lights worked, I noticed the reading from the ammeter was as expected with the parking lights and headlights on. This leads me to believe that the ammeter is showing correct readings including the greater than -30amp current draw.

I have not tried starting as I am concerned doing so with the high -30amp draw will cause more problems.

I like your suggestion regarding a circuit breaker. I have not tried this and will need to figure out what circuit breaker to use.

Thanks for the help and suggestions. First thing I will do is check where the 3 white wires should be connected on the ignition switch. If no change in amp draw, will go back and remove fuses.

Steve
 

Attachments

  • Screen Shot 2022-02-12 at 8.58.43 PM.png
    Screen Shot 2022-02-12 at 8.58.43 PM.png
    448.6 KB · Views: 77

CJD

Yoda
Country flag
Online
Hey Steve,
I would not connect the battery directly until you have the short figured out. To prevent damaging anything, you can connect through a test light. In other words, battery post to the 12v test light to the battery cable. That way any short will be limited to 1 amp or so by the test lamp. Of course, any accessories will only get 1 amp, but it will protect all your systems from the short. As long as the key is off and you have a short, the test lamp will be lit.

As far as the short, you are just going to have to start at one end of the harness and undo connections until the test lamp goes dark.
 

bobhustead

Senior Member
Gold
Country flag
Offline
My on board ammeter sometimes pegs at -30. It is a mechanical issue in the meter itself. There is no short and a simple tap on the glass unsticks the needle. Consider testing the meter along with the other diagnostics suggested. The new switches could also be at fault.
Bob
 
Last edited:
OP
S

SteveBones

Jedi Trainee
Country flag
Offline
Hey Steve,
I would not connect the battery directly until you have the short figured out. To prevent damaging anything, you can connect through a test light. In other words, battery post to the 12v test light to the battery cable. That way any short will be limited to 1 amp or so by the test lamp. Of course, any accessories will only get 1 amp, but it will protect all your systems from the short. As long as the key is off and you have a short, the test lamp will be lit.

As far as the short, you are just going to have to start at one end of the harness and undo connections until the test lamp goes dark.
Hey CJD,

I agree with your recommendation regarding use of the test light via direct connection to the battery. I had not thought of this. Your recommendation will be very helpful. This approach should allow me to investigate further to isolate the short without damaging other electrical items.

"As far as the short, you are just going to have to start at one end of the harness and undo connections until the test lamp goes dark."

I have done this earlier. Based on earlier work I have done, the short is located somewhere within the brown wiring (& items attached) or the white wiring (& items attached). So I believe I have this narrowed down to these two areas (Brown & White wires).

Thanks for your help on this. I was getting stuck and was not sure how to proceed. What you have recommended will allow me to explore further in isolating the short.

Steve
 
OP
S

SteveBones

Jedi Trainee
Country flag
Offline
My on board ammeter sometimes pegs at -30. It is a mechanical issue in the meter itself. There is no short and a simple tap on the glass unsticks the needle. Consider testing the meter along with the other diagnostics suggested. The new switches could also be at fault.
Bob
Bob,

Thanks for the insight. I will follow up and share the progress. I am so ready to get this problem solved!

Steve
 

DrEntropy

Great Pumpkin
Platinum
Country flag
Offline
If there's a "short" someplace you should have seen smoke by now. More likely you've got an excessive draw with something.

Brown circuit is "hot" regardless of ignition switch position, white circuit only gets power if ignition switch is on. Problem is likely not with the white circuit unless the ignition switch is faulty (when all wires are connected).


Rig a test light and connect as John suggests. Disconnect the white wires from the iggy switch and see if the light goes out. If so, switch is bad. If not, next pull the brown/blue wires from the lighting switch, leaving them connected to each other. Light goes off, there's something in the lighting circuit causing issues. Light stays on, disconnect both yellow and yellow/green from the genny. Light goes out, the fault is in the generator or the control box. Process of elimination.

A volt/ohm meter (VOM) is a good tool to have if you've not got one already. Allows checking more than "off/on" with the test light.
 
OP
S

SteveBones

Jedi Trainee
Country flag
Offline
If there's a "short" someplace you should have seen smoke by now. More likely you've got an excessive draw with something.

Brown circuit is "hot" regardless of ignition switch position, white circuit only gets power if ignition switch is on. Problem is likely not with the white circuit unless the ignition switch is faulty (when all wires are connected).


Rig a test light and connect as John suggests. Disconnect the white wires from the iggy switch and see if the light goes out. If so, switch is bad. If not, next pull the brown/blue wires from the lighting switch, leaving them connected to each other. Light goes off, there's something in the lighting circuit causing issues. Light stays on, disconnect both yellow and yellow/green from the genny. Light goes out, the fault is in the generator or the control box. Process of elimination.

A volt/ohm meter (VOM) is a good tool to have if you've not got one already. Allows checking more than "off/on" with the test light.
Your suggestions are very helpful and turning out to be correct. With your and others help I have figured out a few items since my last post. I now have an approach that is working in narrowing down the electrical issues after installing my new wiring harness.

Back to my progress so far. It closely mirrors what you have mentioned and expected. The positive news is that I am now able to have the ignition switch on without experiencing excessive draw (greater than -30 AMP reading on my ammeter). Even better, I can also push the starter switch and the starter works as it should without the significant current draw I was experiencing before.

Here is what I understand so far as the cause. This is regarding the "new" ignition switch from Moss. The ignition switch is different vs. the orginal that might be causing the problem. I am in the process of narrowing it down and getting very close. The "new" ignition switch has 2 connectors. Each connector has 2 tabs (attached the picture again). Per the wiring diagram, one connector is where the BROWN/BLUE wire connects. This is a "hot wire" coming from the battery. There are also 3 WHITE wires that connect to the ignition switch. If I attached only two of the WHITE wires on the one connector (2 tabs), the current draw issue is resolved. I need to now figure out how I can connect the three wires to the one connector when the ignition switch connector only has 2 tabs. ANY SUGGESTIONS ON HOW TO DO THIS IS GREATLY APPRECIATED.

There is more regarding the new wiring harness installation. My TR3A is a 1958. At this time the TR3A's did not include a fuse in the RED wire circuit. One reason for installing the new wiring harness was a result of a short with the RED wire on the old harness. This has required me to also check many of the various connection points in the car's wiring. I already discovered that the light switch was not working when switched on. I have replaced with a new light switch and now the dash lights are working as they should. There is still a problem with the parking lights. One particular wire for the driver's side rear turn signal is not working, This is the rear light that also functions as the turn signal. Last night I got as far as using the test light that confirmed the wire is dead. More work to be done.

I have a few other items still not working. I now have an approach that has been working on figuring out why. Might take some time to figure this all out. Thanks again to everyone who has offered their recommendations.

Steve
 

DrEntropy

Great Pumpkin
Platinum
Country flag
Offline
If I attached only two of the WHITE wires on the one connector (2 tabs), the current draw issue is resolved. I need to now figure out how I can connect the three wires to the one connector when the ignition switch connector only has 2 tabs. ANY SUGGESTIONS ON HOW TO DO THIS IS GREATLY APPRECIATED.
A couple ways to do it, the top-right spade connector in the photo would require cutting one of the existing connectors off and re-soldering it onto the wire. The bottom connector would allow a "two-on-one" without cobbling the new harness. It would need to be insulated in some way for safety's sake. Not sure where I originally got these but they can't be rare:


SpadeConnecors.jpg


There is still a problem with the parking lights. One particular wire for the driver's side rear turn signal is not working, This is the rear light that also functions as the turn signal. Last night I got as far as using the test light that confirmed the wire is dead. More work to be done.

I have a few other items still not working. I now have an approach that has been working on figuring out why. Might take some time to figure this all out. Thanks again to everyone who has offered their recommendations.
This suggests there may be an issue on that one remaining white wire circuit? If the starter spins up, that white wire to starter switch should be okay. According to the diagram, you should have an ignition light come on with the key turned on. If that happens, the only "leg" of the white not connected should be going directly to the coil and through the fuse A3/A4 with green wires to wiper motor, fuel gauge, brake lights and turn signal circuit. But with the description you posted, you have the other turn signal/parking lights working? Just the left rear not?
 

Sarastro

Obi Wan
Silver
Country flag
Offline
You have connected two of the white wires and all is well; the third wire, I take it, causes the 30A draw. If so, you've solved the problem: it is in whatever is connected to that third wire. It's either to the fuses and the "green" circuit, plus some other unfused stuff on that wire, or to the ignition lamp. If it's the latter, a short in the lamp socket (cheap stuff that it is) would cause the high current. If it's the other, remove the fuse and see if it goes away. If so, it's in the green circuit, and you need to start disconnecting some of the green wires at the fuse block to isolate it further. If not, it must be an incorrect connection at the coil.

This is all just logic--you don't need to know any electrical theory to do it. Just systematically eliminate possibilities until you isolate the problem.
 
OP
S

SteveBones

Jedi Trainee
Country flag
Offline
A couple ways to do it, the top-right spade connector in the photo would require cutting one of the existing connectors off and re-soldering it onto the wire. The bottom connector would allow a "two-on-one" without cobbling the new harness. It would need to be insulated in some way for safety's sake. Not sure where I originally got these but they can't be rare:


View attachment 75899


This suggests there may be an issue on that one remaining white wire circuit? If the starter spins up, that white wire to starter switch should be okay. According to the diagram, you should have an ignition light come on with the key turned on. If that happens, the only "leg" of the white not connected should be going directly to the coil and through the fuse A3/A4 with green wires to wiper motor, fuel gauge, brake lights and turn signal circuit. But with the description you posted, you have the other turn signal/parking lights working? Just the left rear not?
You are a few steps ahead of me at this point. I will update and respond below. Item #3 is regarding a new issue with the control head/left turn signal resulting in excessive current measured on the ammeter.

1) Ignition Switch/3rd white wire.

Regarding the 3rd white wire. Confirming this has not been tried out. This 3rd white wire does connect to the ignition warning light. I need to go back to this. I will be researching best approach regarding getting a connector setup that will support all 3 white wires. Thanks for your suggestion.

2) Parking Lights.

I am not sure at this time what might be happening. I have investigated further since my update earlier. Turns out both ends of the GREEN/RED wiring is not live. Meaning no result using the test light. I did go back through the wiring diagram. Needing to research this issue with the GREEN/RED wiring to determine how to proceed in determining the cause. There was a positive test using the test light for the GREEN/BROWN from the wiring harness and originates from the flasher unit. QUESTION, is there a way to test the flasher unit to see if working correctly?

3) Control Head - Turn Signal Operation

Tried using the turn signal. When the turn signal indicator on the control head was moved to the left, the ammeter measured the excessive current draw I experienced earlier (greater than - 30 AMPs). The fuse connecting A3 and A4 also failed (where the WHITE and GREEN wiring connect up on the fuse box). Trying to figure this one out as well. The control head at this point looks to be the source of the excessive current draw. Either this or potentially the flasher unit. The horn does work as it should. This will be the first time I try to isolate any issues involving a TR3 control head. The control head and control head wiring both look to be original. I am researching to determine how to best isolate this excessive current draw when using the left turn signal. I am thinking it makes sense to also replace the control head wiring since it is original. I want to isolate and figure out the cause of the excessive current draw from the control head before I do attempt to replace.

Steve
 
OP
S

SteveBones

Jedi Trainee
Country flag
Offline
You have connected two of the white wires and all is well; the third wire, I take it, causes the 30A draw. If so, you've solved the problem: it is in whatever is connected to that third wire. It's either to the fuses and the "green" circuit, plus some other unfused stuff on that wire, or to the ignition lamp. If it's the latter, a short in the lamp socket (cheap stuff that it is) would cause the high current. If it's the other, remove the fuse and see if it goes away. If so, it's in the green circuit, and you need to start disconnecting some of the green wires at the fuse block to isolate it further. If not, it must be an incorrect connection at the coil.

This is all just logic--you don't need to know any electrical theory to do it. Just systematically eliminate possibilities until you isolate the problem.
Thanks for the recommendations. I just posted an update on the latest. The excessive current might be coming from using the turn signals on the control head. Making progress and getting closer. Learning a few things along the way as well.
 

DrEntropy

Great Pumpkin
Platinum
Country flag
Offline
Disconnect the wiper motor. Just to take it out of the "equation" for now. Assume the flasher is working for the moment, if the green/white side flashes. Since the errant draw has only been from activating the green/red circuit from the switch, after the green/brown wire to the wiper motor (?) is disconnected, try it again. if that draw is still there the issue is in the green/red turn signal wiring (not likely, IMO). If it has disappeared you have a problem in the wiper motor. That's my WAG (Wild Arse Guess). The discontinuity in the green/red may be a different problem.
 
Last edited:

DrEntropy

Great Pumpkin
Platinum
Country flag
Offline
I'm wrong about the wiper motor! Sorry. What is connected at that green/brown connector in the diagram just "hanging"? I made a bad assumption it was the later self-parking wiper power.
 
Last edited:
OP
S

SteveBones

Jedi Trainee
Country flag
Offline
I'm wrong about the wiper motor! Sorry. What is connected at that green/brown connector in the diagram just "hanging"? I made a bad assumption it was the later self-parking wiper power.
I am certainly learning as I go along. Regarding the wiper motor, it is working as it should. I initially connected up the wiring via the diagram in the Haynes manual. A few days ago I reconnected per the wiring diagram I attached in my first message. This "correct" wiring diagram shows the correct wiper motor wire connections for self parking wiper motors.

Back to my latest issue with the dead GREEN/RED wire located at the driver side rear parking light. I also used the test light on the GREEN/RED wire end located inside the driver side engine compartment. This end of the GREEN/RED wire is also dead. I understand this GREEN/RED wire receives it power source from the GREEN/BROWN wire located at the drivers side engine compartment. I was able to confirm via the test light that the GREEN/BROWN wire from the flasher unit to where it connects to the Control Head wiring is also working/live. My planned next step is to use the test light on the Control Head wiring as this the next area where both the GREEN/RED and GREEN/BROWN wires are connected. I need to research this further to confirm next steps before disassembling the control head to access and test the GREEN/RED and GREEN/BROWN wires. I hope to have more progress to share on this soon. Thanks again for the help.
 

DavidApp

Yoda
Gold
Country flag
Offline
I think the Green and Red wire has to do with the LHD and RHD configuration. It is a kind of jumper if needed. Probable a bad explanation but the wiring harness is made so it can be used on either car.

David
 
OP
S

SteveBones

Jedi Trainee
Country flag
Offline
I think the Green and Red wire has to do with the LHD and RHD configuration. It is a kind of jumper if needed. Probable a bad explanation but the wiring harness is made so it can be used on either car.

David
David,

After starting out knowing very little regarding the wiring colors, I searched the intranet using "British Car Wiring Color" and found a link that provides descriptions for the wiring harness colors. The link is: > Lucas wire colour codes for Land Rover < I have also attached a couple of screen shots with info on the Green and Red wiring combinations with descriptions for each.

Currently my focus is on the Green/Red wiring. There is a Green/Red wiring attachment that goes from the main wiring harness to the the control head wiring. I will need to remove the control head from the steering wheel to access the wire connections . Will start with the Green/Brown wire. I confirmed the Green/Brown wire is receiving power via the test light where this wire connects to the control head wiring at the steering box end.
Screen Shot 2022-02-14 at 9.27.49 PM.png
Screen Shot 2022-02-14 at 9.27.03 PM.png
This Green/Brown wire is what appears per the wiring diagram to provide the required voltage to the Green/Red wiring circuit for the driver side/ left side turn signals. I will let you know what I find out.

Steve
 

DrEntropy

Great Pumpkin
Platinum
Country flag
Offline
Steve, the color coding for all the early BMC cars follow the same scheme. The brown and brown/with-stripe carry voltage. Apparently the fault is in the switch not contacting the green/red left-side leg of the harness. Could just be corrosion, or internal contacts worn or misaligned. Glad to find out the wiper motor is good, too.
Another more "graphic" wiring color code legend:

Lucas WireLegend.jpg
 
Similar threads
Thread starter Title Forum Replies Date
CARSINC Sprite Electrical System Information Spridgets 2
K TR2/3/3A Turn signal flasher issue.....electrical is not my strong point. Triumph 13
R Electrical Experts - Vixen 2500 - Ignition Switch Observation? TVR 10
N MGB Electrical Part Identification MG 3
KVH General Tech Yes, the Horns Again--Electrical TR4A Triumph 8
SNClocks Electrical Wire Lug Spridgets 2
K TR2/3/3A Another electrical problem: Park light & 5ignal light on Drivers side are brighter than....... Triumph 3
F General TR Electrical parts Triumph 6
lram59 General Tech Electrical terminals Triumph 8
6 Electrical Help Please Spridgets 7
B Bugeye Electrical Diagram with additions Spridgets 6
B Austin-Healey late 3000 BJ8 Electrical Diagram Austin Healey 1
B Austin-Healey early 3000 BJ8 Electrical Diagram Austin Healey 0
B Austin-Healey 100-6/3000 Electrical Drawing Austin Healey 2
B Austin-Healey 100 BN2 Electrical Diagram Austin Healey 0
B Austin-Healey 100 BN1 Electrical Diagram Austin Healey 0
KVH General Tech O/D Electrical Wire Burned Triumph 22
J TR4/4A Getting electrical shock from horn button when using the horn. Triumph 9
E GT6 Help electrical guru needed Triumph 4
B Bugeye Electrical Diagram Spridgets 0
Got_All_4 TR5/TR250 Wiring/Electrical Mystery Worked Perfect Then Not Triumph 5
D TR2/3/3A TR3A electrical issues Triumph 2
B Bugeye Electrical Wiring Diagram in Logic Format Spridgets 17
dbenichou289 TR2/3/3A Heater electrical connections Triumph 4
Simmo General Tech Electrical question Triumph 4
B BJ8 Phase 1 Electrical Diagram Austin Healey 21
T TR6 72 TR6 electrical snafu Triumph 4
P TR6 Electrical Problem Triumph 26
M Difficult Electrical Problem in 59 BE with Generator Spridgets 6
N Electrical Issues Need Help Austin Healey 8
H Re: electrical short wiring damage Spridgets 11
I Bugeye electrical questions Spridgets 17
N Electrical Troubleshooting Advice Needed Spridgets 6
steveg Electrical sleeving Austin Healey 11
N TR6 Electrical Issues Triumph 5
N Electrical issue. FORUM Navigation Questions 2
C Ghost in the electrical system Austin Healey 51
S TR2/3/3A Electrical Issue Triumph 40
KVH General TR Steering Shaft/Column Short Circuit?--Electrical Issue with Light Switch Triumph 3
6inline Electrical gremlins giving me fits Austin Healey 18
DornTRoriginal TR2/3/3A Electrical Wiring Best Practices Triumph 13
R TR2/3/3A Early TR3 electrical system Triumph 12
K TR2/3/3A More electrical....the Starter? Triumph 8
S TR4/4A Electrical wiring tips Triumph 2
K TR2/3/3A More electrical....the Starter? Triumph 5
B TR2/3/3A Electrical Problem Triumph 13
T TR2/3/3A electrical oddity Triumph 7
L Should I do it?? [electrical conversion] Austin Healey 24
SherpaPilot TR6 Electrical Question Triumph 7
M 1974 Jensen INterceptor electrical help needed Other British Cars 8

Similar threads

Top