• Hey Guest!
    Yoda says: A FREE resource for the Little British Car community BCF is. Support us with an account upgrade, not many will (less than 1%) "Require" you to pay to play we don't, but if you find BCF helpful, appreciate no pop up ads, and want to ensure we stay online - Supporting us with an "optional" low-cost member upgrade you should. There are some benefits to upgrading!
    **Upgrade Now**
    (PS: Seeing this UGLY banner, you won't)
Tips
Tips

Seat Belts Installed This Weekend

Thanks Duane. Might you have a picture of the QR bracket currently installed in the car?
And how did you fit the carpet over the transmission tunnel bracket?

Patrick
 
Thanks Duane. Might you have a picture of the QR bracket currently installed in the car?
And how did you fit the carpet over the transmission tunnel bracket?

Patrick

Patrick,

Unfortunately I have not installed my QR bracket yet, so no picture. I'm really hoping Olin will post pictures of his original ones since I've never seen an install of the original BMC Kit!!

I'm planning on utilizing the information from the instruction manual contained on pages 5 and 6 (Below) as my guide, removing the interior pieces and cutting the holes in the interior trim as recommended in the manual.

https://rhynard.org/images/AH/seat_belt_asj.pdf
 
I believe that reinforcement plate is designed to be installed from the backside. The instructions suggest cutting a 1.5" hole in the tunnel as the first step. It would probably be a little stronger that way.

Csarneson,

I installed it as the original diagram (Below) detailed, but installed the bolts in the opposite direction since it's much easier to get a small wrench to hold in the tight space than a Phillips. I'm guessing they opted for the front face installation so the reinforcing plate and the seat belt bolt would not be adjacent to the propeller shaft!! I agree it would be stronger the other way, but you would also have difficulty connecting the belt with the insulation and carpet. I'm hoping Olin will post pictures of his installation.

Thanks,
Duane


Capture.jpg
 
Csarneson,

I installed it as the original diagram (Below) detailed, but installed the bolts in the opposite direction since it's much easier to get a small wrench to hold in the tight space than a Phillips. I'm guessing they opted for the front face installation so the reinforcing plate and the seat belt bolt would not be adjacent to the propeller shaft!! I agree it would be stronger the other way, but you would also have difficulty connecting the belt with the insulation and carpet. I'm hoping Olin will post pictures of his installation.

Thanks,
Duane

Duane,

Take a look at the written installation instructions you posted. They say to install the reinforcing plate from inside the tunnel. Bet the installation wold be a PITA that way, though but it would give quite a bit more strength in case of an accident as right now you're depending on six small bolts in shear to hold your body from the windshield.
 
Here's an example of how I think they are supposed to be installed. It's not my photo. Just found it on the web. Looks like they plug welded it from the backside instead of using screws for a cleaner install. I don't think you have to worry about space for the driveshaft. You have lots of space side-to-side in there.

seamsealer3.jpg
 
Here's an example of how I think they are supposed to be installed. It's not my photo. Just found it on the web. Looks like they plug welded it from the backside instead of using screws for a cleaner install. I don't think you have to worry about space for the driveshaft. You have lots of space side-to-side in there.

View attachment 40916
My BJ7 came with the mount installed by the factory and looks as the one in your picture. The mount Duane shows is from the BMC kit made for cars before the mounting became standard. There's some more on the BMC kits here: https://mgaguru.com/mgtech/accessories/at116.htm
 
Here's an example of how I think they are supposed to be installed. It's not my photo. Just found it on the web. Looks like they plug welded it from the backside instead of using screws for a cleaner install. I don't think you have to worry about space for the driveshaft. You have lots of space side-to-side in there.

View attachment 40916

You (and Rick) are correct, the instructions very clearly state that the plate is installed this way.

Thanks Guys!
Duane
 
You (and Rick) are correct, the instructions very clearly state that the plate is installed this way.

Thanks Guys!
Duane

The only fly in the ointment is the installation requires the presence of, gulp, the dreaded "Assistant" to secure the phillips screws while you attach the nuts inside the driveshaft tunnel.
 
Duane,

I was happy to check back tonight and see all the discussion. I will post pictures tomorrow, I had a problem with the right eye and I am trying to take it easy for a while. I have a picture of the kit before I installed them that I will post also.
 
The only fly in the ointment is the installation requires the presence of, gulp, the dreaded "Assistant" to secure the phillips screws while you attach the nuts inside the driveshaft tunnel.

Even worse, the directions require installing the phillips screws from inside the tunnel with the nuts and washers on the inside of the interior!
 
Here's an example of how I think they are supposed to be installed. It's not my photo. Just found it on the web. Looks like they plug welded it from the backside instead of using screws for a cleaner install. I don't think you have to worry about space for the driveshaft. You have lots of space side-to-side in there.

View attachment 40916

My 10/61 tri-carb also came with this setup. If you notice the holes for the mounting bracket on the floor, you can see it is slightly raised about a 1/16" due to the added reinforcement.
 
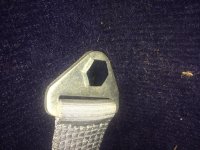
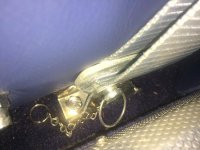
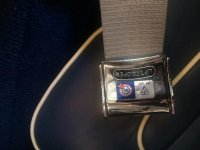
Here are the close-up pictures of my setup.

Floor Bracket:

IMG_5965.jpg


Buckle Receiver:


IMG_5966.jpg

Side view of Buckle Opening:

IMG_5967.jpg

Adjuster and Buckle (note that the adjuster has a plastic coating):

IMG_5968.jpg


Tunnel attachment (Special spacer is used here):

IMG_5969.jpg


Shoulder Strap Attachment (There is a slight bend in this piece so there is room for the belt to connect to the bracket):

IMG_5970.jpg
 
Olin,

Thanks for all the pictures they are great! I appreciate you taking the time to post them.

Even worse, the directions require installing the phillips screws from inside the tunnel with the nuts and washers on the inside of the interior!
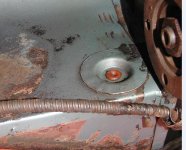
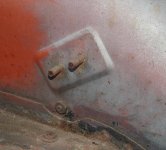
Rick,

Not too bad on the two-seaters through the battery hatch! I did not even need the dreaded assistant. :tennis:

Thanks for everyone's help!

Duane


a6.jpg
a4.jpg


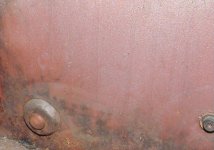
Pictures of original '61 Tri-carb Mounting Points (My next project once I finish my BN6):

a3.jpg
Passenger Compartment Tunnel with Rubber Insert

a7.jpg
Inside Tunnel From Under Car

a2.jpg
Interior

a1.jpg
Rear Wheel Well

a5.jpg
Passenger Floor
 
Last edited:
Duane,

Great set of pics, especially the original mounting points in the tri-carb. If you have a photo of the inside of the tunnel mount, that would be helpful. The pictures in the thread above show the mounting of the "kit" with the six screws & nuts, where-as the original mount was welded from behind. In this set-up was the plate not extended to the chassis rail to give a bit more robustness in the design.

Andy
Andy,

It does not extend to the chassis rail on my car. I would think that the force it would take to rip it out of the tunnel as it is, would be so great that you would probably not be able to survive without a broken shoulder and back.
 
Duane - In picture a6 above, is the inner nut welded to the circular piece?
The inner nut is not welded to the reinforcement plate. That is unfortunate, because you will have to go underneath the car to remove the bolt anytime you want to remove the carpeting in that area.
 
Similar threads
Thread starter Title Forum Replies Date
W TR2/3/3A TR3 Seat Belts Triumph 6
tr6nitjulius For Sale 4$ale: 3 Point Seat Belts Red Triumph Classifieds 0
T Three-Point Seat Belts Austin Healey 8
JohnGone Wanted '80 MGB without seat belts? MG Classifieds 3
M For Sale vintage 3-point retractable seat belts MG Classifieds 0
R 3-point seat belts on late production BT7 MKII Austin Healey 7
S Wanted MGB Static Seat/Shoulder Belts MG Classifieds 0
Rut Seat belts Spridgets 10
S Retractable Seat Belts Spridgets 3
T Looking for two part, three point seat belts Austin Healey 6
D TR6 '74 TR6 Seat Belts Triumph 6
BN6_2197 Seat belts in BN6 Austin Healey 15
69MGC MGC 3-point Seat Belts MG 3
RAC68 Are 3-Point Seat Belts Safe in a Healey? Austin Healey 38
B TR6 Seat belts Triumph 2
T TR4/4A Tr4a - 3 point seat belts with Miata seats Triumph 8
Got_All_4 TR2/3/3A Suggestions for shoulder harness retractable/inertia seat belts Triumph 4
D Seat belts on a BJ8 -64 Phase 2 Austin Healey 20
L Rear seat belts Austin Healey 26
JimTR4 TR4/4A Securon 500/30 seat belts Triumph 0
S Seat belts Austin Healey 2
B TR2/3/3A seat belts Triumph 7
glemon General TR Nice Deal on Seat Belts Triumph 11
A TR2/3/3A Tr3 Seat Belts Triumph 3
M TR2/3/3A Seat belts, what style? Triumph 17
W I really wanted these seat belts... Spridgets 2
D TR6 76 TR6 Kangol Reflex Seat Belts Triumph 3
W 1966 Sprite seat belts Spridgets 7
Lotuswins BJ8 3 pt retractable Seat Belts Austin Healey 10
7 Retractable seat belts - BT7 Austin Healey 8
B 60 TR3 Seat Belts Restoration & Tools 0
Boink Best Seat Belts option for Bugeye? Spridgets 21
T TR4/4A Retractible 3-point seat belts for TR4a Triumph 6
HEALEYJAG 73 etype roadster seat belts Jaguar 1
T 3 point seat belts options / location Spridgets 9
doates Spitfire Spitfire Seat Belts Triumph 4
JRC Seat Belts Triumph 3
GreenOne TR6 TR6 Replacement Seat Belts Triumph 1
jhva MGB 71 MGB Seat belts MG 5
L Original seat belts? Austin Healey 11
ronzet 3 point Seat Belts - Installation Austin Healey 4
L BJ 8 Rear seat belts Austin Healey 2
B Seat Belts in a MKII? Spridgets 4
B 1960 Healey 3000 Seat Belts Austin Healey 10
tinman58 3 point seat belts Triumph 7
nevets Installing seat belts on a BN6/BN7 Austin Healey 5
Johnny AH Seat belts Austin Healey 6
R Seat Belts Question Triumph 5
mjobrien Seat Belts for 100 Austin Healey 10
TR4A_IRS TR4/4A 3 point seat belts on a TR4? Triumph 10

Similar threads

Back
Top