• Hi Guest!
    You can help ensure that British Car Forum (BCF) continues to provide a great place to engage in the British car hobby! If you find BCF a beneficial community, please consider supporting our efforts with a subscription.

    There are some perks with a member upgrade!
    **Upgrade Now**
    (PS: Subscribers don't see this gawd-aweful banner
Tips
Tips

Richmond VA 1960 Bugeye Bringing Miss Eva back to life.

I have been tied up on another project so I am ready to get back on Miss Eva.
SbGFPql.jpg

Using the Speed Hut Gauges the Water Temperature sending unit would not screw into the Whitworth Threads in the Cylinder Head or Cross Flow Radiator.
I was able to get the adapter from Moss that is suggested to be used instead of screwing it directly into the head.
tPnleJM.jpg

We were able to tap the adapter since the standard threads were very close to the Whitworth. The Tap was not able to go in as deep as I would have liked; however, with the low pressure it should hold the sending unit without leaking.
5BHTiM6.jpg
 
SS Exhaust Installation

I used the Falcon SS Exhaust from England.
xO9U35T.jpg

I used hangers and U bolt exhaust clamps from an Auto Parts Store to complete the system.
The Rubber Washers from Moss and the distance tube for the Muffler made for a neat installation.
fHNN9Lb.jpg
 
Detour.

I am back on the project BE. I had to walk away as sometimes I am so close to a project, I am blinded as to the solutions I need or what is my real problem. Electrical is always my stumbling block. I was changing things so much a stock wiring harness was not really a good option. In the end, most of my electrical issues are always grounding issues. New paint = bad grounds. You can never have too many grounds. So my issue was my battery disconnect switch. There cannot be many things installed that are that simple. This is the short version of the story. It should be properly wired into the ground side of the battery. Voltage was still leaking as I could still have lights etc... with the switch off.
canJVqK.jpg

I read up on the internet bible and while there are more people that say to wire on the negative side, there are others that push wiring the cut off on the positive side of the battery.
Here is one justification.
If the charging system is properly grounded, and the ground of the battery is disconnected, and the engine is running, then the alternator is still supporting the ignition.
The end result could be terrible...the engine continues to run...fuel is still being pumped...oil pressure is maintained (and possibly leaking or spraying all over....and the wheels might still be driven.
The only safe system I can think of is to remove the positive in such a way as to kill the ignition.
It would require a 2 section switch....one to the main bus...and the other to the ignition circuit.
Bob
____________
I changed my wiring and go with my switch on the positive side of the battery and it did eliminate my voltage issue in the disconnected position. This works and I can move on, but
I know deep down this is not the right way to wire the disconnect, so I changed it back.
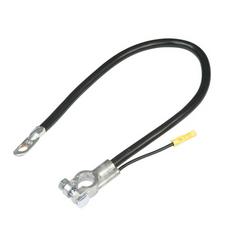
120200_primary_225px.jpg

See the little lead off the battery. I had this connected to the ground wire on my bonnet wiring. So this was still keeping the battery grounded and it was not being isolated. I kept looking straight past that obvious issue and voilĂ !
That little wire was grounding my entire system; however, the give away was it was not allowing much of the current to flow. Dim lights, signals etc. so I still knew something was not right.


I've seen many a throttle cable absolutely SMOKED due to poor grounding points. That li'l wire would do the same thing if the starter were engaged without the switch connecting the battery lead.

...just a word to the wise. :wink:
 
Progress ever forward. Bugsy’s Wiring Harness is the next challenge after sorting the wiper linkage. Keep at it and you will get there.
 
With the rear shock cores sent back to Worldwide, my parts car is officially stripped of anything I could possible use. It is a rusted hulk without any suspension, drive train or any other usable part. My wife has wanted it gone for at least 2 years, but I kept saying you never know what you will need. The accelerator was the last piece that was usable so it was well worth the heat from her.
 
It's loo0king good. You are really close. Just 30 minutes a day with next task in your head before you step into the garage and all tools back to their proper place from the day before so no hunting and you'll be done shortly. Good luck.
 
beautiful, beautiful
 
I just stumbled upon this thread for the first time over this past weekend. Beautiful work all the way through.

You probably mentioned it somewhere within the last 22 pages but, what brand and model seat are you using. They look great !

In the photograph of the diff gasket which you sourced from Vicky Brits, it looks beefier than the ones I have been sourcing lately. Is it the run of the mill paper thin variety or does it have some thickness to it?

Myself being from Virginia Beach, I would like to know who your local engine builder was.

Do me a favor and please post a photo of that Rockwell jig you've been using. It looks like a very handy tool.

I very much look forward to admiring this car in person at some of the local British cars shows in Virginia in 2021, assuming of course that the pandemic is well behind us by then.
 
I just stumbled upon this thread for the first time over this past weekend. Beautiful work all the way through. Many Thanks!

You probably mentioned it somewhere within the last 22 pages but, what brand and model seat are you using. They look great !I don't have the information close at hand. They were off a company in England. It was crazy. Ordered one day and two days later they showed up DHL. Super comfortable and well made. They came with the sliders included. Only drawback is they are fixed back.

In the photograph of the diff gasket which you sourced from Vicky Brits, it looks beefier than the ones I have been sourcing lately. Is it the run of the mill paper thin variety or does it have some thickness to it. Some thickness; however, I used Synthetic Fluid and I wish I had used Dinosaur oil based. Synthetic seems to seep.

Myself being from Virginia Beach, I would like to know who your local engine builder was.NAPA (Carl at the NAPA machine Shop has been doing British Cars for years. I am afraid once he is gone so is the skill level in the shop for these cars.) Jim Swenson British Car Service builds a lot of motors here in Richmond. He assembled this one and has an extensive inventory of used parts.

Do me a favor and please post a photo of that Rockwell jig you've been using. It looks like a very handy tool.fo It works great for many different applications, it is a big help and has been abused as a welding table at times.
rockwell-saw-horses-rk9003-64_1000.jpg


I very much look forward to admiring this car in person at some of the local British cars shows in Virginia in 2021, assuming of course that the pandemic is well behind us by then.
I am getting close. I am installing a Mini Denso one wire alternator and trying to work out the brackets.
 
One wire alternator. 12V 40 AMP

Mini Denso One Wire Alternator
OMKACBs.jpg

It is just that. One wire to the battery with an internal regulator.
Issue is going to be the alignment of the 3 pulleys.
3qwx8gg.jpg

I am using a plastic drafting triangle, inserting it into the pulley groves to confirm the layout.
BWnAzfi.jpg
With a 4.5" grinder and a belt grinder I took off enough material to align the pulleys.
dW0Kxr2.jpg

I am now searching for a new universal alternator adjustment bracket.
On the Bugeye, it now has one metric bolt. That may confuse someone down the road.
 
Back
Top