• Hi Guest!
    You can help ensure that British Car Forum (BCF) continues to provide a great place to engage in the British car hobby! If you find BCF a beneficial community, please consider supporting our efforts with a subscription.

    There are some perks with a member upgrade!
    **Upgrade Now**
    (PS: Subscribers don't see this gawd-aweful banner
Tips
Tips

TR2/3/3A Rear tail light cutouts

LionelJrudd

Jedi Trainee
Country flag
Offline
I understand the TR2 had a rectangular cutout for the rear light fittings either side because the light fitting was recessed into the body. With the later light fittings the the globe fitted into it's socket which was attached to the chrome bezel and only required a round hole for the cables to pass through.

Can anyone tell me if and when Triumph stopped cutting the rectangular hole in the body and only used a round hole.

The reason I ask is that my car body has both the rectangular and round holes. Commission number TF17505L and body number EB16140.
thanks, Lionel
 
Hey, Lionel -

Don't have the '57 (TS16162L) any more, but I just looked at the photo album of the restoration which I kept after selling, and both sides have a rectangular (or oval? - hard to tell from the pictures I have) hole with a smaller round one above and slightly inboard it. Is that what you're asking?

Mickey
 
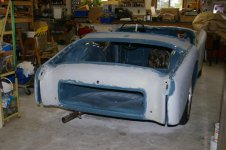
Took a while to track down a picture. Seem to have taken few pictures from directly behind during the restoration. Mine is early 56 (TS11537), and here are the holes on mine ... both round and rectangular. No idea when switch took place. Maybe when middle light changed to one with chrome on it? Cheers, Mike

IMGP7952 (Medium) (1).jpg
 
Thanks for the rapid response guys. That is exactly what I was referring to. Your phot Mike shows a clear image of what my rusted panel has. I guess they just carried the old metalwork forward even though it was no longer required. I am in the process of forming a new panel and was wondering whether I should include the rectangular cutouts.
 
The very early TR2 had rectangular tail lights. They were changed to the normal oval lights in short order. I was not aware that there were any changes to the sheet metal when the lights changed. I was under the impression either light would work on any car...the only difference being which was “correct” for your particular car.

Anyone have an early TR2 to verify?
 
My TS981 does have the rectangular rear tail lights. The lens, bezel and gasket are completely different from the version that was used completely through the 3B and I have been told the two versions are not interchangeable, why I don't know. That change happened at TS1306 or about the spring of 1954. Reason for the change was the early lens did not have the built-in reflector as the later.

View my TS981 at www.vtr.org/tr2

Lou Metelko
Auburn, Indidna
 
Lionel and Others,

My 1957 TR3 has the round and rectangular cut-outs. The rectangular cut-out has "spire clips" top and bottom, where the screws for the chrome light plate are threaded into. The round hole is where the wires pass through. I also notice that that whole oblong area has a slight recess, which allows the wires to sit behind the chrome fixture (which itself sits on a rubber gasket). The wires pass through the one hole in the body, then separate to pass through the gasket and plate in two holes, one to the left of the bulb and one to the right of it.
 
Thanks everyone for the responses. Some way to go before I need to do the cutouts for lights but just wanted to be sure before I get there. I have been doing the panel in two halves, left and right and just tigged them back together today. Tomorrow I start doing the flanges around edges and then will chase in the channel around the spare tyre opening. Last job will be raising the plinths for the indicator lights.
 
Sounds like you are into some serious body work if you are going to make the plinths yourself.

Post some photos of your progress.

David
 
Hi David.
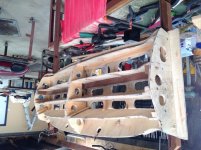
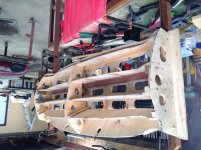
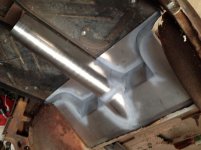
attached is a photo of the buck I made taking profiles from the back of the car and then the two roughed out halves before welding together. Still got to detail the line around the tail light locations. Sorry but looks like the photos are upside down, regardless of which way I have them on my iPad. Will upload some more shots when I have finished the metalwork and sorted out how to get them rightway up.
regards,
Lionel

IMG_1138.jpg


IMG_1136.jpg
 

Attachments

  • IMG_1138.jpg
    IMG_1138.jpg
    87.4 KB · Views: 285
That is hard core restoration. You must have a background in sheet metal.
Looking impressive.

The photos are the right way up for you.

David
 
Hi John, David, Just self taught with a lot of you tube viewing. My background is in teaching and IT.

I have a cheap English wheel which I used to raise the middle of the panel and to smooth off hammer marks. Also got a basic shrinker / stretcher. The type of gear you get from your Harbour Freight company in the US. Built myself a bead roller per the type you get in HF with a few improvements compared to their model.

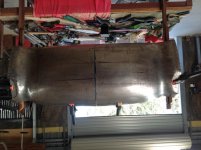
I found the panel was too big for me to handle well in the wheel by myself so cut it in two after I had the basic curvature sorted. The major shaping was done with hammers and sandbag. As you can see from the photo below it never looks good to start with. In fact I got depressed with it and went off and rebuilt a motorcycle for some time before I came back to the panel. Woke up one morning and decided it wouldn't change shape by itself so started hammering on the sandbag again.
Lionel
IMG_1027.jpg

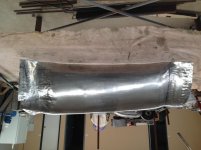
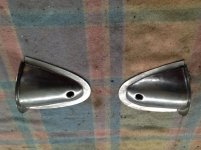
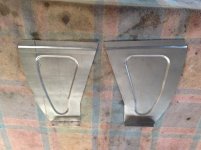
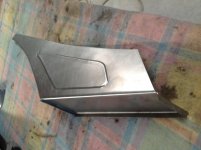
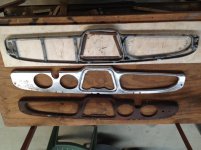
Some other peices I have had to make.
IMG_0943.jpgIMG_0955.jpgIMG_0953.jpgIMG_0944.jpg

My car is left hand drive and I want to covert it to RHD so I made a former whichcould be flipped over to fabricate either LHD or RHD dash panels.

IMG_1053.jpg

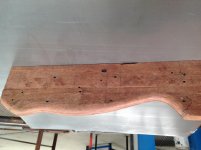
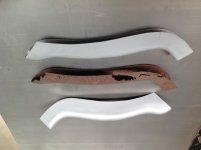
Only one rusted arm rest so I made a straight wooden former and and made left and right halves which allowed me to then produce the left and right hand curve for each side of the car. I then fitted the halves together and tigged them along the longitudinal axis.
IMG_1061.jpg

IMG_1055.jpg
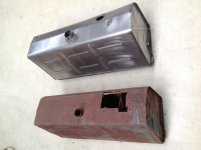
Fuel tank was wreked so made a new one. Turned profiles for the bead roller to impress the panels.

IMG_1042.jpg
 
Very nice work! That's it...an English wheel is moving to the top of my wish list! Your parts are better than what we're gewtting from our usual suppliers.
 
John, I followed through all you posts when you were working on your TR2. Most impressed with your work. Was staying in a village in Indonesia and filled my time going through your posts. Couldn't wait to get back home to my shed and get back onto my tok tok toking as my wife calls it.

Have rebuilt the scuttle and had to totally remake the air vent section and catchment under it as it was rusted out completely. Still got to make the flap and closing mechanism. Will post some photos when I work out how to take photos the right way with the iPad.

Graham, wouldn't mind catching up some time if that is possible to compare notes. There are some sections that are so rusted out I would like to see a live sample car to see how I remake them.
Lionel
 
Well, glad I had an input, Lionel, but you have definitely stepped it up from my level. Please post as you go, as I would very much like to learn some of the techniques you are employing!
 
I have a drawing with measurements someone posted some time ago. Have been collecting snippets of info whenever it comes up in anticipation of jobs to come. Will try and find an example in the flesh as I find it helps me if I have it fixed in my head before I start.
 
Back
Top