-
 Hi Guest!
If you appreciate British Car Forum and our 25 years of supporting British car enthusiasts with technical and anicdotal information, collected from our thousands of great members, please support us with a low-cost subscription. You can become a supporting member for less than the dues of most car clubs.
There are some perks with a member upgrade!**Upgrade Now**
(PS: Subscribers don't see this gawd-aweful banner

Tips
- We have a special forum called "Member Articles" where you can submit actual articles for consideration for publication. Learn More
- Don't have an Avatar? If not, your avatar will default to the 1st character in your username. Go into "Account Details" to change your Avatar.
- Some basic forum navigation info: click
Hey - did you know if you click on the title of a thread it will take you to the first unread post since you last visited that thread?
- Hey Guest - Is your British Car Club in our Clubs database? If not, send me a PM - Basil

- Looking for a local club? Click the "Clubs" tab above and browse hundreds of clubs world-wide.
- Add Android or iPhone APP: click
- Did you know - any picture or video you add in your posts in any marque-specific forum will also get added to the Media Gallery automatically.
- A few more tips about posting and replying: click
- Hey there Guest - be sure to keep your profile page up to date with interesting info about yourself: learn more
- More tips and tricks on Posting and Replying: click
 STOP!! Never post your email address in open forums. Bots can "harvest" your email! If you must share your email use a Private Message or use the
  smilie in place of the real @
- Want to mention another member in a post & get their attention? WATCH THIS

- So, you created a "Group" here at BCF and would like to invite other members to join? Watch this!
- Hey Guest - A post a day keeps Basil from visiting you in the small hours and putting a bat up your nightdress!
- Hey Guest - do you know of an upcoming British car event?
 Pretty Please - add it to our Events forum(s) and add to the calendar! >> Here's How <<
- Hey Guest - you be stylin'
Change the look and feel of the forum to fit your taste. Check it out
- If you run across an inappropriate post, for example a post that breaks our rules or looks like it might be spam, you can report the post to the moderators: Learn More
- If you would like to try some different "looks" or styles for the site, scroll to the very bottom, on the left and click the Style Selector.
You are using an out of date browser. It may not display this or other websites correctly.
You should upgrade or use an alternative browser.
You should upgrade or use an alternative browser.
TR2/3/3A Rear sheetmetal repair
- Thread starter Frank Canale
- Start date
OP
Frank Canale
Jedi Warrior
Offline
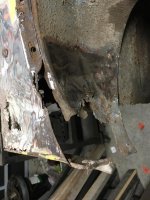
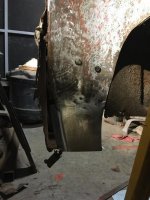
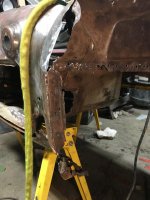
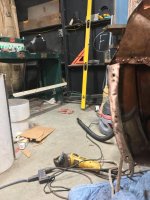
Yes it is obvious he has been doing it for a long time. He like lionel are one with the metal. They have that 3D eye that lets them know which way the metal needs to move. The more I work with it it does seem that some repairs go a little faster. My repairs take so much longer because mine have to fit so much better than if it was MIG welded, but I save a little time not having all the grinding and I hate grinding. I will take a little more time to keep from having to do the grinding. Speaking of grinding I have run into a stubborn rear closing panel. The spot welds are difficult to find and are very good so they are holding on for dear life. I don't want to damage the spare tire compartment as it is one of the few places that is not rusted. Once I get it removed I can continue with repairs to the rear apron. Frank
LionelJrudd
Jedi Trainee
Offline
Wonderful to see the standard of work you are doing Frank. I have been out of the loop for a while and it seems you have moved ahead in leaps and bounds. Lionel
OP
Frank Canale
Jedi Warrior
Offline
Great to hear from you,Lionel. Hope you are doing well. I have been looking back at your post and pictures. They have been great help and also keeps me motivated. Frank
OP
Frank Canale
Jedi Warrior
Offline
Wow, what a boost. Thank you Lionel
OP
Frank Canale
Jedi Warrior
Offline
I am a little aggravated that I did not get a good picture of the damage to the driver side rear apron before I started. I thought I had one but I guess not.
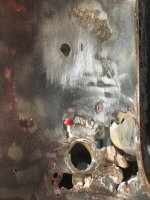 This picture is too close to show all the damage but I think you get the idea.
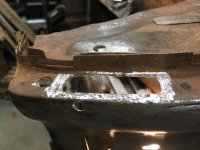 This is where the very back of the rear wing bolts on. The top and bottom bolts had to be cut to remove them and the cages had to be removed also. The center one may just get a new nut. I have not decided if I am going to order the heavy duty cage and nuts or use the cages and nuts that I have made. This is one area that you do not want to have a problem with the nut being able to spin.
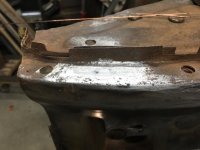 Damage repaired
 Damaged area cut out.
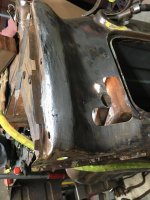
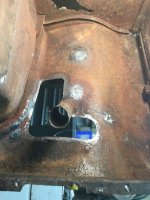 Ever wonder what the inside looks like? I took this picture to emphasize that both sides need to be clean before you weld. I will be figuring out how I am going to sand blast the inside and prime before I replace the new rear closing panel. Input on this subject is appreciated, sand blast media ,POR 15, Epoxy primer, rattle can primer, rust converter?
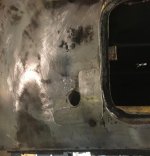 Patch ready to tack in place. Forgot to take picture of tacks. This patch was an odd shape with twist and turns and took a while to get tacked in place. I don't want anyone to think that I am a welder and so it is fast and easy for me. I have my troubles, I blow holes in my repairs and I have to fix them also. Welding this thin sheetmetal is difficult but do not give up, it takes practice and patience.
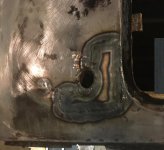 patch welded in.
 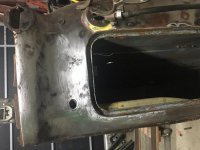 Repair done for now, minor hammer and dolly work remain once the passenger side is done.
The passenger side is next and it is the ugly side but now I have the driver side to go by. The entire lower corner is gone so I have some metal forming to look forward to. I have the pattern to make the rear closing panel and will get it made and out of the way but it will be a while before it will be installed after sandblasting, cage nuts, and repairs to the passenger side. Frank
 This picture is too close to show all the damage but I think you get the idea.
 This is where the very back of the rear wing bolts on. The top and bottom bolts had to be cut to remove them and the cages had to be removed also. The center one may just get a new nut. I have not decided if I am going to order the heavy duty cage and nuts or use the cages and nuts that I have made. This is one area that you do not want to have a problem with the nut being able to spin.
 Damage repaired
 Damaged area cut out.
 Ever wonder what the inside looks like? I took this picture to emphasize that both sides need to be clean before you weld. I will be figuring out how I am going to sand blast the inside and prime before I replace the new rear closing panel. Input on this subject is appreciated, sand blast media ,POR 15, Epoxy primer, rattle can primer, rust converter?
 Patch ready to tack in place. Forgot to take picture of tacks. This patch was an odd shape with twist and turns and took a while to get tacked in place. I don't want anyone to think that I am a welder and so it is fast and easy for me. I have my troubles, I blow holes in my repairs and I have to fix them also. Welding this thin sheetmetal is difficult but do not give up, it takes practice and patience.
 patch welded in.
  Repair done for now, minor hammer and dolly work remain once the passenger side is done.
The passenger side is next and it is the ugly side but now I have the driver side to go by. The entire lower corner is gone so I have some metal forming to look forward to. I have the pattern to make the rear closing panel and will get it made and out of the way but it will be a while before it will be installed after sandblasting, cage nuts, and repairs to the passenger side. Frank
OP
Frank Canale
Jedi Warrior
Offline
Thank you John. I hope you are right because I am running out of places to practice on. Most of what is coming up will be very visible so will need to be spot on.
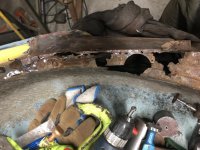 This is the driver side wheel arch. Plenty of rust damage.
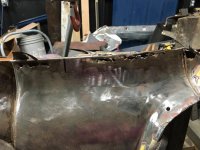 This is the top view of the driver side what I call the rear deck. Center of the wheel arch also rusted out.
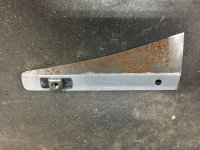 Repair patch with cage nut spot welded and zink primer where the upper flanges meet. I copied the original cages and made my own stainless nuts. Modern nuts are 7/16 square and not as thick as the originals. The nuts I made are out of 304 stainless bar. The nuts are 1/2" square and .200" thick to match the originals. These are less likely to spin in the cage.
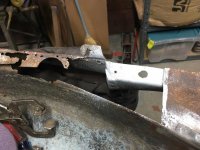 This is the driver side boot wall as it gets to the top of the wheel arch. It was easier to cut a large area out so the weld was easier to work than try and do a couple of small repairs. Getting a little more comfortable doing it this way instead of little repairs. better results.
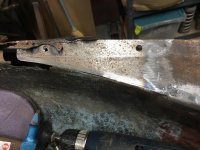 Repair welded and finished.
 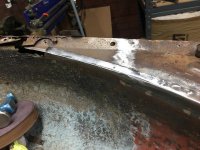 Inner wheel arch flange replaced.
More wheel arch flange to replace before the top of the outer wheel arch flange and rear deck area are repaired. If there is a proper name for the area that the fuel filler goes in I would love to know.I think it is referred to as the rear deck area. All of my repairs may be getting repetitive . If so I can condense it to before and after unless there is still interest in seeing the details. Thank you all for your input and encouragement. Frank
 This is the driver side wheel arch. Plenty of rust damage.
 This is the top view of the driver side what I call the rear deck. Center of the wheel arch also rusted out.
 Repair patch with cage nut spot welded and zink primer where the upper flanges meet. I copied the original cages and made my own stainless nuts. Modern nuts are 7/16 square and not as thick as the originals. The nuts I made are out of 304 stainless bar. The nuts are 1/2" square and .200" thick to match the originals. These are less likely to spin in the cage.
 This is the driver side boot wall as it gets to the top of the wheel arch. It was easier to cut a large area out so the weld was easier to work than try and do a couple of small repairs. Getting a little more comfortable doing it this way instead of little repairs. better results.
 Repair welded and finished.
  Inner wheel arch flange replaced.
More wheel arch flange to replace before the top of the outer wheel arch flange and rear deck area are repaired. If there is a proper name for the area that the fuel filler goes in I would love to know.I think it is referred to as the rear deck area. All of my repairs may be getting repetitive . If so I can condense it to before and after unless there is still interest in seeing the details. Thank you all for your input and encouragement. Frank
Last edited:
OP
Frank Canale
Jedi Warrior
Offline
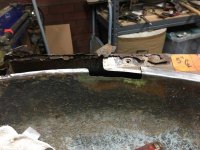 damaged flange cut out ready for repair
 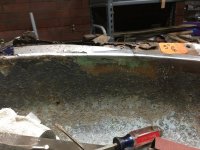 repair piece in place.
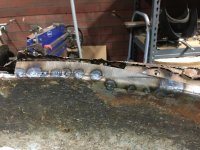 repair tacked in place.
 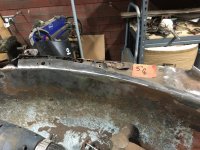 flange welded and finished. drilled for cage nut.
the driver side flange is repaired from the back to where the dog leg quarter panel meets the rear deck. I think I am going to go ahead and finish the flange all the way to the bottom. This is slow tedious work but I want to go ahead and get the driver side a little farther along before I flip it over to work on the passenger side. Frank
OP
Frank Canale
Jedi Warrior
Offline
UPDATE, been a little lazy posting as I go so I will try and do quick post to get up to date. Wheel arch repair was boring but will look to see if there are any good pictures to post.
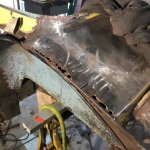 Driver side before
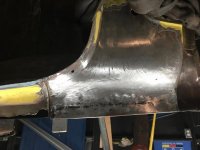
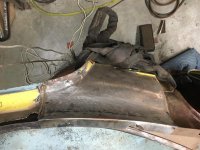 Driver side after. This area is very tight to get a dolly in to planish the weld, but came out ok. Frank
 Driver side before
 Driver side after. This area is very tight to get a dolly in to planish the weld, but came out ok. Frank
OP
Frank Canale
Jedi Warrior
Offline
I don’t think my car has had much love for a long time. Slow going but we are getting there. Thank you for the encouraging comments.
OP
Frank Canale
Jedi Warrior
Offline
LionelJrudd
Jedi Trainee
Offline
Wonderful work Frank. You have come a long way since your first photos.
lionel
lionel

