OP
Frank Canale
Jedi Warrior
Offline
Thank you, Lionel. Great to hear from you. How are things going in Australia?
 Hi Guest!

 smilie in place of the real @
 Pretty Please - add it to our Events forum(s) and add to the calendar! >> Here's How <<
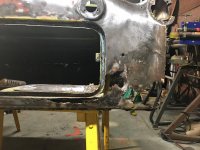 The bottom right corner of the spare tire cover channel has too much rust so i decided to replace the corner section of channel.
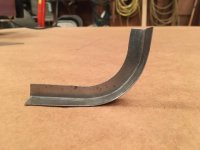
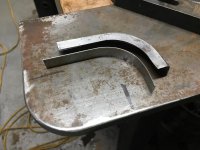
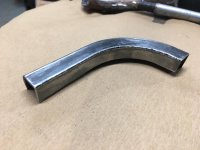
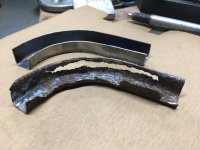 Thanks to Lionel I had an easy time fabricating the corner channel. I remembered he welded the inside leg to make his channel.I cut the corner of a heavy plate to match the radius i needed to help form the pieces. The first step was to brake a piece to form a piece of angle then I shrink the bottom leg of the angle with my Harbor Freight shrinker. It is very good for forming small pieces like this. A little bit of hammer forming on the steel plate and it was ready to weld. The fit was very good and so that made the welding much easier. The edge was fused with no filler wire, very low amperage with full penetration. Probably the best weld on my car so far.
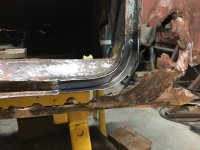 Repair corner tacked in place.
 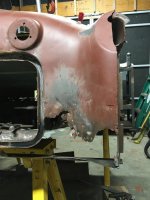 end of horizontal closing panel replaced and connected to the rear wing attachment flange. This establishes the bottom corner. some of the rust damage has been removed.
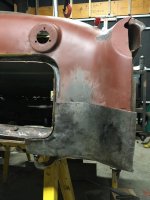 Starting to form the repair panel. slow going continuing to plan how the repair goes.
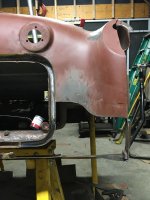 Remaining rust damage has been removed.
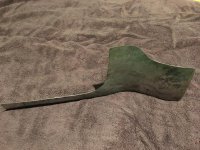 2 piece repair panel before tacking in place
 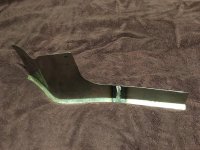 inside of repair showing 2 pieces welded together. I welded the two together now because it is easier to weld and planish the weld.
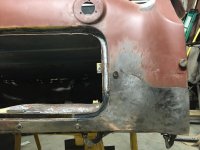 Repair panel in place ready to tack in place. It took longer to tack the repair in place carefully making sure the panel and repair were flush, than it did to weld it up. One thing to note that the repair is not a straight line horizontally. The curved weld line was done to help prevent warpage and it worked as planned.
 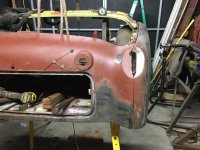 This is the repair after welding and planishing. The weld shrank a little and that can not be avoided but as long as it is not warped the weld can easily be planished and will need only minor sanding.Doing the repair this way is slow but in the end very rewarding. The bumperette tube will be located after the back end is on the chassis. I plan to level the raised plinths on the rear of the valance with the laser and then use the driver side for the reference to locate the passenger side. one step at a time. Frank