
-
 Hey Guest!
British Car Forum has been supporting enthusiasts for over 25 years by providing a great place to share our love for British cars. You can support our efforts by upgrading your membership for less than the dues of most car clubs. There are some perks with a member upgrade!**Upgrade Now**
(PS: Upgraded members don't see this banner, nor will you see the Google ads that appear on the site.)

Tips
- We have a special forum called "Member Articles" where you can submit actual articles for consideration for publication. Learn More
- Don't have an Avatar? If not, your avatar will default to the 1st character in your username. Go into "Account Details" to change your Avatar.
- Some basic forum navigation info: click
 Hey - did you know if you click on the title of a thread it will take you to the first unread post since you last visited that thread?
- Hey Guest - Is your British Car Club in our Clubs database? If not, send me a PM - Basil

- Looking for a local club? Click the "Clubs" tab above and browse hundreds of clubs world-wide.
- Add Android or iPhone APP: click
- Did you know - any picture or video you add in your posts in any marque-specific forum will also get added to the Media Gallery automatically.
- A few more tips about posting and replying: click
- Hey there Guest - be sure to keep your profile page up to date with interesting info about yourself: learn more
- More tips and tricks on Posting and Replying: click
 but were afraid to ask:
  STOP!! Never post your email address in open forums. Bots can "harvest" your email! If you must share your email use a Private Message or use the
  smilie in place of the real @
- Want to mention another member in a post & get their attention? WATCH THIS

- So, you created a "Group" here at BCF and would like to invite other members to join? Watch this!
- Hey Guest - A post a day keeps Basil from visiting you in the small hours and putting a bat up your nightdress!
- Hey Guest - do you know of an upcoming British car event?
 Pretty Please - add it to our Events forum(s) and add to the calendar! >> Here's How <<
- Hey Guest - you be stylin' Change the look and feel of the forum to fit your taste. Check it out
- If you run across an inappropriate post, for example a post that breaks our rules or looks like it might be spam, you can report the post to the moderators: Learn More
- If you would like to try some different "looks" or styles for the site, scroll to the very bottom, on the left and click the Style Selector.
You are using an out of date browser. It may not display this or other websites correctly.
You should upgrade or use an alternative browser.
You should upgrade or use an alternative browser.
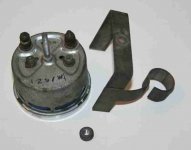
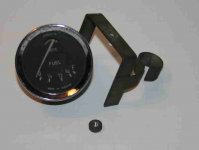
Of fuel gages
- Thread starter jlaird
- Start date
regularman
Yoda
Offline
Hey jack, try hooking an ohmeter from the wire that goes to the sender to a good ground and read the resistance. That resistance should change with the fuel level. About any fuel gauge should peg high or low depending on polarity when a hot and ground are applied straight to it. I bet those gauge people will charge a fortune. Be very careful when changing the faces, the inner part you have to work the gauge needle through and not damage the movement.
regularman
Yoda
Offline
Lets use an ohmeter before we start smoking gauges.
regularman
Yoda
Offline
Dang, sounds like a bad connection or a gauge needle that is really stuck or the coil inside has been burned up.
regularman
Yoda
Offline
Oh, one more thing if the resistance of the float sensor is a lot less than that of the meter, the meter might read full voltage even when this realy is not due to the meter not putting enough load on the circuit. Especially a digital meter. Best to work with ohms. Guys you can test a gauge with a 9v battery. It may not go all the way to max but you also are apt to do less damge if it is hooked up wrong. It should move from e across to amost full anyways. At least you can see it move and get your polarity right.
regularman
Yoda
Offline
I wish I could be there and help you guys. I love working on auto electrical problems. Just think it all through, ya'll will figure it out.
regularman
Yoda
Offline
Maybe the needle is stuck. Can you see the needle move if you thump it a bit?

regularman
Yoda
Offline
We have to be able to fix these things and maintain the originality. I know you can send them off and spend megga bucks but there has got to be a better way. Most gauge movements are very simple. I went through my tach when it started hanging up and managed to just bend a piece of metal a slight amount and it freed up. Now that was complicated. Has two coiled springs like a watch. One forward and one reverse. Very good original craftsmanship.