Hey Guest!

 Hey - did you know if you click on the title of a thread it will take you to the first unread post since you last visited that thread?
 but were afraid to ask:
  STOP!! Never post your email address in open forums. Bots can "harvest" your email! If you must share your email use a Private Message or use the
  smilie in place of the real @
 Pretty Please - add it to our Events forum(s) and add to the calendar! >>
2wrench
Luke Skywalker
Offline
Well, Dale, you asked to see the number one cylinder
at top dead center, so here she is.
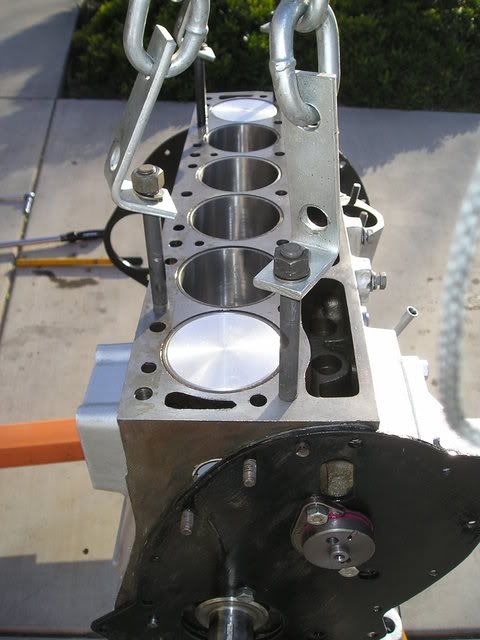
Notice that number six moves in unison with number one,
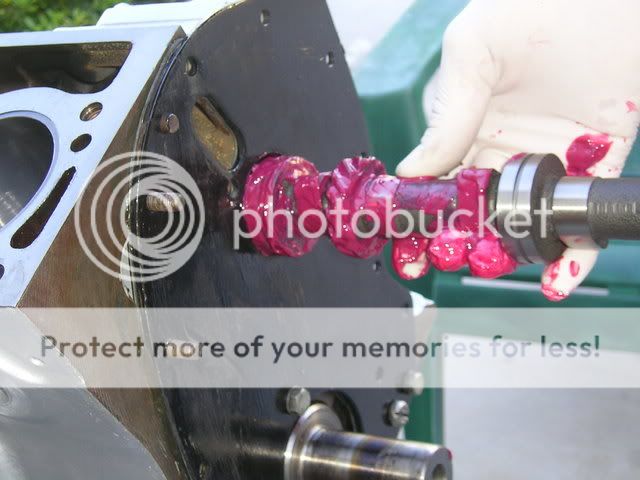
And referring back to the first photo, the bolts that hold
the cam in I tightened to about2 20+ pounds. Because the
cam would not turn, I backed them off until the cam would
turn, but they were still snugged down.
Can somebody confirm that this is correct? They certainly
do not seem to be very tight at all, but the cam binds and
stops if I go tighter.
Thanks,
at top dead center, so here she is.
Notice that number six moves in unison with number one,
And referring back to the first photo, the bolts that hold
the cam in I tightened to about2 20+ pounds. Because the
cam would not turn, I backed them off until the cam would
turn, but they were still snugged down.
Can somebody confirm that this is correct? They certainly
do not seem to be very tight at all, but the cam binds and
stops if I go tighter.
Thanks,