• Hi Guest!
    You can help ensure that British Car Forum (BCF) continues to provide a great place to engage in the British car hobby! If you find BCF a beneficial community, please consider supporting our efforts with a subscription.

    There are some perks with a member upgrade!
    **Upgrade Now**
    (PS: Subscribers don't see this gawd-aweful banner
Tips
Tips

HUS 2 main jet adjustment

The float bowls should be level when installed on the intake manifold. If they are not, let us know.

The fuel weeping into the carb may be an indication that the float valve on that carb is not completely closing. When you remove the suction chamber from the top of the carb, you should be able to look down into the jet and see gas but the gas should not be at the top of the tube. If the float valve is leaking, that could also be affecting the idle.
New float valve. Tested for closing and opening. They did do that. Cannot adjust float height, they are fixed
It does appear the float bowl is not straight up and down. I can modify the float grommet to get them straight up and down. Should I?
float bowl.jpg
 
I don't know what angle is correct for Spridgets. Mini, Spridget, and (I think) Austin America intake manifolds look similar but are cut at different angles so SU makes different angle grommets to set the float bowl vertical. Others will have to comment on what combination of grommets and manifold are correct for your car.

I assume that when you say the float level is not adjustable... you mean the carb has the all plastic float, not the plastic float with the metal arm. Setting the float height on with the metal/plastic floats is done by bending the metal float arm. If you have the all plastic floats, there still is adjustment but I don't know that it is described in any manual that I have ever seen and the rebuild kits never come with what you need (always save old parts). To set the all plastic float height, change the thickness and number of fiber washers between the float valve and the bowl lid. Ideally, if you run the engine, switch off, and remove the float bowl lid with float, the bowl will be between 1/2 and 2/3 full of gas. If the level is higher than 2/3 you need to add fiber washers.

You say the float valves are new. Are they "traditional" all metal, Viton tipped brass, or ball-bearing type Grose Jets? If Grose jets, remove them and either: 1) throw them away, or 2) as a minimum, soak them in carb cleaner, then flush them out with spray carb cleaner and compressed air. New ones ship with a protective coating to keep the balls from rusting in storage. The coating can prevent the balls from sealing or can cause them to stick in place. Personally, I prefer the Viton tipped needles but there is nothing wrong with the all brass OEM type.

Assuming the float valves are closing and the level is set "right", you may have some drainage into/out of the jet if the rubber fuel line connected to the carbs is routed higher than the lids. Any residual fuel in the hose above the lid has got to go somewhere when you stop the engine and even with good float valves you can expect a little to seep past the float valves. Keep the rubber lines as low as possible.
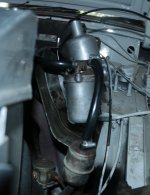
OK I need to reroute the fuel lines. I will then remove a little of the float gromit so I can rotate the float bowls to vertical. I did install the new jets that came with the master rebuild kit. I will check floats to see . I think right now I need to add washers
Thanks
very much Rod
 
You can buy the correct bowl grommets when you figure out what angle you need. If you shave or alter the existing grommets the bowl is going to be a bit "loose" on its mountings. Google the following list of part numbers once you determine the angle you need. Since you are in CA, places like Mini Mania and Seven Enterprises should have them.

AUC1366
AUC1336
AUC1316
AUC1367
 
OK I need to reroute the fuel lines. I will then remove a little of the float gromit so I can rotate the float bowls to vertical. I did install the new jets that came with the master rebuild kit. I will check floats to see . I think right now I need to add washers
Thanks
very much Rod
I now have the float bowls vertical. One float is just under a 1/4 inch the other was lower. Added a washer form another inlet assembly
It is now over a 1/4 inch. Still has a pulsing run a pop pop idle which leans out to mid range RPM about 2000 Really does not have any Throttle response. It just does it own thing. I think the pop idle means too rich
Here is what it sound like https://youtu.be/7h8sOMPfDmo
 
I saw in your other thread that you are going back to the earlier carbs. I'm sorry these didn't work for you. Clearly something fundamental must be wrong/different between them.

Other things that come to mind that I don't believe were mentioned or discussed earlier were things like...
Do the pistons drop freely and smoothly at the same rate?
Do you have the PCV connection point on both carbs attached to a PCV valve or plugged (don't leave it open).
On the carb do you have the gasket installed so the it is not blocking any of the holes on the front flange?
 
I saw in your other thread that you are going back to the earlier carbs. I'm sorry these didn't work for you. Clearly something fundamental must be wrong/different between them.

Other things that come to mind that I don't believe were mentioned or discussed earlier were things like...
Do the pistons drop freely and smoothly at the same rate? Yes
Do you have the PCV connection point on both carbs attached to a PCV valve or plugged it is rtgchristiaens@gmail.com (don't leave it open).
On the carb do you have the gasket installed so the it is not blocking any of the holes on the front flange? Is this the side the air filter fits to? if so not blocked
do the pistons drop freely and smoothly at the same rate? Yes
Do you have the PCV connection point on both carbs attached to a PCV valve or plugged it is plugged
On the carb do you have the gasket installed so the it is not blocking any of the holes on the front flange? Is this the side the air filter fits to? if so not blocked
It is acting like a vacume leak but I could not find one after I got the throttle plates in the correct position.
Throttle shafts are nice and tight. I started adjusting jets when their heads were flush. then 3 flats open at a time Till I was past 4 complete turns out
On my last attempt after cleaning the manifold gasket and using a smaller amount of Right Stuff sealant. It did run at idle for about 20 seconds then started running fast. The dampers were half open. which was faster than it was.
I put the old ones back on without sealant and they worked just like before.
It looks like everything is ok and everything test ok but it does not work.
My only guess is the intake manifold is not matching the Al head and is leaking there but Carb cleaner did not detect the leak. I was careful to match the ports up.
 
View attachment 34120 I am having a time trying to remove the needle from the body. I have heated it several times. cooled it with carb cleaner and it still will not move. This is the spring loade needle for self centering. Any suggestions?


View attachment 34121

When you heated the piston/needle, it looks to me like you burned out the nylon plug. (2 o'clock position in bottom pic). I wonder if that could be the cause of the run/die/bad idle etc...? Also, did you change the throttle shafts?
 
When you heated the piston/needle, it looks to me like you burned out the nylon plug. (2 o'clock position in bottom pic). I wonder if that could be the cause of the run/die/bad idle etc...? Also, did you change the throttle shafts?
Yes did change the throttle shafts.
I will check the plug but did not see any smoke or anything melting . I do not think I got it past 300 F
 
I'd bet now that there is still a air leak. You mentioned modifying the manifold. Is it still clamped up solid against the gasket? Also, the jet should be adjusted down 12 flats or two complete turn's of the jet adjusting sleeve from the top of the jet being even with the bridge across the inside of the carb throat. That might not be all the way tight for the adjusting sleeve. That additional adjustment is sort of critical for doing other adjustment's. Sorry you are having a hard time with the carb's. I was going to suggest checking ignition but if it run's OK on the S1's I guess that's not it.

Kurt.
Hi
i did not modify the intake manifold. That was a suggestion on the ones with wings. On the last try I mounted just the manifold to make sure It was aligned with the intake ports. Had a thin coating of right stuff on the flanges. It did bolt up flat and firm. I then installed the carbs. I also checked the gaskets on the back side of the heat sheild to make sure they were there and that the heat shield was not warped.
 
Sorry I misunderstood. How about the jet adjustment procedure? Was it 2 full turn's down from the top of the jet being even with the bridge across the bottom of the carb throat. I'm just wondering why it wouldn't run right since I've never had any problems with them. Oh, well, youv'e changed them anyway.

Kurt.
Yes 2 turns down. I too am wondering why these did not work. I will have a closer look at the intake manifold got to be something wrong there.
 
I think I have found the problem It seems the connection that works the throttle shafts is binding when the carbs are bolted down to the intake manifold and before installing to the engine. The throttle shafts work just fine till they are linked together. Any suggestions?
 
ok I reworked the connection link. I now have an even amount on each side fitting into the throttle nut. It now moves without binding.
I also notice that I could wiggle the carbs from side to side before bolting up tight. By doing this I was able to get them in lined to allow free movement of the connecting link. I also twisted the clamps to allow the throttle plates to close all the way. Now when closed I see no light coming from the back side. Before doing this , there was a lot of light coming through.
so this is what happened on my last try. Throttle plates were closed when I installed the carbs to the al ready installed manifold. I did not twist them to align them. When I started the car, I did not touch the throttle. .That is when I had a rich idle. I then may have given it a little throttle which did not come back all the way due to binding. If i remove the dampers, I think I can install as a unit and get a good alignment on the ports.
 
I know that you had twin carbs on before and that they worked without binding. However, from your post above it sounds like you may want to review the steps involved with linkage adjustments as part of balancing and tuning. The "clamps" you moved to set the butterflies require a specific adjustment. There are a couple of different versions of the throttle linkage but basically, the linkage is completely slacked off and the carbs should be set where their butterflies can close but are individually held open by that carb's idle screw (typical start adjustment is 1 turn from the butterfly being closed). The "clamps" have pins on them that engage a fork on the carb throttle shaft. The pins are not supposed to be resting on the forks but have a small gap so idle speed is not influenced by the linkage or the gas pedal. I assume you have a manual for your car and whichever manual you have addresses basic SU tuning. If not, the Burlen web site has tech articles online for tuning HS series carbs. There are several John Twist videos on YouTube that also cover SU carbs. A PDF copy of a good SU tuning guide is available online and I am posting a link to it below.

See Section 3, page 24
https://www.mgexp.com/article/all/Tuning_SU_Carbs_Speedsport.pdf

Additional background
https://sucarb.co.uk/technical-hs-type-carburetter-description-adjustments
https://www.nicoclub.com/archives/2-write-ups-on-tuning-su-carbs.html
Thanks I will read up on this.
 
Sounds like you may have discovered the problem!

Kurt.
 
almost there but ready to really give up and buy an Asian made Weber. The guy said he can set it up for street.
The problem I am having with the HS2 after warm up. I start it, it revs up then settles to an idle. I did not touch the throttle. After it idles for a bit it will reve back up. I started with jet head flush with the bridge, then 3 flats of the adjusting nut, then 3 more and on till I got 12 turns out. idle was a little better but did just about the same thing every time. Throttle response was good up but lagged on the way down. I have springs on both throttle levers. Again tested for a vacume leak and could not find one.
 
The pain is gone After 3 weeks and 8 redoes RnR on the HS2 I got it fixed and the car is now running better with more power and more torque. I now may need disk brakes. It turned out to be an easy fix, You see I bought a new aftermarket weber dcoe. The company I bought it from set it up for my sprite. Something that Moss does not offer. After boulting up, getting the throttle linkage working properly, I started it up. Sweet sounds all around. I did a little idle adjusting to get RPM down to 700 or so and took it out on the road.
After it warmed up I took it hard through the gears. I now have a little beast. It accelerated faster and ran smoother than it ever has. I now have a real sports car. Not sure I can use full throttle in 2nd gear in that 90 turn I have on my way home and keep it in its lane. What is nice about Webers is the ability to tune and set them up to a large number of engine displacements. So if you have tried a Weber carb and found its performance to be poor, You did not set it properly. I am taking my HS2 out the the range and put a lot of holes in them
 
Back
Top