
-
 Hey Guest!
British Car Forum has been supporting enthusiasts for over 25 years by providing a great place to share our love for British cars. You can support our efforts by upgrading your membership for less than the dues of most car clubs. There are some perks with a member upgrade!**Upgrade Now**
(PS: Upgraded members don't see this banner, nor will you see the Google ads that appear on the site.)

Tips
- We have a special forum called "Member Articles" where you can submit actual articles for consideration for publication. Learn More
- Don't have an Avatar? If not, your avatar will default to the 1st character in your username. Go into "Account Details" to change your Avatar.
- Some basic forum navigation info: click
 Hey - did you know if you click on the title of a thread it will take you to the first unread post since you last visited that thread?
- Hey Guest - Is your British Car Club in our Clubs database? If not, send me a PM - Basil

- Looking for a local club? Click the "Clubs" tab above and browse hundreds of clubs world-wide.
- Add Android or iPhone APP: click
- Did you know - any picture or video you add in your posts in any marque-specific forum will also get added to the Media Gallery automatically.
- A few more tips about posting and replying: click
- Hey there Guest - be sure to keep your profile page up to date with interesting info about yourself: learn more
- More tips and tricks on Posting and Replying: click
 but were afraid to ask:
  STOP!! Never post your email address in open forums. Bots can "harvest" your email! If you must share your email use a Private Message or use the
  smilie in place of the real @
- Want to mention another member in a post & get their attention? WATCH THIS

- So, you created a "Group" here at BCF and would like to invite other members to join? Watch this!
- Hey Guest - A post a day keeps Basil from visiting you in the small hours and putting a bat up your nightdress!
- Hey Guest - do you know of an upcoming British car event?
 Pretty Please - add it to our Events forum(s) and add to the calendar! >> Here's How <<
- Hey Guest - you be stylin' Change the look and feel of the forum to fit your taste. Check it out
- If you run across an inappropriate post, for example a post that breaks our rules or looks like it might be spam, you can report the post to the moderators: Learn More
- If you would like to try some different "looks" or styles for the site, scroll to the very bottom, on the left and click the Style Selector.
You are using an out of date browser. It may not display this or other websites correctly.
You should upgrade or use an alternative browser.
You should upgrade or use an alternative browser.
Harry_Ward
Jedi Knight
Offline
June????? Don't even tell me you sent that flywheel to those guys with that big vertical stone grinder you spin with a hand crank.
/bcforum/images/%%GRAEMLIN_URL%%/laugh.gif
/bcforum/images/%%GRAEMLIN_URL%%/laugh.gif
OP
Tinster
Guest
Guest
Offline
Yup, I figure end of June unless
Crypty REALLY puts up a fight.
Dec-Jan-Feb-Mar: Replace clutch and all that
goes with it.
(Feb 07, have not yet gotten flywheel out)
April: Rebuild rear brake system 100%
May: Replace floors both sides
June: Install new carpet
Maybe July 4th for a test drive?
Or am I being overly optomistic?
d
Crypty REALLY puts up a fight.
Dec-Jan-Feb-Mar: Replace clutch and all that
goes with it.
(Feb 07, have not yet gotten flywheel out)
April: Rebuild rear brake system 100%
May: Replace floors both sides
June: Install new carpet
Maybe July 4th for a test drive?
Or am I being overly optomistic?
d
Harry_Ward
Jedi Knight
Offline
Just Kidding ya Dale. Take your time.
OP
Tinster
Guest
Guest
Offline
The Crypt Car is beyond redemption.
As usual, I am stuck and need more advice.
I wasted the entire morning trying to remove
the 4 bolts that hold the flywheel to the engine.
Bentley says to remove them but gives no clues
how to accomplish this task. I was not able to
budge a single bolt loose.
While on my back, under the Crypt Car I was able
to put my entire body weight 154# onto the wrench.
The engine rotated very well but the bolst stayed
tight.
I switched to a long handle socket wrench with same
negative results.
I then tried banging the bolts with a short wrench
and a 3# hammer. Not enough room to accomplish anything.
There is not enough room to swing a hammer to use a cold chisle to attempt to cut off the 4 bolts.
There is not enough room to grind off the bolts and
I don't want that mess falling on my face anyway..
I gave some thought to a cutting torch but I am afraid
I might damage something behind the flywheel.
So after a few hours of this and several cut knuckles
and a very stiff neck, I spit on Crypty and left him
at the funeral home-- victorious as usual.
What is the secret to remove these four bolts??
I am very discouraged today after the high last
night of getting Paul's drive shaft.
Thanks as always, dale

Offline
Do you have access to an impact wrench and compressor? They'll make short work of countless "impossible" tasks.
TRopic6
Jedi Warrior
Offline
Dale,
I'll have to do this when I replace my trans and clutch and there are two techniques I plan to use. As you found, the problem is the flywheel turns with the engine, and you can't get the torque needed to loosen the bolt (book says to tighten them to 50-75 ft-lbs, so it will take more to break it free.
I'll use the same Sears torque wrench I'll use to put them back on. It's about 1.5' long with a 1/2" drive. Use a 6-point socket.
First, minimize the moment arm that's trying to turn the engine. It probably doesn’t make any difference, but i feel smarter when I do. In your picture, put the socket on the bolt with the "4" beside it and the wrench handle extend toward the "10". That cuts a couple of inches off the force trying to rotate the flywheel as you turn the bolt CCW.
Second, I'll do what I did when I removed the cylinder head. Remove a couple of spark plugs (they are still in, aren't they?) Remove them from 2 cylinders that the pistons will both come up at the same time. I think it was 3 & 4, but I'd need to watch them to make sure. With those pistons all the way down, feed rope into the sparkplug hole until the cylinder is full. Do the other one. Now when the engine turns with the flywheel, it will compress the rope until it stops the piston...and the flywheel. You'll have to keep moving the wrench around to the next bolt as the piston travels up the cylinder bore, but it will eventually stop.
I bet someone else has a real clever way to do this. I guess someone could hold a wrench on the front crankshaft extension, but I'm afraid it might slip out of their hands. And you'll need to keep it from turning when you tighten them back up. I'm interested to hear other ideas. If your flywheel looks good, maybe you could just clean it with 1000 grit sandpaper on a sanding block and wipe down with thinner.
Jeff
74 TR6 CF13816U
OP
Tinster
Guest
Guest
Offline
Thanks all,
No, I do not have access to any air tools.
The engine now runs pretty good. I would be
afraid to stuff cylinders with anything.
I'm thinking out loud now.
All my new TRF clutch components are now 2 months
in the salt air and turning to rust rapidly.
The face of the flywheel was mirror smooth when
I removed the clutch. No ridges or cracks, etc.
The flywheel is now beginning to rust.
I have no real expectations this car will ever be
more than a five mile from home before break-down
vehicle. I believe it was too far gone when it was
sold to my wife by dishonest Pedro.
Maybe just leave the existing flywheel in place
without resurfacing it?
What would actually occur if I just lightly wet
sanded the rust off the flywheel with 1000# grit
and then used wet polishing powder. A final cleaning
with xylene and then just install the damned rusted
TRF clutch components and hope for the best.
What would be the outcome?
Thanks,
dale
TR6oldtimer
Darth Vader
Offline
<div class="ubbcode-block"><div class="ubbcode-header">Quote:] What would be the outcome?
[/QUOTE]
For your purposes, it will run just fine.
Ray
[/QUOTE]
For your purposes, it will run just fine.
Ray
TR4nut
Yoda
Offline
Dale-
Just my two centavos of advice, but no to the sanding.
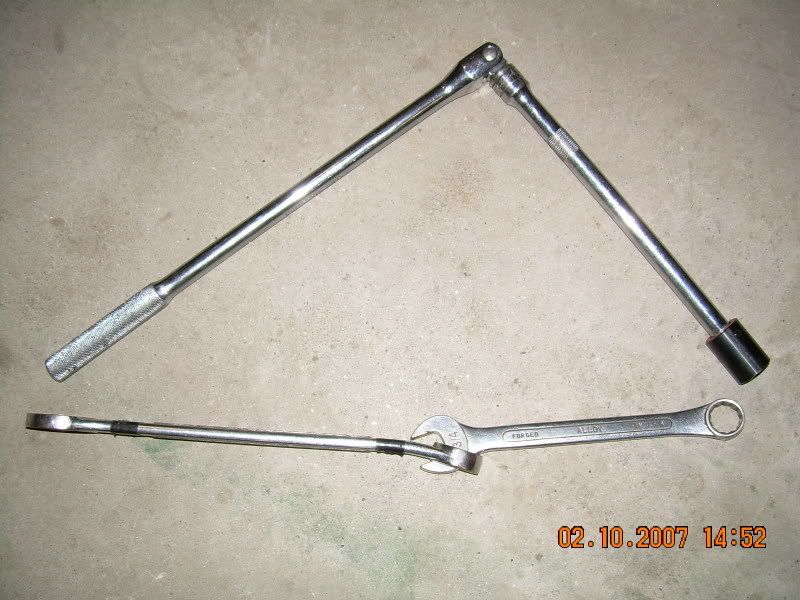
To immobilize the flywheel, you can try a piece of wood such as a two by four scap, wedge it against the ring gear (a good spot for the wood is the starter hole) to keep things from rotating. Then either a socket with a long breaker bar, or if you have to the wrench you show with a quick whack of a hammer to back off the bolts. I did this a long time ago on a Spitfire and it worked then.
Randy
Just my two centavos of advice, but no to the sanding.
To immobilize the flywheel, you can try a piece of wood such as a two by four scap, wedge it against the ring gear (a good spot for the wood is the starter hole) to keep things from rotating. Then either a socket with a long breaker bar, or if you have to the wrench you show with a quick whack of a hammer to back off the bolts. I did this a long time ago on a Spitfire and it worked then.
Randy
Harry_Ward
Jedi Knight
Offline
Dale,
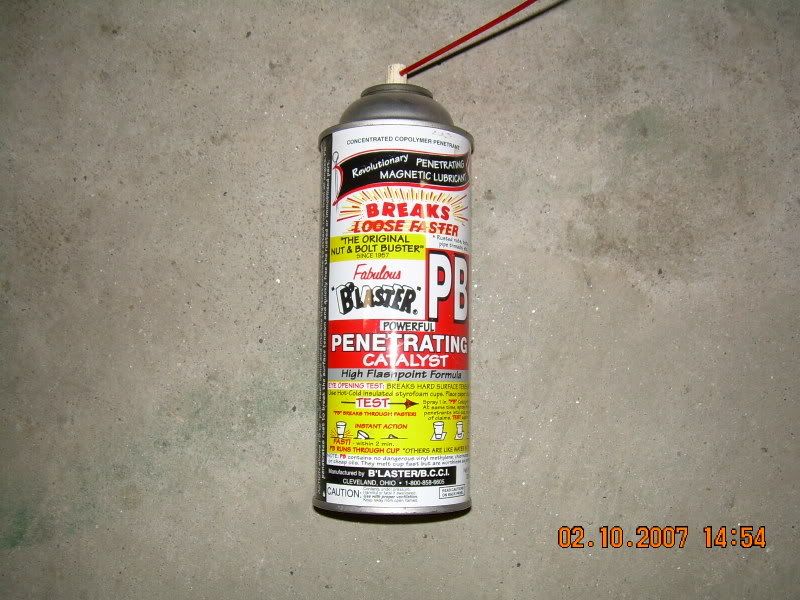
No sanding. Any roughness created on the mating surface will eat up your clutch disks. If your efforts fail you can wipe off surface rust with a clean rag soaked in all purpose solvent such as Omni MS100 (Do not get it on paint). I would try the block of wood cut long enough to brace the flywheel from the starter hole as mentioned or directly from the floor to the teeth of the gear. Do NOT use a pipe wrench, or any metal to metal contact with the flywheel or you may damage the ring gear. A strap wrench could also be used if you can find one big enough to wrap around the entire flywheel. As for breaking the bolts free try squirting the bolts with some PB Blaster.
- Then go get a medium sized coffee - Drink coffee.
Then hook up the 2x4 as mentioned previously so the flywheel will not turn.
Attach either the breaker bar with a short extension or wrench setup as shown and in a manner that you are pushing down on the bolt to loosen it. You need the help of gravity here.
Take a little test by hand to make sure the flywheel is not going to move and then place whichever foot and knee you value less on top of the end of the wrench or breaker bar and like your kicking over a 1948 Harley big boy stomp on the end of that wrench with a vengeance. If the wrench breaks (which it may) reread the part about the solvent.
Tinster said:Thanks all,
The face of the flywheel was mirror smooth when
I removed the clutch. No ridges or cracks, etc.
The flywheel is now beginning to rust.
Maybe just leave the existing flywheel in place
without resurfacing it?
What would actually occur if I just lightly wet
sanded the rust off the flywheel with 1000# grit
and then used wet polishing powder. A final cleaning
with xylene and then just install the damned rusted
TRF clutch components and hope for the best.
What would be the outcome?
Thanks,
dale
Dale
You say it was smooth and shiny when you took off the old clutch.Did the clutch shudder when you shifted gears? Was is slipping badly which could heat it and warp the flywheel?
If the answer to these questions is know then your flywheel is probably fine.
The first time you put the change gears all that rust will magically polish itself off. Just like the brake disks.
Just put the new clutch in, and drive. As hard as it is, resist the urge to take it apart!
Yisrael
AweMan
Jedi Knight
Offline
Dale:
Nope! an end wrench isn`t going to remove those flywheel bolts. You will need a preferably 6 point socket and as long a breaker bar as you can manipulate in the tight quarters.
Here is one way to stop that flywheel from turning. Use two of the pressureplate bolt holes screw in #8 bolts and use a piece of pipe or other straight bar stock insert the bar inbetween the bolts one on top and one on bottom of the bolts. turn the flywheel until the bar touches the ground. making sure you are stoping the flywheel in the direction you will need to remove it`s bolts then use the socket and breaker bar to attempt breaking those flywheel bolts loose. By NO means would I use my torque wrench to loosen any bolts.
P.S. From what I can see in your posted pic, that flywheel looks perfectly servicable. As long as it is smooth, no heat cracks, and no goorves and the ring gear is not damaged, by all means use it!
Kerry
swift6
Yoda
Offline
TRopic6 said:I'll use the same Sears torque wrench I'll use to put them back on. It's about 1.5' long with a 1/2" drive. Use a 6-point socket.
Jeff
74 TR6 CF13816U
Jeff, that's a quick way to hurt the calibration of your torque wrench. The torque wrench is reversible so you can use it on left-hand and right-hand threads. Not for removing or breaking loose bolts. Breaker bars are much better for that, cheaper than a torque wrench and don't need re-calibrating.
So just use your torque wrench for applying final torque, not for anything else. Otherwise your torque values could be way off from what you think they are when it gets knocked out of calibration.
martx-5
Yoda
Offline
If you have access to an impact driver, I'm sure it will get those bolts loose. I've used it on some really tight bolts and nuts where I couldn't use a long wrench or socket because of the same thing you are encountering...something's gonna turn. You hit the impact driver with a hammer, and it transfers that energy into rotational energy. It works in both left and right directions. I've used it to get bolts off that my 1/2" pnuematic impact wrench wouldn't get off! /bcforum/images/%%GRAEMLIN_URL%%/smile.gif
Harry_Ward
Jedi Knight
Offline
Hey Dale,
Now that I think about it there's also an electric heavy duty impact drive gun available as well. It's similar to an air impact but runs on electric. Maybe you can rent one and if no electricity available don't forget to rent the gas powered generator. The impact I'm thinking of has a 1/2 inch drive but they also come in 3/4 and should do the job. Six point socket the way to go! Thanks AweMan. I didn't think to tell Dale that a 12 point may just round off the bolt head.
Now that I think about it there's also an electric heavy duty impact drive gun available as well. It's similar to an air impact but runs on electric. Maybe you can rent one and if no electricity available don't forget to rent the gas powered generator. The impact I'm thinking of has a 1/2 inch drive but they also come in 3/4 and should do the job. Six point socket the way to go! Thanks AweMan. I didn't think to tell Dale that a 12 point may just round off the bolt head.
Alan_Myers
Luke Skywalker
Offline
Hi Dale,
I agree with the others, a block of wood to help stop the flywheel and engine from turning should do the trick. It can be wedged against the floor of the garage, or inside the starter opening, etc. Anywhere it will temporarily provide some resistance to the engine/flywheel turning is okay, so long as its solid enough to not be damaged. The block of wood really only needs to provide some momentary resistance and might be repositioned for each bolt if it makes it easier.
You'll need to use a similar but reversed procedure when reinstalling and re-torquing the flywheel.
Personally, I don't think it's a great idea to pull a spark plug and stuff a cylinder with rope (the old head removal trick). It would probably work. But, doing that there is some remote danger of breaking the head gasket's seal, tweaking a conrod or damaging a cylinder wall, etc. all of which may not be of concern when the head is being pulled and the engine disassmbled for rebuild anyway, but are all something you want to avoid when just replacing a clutch.
And, yes, an air-powered impact wrench (cheap) and air compressor (expensive) would probably make short work of loosening those bolts (but should not be used to reinstall them).
Do you have a tool rental place near you? If so, they might offer an *electric* impact wrench (or a compressor and air impact wrench, although that's a lot more stuff to rent and haul home). Be sure to rent (or buy) a set of those black oxide finished impact sockets too, if you go this route. Regular sockets often are broken or damaged by impact wrenches.
Although an impact wrench works, a simple 1/2" breaker bar usually does fine, too, just a little slower. Yes, a hex socket is a good idea (grips the head of the bolt better than a 12-point socket, less likely to round off the corners of the bolt/nut). Sometimes a short extension helps position it all a bit more conveniently. I also keep handy a couple lengths of pipe that slide snugly over my breaker bars, to give me a little more leverage when needed.
Finally, with a breaker bar you can often mimic an impact wrench just by hitting the breaker bar with a rubber or plastic mallet. One good whack is often all that's necessary to bump a nut or bolt free. Obviously, you need to work everything into a position where you can get a good swing on it, but that's the hardest part.
You mention that the flywheel is smooth. However, I still think you are be wise to removing it and taking it to a machine shop. It may be glazed too smooth. Someone earlier alluded to this and to warpage if it overheated, which is another possibility, but I think it bears repeating. The surface may simply be over-polished due to slippage. So I think you are wise to take it to a machine shop for proper resurfacing. You probably won't need to remove the ring gear. The shop should also check it for trueness and balance. Balancing should be done with the ring gear in place, but without the clutch assembly installed. (Clutch assembly balance might be checked for balance separately, although most manufacturers do at least minimal balancing and many folks just install right out of the box.)
When reinstalling the flywheel, check the service manual and be sure to properly install and carefully torque those bolts to spec. This is one part of the drivetrain you *never* want coming off and bouncing around in the footwheels of the cockpit!
Also, do you have a replacement for that pilot bearing? It's visible right in the middle of your photo, fits into the tail end of the crannkshaft. It looks as if it might be fouled with rust, is the reason I ask. Might be okay, as some of the clutch stuff seemed to be replaced not too long if I recall. Just be sure to check it. And, you can carefully smear a little grease in there (and on the clutch release mechanisms on the input shaft of the gearbox) to help everything operate smoothly and protect from rust a bit. Just be a little careful to keep grease to a minimum and only use it in a few key areas, so that none will ever spin out onto the clutch's driven disk. I like to use a nasty, sticky, heavy waterproof grease in there, personally. It's the stuff that's often used on boat trailer axle bearings, for example.
I gotta ask. Why the numbers next to the bolts on the flywheel? Is that a record of the number of attempts to remove each one? ;-)
Harry_Ward
Jedi Knight
Offline
Alan_Myers said:Hi Dale,
I gotta ask. Why the numbers next to the bolts on the flywheel? Is that a record of the number of attempts to remove each one? ;-)
Alan, I was truly afraid to ask that question. I think Dale uses some kind of magic at times. I'm just not sure which type so I don't ask. Ever since that frog episode... /bcforum/images/%%GRAEMLIN_URL%%/laugh.gif