• Hi Guest!
    You can help ensure that British Car Forum (BCF) continues to provide a great place to engage in the British car hobby! If you find BCF a beneficial community, please consider supporting our efforts with a subscription.

    There are some perks with a member upgrade!
    **Upgrade Now**
    (PS: Subscribers don't see this gawd-aweful banner
Tips
Tips

TR2/3/3A Boot floor

Thank you Tom. Every picture is very helpful. I had not thought about using the boot Hinge point for lifting. I have been using a nylon lifting sling (spanset) looped around the rear scuttle on the driver side. Passenger side not attached, still being repaired. Do you have a picture of the panel that goes behind the fuel tank? Frank
 
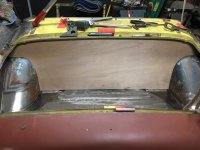
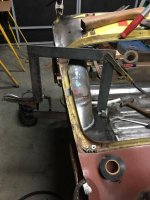
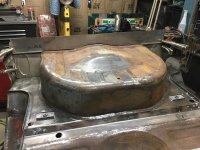
IMG_1271.jpgThe luan template fits pretty good. too tight to get in without scratching paint so it still needs some adjustment. Had to move on to more important stuff.
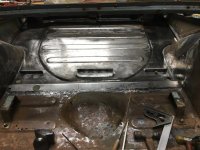
Spent most of the evening removing paint from the spare tire pan while the boot floor is out. This should make it a lot easier when it gets sand blasted. Working on a plan of attack to weld in the boot floor, maybe this weekend , fingers crossed. Frank
 
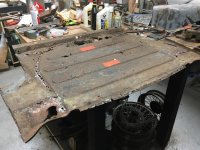
old boot floor.jpgOut with the old boot floor. new boot floor.jpgIn with the new boot floor.
inner wing spotwelds (1).jpgInner wing spot welded to the boot floor.
boot floor clamp.jpgHome made clamp to clamp spare tire pan to the boot floor for plug welding.
boot floor with closing panels.jpgBoot floor upside down, plug welds cleaned up, test fitting closing panels at the rear. before I get too far along more fitting of panels to make sure everything lines up. so far so good. This part has taken a lot longer than I thought but I have spent a lot of time making sure everything lines back up. Too bad none of this will be seen. I feel sorry for the next guy that has to take it apart. around 250 spot welds to take the boot floor out. 100 plug welds in the spare tire pan alone. My plug welds won't drill out like the factory welds did. All and all very happy with this repair. Frank
 
Exemplary work, Frank. Yes, those plug welds are pretty much permanent, so do not make a mistake. I know that from experience. Tom
 
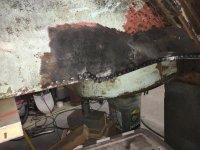
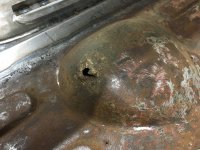
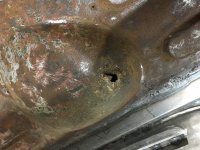
seat floor pumpkin bulge (1).jpg I have seen pictures of this damage before but have not found any description of why it happens. There is a hole in the bulge over the rear end. I believe the vent tube on the rear end hits the seat floor. Is this because the rear suspension is weak and bottoms out or the rubber bumpers on the rear end were worn out and they continued to drive it. Just another repair in a long list. Comments are appreciated as I don't want this to happen again. Last night went very good as I got the boot floor welded to the seat pan, entire weld with no filler metal, fused together and planished, boot floor complete and moving on. Frank
 

Attachments

  • IMG_1290.jpg
    IMG_1290.jpg
    84 KB · Views: 101
Hard to say. My car has several holes on that bulge but the metal is a bit thin so rust outs are not unexpected. My driver has the earlier rear deck so it's no help as to clearance. I'd patch the hole and take the suspension as a separate issue. Perhaps check the leafs for cracks which sometimes show if clean off the crud and probably a good idea to get them replaced or re-arched anyway as it is far easier to do while the body is off.
Tom
 
That hole looks to be in line with the diff breather but it's hard to believe the suspension would be maxed out often enough to make contact with the floor?

Graham
 
I went with new springs made by Eaton Springs. The car rides very well. The British Heritage springs I had got from the UK were too high a spring rate for the TR3A and my original springs were an unknown age and condition.

David
 
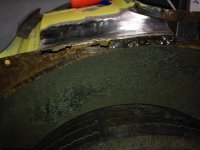
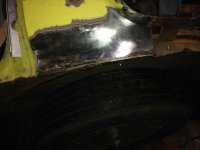
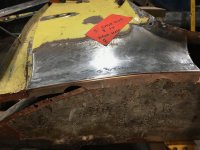
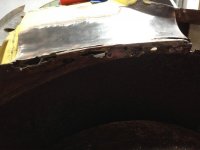
Sorry for the dark pictures, first two pictures are before I added better lights to my shop.
passenger rear inner wheel arch.jpgpassenger rear inner wheel arch in bad shape passenger side rear deck #2.jpgpassenger deck rusted out
passenger rear deck repair.jpgdamaged area cut out
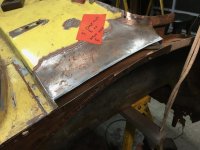
passenger rear deck repair tacked.jpgrepair tacked ready to be welded
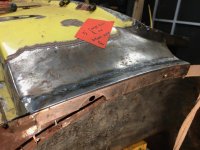
passenger rear deck repair welded and finished.jpgrepair welded and finished. took a lot less time to finish than the driver side, the more you do the better you get I guess.
It is starting to get cold at night so going to have to get propane tank filled for my small heater so I can knock the chill off. Frank
 

Attachments

  • IMG_0169.jpg
    IMG_0169.jpg
    37.2 KB · Views: 97
Your project seems to be a bit of a challenge and kudos to you for meeting that challenge. There are a lot of critical curves and lines that need to match in your repair piece. Well done.
Tom
 
Thank you, Tom. I committed the cardinal sin of buying the first car I looked at that I could afford. I should have looked at it a lot closer , but in hindsight I am accomplishing what I sought out to do and that is to learn new skills. The next car, I will know more about what to look out for. Custom fabrication for 40 years but nothing has challenged me like this has. The journey is longer than I expected but so far it is going ok, thanks to all the support from the forum.
 
Looking great! Just keep plugging one rust hole at a time...and before you know it you can see the end in sight.
 
Thank you John, I have panels made and like you have suggested make the replacement before you cut the damaged area. Finally starting to see it coming back together. Still lots of rusty holes to to repair but starting to see progress. Frank
 
WOW! Coming from a metal Guy! GREAT WORK.
 
When I had my body sand blasted they missed the inside of that section which is a good place for rust to start, fortunately it wasn't as bad as yours Frank so well done again.

Graham
 
One thing I would do if I could do it over is fill the screw holes where the trim panels are attached. Always seemed to be trying to drill a half hole. There were lots of holes where POs must have re done the trim and drilled new holes.

David
 
I agree with you David, I also left some of the holes in the engine bay and as it turned out I should have filled most of them, it's too late after the final paint job.

Graham
 
Thank you for the suggestion, great to know I am on the right track. Sometimes I feel like I am wasting time filling pop rivet holes and screw holes from the PO.
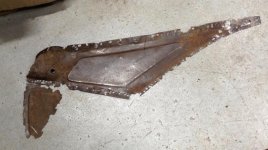
original passenger boot wall and lower closing panel.jpg Passenger side, out with the old. This panel should be one piece.
passenger boot wall closing panel.jpg Replacement panel. I made this in two pieces and welded them together. The lower closing panel is offset 3/8" toward the boot floor flange so I joined the two pieces between the offset and the light bucket. There is a 1/2" flat area there that made a good place to weld and finish out. The offset was put in like the original and matches the original on the driver side. I try not to change anything because I feel it will come back to cause trouble later. I am sure they did it for a reason I just don't see why. Once again planning ahead made for a nice panel but no-one will see it. That is ok there will be plenty of panels and repairs that will be seen, hope they turn out as good.
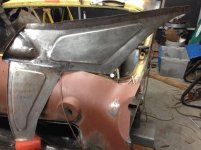
passenger boot wall fitting.jpg Passenger side boot wall and lower closing panel in place. Still have final fitting of top edge and wing mounting holes to drill. Plug weld holes still to drill, lots of checking to make sure outer wing still lines up ok before I do any welding. There is a lot to check and make sure all is good. Taking a little longer than I thought it would but that is usually the case. Frank
 
Minor setback as the back edge of the outer wing did not fit. The passenger lower corner that was rebuilt was a little too far back so after removing the new side closing panel and adjusting the corner and then adjusting the closing panel the outer wing fits nicely. Since this is my first car to restore and I started with a basket case I could use a little insight concerning how good do the wings need to fit. The wings fit pretty much to the mating panels and just a little proud of the boot gutter rails. Where the wing bolts to the back flange matches up good. My car did not have any of the beading so I have no idea how much that will help to hide any misalignment or make it show up more. Does the beading cover the boot side flange where the wing bolts thru the flange?
wing test fit.jpgThis is first fit up with the closing panel in place. The wing only has 2 bolts holding it . One at the top of the wheel arch and one at the corner of the boot opening.I don't feel like I need to spend a lot of time fitting the wing because it still needs cage nuts welded on as well as flange work and the front of the wing repaired. Still going slow trying to see how things line up and that it looks reasonably like the other side. Going to be very cold next week so weather is going to slow progress down. Comments are welcome. Frank
 
Hello Frank,

It looks like you have it in the right place and the wing beed conceals the join quite well. I made some adjustments to the outer angle of the side gutter to where it looked like it should be but after final fit out the fender mounting bolt heads were rubbing on the trunk lid. The only thing I could change at that late stage was to file the heads of the bolts to get clearance .
Can someone turn them right way up for me, thank you
Graham
IMG_1840.jpg
IMG_1837.jpg
IMG_1835.jpg
 
Back
Top