• Hi Guest!
    You can help ensure that British Car Forum (BCF) continues to provide a great place to engage in the British car hobby! If you find BCF a beneficial community, please consider supporting our efforts with a subscription.

    There are some perks with a member upgrade!
    **Upgrade Now**
    (PS: Subscribers don't see this gawd-aweful banner
Tips
Tips

BN4 Longbridge interior

Thanks again Jim!

Yes, your workshop looks surprisingly similar to mine. I'm not brave enough to drill holes through new paint though so I'm doing a full build in bare steel first which is slightly complicated by the fact that our house is on the market and we are moving 500 miles down country in March. I'm thinking first drive is going to be rat-rod style with no paint...

Andy.
 
Bob,
Thanks I hope to work on the left door tomorrow and get that done as well. I come from Porsche 356 restoration background so I know the importance of proper gaps.

Andy,
Wow good luck with the move. That can't be easy doing it mid-restoration, but moving is never convenient.

Got some work done today on the seat upholstery. I did the typical drill out of the replacement foam with a hole saw, so hopefully that will give a little softer seat. I started with gluing up the center section only and placing heavy books (quality books are the key
icon10.png
) then let it sit for a couple hours. I then glued the rest of the top in place, but not the sides as they will need to flex and compress with seat movement. I then started at the front center and pulled the material down and around the bottom and stapled it in place. Then I went to each corner and did the same making sure the top and sides were not buckling or wrinkling and was smooth. I then stapled between the center and the corners. Then I moved to the back corners and did the same. The last to attach was the rear section which was actually the pleated center leather section. I stretched and stapled it in place. Once done it looked good except when I test fit it in the car I noticed the holes I had put in the foam was shedding small scraps of lint and foam pieces so I decided to attach a vinyl catch panel on the bottom side to prevent dirtying the carpet. The right side seat is drying under the book press tonight so I can finish it tomorrow. Then I can start on the back rests once they get back from the powdercoaters.

Jim
 

Attachments

  • 2013-02-05 007.jpg
    2013-02-05 007.jpg
    86 KB · Views: 109
  • 2013-02-05 008.jpg
    2013-02-05 008.jpg
    87.3 KB · Views: 100
  • 2013-02-05 006.jpg
    2013-02-05 006.jpg
    93.7 KB · Views: 96
Heres a picture of the underside vinyl catch panel and a picture of the seat bottom in the car.

Jim
 

Attachments

  • 2013-02-05 009.jpg
    2013-02-05 009.jpg
    96.5 KB · Views: 95
  • 2013-02-05 010.jpg
    2013-02-05 010.jpg
    96.4 KB · Views: 89
Looks like Randy's gettin' ready to fire up the ol' still (or have I been watching too much 'Moonshiners' lately?).

Now that the rollbar is off Randy's Healey, it has been finding use as a condenser.
You guys are hilarious! The corn was for all the ducks I'd feed along the creek behind the house in Ohio (at one point, I had them eating it out of my hand) but it did do a nice job conforming to the shape of the backrests, keeping the pleated center section in cotact with the foam until the adhesive dried.


I just couldn't commit myself to cutting the holes in the carpet to fit around the rollbar, even after taking out the SCCA/GCR version and making one that fit under the soft top (still passed the broomstick test). I have them (both) still, you know, for after ther carpet wears in a bit...
 
Randy,
Thanks for that tip. Don't have corn but being in Louisiana we buy our rice in big sacks like that. I can see how it would be better than books for the backrests. It will conform to the shape of the backrest and be heavy enough at the same time.

Got the other seat bottom done today. One thing I thought about today was a trick I use to make sure there are no wrinkles along the edges of the seat. When glueing up the cushion to the foam, be sure the sewn hem is laying flat and even the entire way around the cushion. I took a picture today to try and show that.
 

Attachments

  • 2013-02-06 002.jpg
    2013-02-06 002.jpg
    81.5 KB · Views: 87
  • 2013-02-06 003.jpg
    2013-02-06 003.jpg
    92.4 KB · Views: 82
  • 2013-02-06 009.jpg
    2013-02-06 009.jpg
    91 KB · Views: 87
  • 2013-02-06 011.jpg
    2013-02-06 011.jpg
    98.1 KB · Views: 81
I also was able to get the left door on today. One tip for installing the doors I can pass on is to make some short studs to help align the hinge to the nut plates. I found the nut plates could fall down a little making screwing in the screws tricky. I took a bolt, cut the head off, and cut a slot in the end to allow a standard screw driver to install and remove them once a few screws are in place. The car is now complete of all panels and trim. The only things left are the rear seats and front backrests. Then I can finish the top (went with canvas instead of vinyl). I also have a hardtop I will be restoring to use with this car. We will be entering this car in the local World of Wheels show in a couple months so it will need to be done for that. Sending in the registration for the show tomorrow so needed some pics of the car to send with the registration.
 

Attachments

  • 2013-02-06 008.jpg
    2013-02-06 008.jpg
    96.4 KB · Views: 84
  • 2013-02-06 004.jpg
    2013-02-06 004.jpg
    96.8 KB · Views: 87
  • 2013-02-06 007.jpg
    2013-02-06 007.jpg
    97.4 KB · Views: 158
  • 2013-02-06 001.jpg
    2013-02-06 001.jpg
    91.9 KB · Views: 93
Randy,
Thanks for that tip. Don't have corn but being in Louisiana we buy our rice in big sacks like that. I can see how it would be better than books for the backrests. It will conform to the shape of the backrest and be heavy enough at the same time...
Oh yes, rice is still a big staple in our house too__twenty (20) years of Southern Louisiana cooking will do that to you! I well remember the Boudreaux & Thibodeaux joke about the Martian that landed on the Atchafalaya levee: "Boudreaux, waz dat?" "I dunno Thibodeaux; put on some rice..." I mean, there's an awful lot of truth in that :smile:
attachment.php


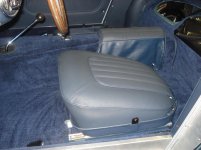
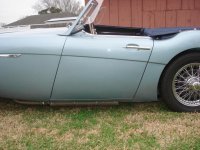
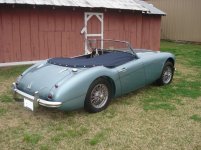
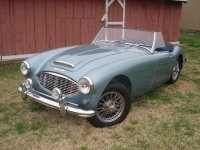
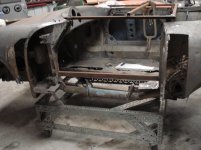
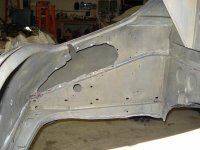
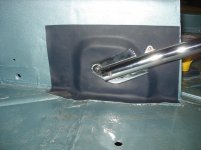
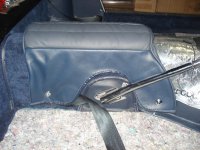
Wow Jim, that's sure coming along nicely! How do you compare doing the Healey restoration to the 356s? Healeys, though of simple architecture, are notorious for poor fitting bodywork__even when new. The mechanicals are simple enough, and plenty robust, perhaps even to a fault.
I drive mine every chance I get (which is frequent, often a couple times a week) and at ten plus (>10) years since it was painted, still looks 99.9% flawless, so I hope that you guys will do the same (I understand keeping it fresh and doing shows for a couple years, but she needs to be exercised or the mechanicasls__brakes in particular__will go to crap). Sportscars in shows always look better with the tires scrubbed in, especially where the tread rolls over onto the sidewalls!

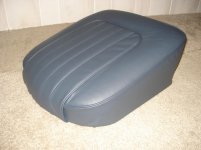
Good job Jim, and I'm really glad to see you posting all the pictures of your work, as you have already seen, very valuable to the rest of the patrons here (and I can assure you, the benefits are much farther reaching than from those that are regular posters, as many-many more view than comment).
 
Randy
The healey is much more time consuming to restore than a Porsche 356. The Porsche is better engineered than the Healey. By that I mean Porsche makes a part or component work with as few parts as possible yet still function (and very well at that). Healey on the other hand seem to need much more parts to accomplish the same task and still not seem to do it as well. Take the park brake system for example. The Porsche uses a 3 cables the handle mechanism and the lever inside the drum and that is it, and most Porsches whether they have been restored or maintained properly still have a functioning e-brake. The Healey uses what, the handle a cable a pivot lever a long cross lever two more levers some springs and then the parts inside the drum. Very complicated and easy to get wrong and not have it work well. Even that being said I say the Healey is a prettier car all around. When you open the engine bay of a Porsche 356 all you see is the engine. and while pretty once restored there is nothing spectacular about it. The Healey on the other hand is quite pleasing to look at, every thing is laid out in the engine bay to be pretty. All the brake lines are neatly run and in a logical order, all the wiring is neatly run with clips holding securely. The underside of a healey is also very nice to look at, the Porsche is just flat and undercoated (functional but not too pretty). Last year I just finished a Porsche 356 speedster and from the painted body shell to a completed running car took about 4 months (working about 2 days a week on it). This Healey has been since October of 2011 and I have about one more month left. Now the speedster we had the front seats done by someone else because they are tricky seats with a lot of hand stitching.

As for driving this car, you bet it will get driven. We will probably put a few local drives just to check out all the systems and the initial shakedown stuff but that will be it until after the first two shows (the first in April then the conclave in June). After that it will get rotated with the other cars but still get used without any concern of it being a "show queen".
 

Attachments

  • speedster done 021.jpg
    speedster done 021.jpg
    87.1 KB · Views: 86
  • speedster done 014.jpg
    speedster done 014.jpg
    94.8 KB · Views: 92
  • speedster done 017.jpg
    speedster done 017.jpg
    94 KB · Views: 81
Last edited:
I would have imagined so, just from the little I know about Porsches. That Speedster looks gorgeous and am I correct to assume that the 3-point belts and fan under the dash are modern concessions to the driver's safety & comfort?

I missed you the last time we were in town, but I hope that we can all get together the next time, I'd like to see those babies up close!
 
The speedster didn't always look quite so nice. I think these open top German cars rust just a well as the open British cars. Check out a couple before pics. Yes the seat belts are definitely a modern touch for safety as these cars are meant to be driven. The fan is actually a period accessory (6 volt) with rubber fan blades. It's a neat little item and actually moves a good bit of air. Yes, next time you are back in the area call us to come for a visit. We could all jump in a car and go for a cruise.
Jim
 

Attachments

  • body 104.jpg
    body 104.jpg
    87.5 KB · Views: 90
  • body 86.jpg
    body 86.jpg
    90.3 KB · Views: 95
Jim,
i finally got my longbridge upholstery mostly installed this weekend and was wondering if you had pictures of the door and footwell panels. Why is the one footwell cutout? Also, wondering if you installed seat belts and if so how/where. I was reading Roger Moment's suggestion for tapping into the inner sill for strength, but I don't think it will be easy because of the way the rear panel re on our cars. Thoughts....
thanks,
rich
 
The right side footwell panel is cut out for more clearance for the feet on right hand drive cars. The area of the cut out will have matching vinyl glued directly over the inner metal panel. My attached picture shows the vinyl before the actual kick panel goes on. I have only the one picture of the finished door panels installed. They are pretty straight forward in putting them on. I did put in lap belts. I welded special seat belt nut plates behind the driveshaft tunnel panel. For the outboard sides I welded in the nut plates to the inner rockers shile I was repairing the outer rockers and had them opened up. I think the pictures will show what I am talking about.
 

Attachments

  • 2013-01-08 002.jpg
    2013-01-08 002.jpg
    196.5 KB · Views: 101
  • 2013-01-16 012.jpg
    2013-01-16 012.jpg
    183 KB · Views: 89
  • healey 064.jpg
    healey 064.jpg
    197.4 KB · Views: 94
  • 2012-09-13 september 2012 021.jpg
    2012-09-13 september 2012 021.jpg
    196 KB · Views: 90
Heres a couple pics of the seat belts installed after the carpet was in. The center belts can hide under the armrest if you would want them not visible at a show. To hide them I remove the armrest via the tenax snaps and then criss-cross the belts over the top of the tunnel and then re-attach the armrest over top of them. The side belts can lay flat and tuck along the inner rocker panel between the seat and carpet.
 

Attachments

  • 2013-01-16 009.jpg
    2013-01-16 009.jpg
    191.6 KB · Views: 88
  • 2013-01-09 013.jpg
    2013-01-09 013.jpg
    196 KB · Views: 86
  • 2013-01-16 008.jpg
    2013-01-16 008.jpg
    195.1 KB · Views: 92
Did you recover the seats yet? Are you doing them yourself or having them done? I have photos of the front seats (longbridge specific) to upload one of these days.
 
Thanks so much for those photos. They are very helpful. I will attempt to install my interior panels tonight. Unfortunately, I did not think about how to install the seat belts when I could have welded bolts in so I will now need to cut open the sill from the top as Roger show in his guide, then notch out the rear panel to hide it. I will also need to figure out where to place the shoulder anchor point.
The seat were made at AHSpares. Here's the link to my album: https://picasaweb.google.com/110087349657726745747/57AustinHealey#
Any pictures and pointers for installing the hood (top)? That's up next...
thanks,
rich
 
Rich - Great photos!!!! thanks for sharing. I can't wait to see the car at Encounter!!!! I have a question. I see that you placed carpet behind the back of the rear seat? Can I ask why this was done? Actually no one will ever see it, but in all the Longbridge cars that I have seen this area was just covered in the vinyl and not carpet. But what do I know??? thanks again for sharing jim:driving:
 
Jim,
Good eye. Did you also see the uncovered rear wheel arches? When AHSpares made my interior they sent carpet not vinyl. In fact they have been searching unsuccessfully for months now to obtain enough matched vinyl to cover the rear arch wells and behind the rear seat. Since I didn't like it uncovered I decide to place the carpet for now. Tonight I will try to determine if there is enough extra vinyl to cover the wheel arches. I'm working so hard to get her close to finished for Encounter 2013.
Best,
rich
 
Back
Top