
-
 Hey Guest!
British Car Forum has been supporting enthusiasts for over 25 years by providing a great place to share our love for British cars. You can support our efforts by upgrading your membership for less than the dues of most car clubs. There are some perks with a member upgrade!**Upgrade Now**
(PS: Upgraded members don't see this banner, nor will you see the Google ads that appear on the site.)
You are using an out of date browser. It may not display this or other websites correctly.
You should upgrade or use an alternative browser.
You should upgrade or use an alternative browser.
TR2/3/3A Beginning the TR2 Bodywork
- Thread starter CJD
- Start date
OP
CJD
Yoda
Online
Week 38
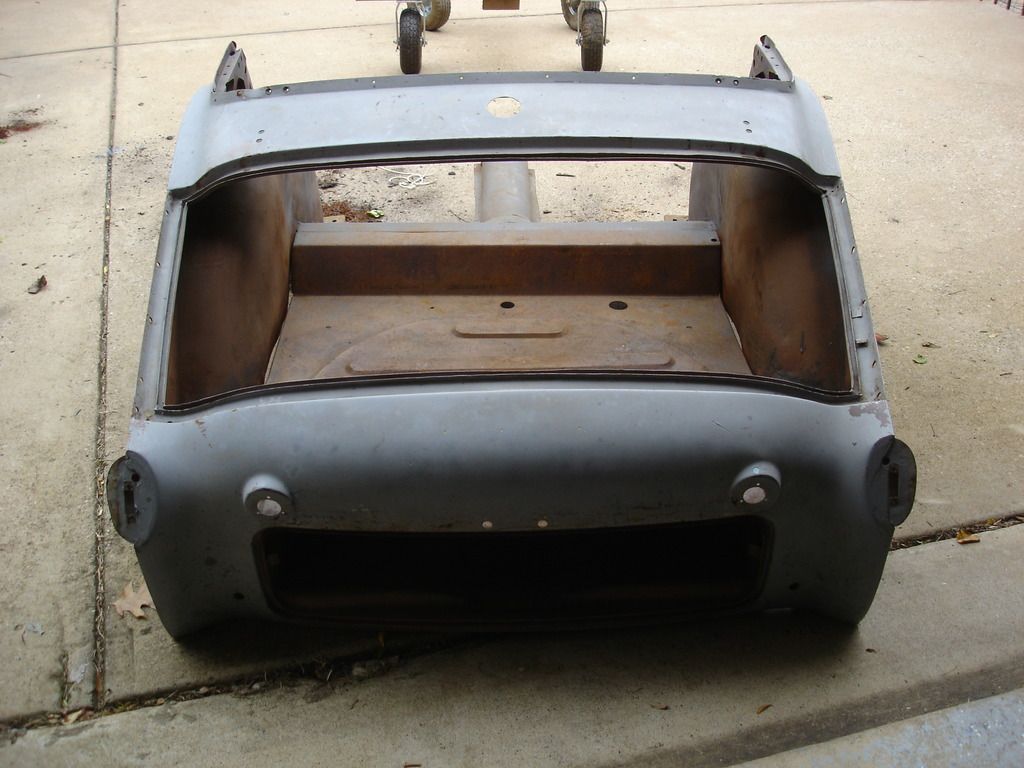
The last 2 weeks were spent organizing the last part of the tub...I'll choose to call it the "fantail", in keeping with the great British nautical tradition. Part of the organization fell to depression as I realized what bad shape the fantail is in.
As I approach the end, I have come to realize that the donor car was a mistake. While better than the TR2, it is far from the "solid" car I was told that it was. No more sight unseen car purchases for me. Anyway, time to get going...
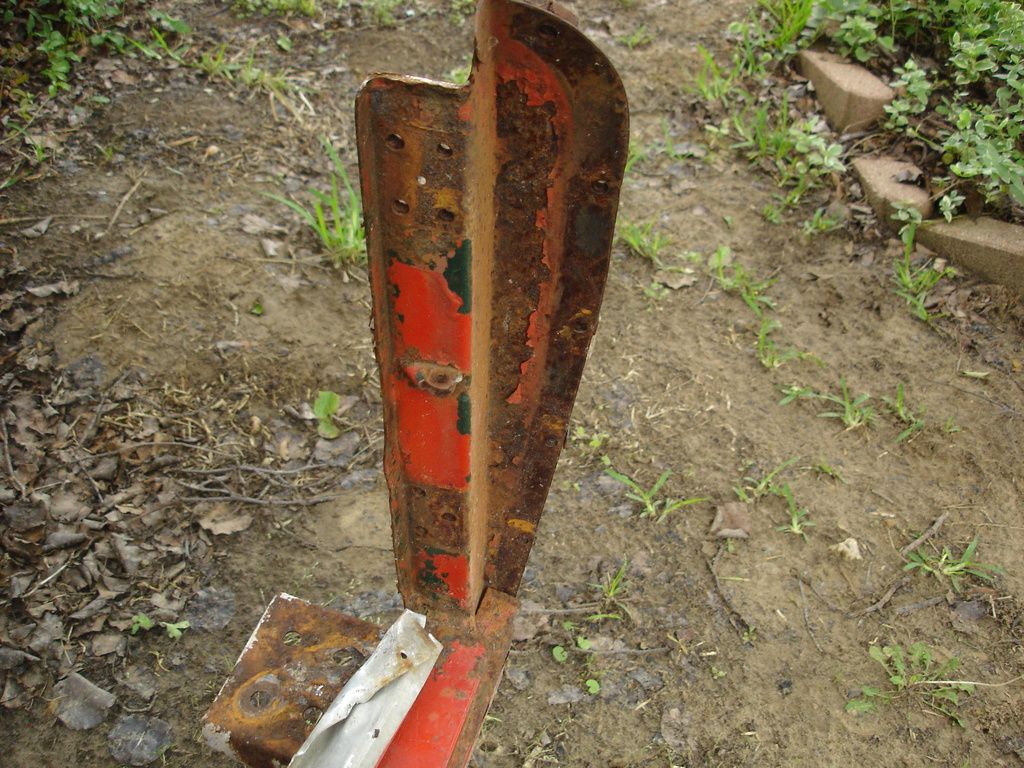

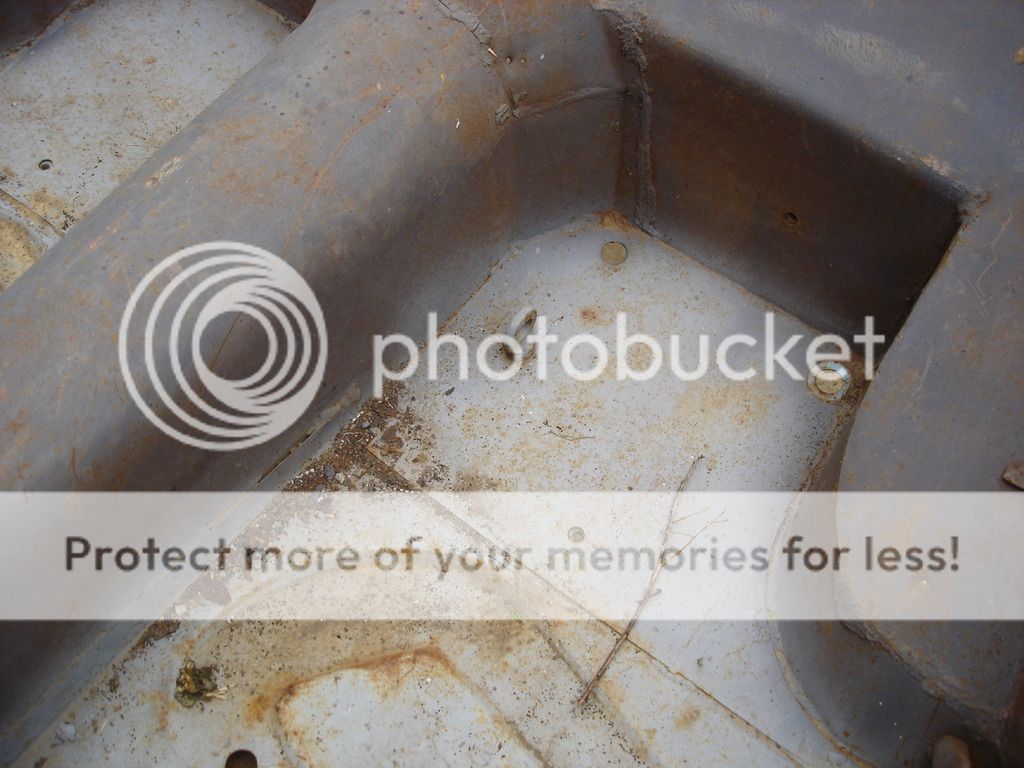
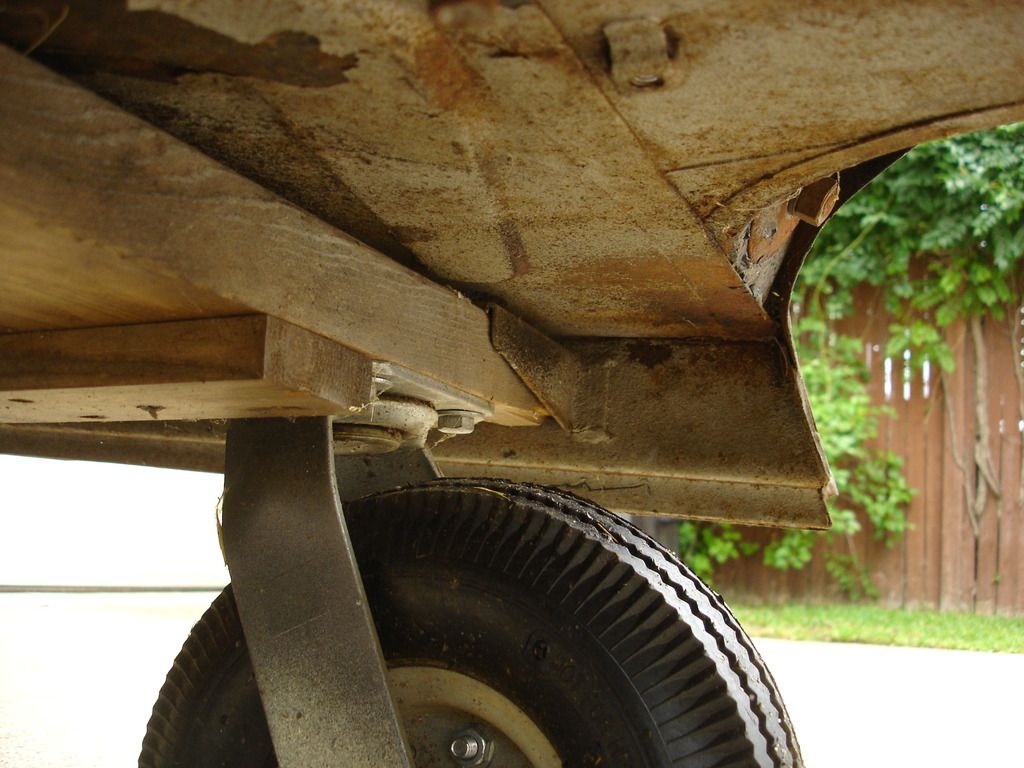
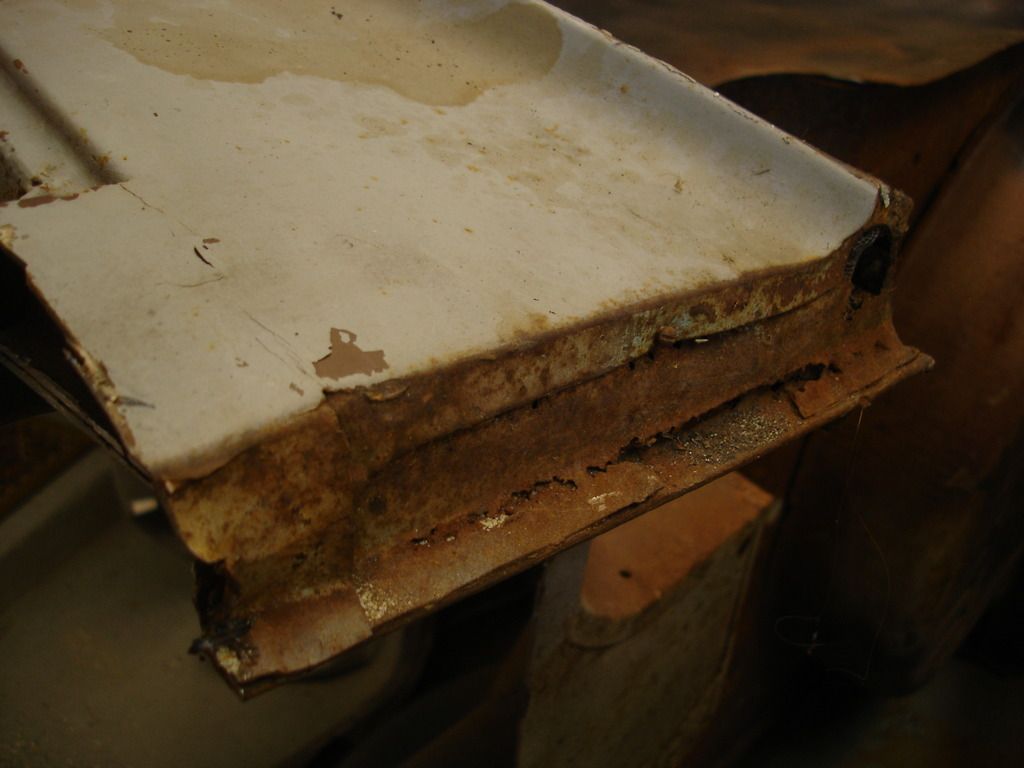
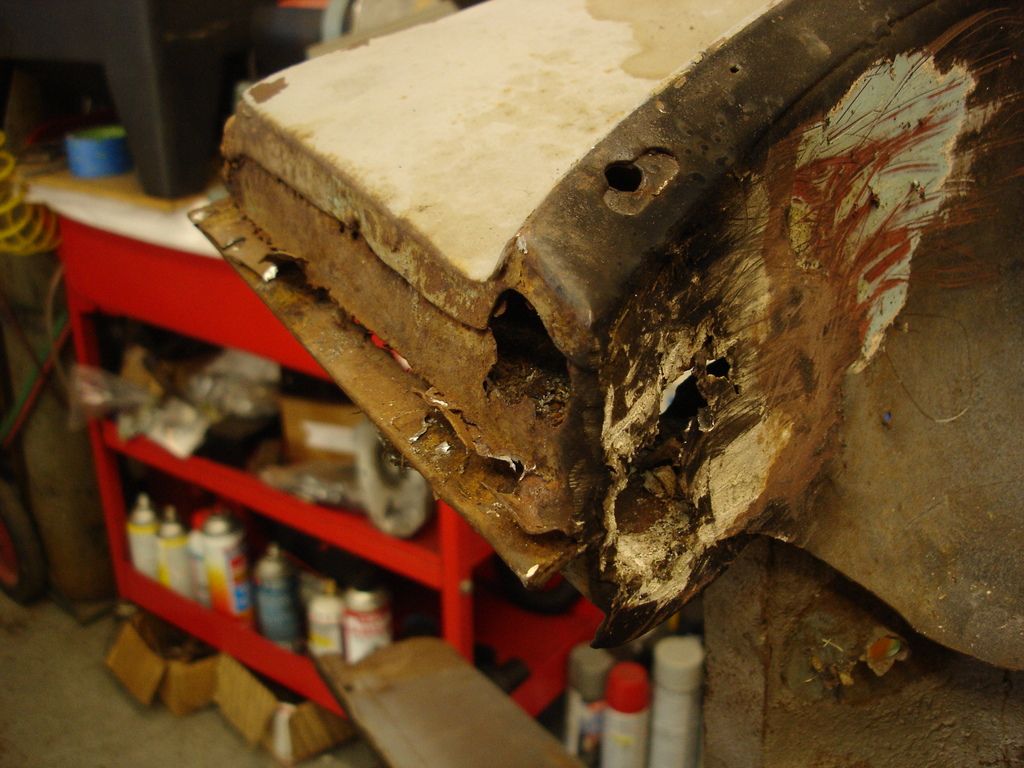
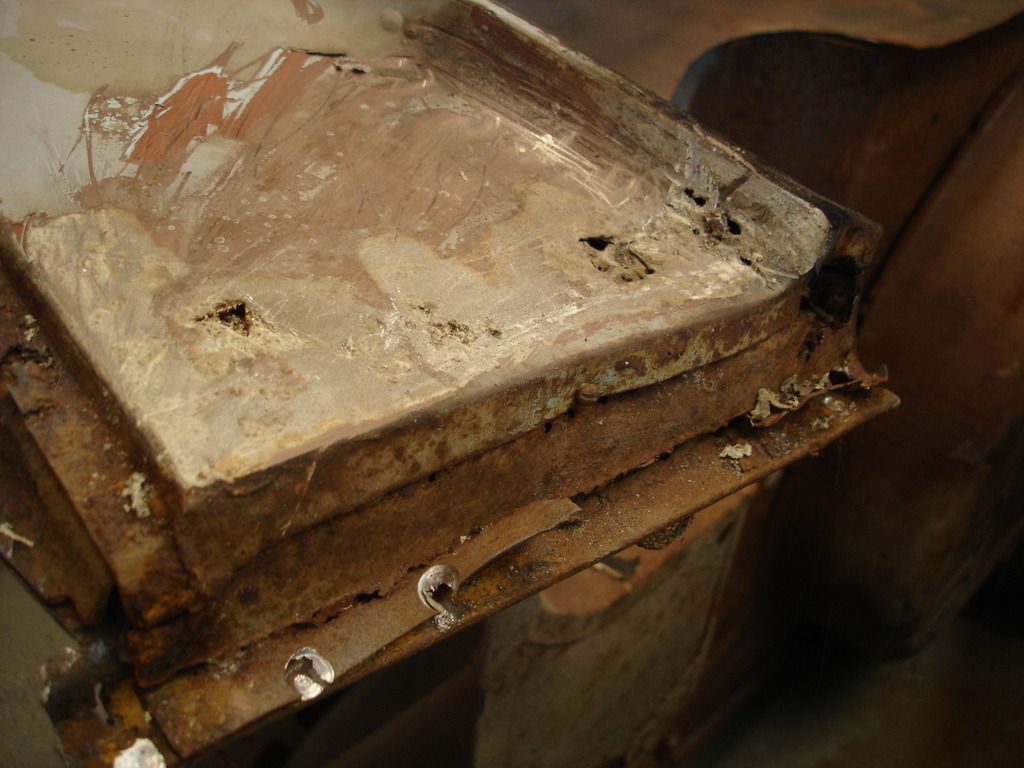
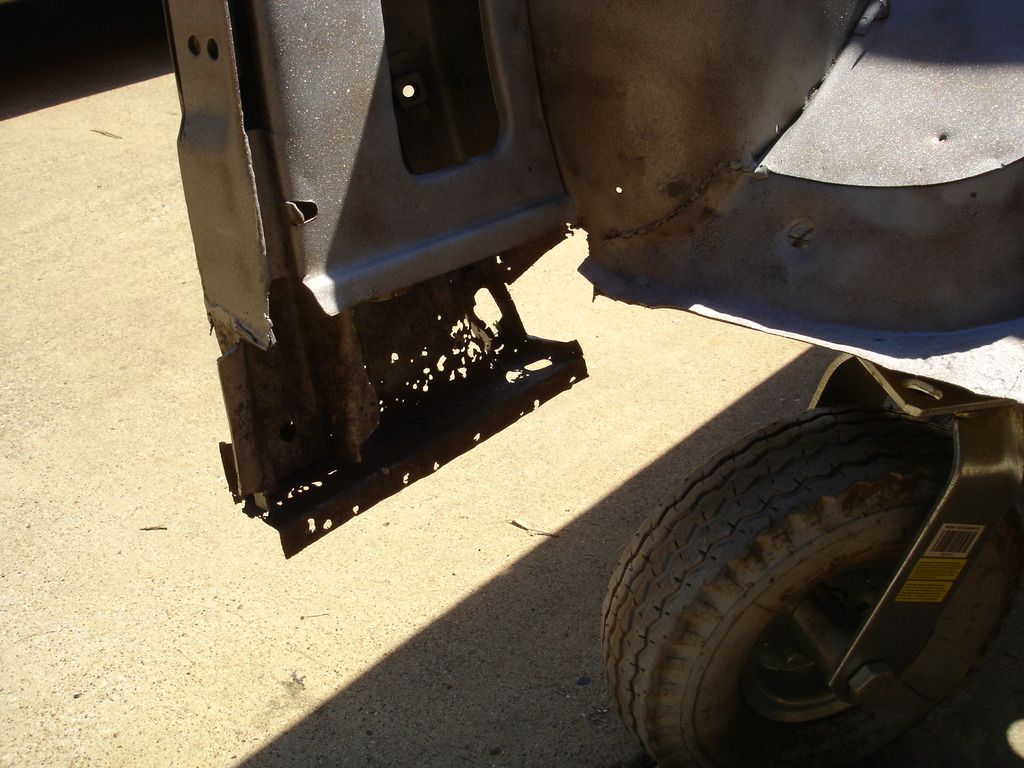
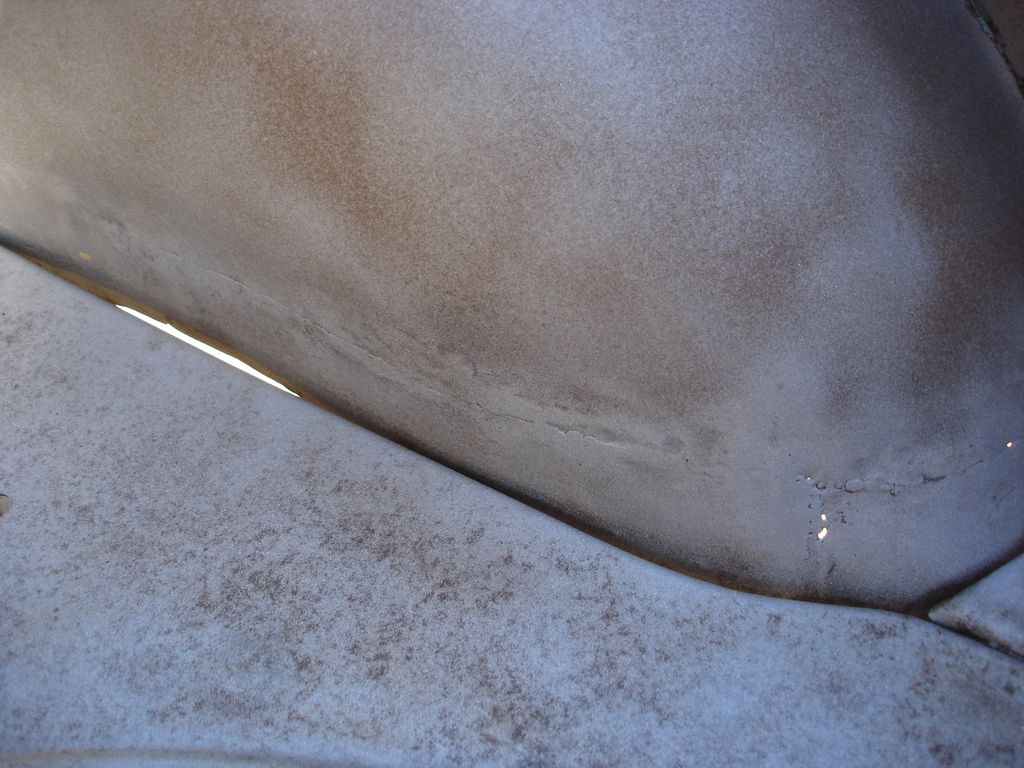
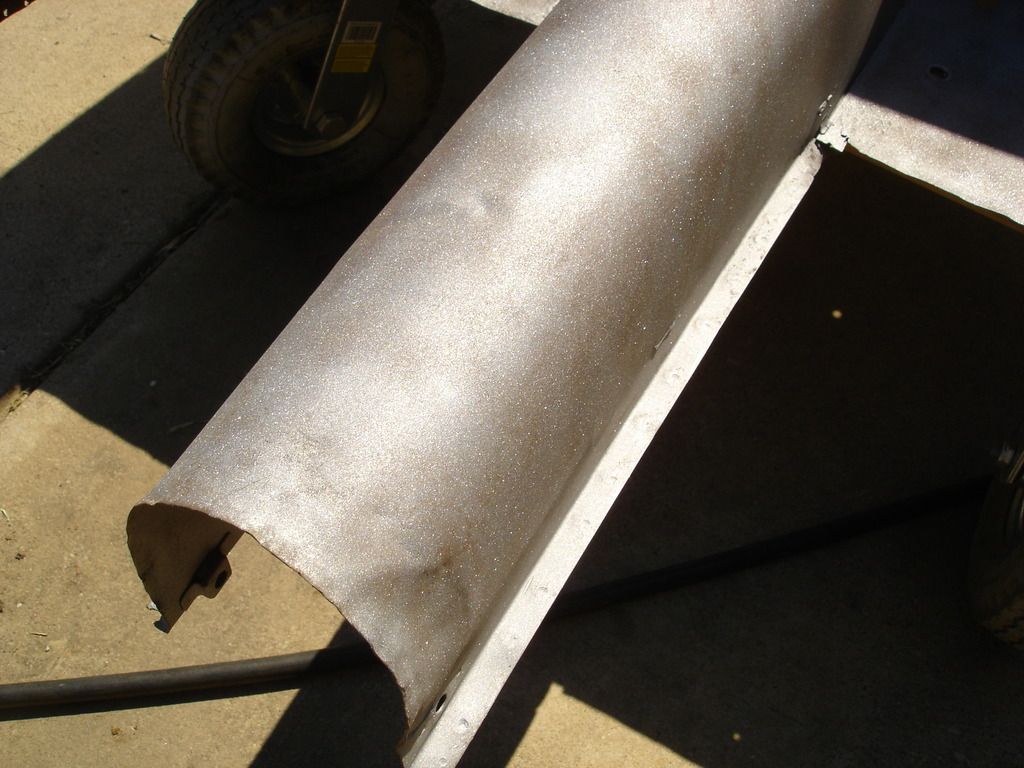
First on the agenda is the left and right "A" posts. The first 2 pics are of the right side post, which is straight, but rather badly pitted. The second 2 pics are the left post, which, in addition to the rust, is also bent from a prior accident. We will use the donor car's "A" posts, so time to remove them.
Starting with the left "A" post, I will use a cutting disc on a 4" grinder to make quick work of it.
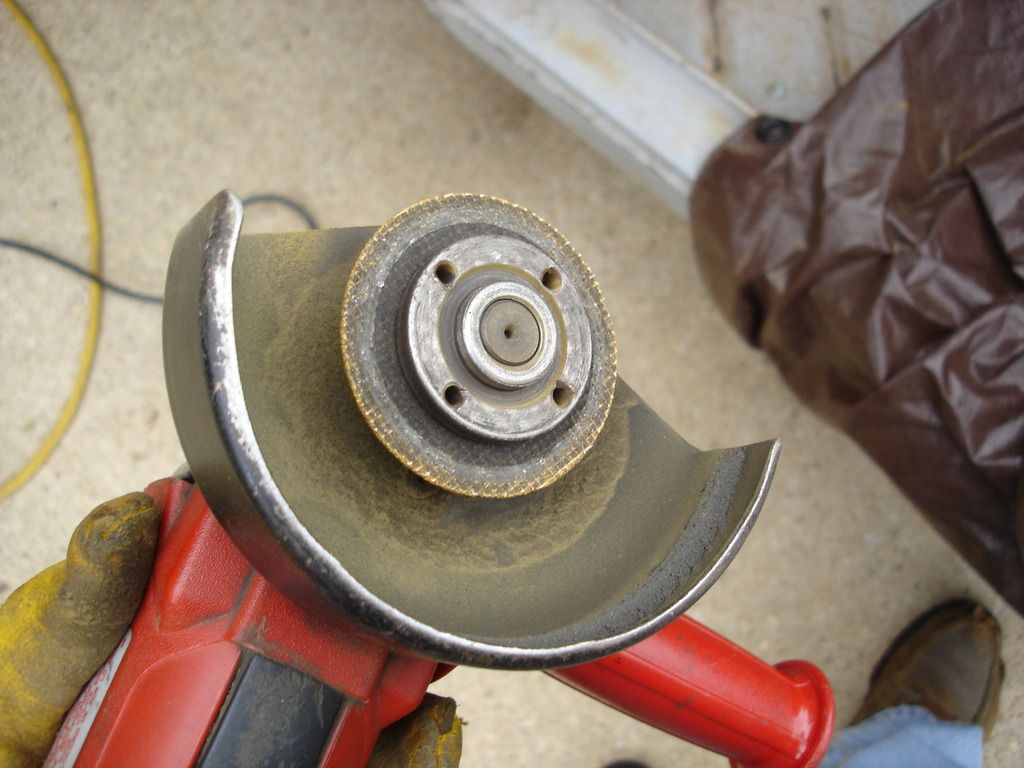
This is a 4" grinder with 2 inches of disc left...you go through a lot of these discs, like 2 per post. But nothing works quicker.
Slices through the left inner kick panel.
Slices through the lower sills, floor and kick panel.
Slices through the outer scuttle.
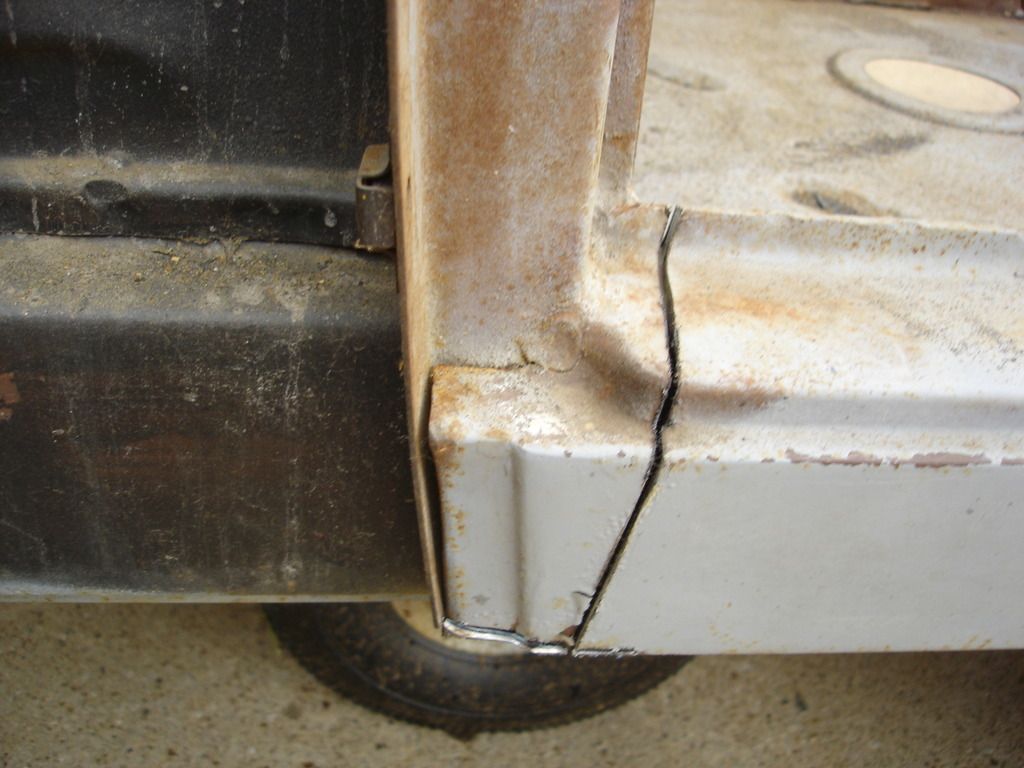
Slice through the outer sill.
The upper end of the post is now free.
On the bottom, the post is welded to the inner sill, so the outer sill has to be peeled back, and then the weld joint can be ground off. The first post is free.
The last 2 weeks were spent organizing the last part of the tub...I'll choose to call it the "fantail", in keeping with the great British nautical tradition. Part of the organization fell to depression as I realized what bad shape the fantail is in.
As I approach the end, I have come to realize that the donor car was a mistake. While better than the TR2, it is far from the "solid" car I was told that it was. No more sight unseen car purchases for me. Anyway, time to get going...


First on the agenda is the left and right "A" posts. The first 2 pics are of the right side post, which is straight, but rather badly pitted. The second 2 pics are the left post, which, in addition to the rust, is also bent from a prior accident. We will use the donor car's "A" posts, so time to remove them.

Starting with the left "A" post, I will use a cutting disc on a 4" grinder to make quick work of it.

This is a 4" grinder with 2 inches of disc left...you go through a lot of these discs, like 2 per post. But nothing works quicker.

Slices through the left inner kick panel.

Slices through the lower sills, floor and kick panel.

Slices through the outer scuttle.

Slice through the outer sill.

The upper end of the post is now free.

On the bottom, the post is welded to the inner sill, so the outer sill has to be peeled back, and then the weld joint can be ground off. The first post is free.
OP
CJD
Yoda
Online
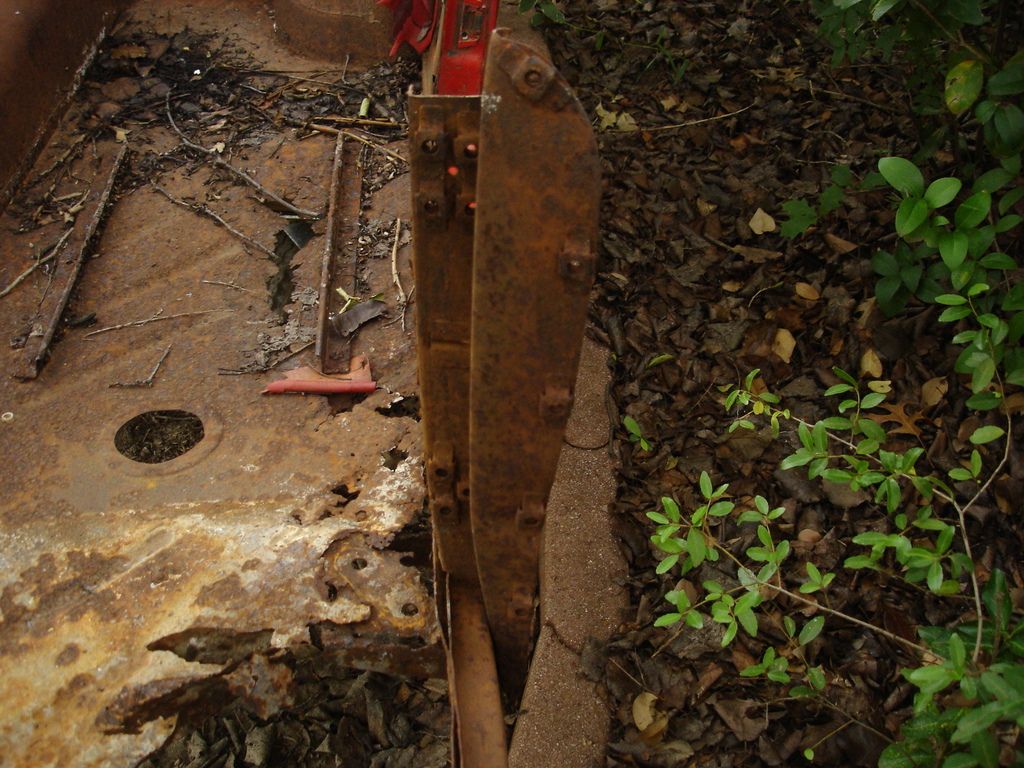
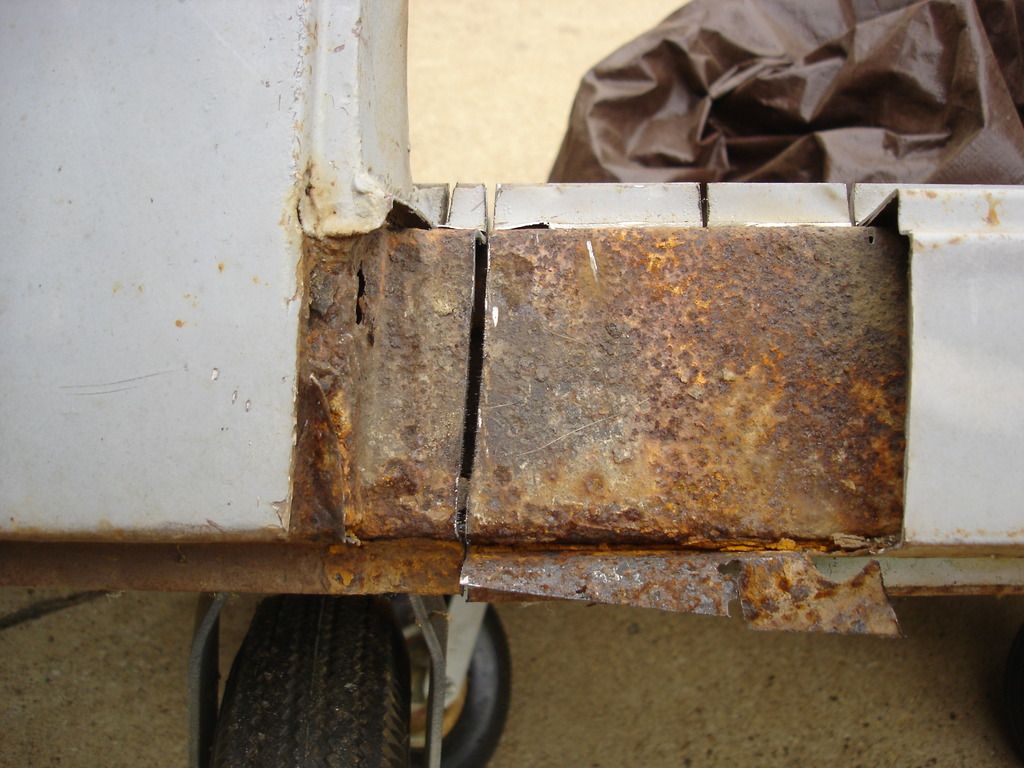
The right side "A" post came out in an identical fashion.
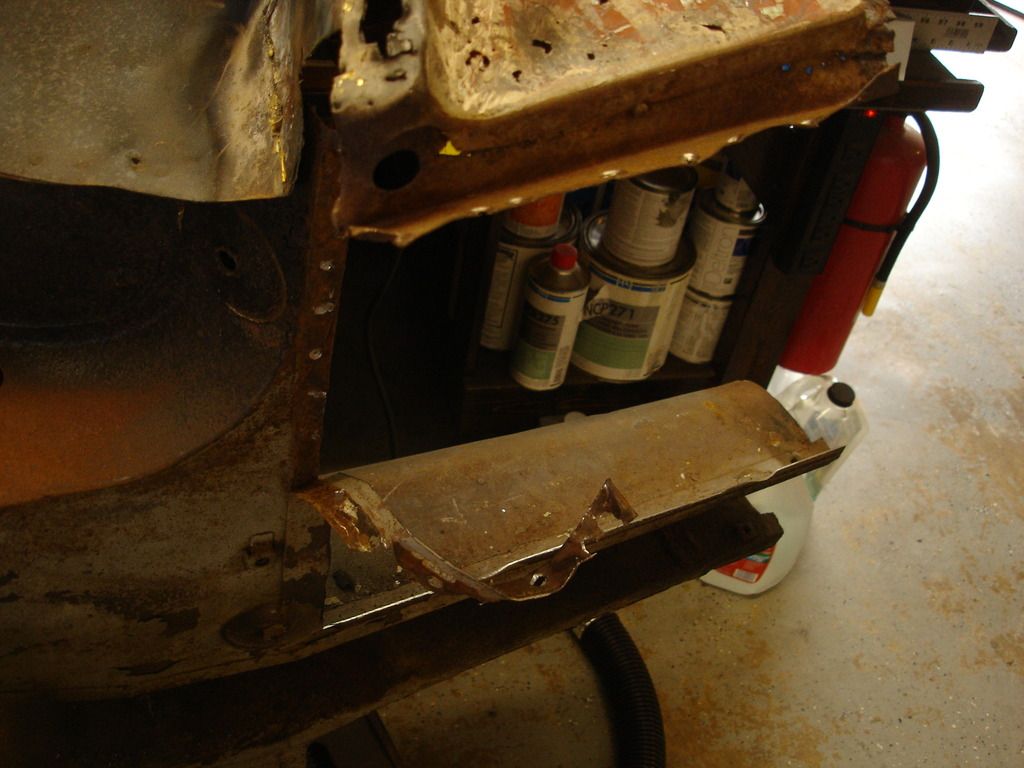
Now it's time to separate the fantail from the inner and outer sills. I'll do this is 2 steps. The first will be to cut the sills off, so I can then, secondly, separate the inner sill while on the bench. Notice the PPO added seat belt anchors. They are not installed the same left and right side, and they are not as the dealer would have done it. They will have to come out and the holes plugged.
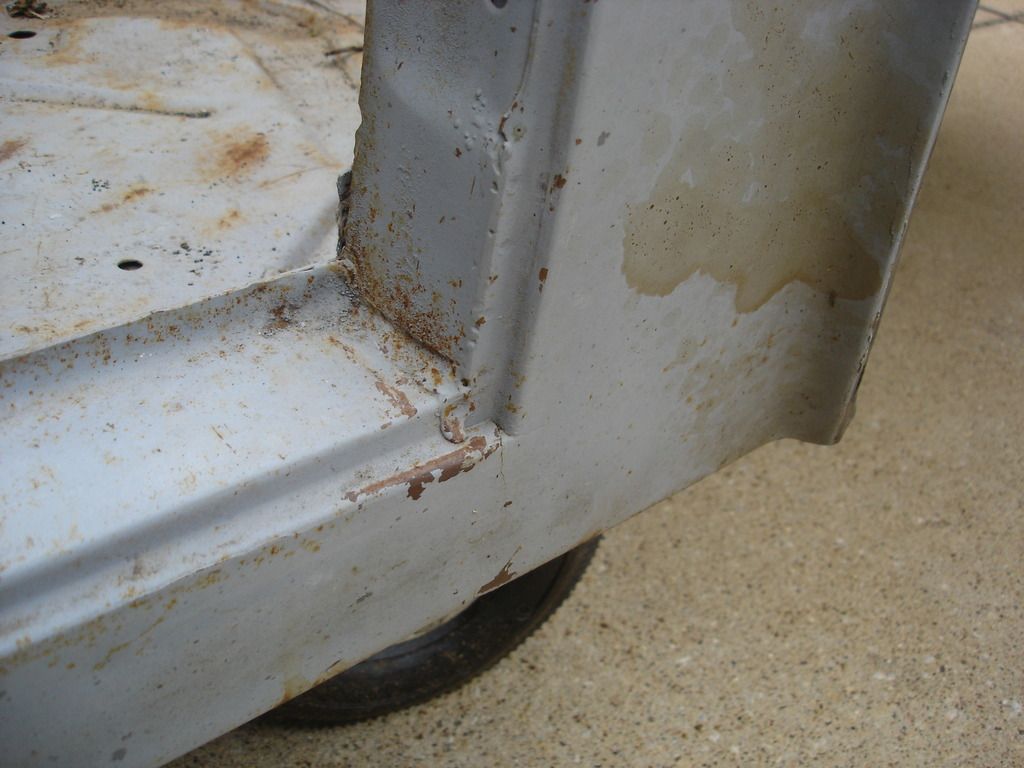
Here is the starting point for the separation.
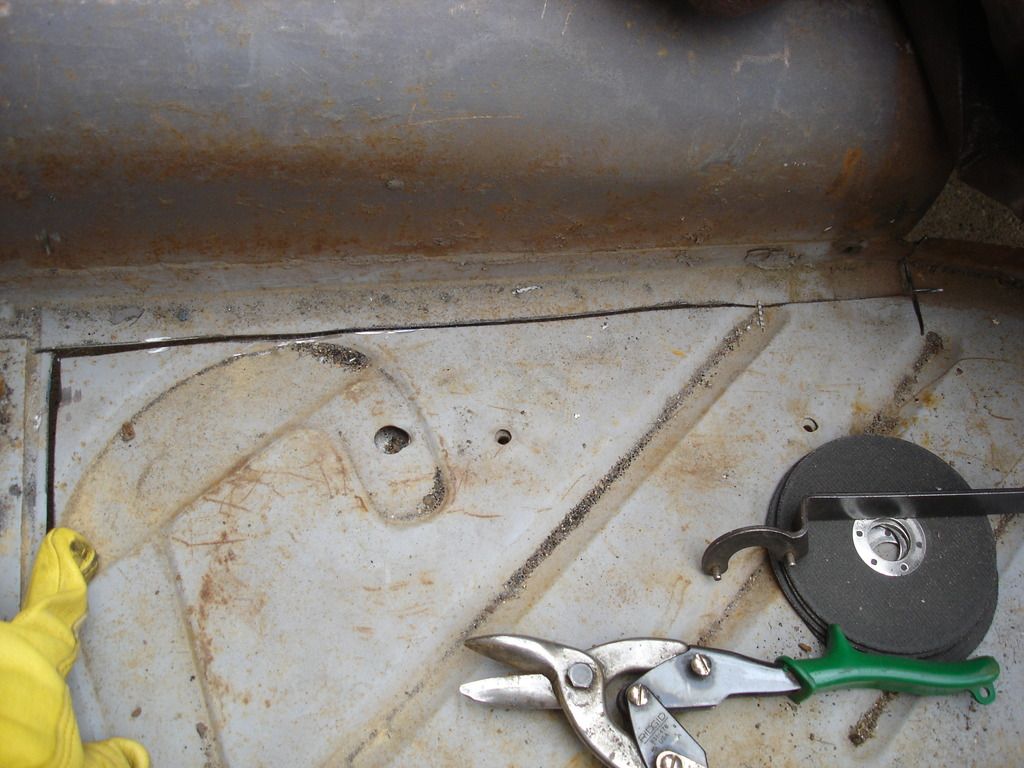
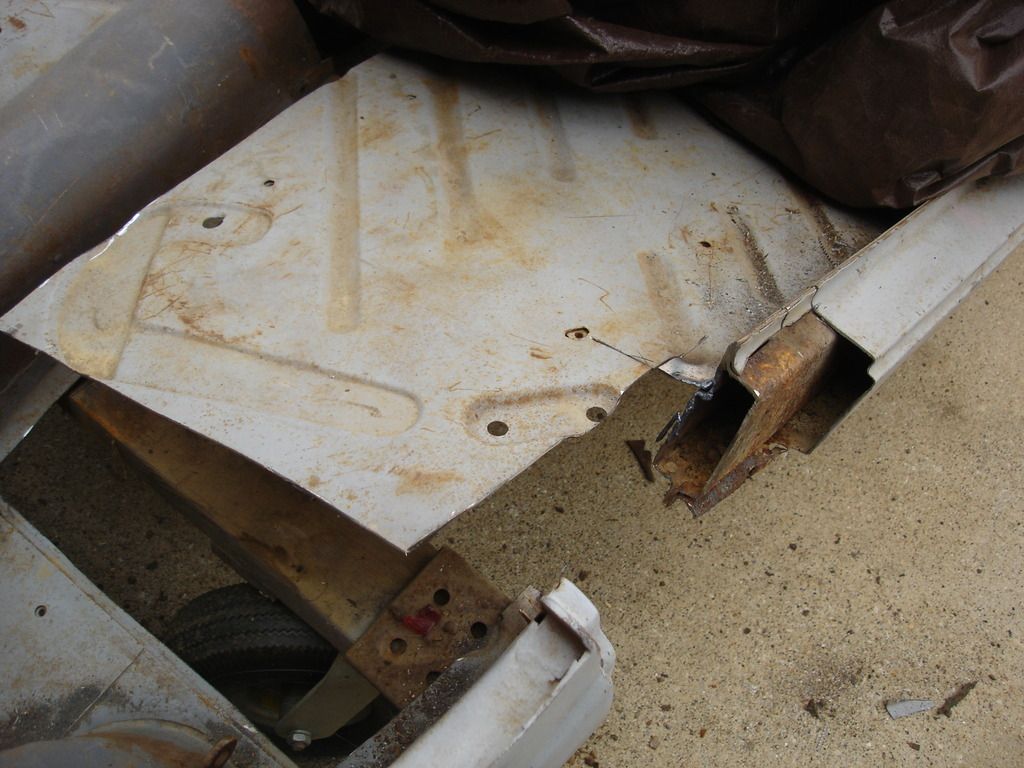
The floor will be replaced, so the rusted floor in the donor car is expendable. Here I am cutting the forward floor from the rear of the floor where it transitions to the differential bump.
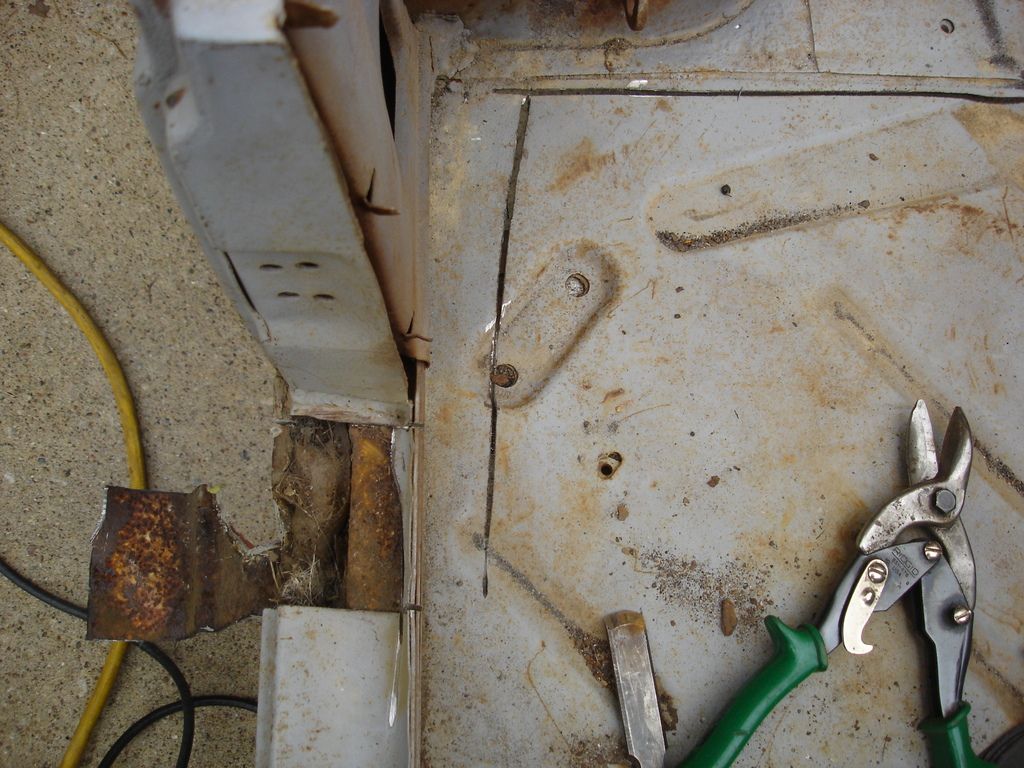
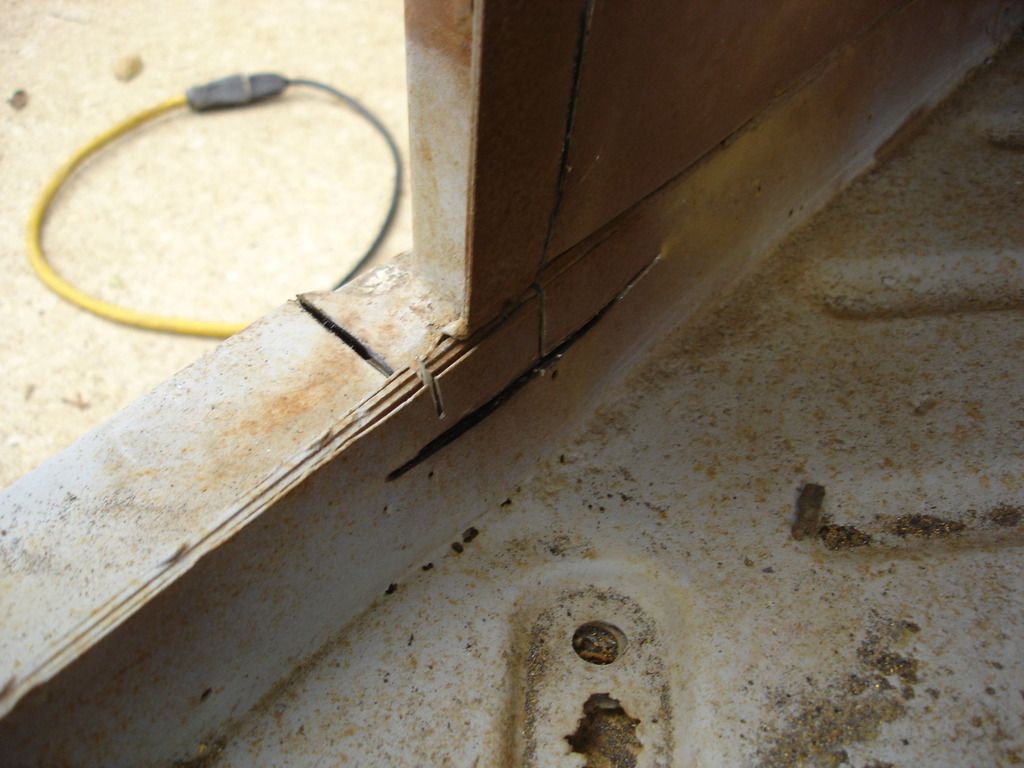
The cut continues around and goes through the outer sill, which gets peeled back for access to the inner sill.
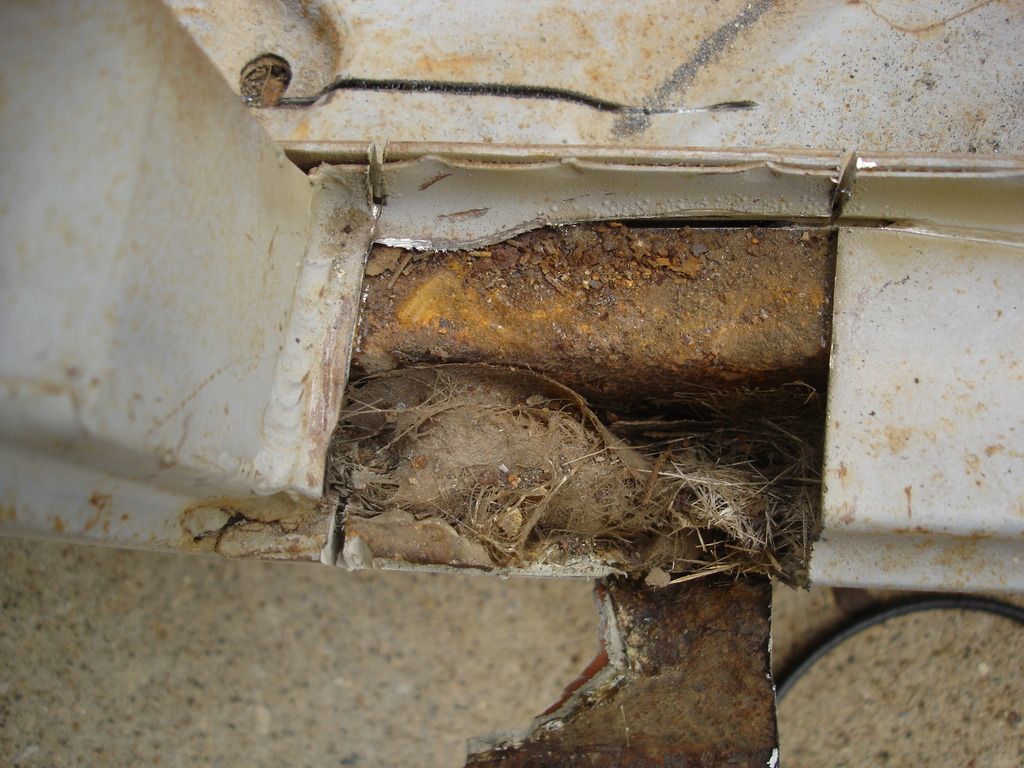
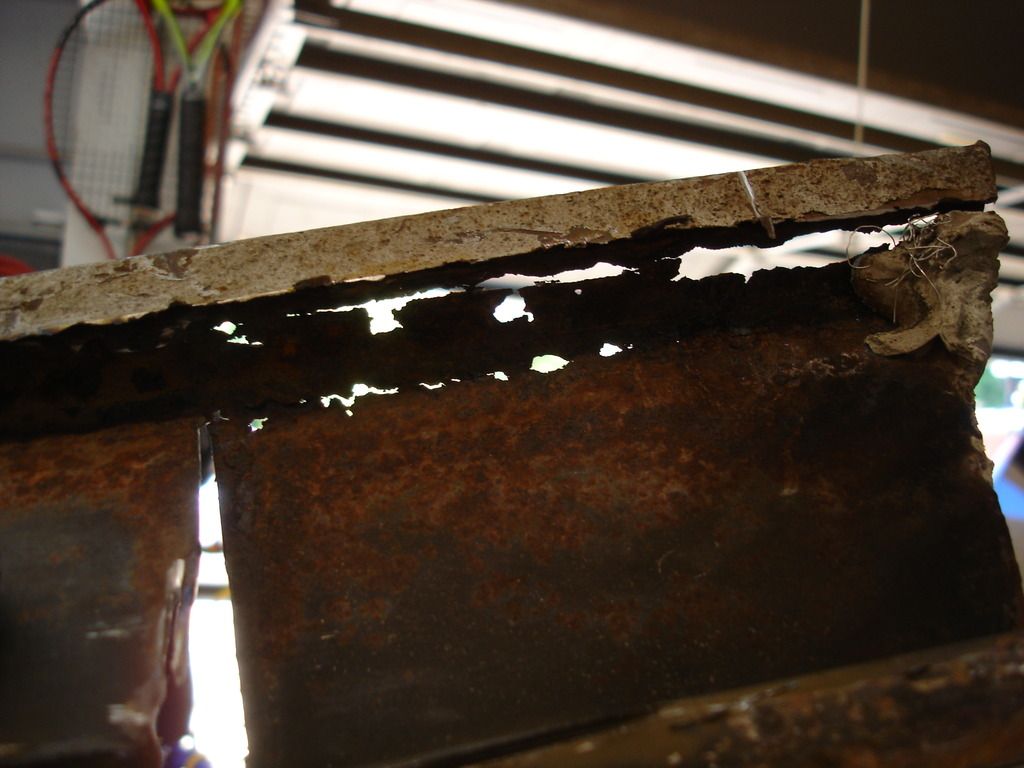
The first big surprise. Someone has been here before! That is glass cloth jammed into the space between the inner and outer sills. A sure sine that there must have been rust damage in this area that was NOT properly dealt with.
With access to the inner sill, the cut continues through it, as far as the disc can reach...about 3/4 of the way around the inner sill. I did have to break out the cutting torch to reach the 1/4 of the inner sill that could not be reached.


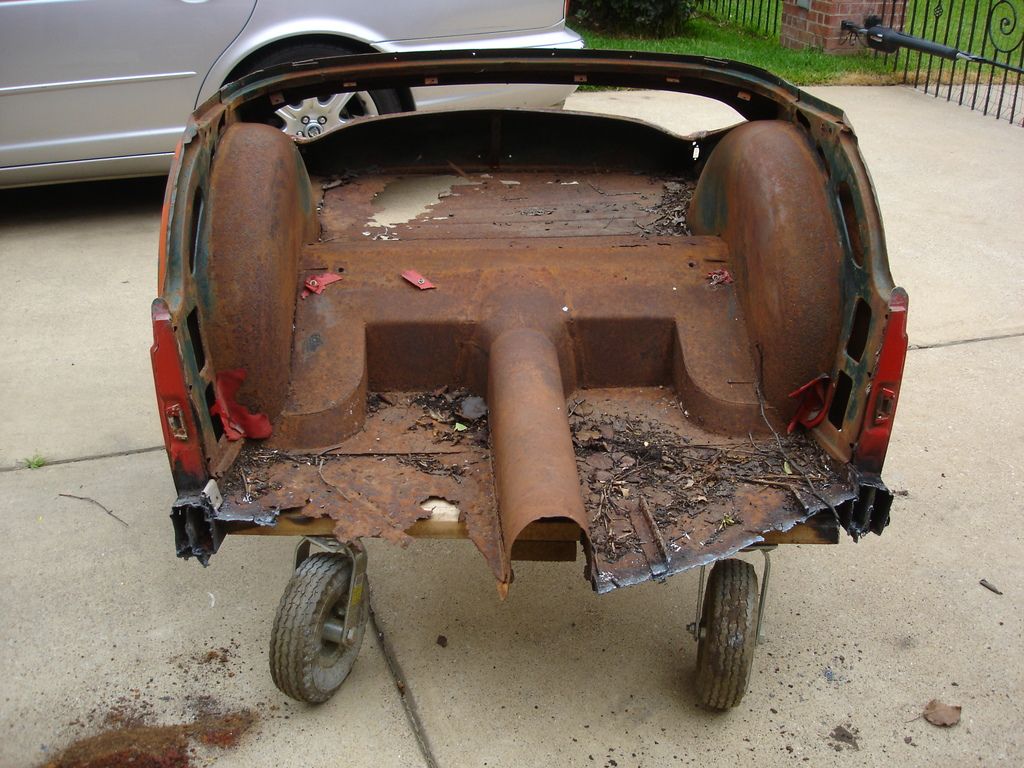
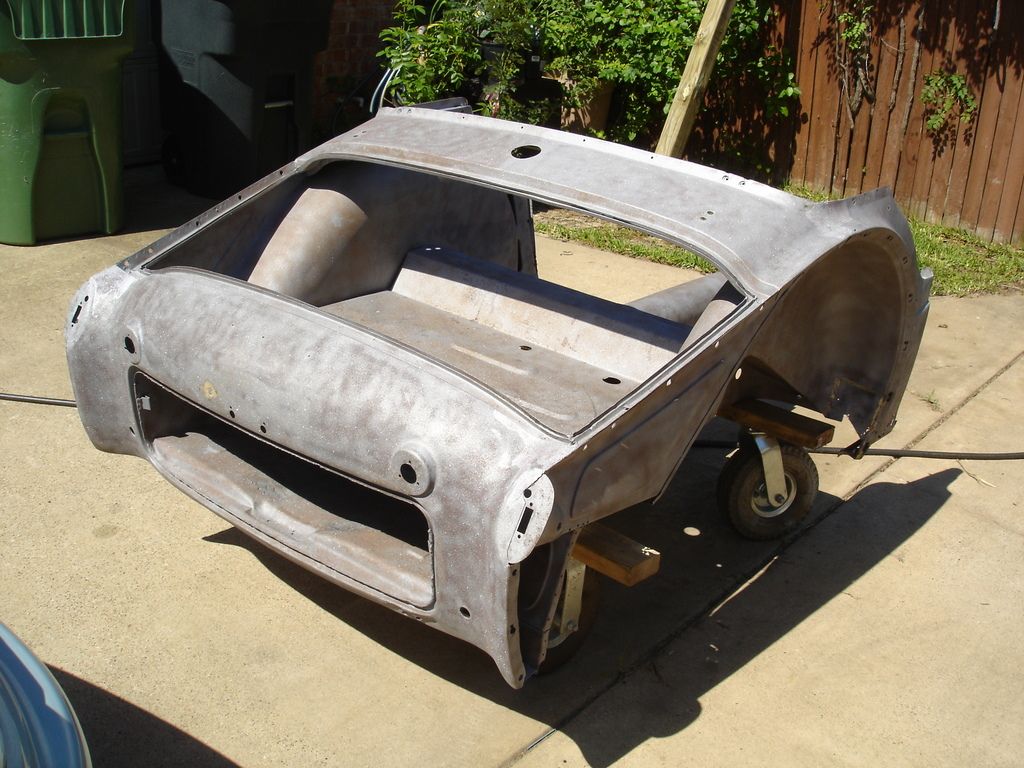
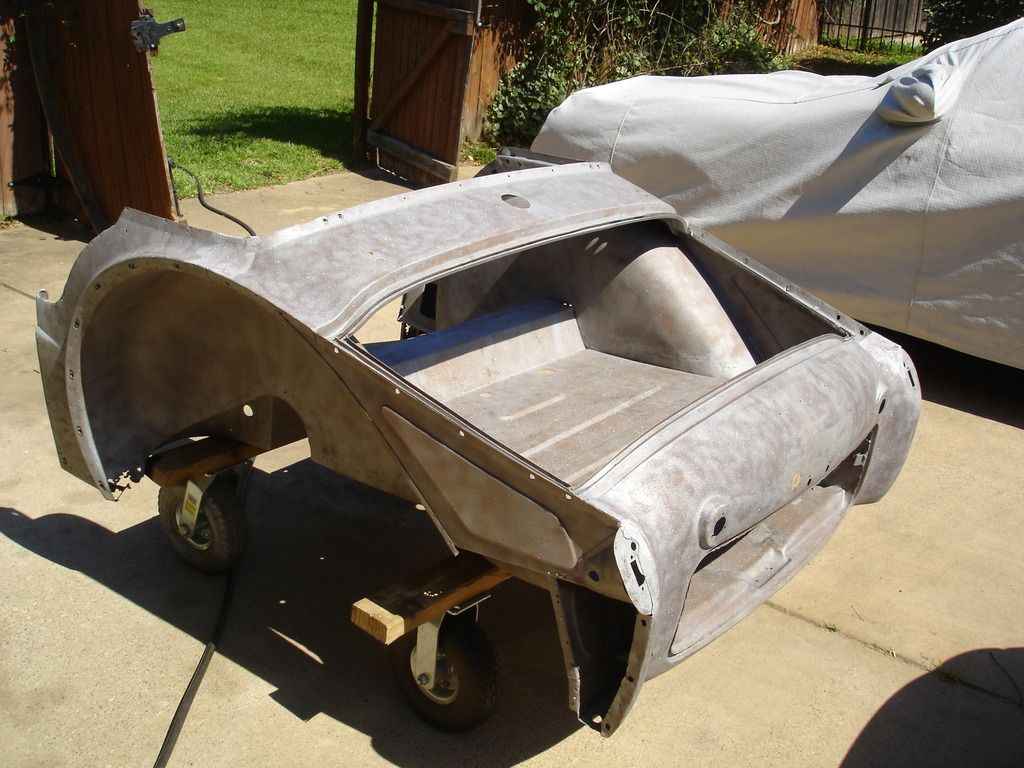
And boom! The fantail is separated from the rest of the tub.
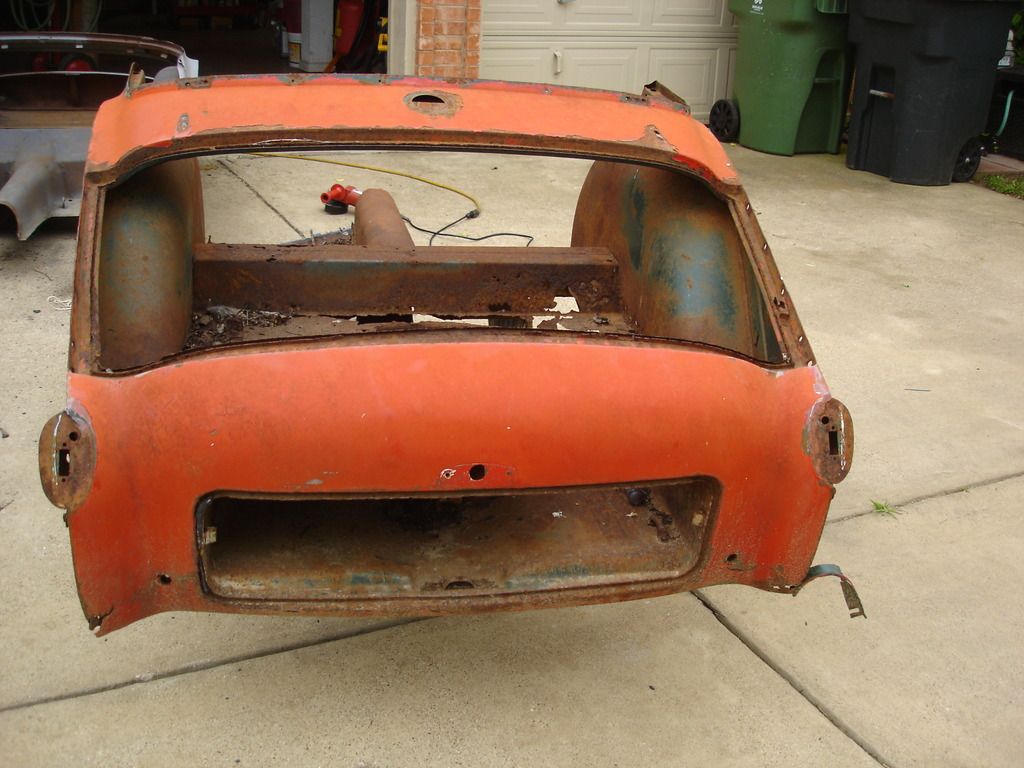
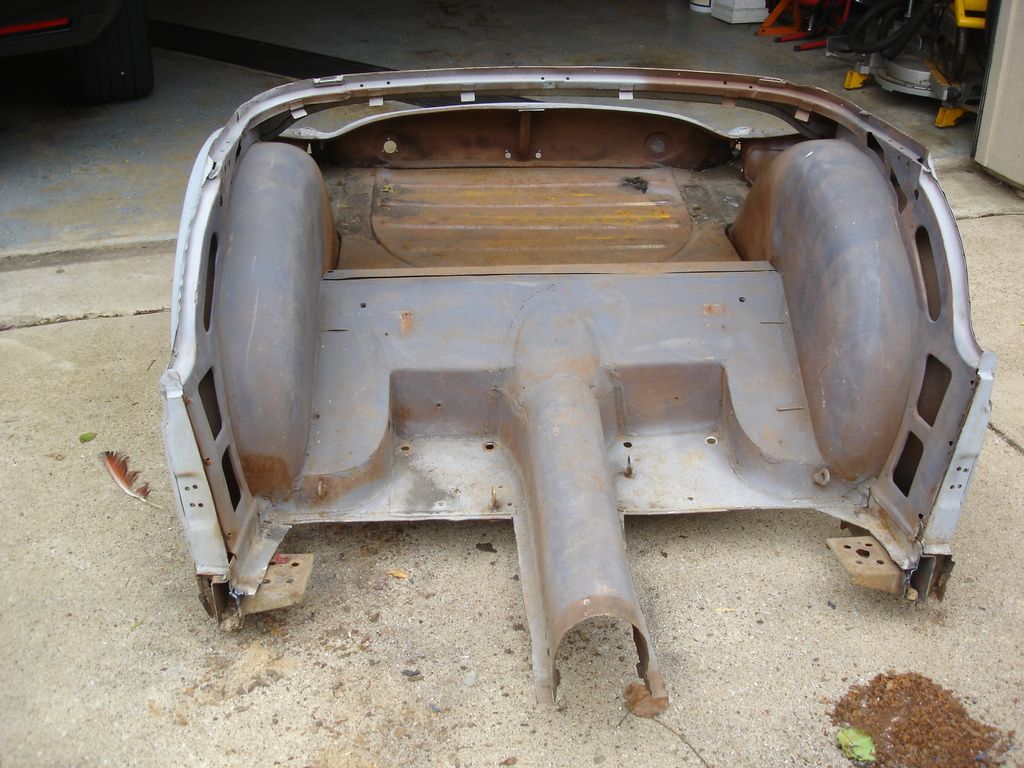
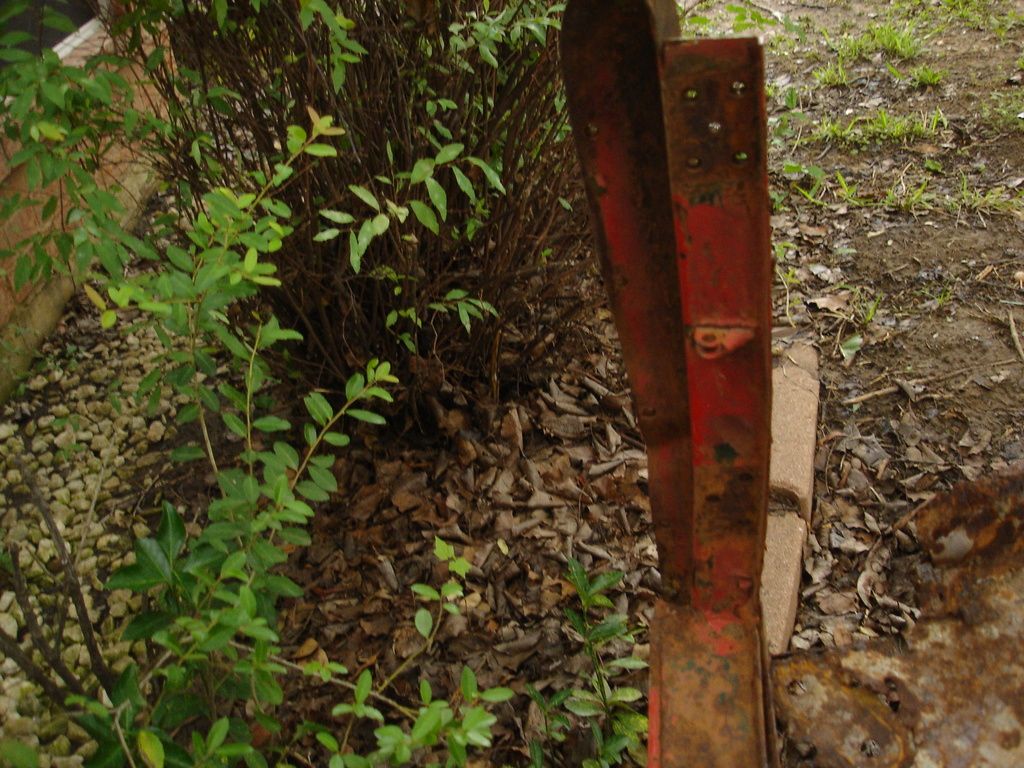
Here is a quick comparison of the original fantail (red) and the donor. After repairs, I will have to convert the TR3 tail into the TR2. That in itself is a big job...rust damage to the donor fantail will compound the work required.
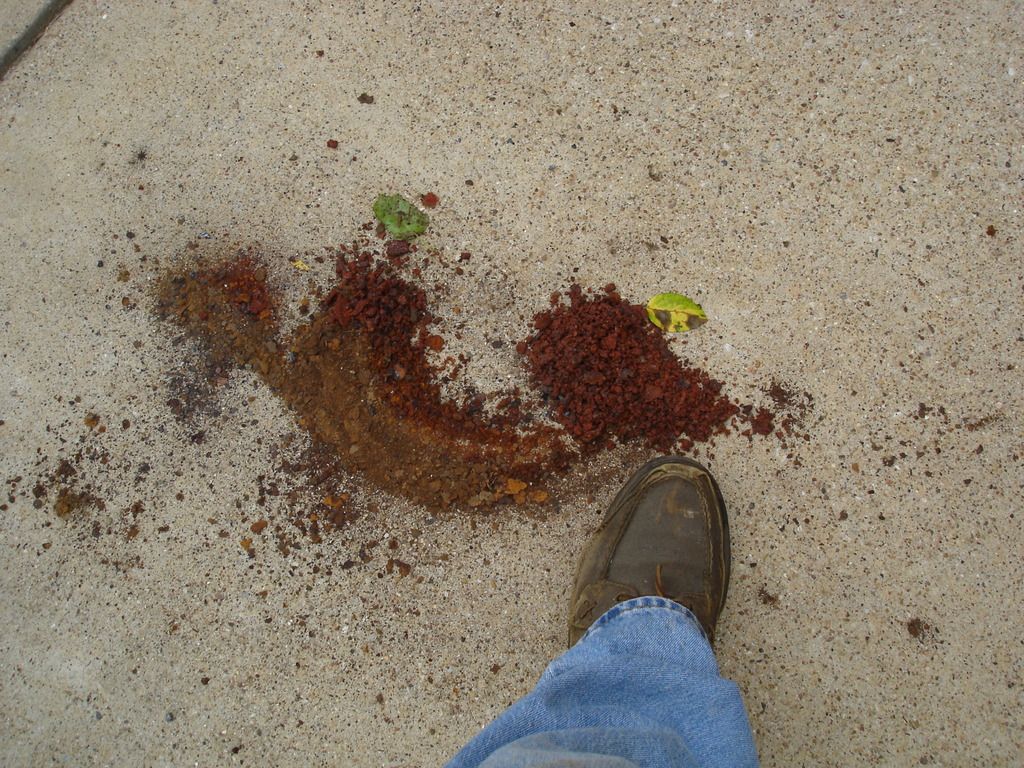
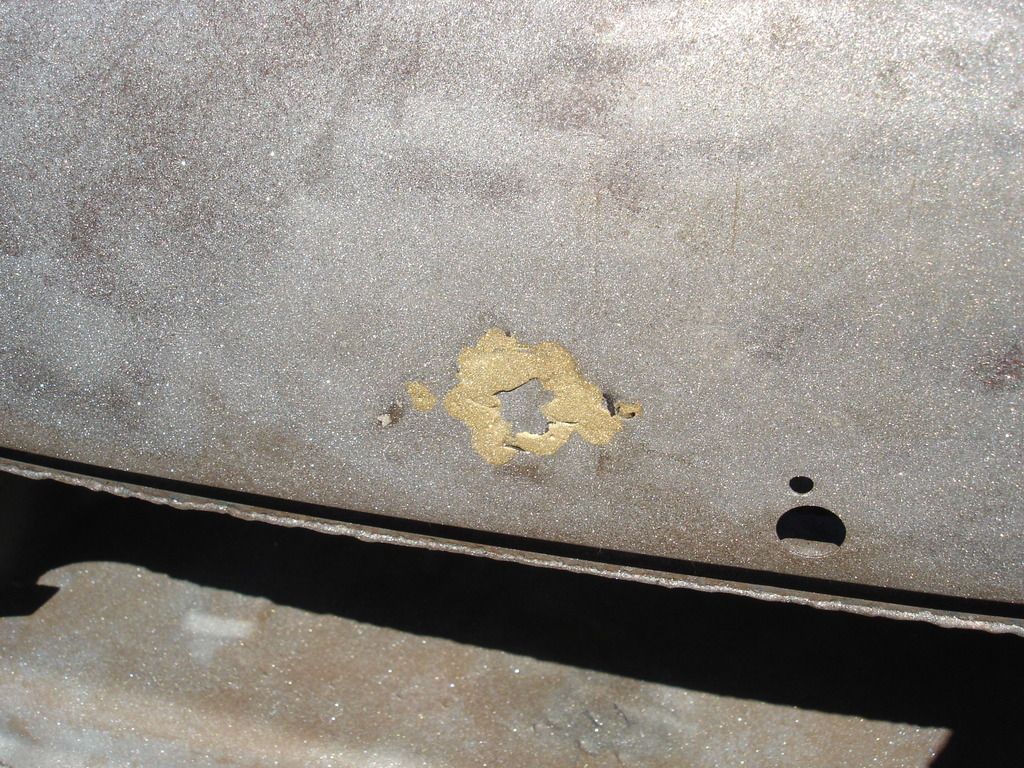
Here is one of the sure signs that bondo is covering some very significant problems. This is one of 3 piles of rust that fell out of the fantail as I was separating it from the front. That is 3" deep. Bummer.


Now it's time to separate the fantail from the inner and outer sills. I'll do this is 2 steps. The first will be to cut the sills off, so I can then, secondly, separate the inner sill while on the bench. Notice the PPO added seat belt anchors. They are not installed the same left and right side, and they are not as the dealer would have done it. They will have to come out and the holes plugged.


Here is the starting point for the separation.

The floor will be replaced, so the rusted floor in the donor car is expendable. Here I am cutting the forward floor from the rear of the floor where it transitions to the differential bump.

The cut continues around and goes through the outer sill, which gets peeled back for access to the inner sill.

The first big surprise. Someone has been here before! That is glass cloth jammed into the space between the inner and outer sills. A sure sine that there must have been rust damage in this area that was NOT properly dealt with.

With access to the inner sill, the cut continues through it, as far as the disc can reach...about 3/4 of the way around the inner sill. I did have to break out the cutting torch to reach the 1/4 of the inner sill that could not be reached.


And boom! The fantail is separated from the rest of the tub.


Here is a quick comparison of the original fantail (red) and the donor. After repairs, I will have to convert the TR3 tail into the TR2. That in itself is a big job...rust damage to the donor fantail will compound the work required.

Here is one of the sure signs that bondo is covering some very significant problems. This is one of 3 piles of rust that fell out of the fantail as I was separating it from the front. That is 3" deep. Bummer.
OP
CJD
Yoda
Online

The "A" posts are easy, so I dealt with them first. Since I cut them out, I now have to remove the remnants of the kick panel, by drilling the spot welds out.


Here they are after removing the kick panel debris and grinding down the welds that had held them to the inner sills.


And here they are after sand blasting and straightening. They are all ready for installation on the new inner sills, but for now they go to the storage shed. If you have a keen eye...you'll notice the brazing done by the PPO. In this case the brazing would be more trouble than it's worth to remove. It should hold just fine holding the door strap.
Back to the fantail!
OP
CJD
Yoda
Online

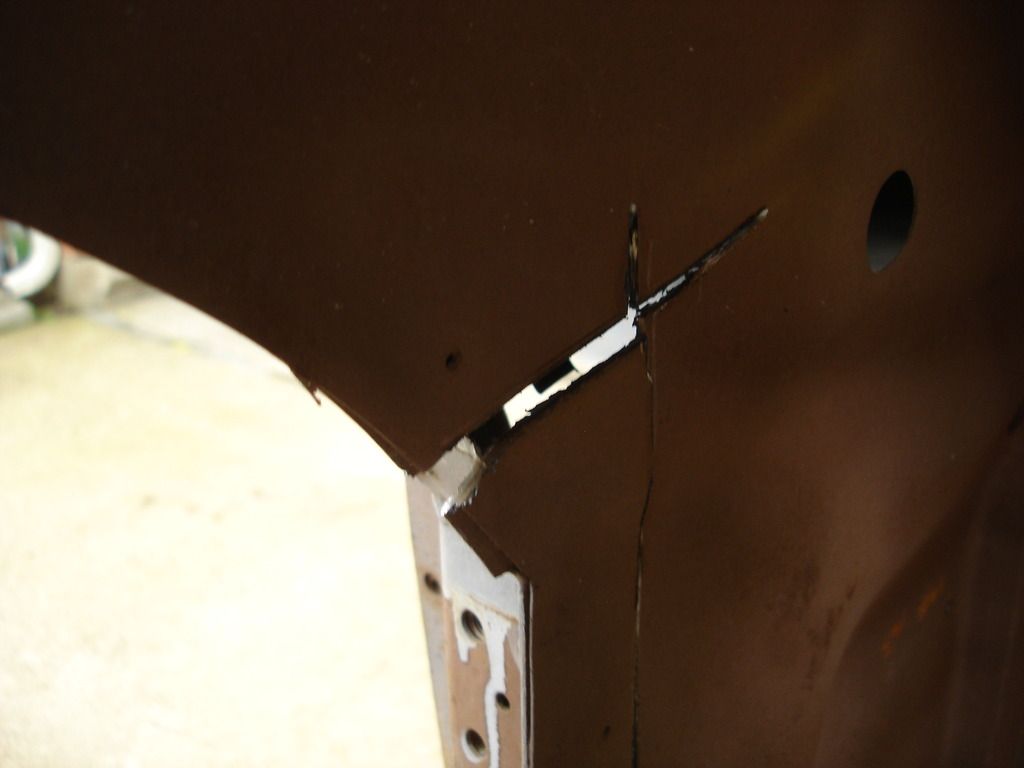
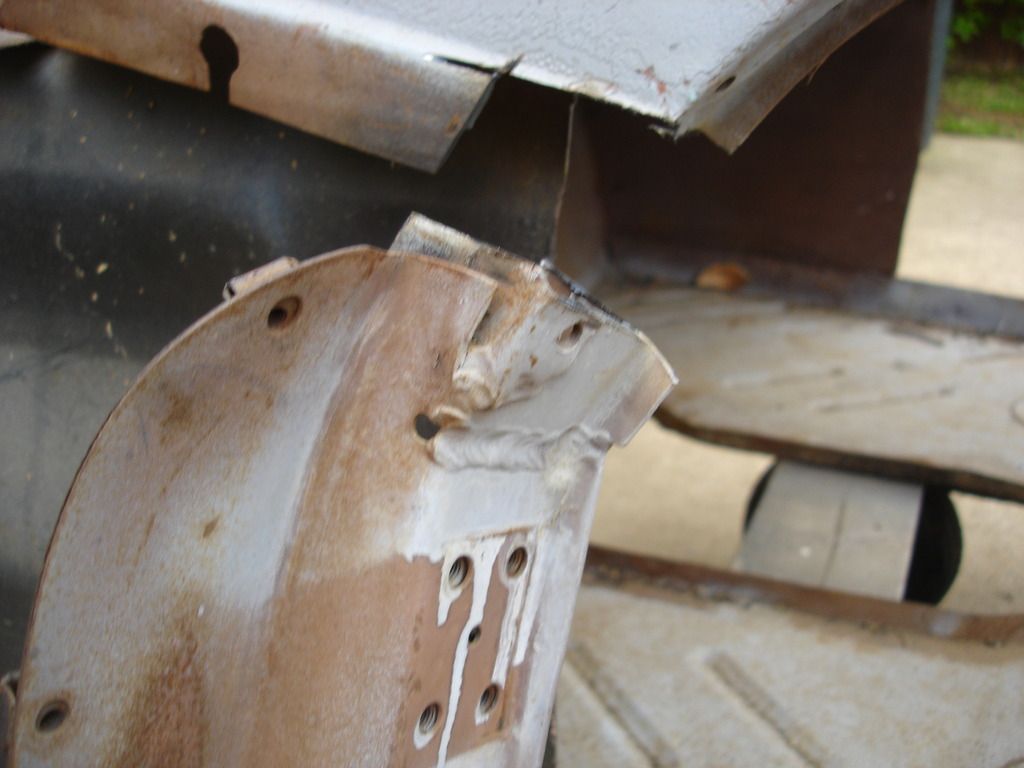
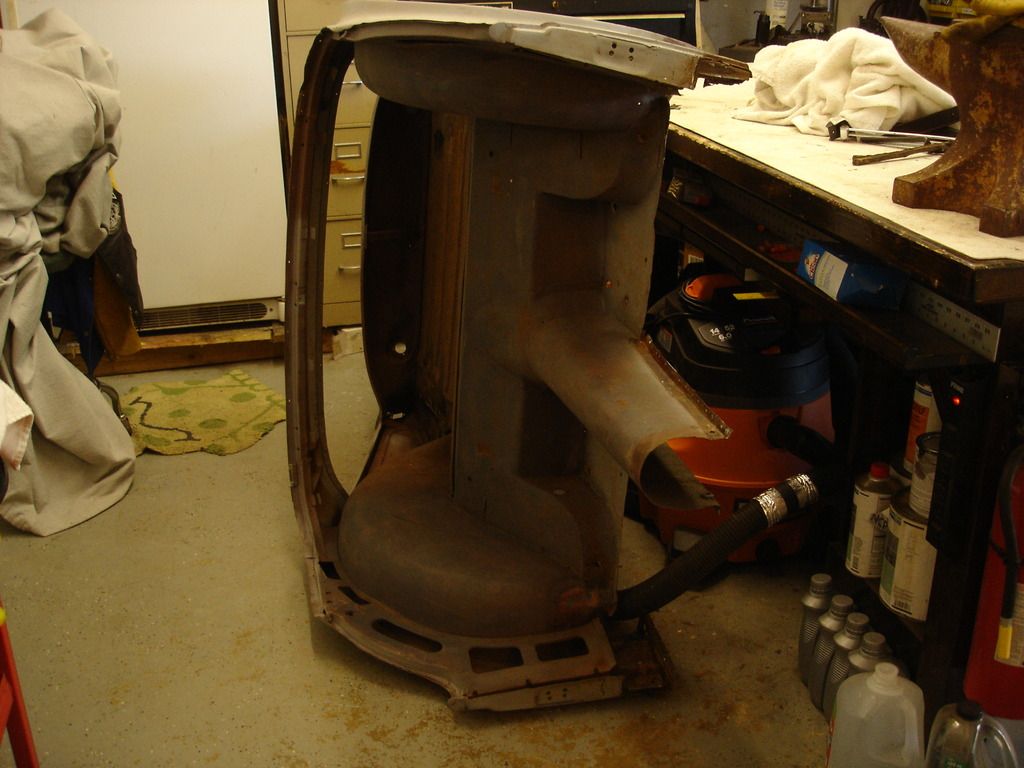
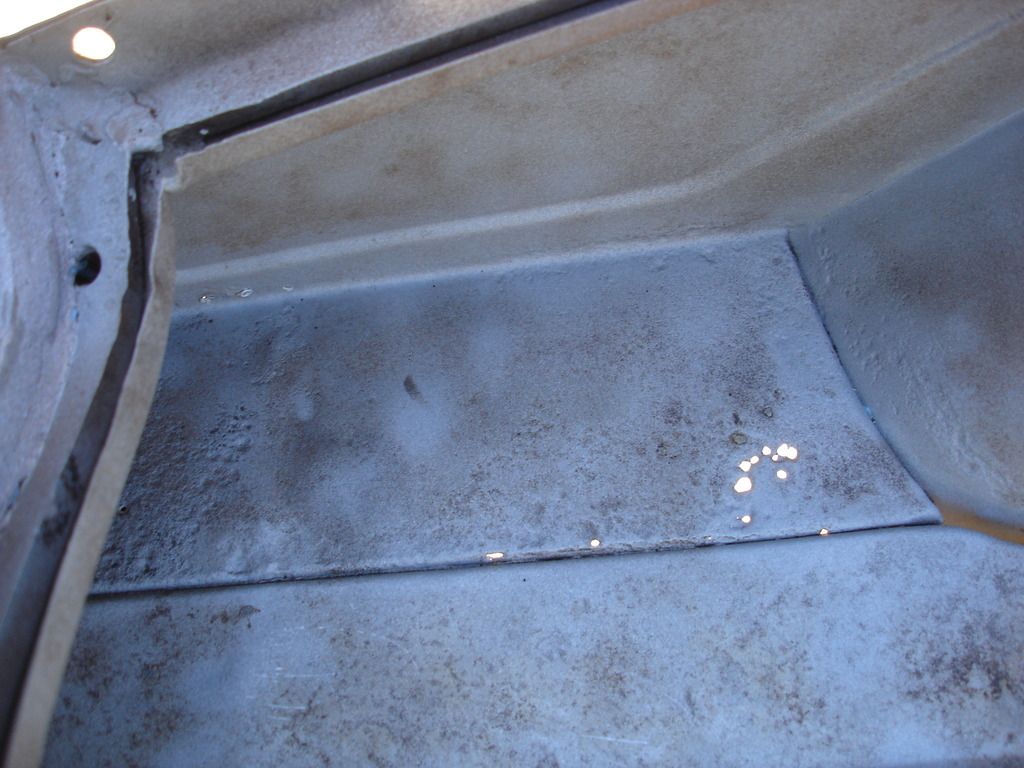
This is the bottom of the right rear quarter panel. (The fantail is sitting on it's side in this view). It is spot welded to the lip on the inner sill. I am in the process of drilling the spot welds out.

This is an ugly patch plate on the right inner wing. It was just laid against the wing and brazed. The PPO loved bronze and "put that $hit on everything", to quote the old lady in the advertisement. I don't get it, but that's just me.

I began thinking I would grind the panel off. That was a bad idea.


So I switched to the oxyacetylene and heated it as I peeled it off...slowly.

Here the patch is removed. The entire inner area is filled with sand! Ugh.

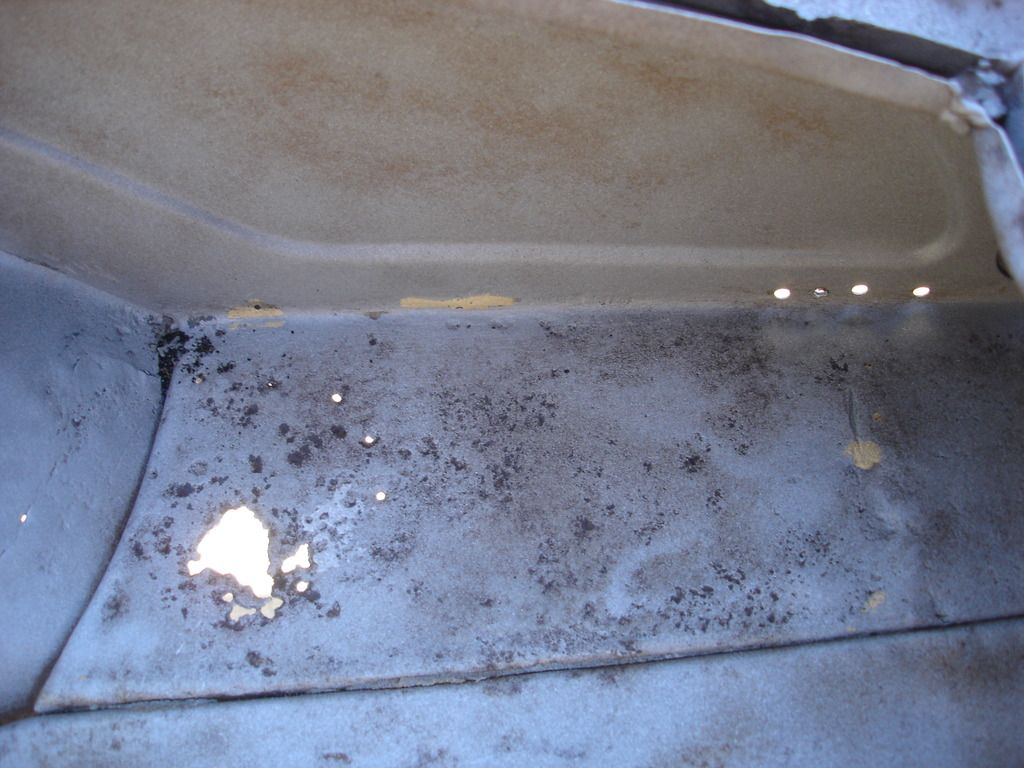
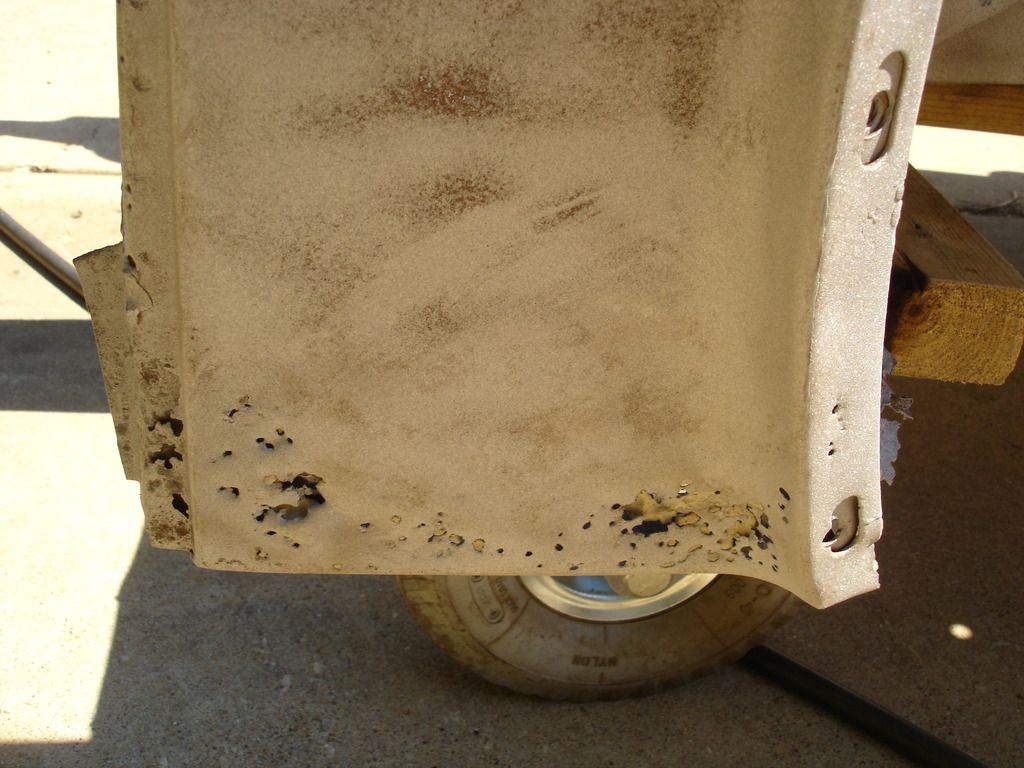
Now it just keeps getting better. With the torch out already, I heated the lower rear quarter and peeled off the layers of bondo. This is what is under...the quarter panel is pitted all across the bottom. So...at this point my "solid" fantail will need patches or replacement inner fenders and quarter panels. This is after the first 15 minutes.


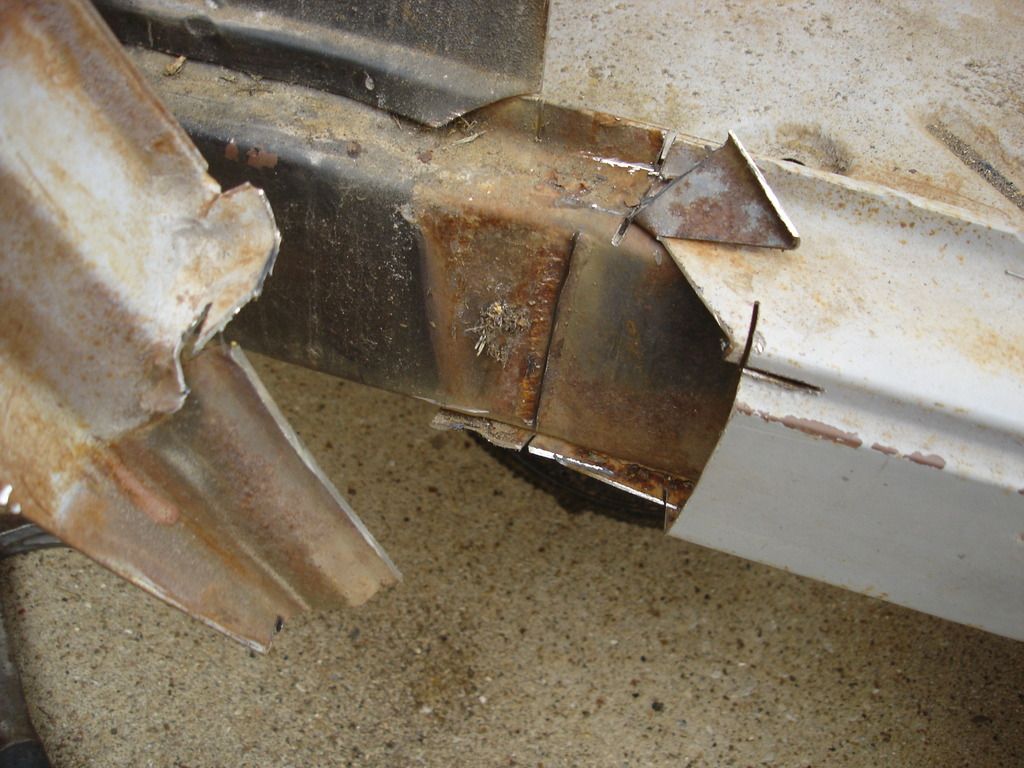
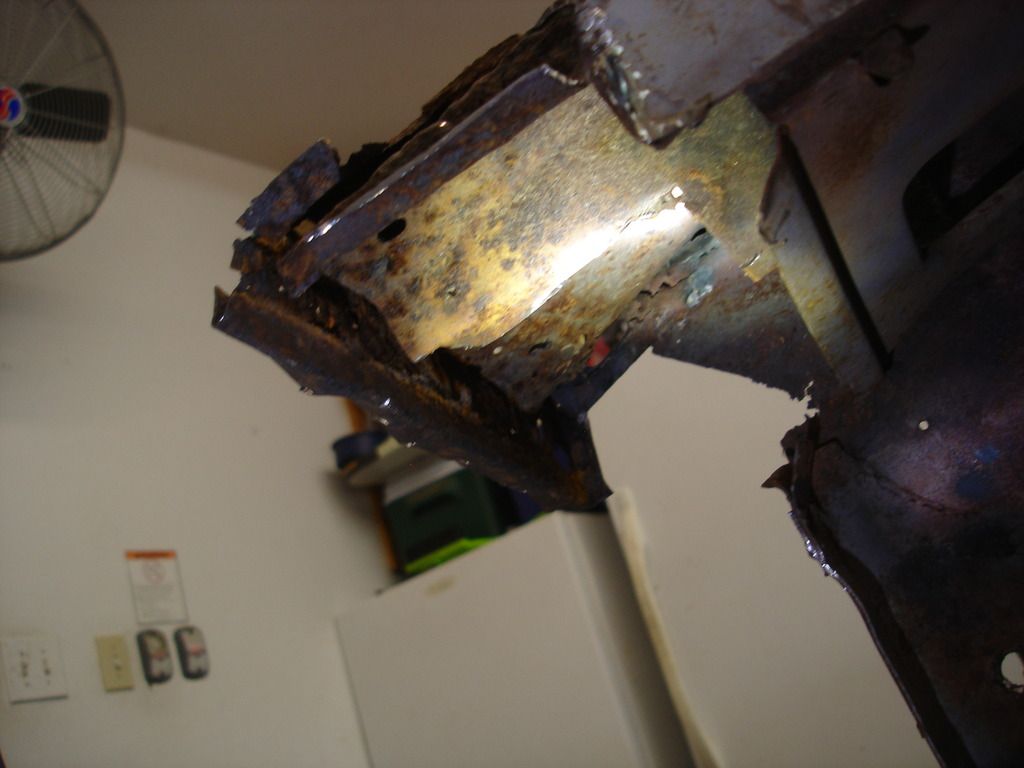
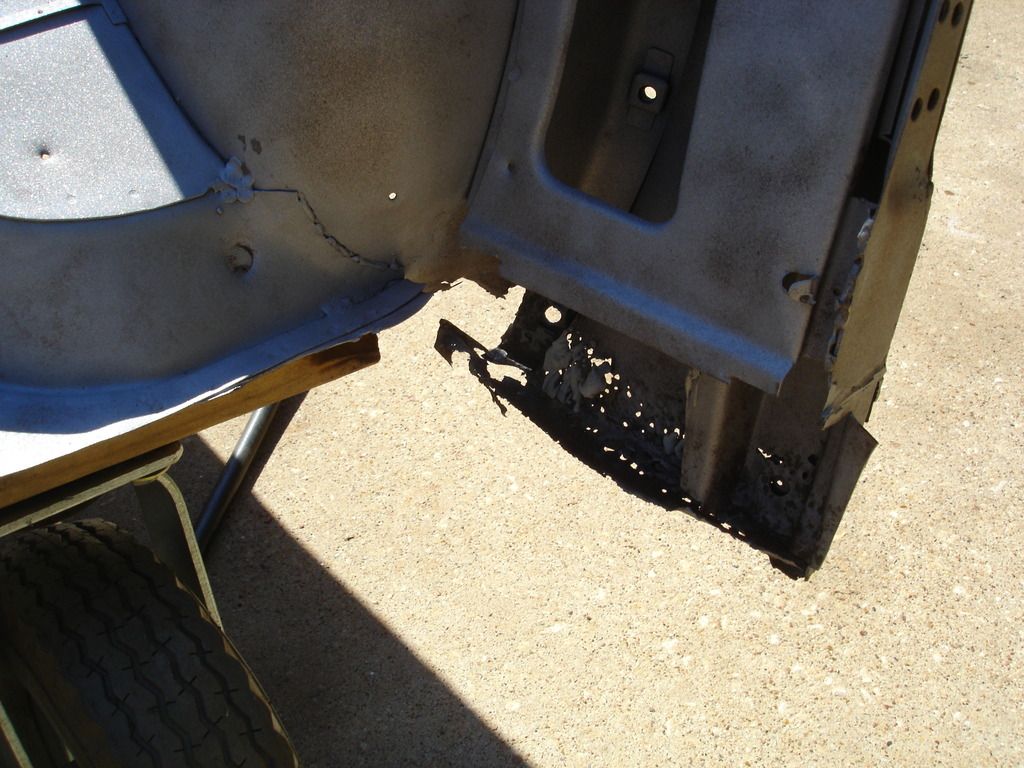
And it gets better. This is the bottom of the "B" post as I start to grind it loose from the inner sill. There is not much left of it.

And, this is the back of the inner sill once I opened the rusted out section of the inner wing. Double ugh.

As I am working on the right side of the fantail, this is what is pouring out of the left side sills...literally POUNDS of rust.
Well, this is where I stopped for the time being, called my riding friend and we took the bikes out for a long ride. I have spent less than an hour on the fantail and so far everything I touch is just bondo covered crap. I'll get over it, but I was expecting better for what I paid.
So, no breaks for the weary. I can easily patch the inner wings, so no problem there. I priced the rear quarters from the big 3, and the prices have more than doubled since I worked on the TR3. A new quarter now runs $279 from TRF, $379 from Moss, and NA from VB and Rimmer bros. So best case a set is over $550. Bummer. I'll have to spend a lot of time hammering complicated patches out of flat sheet.
Cheers...
Last edited:

Hello John
I will be following this section closely. I think my right hand quarter panel is in worse shape. The drivers side appears better on the surface.
I was thinking about the panel from the big 3 and noticed that Rimmer had them for $234.00 but shipping would probable put the cost up to the TRF price.
Is this another area for a sectional patch?
David
OP
CJD
Yoda
Online
Oh, that's right...I did see that Rimmer has the newer style quarters. I am not sure what the difference is, but the early style is getting rare. They are good about responding to e-mails, so it is worth asking them what shipping is. They came in much cheaper on the inner sills, so I actually bought those and had them shipped cheaper than I could by them here. Guess that's the benefit of a strong dollar.
I am thinking about constructing the quarter patch in sections. I think I can do it in 2, those being the flange that the outer wing bolts to, and the remainder. It may have to be more, though, once I start hammering.
I am thinking about constructing the quarter patch in sections. I think I can do it in 2, those being the flange that the outer wing bolts to, and the remainder. It may have to be more, though, once I start hammering.
OP
CJD
Yoda
Online
Week 39
The project has come full term, but refuses to pickle.
The goal this week was to prep the fantail for sand blasting, by taking off everything (including Bondo) that will not be staying on the finished car. In a word...the fantail is dismal. But here goes:
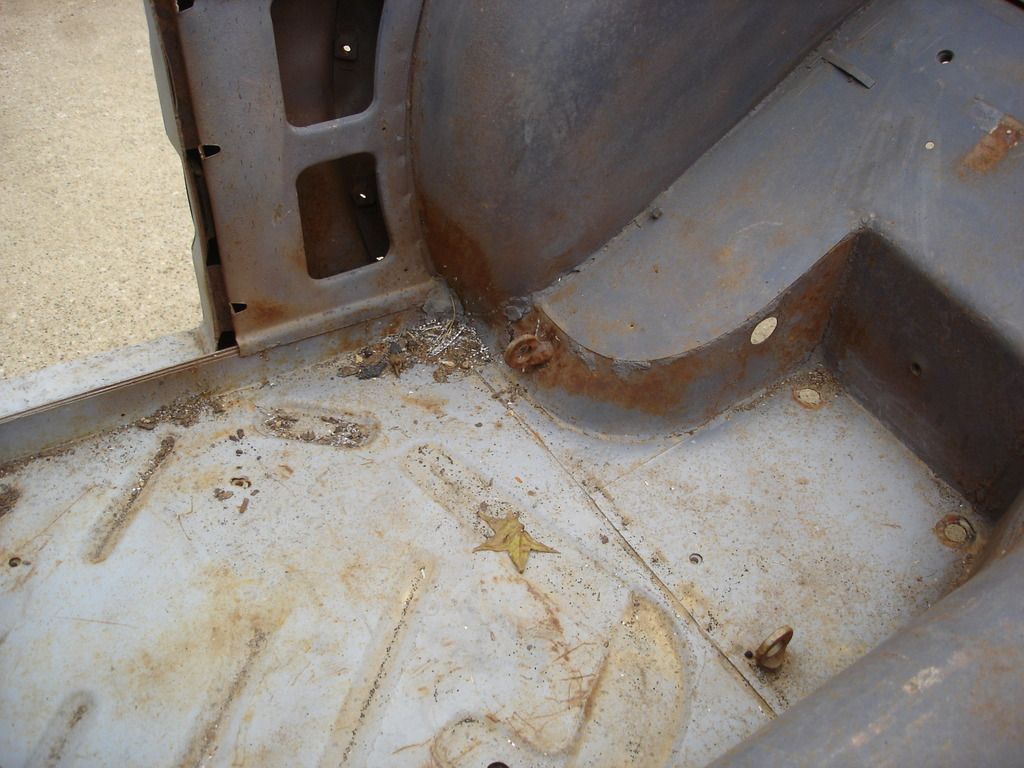
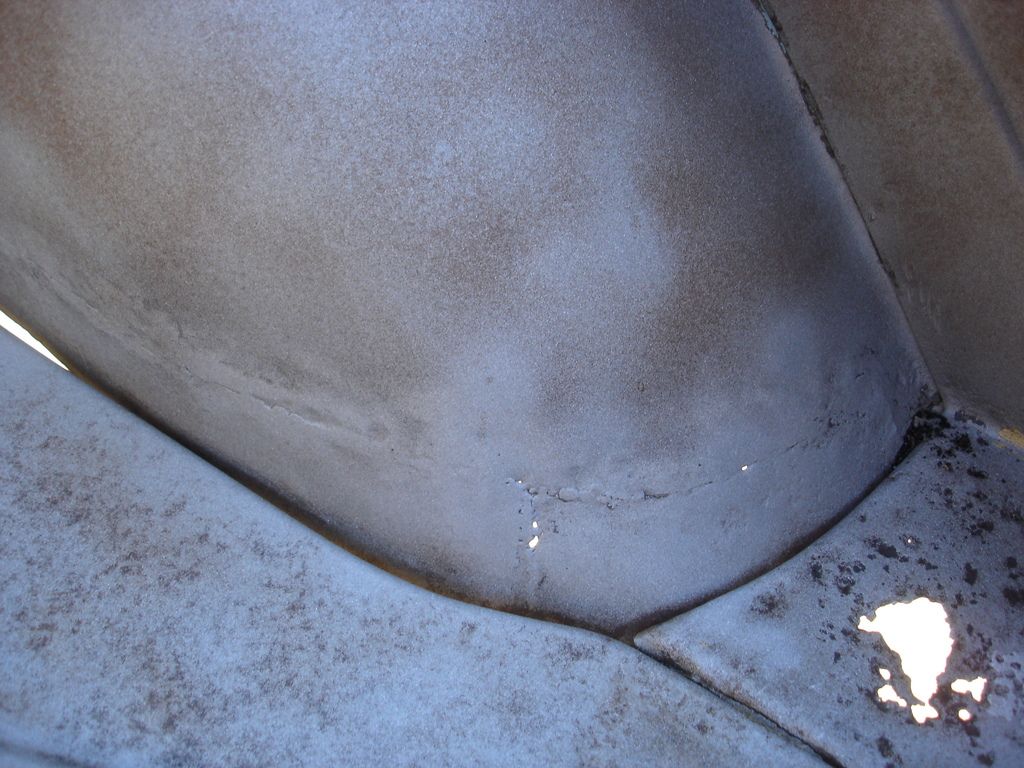
This is a funky angle, but you are looking at the inside of the right side quarter panel, after the section of inner sill is removed. That rusty, pitted part is my "B" pillar. That is a $325 part new, so this POS will have to do. Patches to come.
Here is drilling the spot welds as I peal the remaining edge of the old floor out.
Now I flipped the fantail. This is the first view of the left side quarter panel.
Left inner wing. Lotsa bondo to deal with.
A little heat and bondo turns to cheese.
And look what we were hiding. Oh boy. Just in case anyone is wondering...this is NOT an acceptable way to fix rust throughs. If this had been left, the bondo would start to bubble within a year of use.
Here is a view of the section of left inner sill. I bought this donor car to avoid dealing with this crap. That plan has really backfired. No big deal...just could have better spent my money, as the donor car cost more than I paid for the TR2 to begin with. Lesson learned...never again.
Moving back to the boot. This is a view of the boot floor, just outside of the center boot floor panel. Pretty lights! The PPO had glassed over this area to cover the tatters. The other side is even worse.
Here is where I end the week. The fantail is ready to go out in the back yard tomorrow and get stripped to the bone with the blaster. The only good news from all this is that after I blast the fantail, there will be no more new surprises for the remainder of my body work. All secrets will be revealed.
I am so tired of dealing with rust. This job is a perfect example of how some cars "can" be fixed, but that does not mean that they "should" be fixed.
The project has come full term, but refuses to pickle.
The goal this week was to prep the fantail for sand blasting, by taking off everything (including Bondo) that will not be staying on the finished car. In a word...the fantail is dismal. But here goes:

This is a funky angle, but you are looking at the inside of the right side quarter panel, after the section of inner sill is removed. That rusty, pitted part is my "B" pillar. That is a $325 part new, so this POS will have to do. Patches to come.

Here is drilling the spot welds as I peal the remaining edge of the old floor out.

Now I flipped the fantail. This is the first view of the left side quarter panel.

Left inner wing. Lotsa bondo to deal with.

A little heat and bondo turns to cheese.


And look what we were hiding. Oh boy. Just in case anyone is wondering...this is NOT an acceptable way to fix rust throughs. If this had been left, the bondo would start to bubble within a year of use.

Here is a view of the section of left inner sill. I bought this donor car to avoid dealing with this crap. That plan has really backfired. No big deal...just could have better spent my money, as the donor car cost more than I paid for the TR2 to begin with. Lesson learned...never again.

Moving back to the boot. This is a view of the boot floor, just outside of the center boot floor panel. Pretty lights! The PPO had glassed over this area to cover the tatters. The other side is even worse.

Here is where I end the week. The fantail is ready to go out in the back yard tomorrow and get stripped to the bone with the blaster. The only good news from all this is that after I blast the fantail, there will be no more new surprises for the remainder of my body work. All secrets will be revealed.
I am so tired of dealing with rust. This job is a perfect example of how some cars "can" be fixed, but that does not mean that they "should" be fixed.
M_Pied_Lourd
Darth Vader
Offline
Watching!
Cheers
Tush
Cheers
Tush
You inspire me on my Bugeye. At least I am not dealing with wood issues! My project is looking more and more doable. I really appreciate your post. I am big on pictures as they tell the real story. So many projects only show the good, when you deal with old cars of any make they all have problems. Thanks again.
https://www.britishcarforum.com/bcf...0-Bugeye-Bringing-Miss-Eva-back-to-life/page7
https://www.britishcarforum.com/bcf...0-Bugeye-Bringing-Miss-Eva-back-to-life/page7
OP
CJD
Yoda
Online
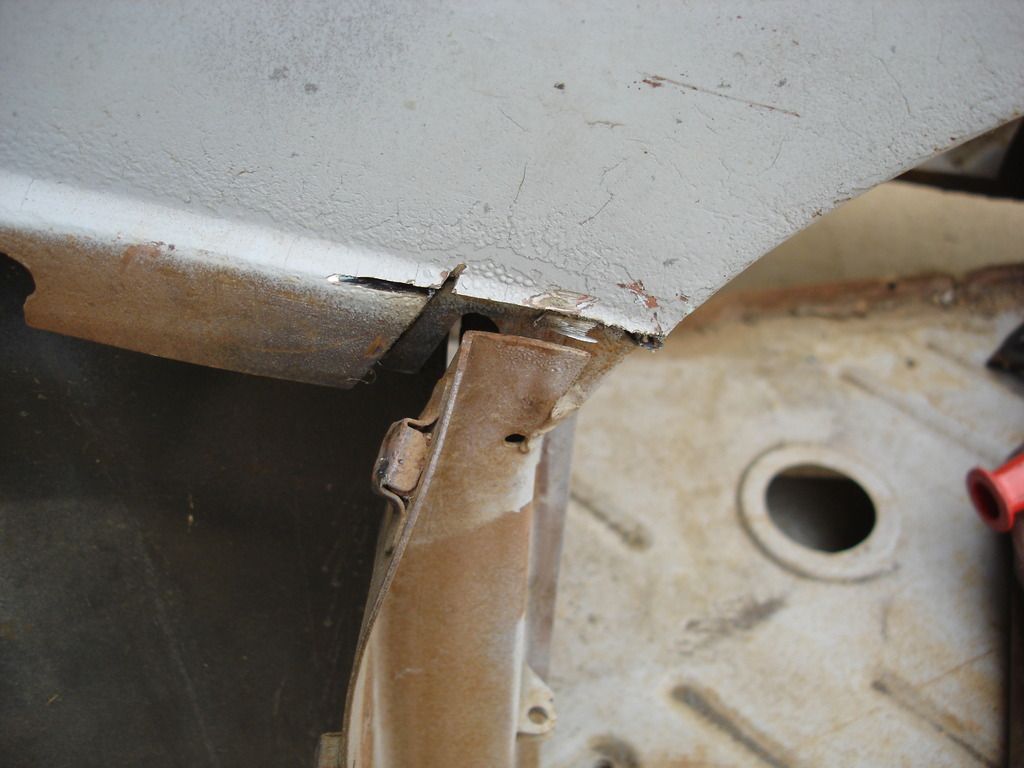
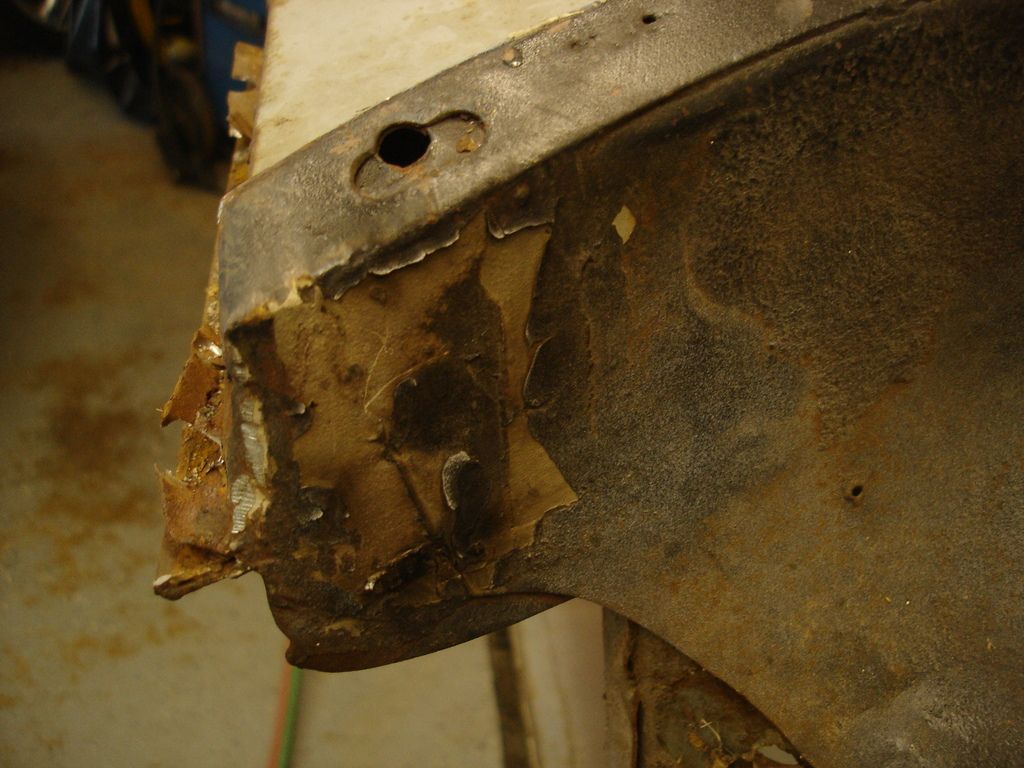
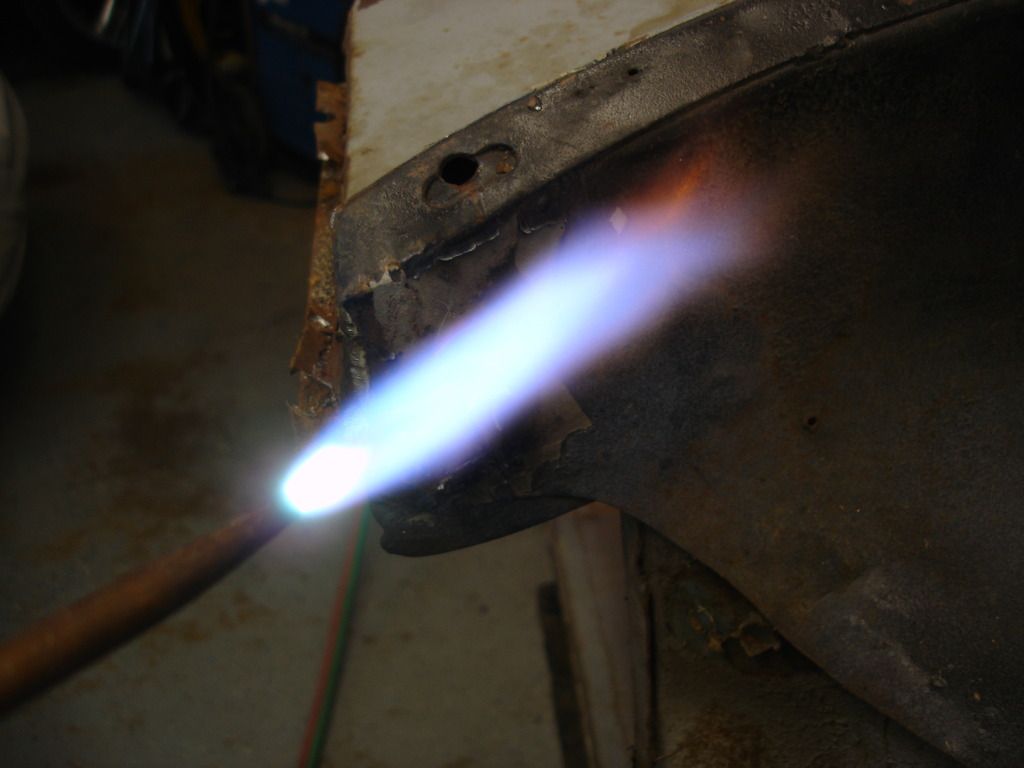
It seems to be a flange that was spot welded onto the bottom of the dog leg. It looks very similar to the flange spot welded to the bottom of the front wing. It looks original, but I can't say for sure with the damage in this area. I have not studied the TR2 dog leg yet to make sure it is assembled the same.
For the repair, I will likely weld a new flange to the inner sill, and then use that to stabilize the dog leg patch.
For the repair, I will likely weld a new flange to the inner sill, and then use that to stabilize the dog leg patch.
Hello John
Thank you.
On the drivers side on mine there is an add on patch so I was not sure what should be there. I have not dug into that area yet but your photos are a great help. Mu passenger side is completely gone so I will use the info from the drivers side for guidance.
David
Thank you.
On the drivers side on mine there is an add on patch so I was not sure what should be there. I have not dug into that area yet but your photos are a great help. Mu passenger side is completely gone so I will use the info from the drivers side for guidance.
David
OP
CJD
Yoda
Online
Week 40
A little late, and there may be a few weeks before I can do any more work following our lightening strike. But, here's what I got for week #40!
Here was the big chore. For those who have never sand blasted, it looks trivial. For those who have...the above pics represent 3 very dirty, nasty, hot, sweaty days under the blaster hood. The good news is this is the last of the rusty body I will EVER have to sandblast again! It is the last of the truly nasty work...and it's finally over after 40 weeks.
Moving on, here is a little tour of the issues at hand:
Right side quarter panel. Anyone need to grade some cheese?

Top of the right side quarter panel.

This is looking in the boot at the left inner wing. The trunk on this shell was replaced before I got the donor car, and this gap has concerned me since the day I removed all the crap stored in the boot and saw ground through this gap. Needless to say, an inch gap is too much! If you look very closely, you can see what is going on...
The PO trimmed and patched the lower 3 inches of the inner wing. It's a crap job, and that is why the new boot floor does not reach the inner wing. This will take some thought...and lots of beer to solve.
This was my "under fiberglass surprise" number one. This is the left side boot floor. At least it is a completely flat area, so the patch will be rather easily fabricated.
And surprise #2 was the right side boot floor to match!
A close up of the right inner wing. Yep...patched at the bottom too. Yep, that's light shining through the edge of the patch. At least this patch was touching the boot floor (mostly)...Aaaahhh, the small things...have to be happy for the small things in life!
Start with cheese grader, end with cheese grader. This is the left lower quarter panel.
Oh, Yeah. You knew there had to be brass somewhere! Actually, there are signs that the PO started to install the new boot floor...brazing!! It is obvious he learned that would not work, as he later switched to welding. If only he had learned for all the other body work.
Here is the rear tunnel. Not sure why, but someone beat the edge to bits. It almost looks like the U-joint broke, except there are no scratch marks inside. Who knows?!?
So...
I bought this tub under the premise that is was "solid". I think you can see why I am a bit bummed about it, having cost over $3k. For that amount of money I am only using one wing, the boot cover, the bonnet brace, a handful of nuts and bolts...and what you see of the tub above. It is far from solid. In fact, all I can really say positive is that it is a bit better than the TR2. My first and last sight unseen car...
A little late, and there may be a few weeks before I can do any more work following our lightening strike. But, here's what I got for week #40!


Here was the big chore. For those who have never sand blasted, it looks trivial. For those who have...the above pics represent 3 very dirty, nasty, hot, sweaty days under the blaster hood. The good news is this is the last of the rusty body I will EVER have to sandblast again! It is the last of the truly nasty work...and it's finally over after 40 weeks.
Moving on, here is a little tour of the issues at hand:


Right side quarter panel. Anyone need to grade some cheese?

Top of the right side quarter panel.

This is looking in the boot at the left inner wing. The trunk on this shell was replaced before I got the donor car, and this gap has concerned me since the day I removed all the crap stored in the boot and saw ground through this gap. Needless to say, an inch gap is too much! If you look very closely, you can see what is going on...
The PO trimmed and patched the lower 3 inches of the inner wing. It's a crap job, and that is why the new boot floor does not reach the inner wing. This will take some thought...and lots of beer to solve.

This was my "under fiberglass surprise" number one. This is the left side boot floor. At least it is a completely flat area, so the patch will be rather easily fabricated.

And surprise #2 was the right side boot floor to match!


A close up of the right inner wing. Yep...patched at the bottom too. Yep, that's light shining through the edge of the patch. At least this patch was touching the boot floor (mostly)...Aaaahhh, the small things...have to be happy for the small things in life!


Start with cheese grader, end with cheese grader. This is the left lower quarter panel.

Oh, Yeah. You knew there had to be brass somewhere! Actually, there are signs that the PO started to install the new boot floor...brazing!! It is obvious he learned that would not work, as he later switched to welding. If only he had learned for all the other body work.

Here is the rear tunnel. Not sure why, but someone beat the edge to bits. It almost looks like the U-joint broke, except there are no scratch marks inside. Who knows?!?
So...
I bought this tub under the premise that is was "solid". I think you can see why I am a bit bummed about it, having cost over $3k. For that amount of money I am only using one wing, the boot cover, the bonnet brace, a handful of nuts and bolts...and what you see of the tub above. It is far from solid. In fact, all I can really say positive is that it is a bit better than the TR2. My first and last sight unseen car...
OP
CJD
Yoda
Online

Once the fantail was on the table, the first order of business is this center rear section. The TR3 has separate brake lights. The TR2 puts the brake light in the license light. So this has to change, along with getting rid of that brazed hole.

I do still have the TR2 fantail, so I decided to cut the patch out of it. The area is covered with 1/4" of bondo, and the metal was mangled under the bondo..but that is easily fixed.

Patch...bondo and all.

The bondo comes off with a little heat and a scraper.

After blasting...you can now see how bent this section is. A trip to the anvil with a body hammer quickly fixed those waves.

I rounded the corners, and now traced the patch shape onto the donor fantail.

I cut the straight with the body grinder...and the rounded ends with aircraft tin snips.

Your patches should be able to fit on their own before you are happy with them.


Tacked and welded using the lowest power setting and 28 fpm wire feed.

These are the emblem holes. The TR2 had no rear emblems, so these get plugged.

Like so...

And the fantail is on it's way to becoming a TR2 fantail.
Next those turn signal pintles have to go. It may be a few weeks.
Cheers!
M_Pied_Lourd
Darth Vader
Offline
Nice.
Cheers
Tush
Cheers
Tush
When you sand blast what medium do you use and do you collect the sand and reuse it?
I remember you saying to not have square corners on a patch but I forgot what your reason was. Making a patch for the firewall and it came to me that I should round the top corner.
Hope the home repairs are progressing well.
David
I remember you saying to not have square corners on a patch but I forgot what your reason was. Making a patch for the firewall and it came to me that I should round the top corner.
Hope the home repairs are progressing well.
David