
-
 Hey Guest!
British Car Forum has been supporting enthusiasts for over 25 years by providing a great place to share our love for British cars. You can support our efforts by upgrading your membership for less than the dues of most car clubs. There are some perks with a member upgrade!**Upgrade Now**
(PS: Upgraded members don't see this banner, nor will you see the Google ads that appear on the site.)
You are using an out of date browser. It may not display this or other websites correctly.
You should upgrade or use an alternative browser.
You should upgrade or use an alternative browser.
TR2/3/3A Beginning the TR2 Bodywork
- Thread starter CJD
- Start date
OP
CJD
Yoda
Online
Week 16
I'll be spreading this weeks update over a few days. Still focused on the left wing. I've made progress, but then got kicked in the @$$ at the end. Working on a hand built car has no limit to the issues that present themselves. But, here goes the start...

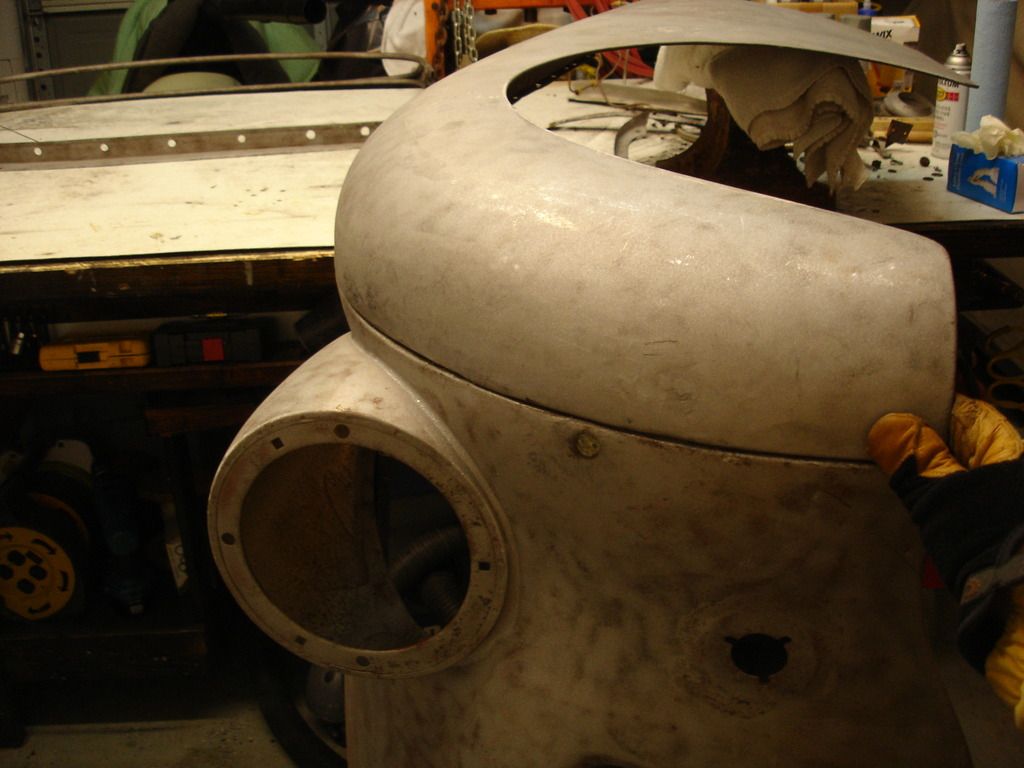
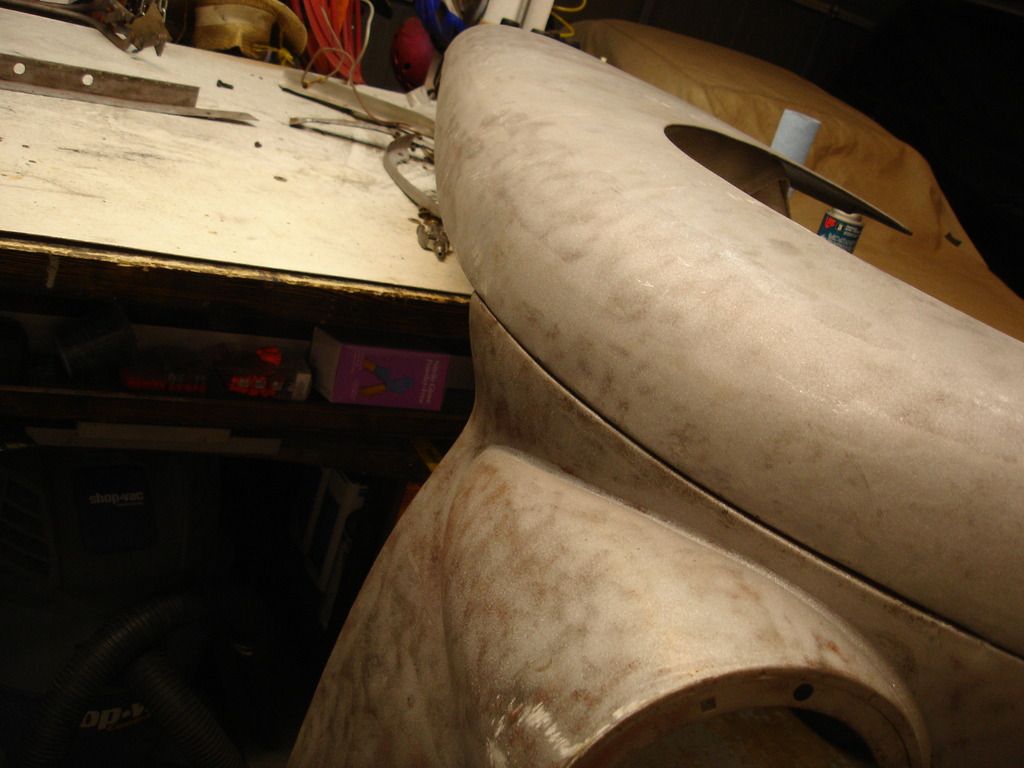
As I left off, the left wing has been patched, but is still just a bare skin with no framework. I started by sand blasting the skin. It looks decent in the pic above, but I still have a whole lotta hammer work to do. Like I said earlier, the more you work on a panel, the more you find to work on. It's close at this point, though.

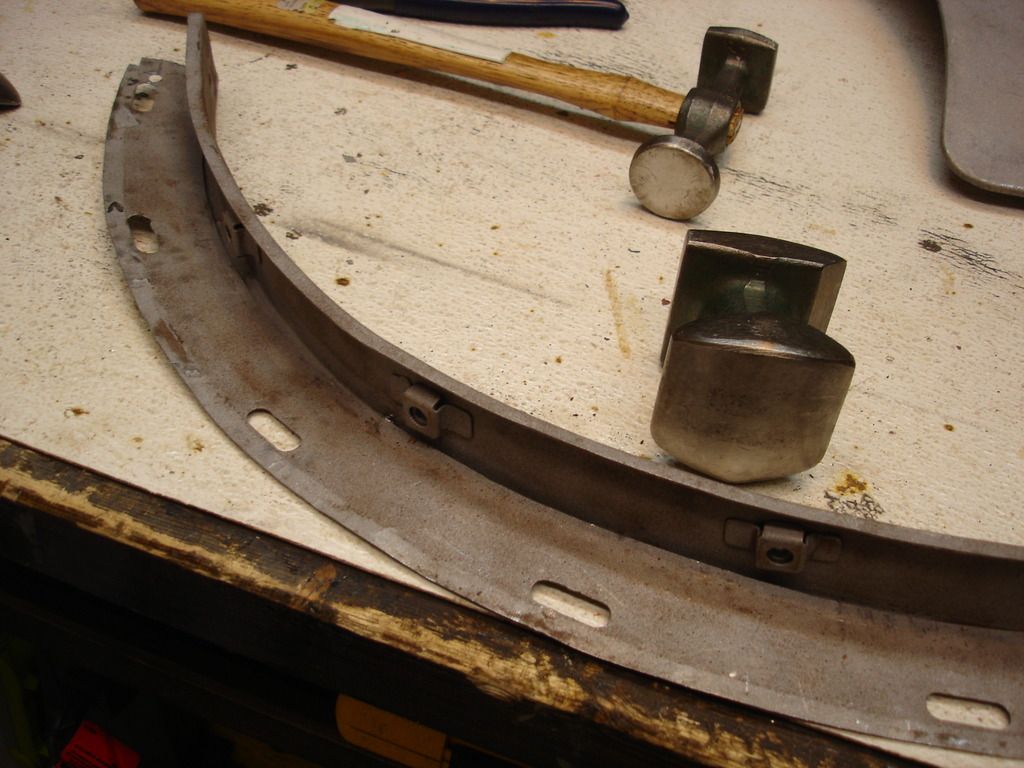
This is the inner framework. I also separated it into the basic components, and then chose the best of the 2 wings to re-assemble. If you remember, this frame was badly mangled in a prior accident, so this is after working out the wrinkles.
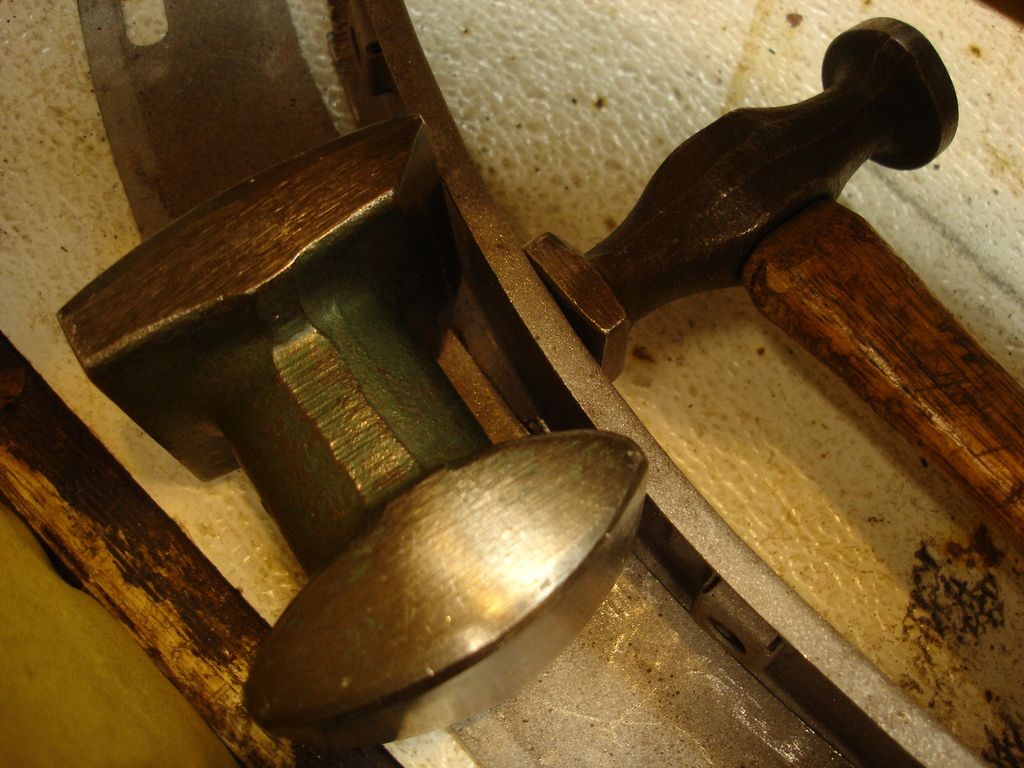
Quick tip, if you need to add bow, or lift a section of a flat panel, use the hammer and dolly like shown. the dolly allows you to use relatively light taps to gradually work the metal upward.
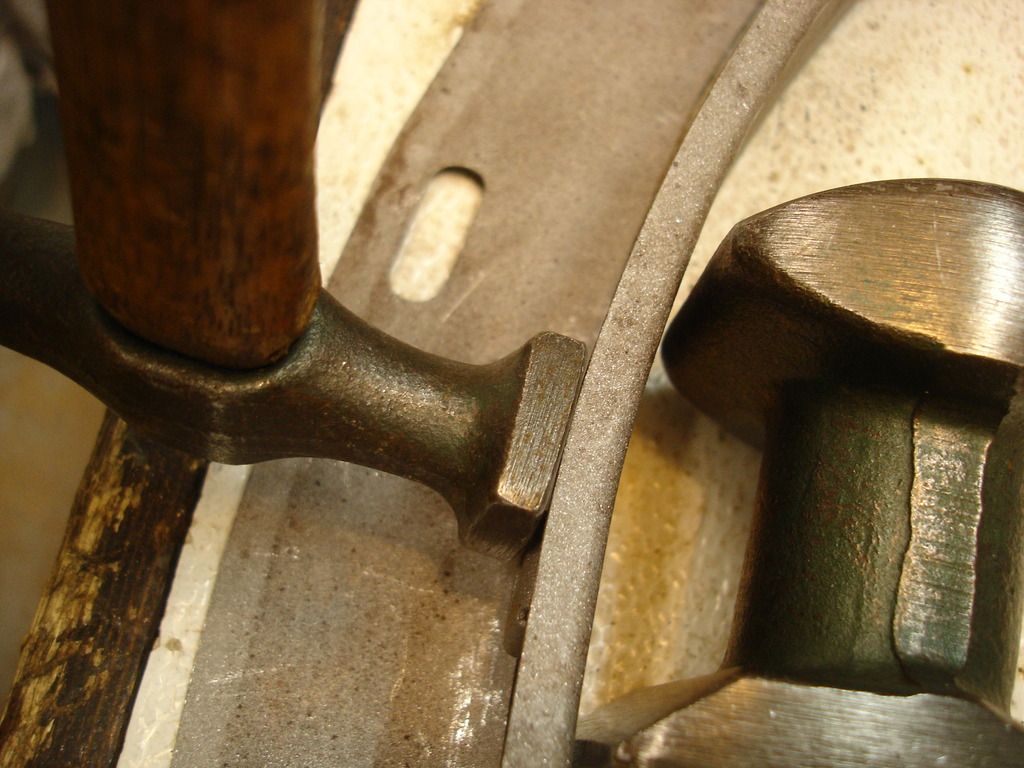
Likewise, reverse the sides of the hammer and dolly, and you can remove some of the bow gradually. Of course, the question comes up as to how to know what bow is needed in this frame...
For that, I had to pull the front apron out of the shed to match it to the front of the wing. I worked to get both the skin and the frame to the correct shape. Effort now will pay off when it comes time for the final fitting.
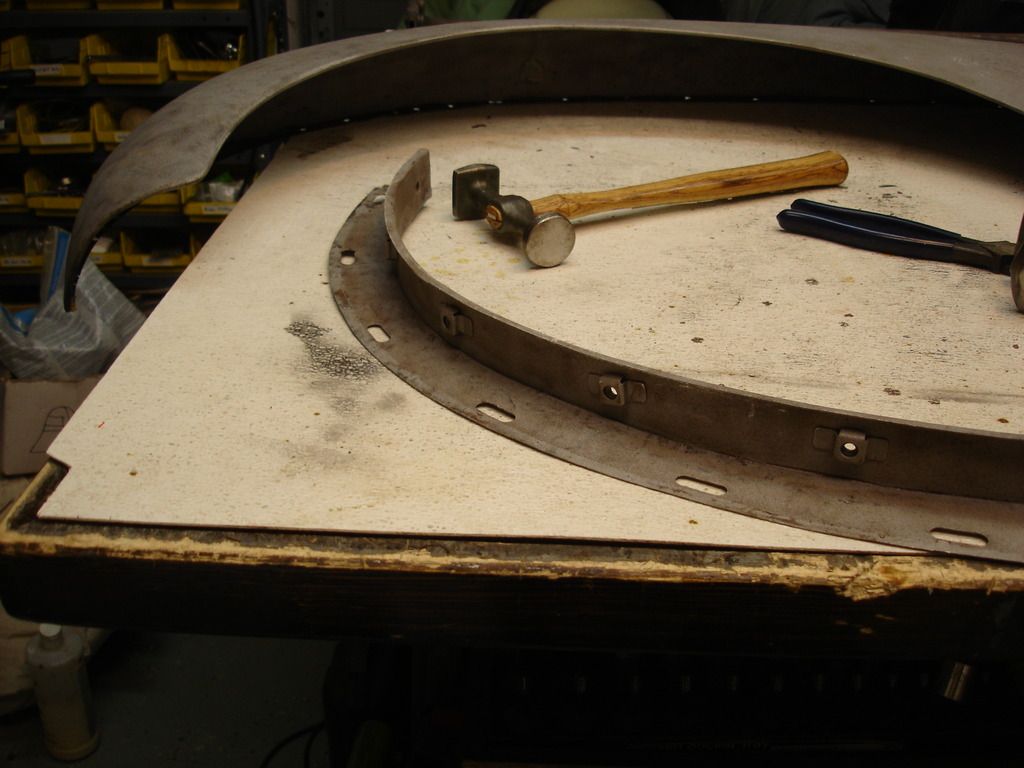
After a few hours I got the frames to not only match the skin and apron, but also to match each other.

Here I ran into some issues with the vertical frame. It could not be bowed enough to match the apron and wing, so I had to use both heat to stretch some areas, and ultimately had to slice part of it to blend the correct curve. I assume this is due to the fact it was so mangled, some areas stretched out of shape. Later this will come back to bite me...
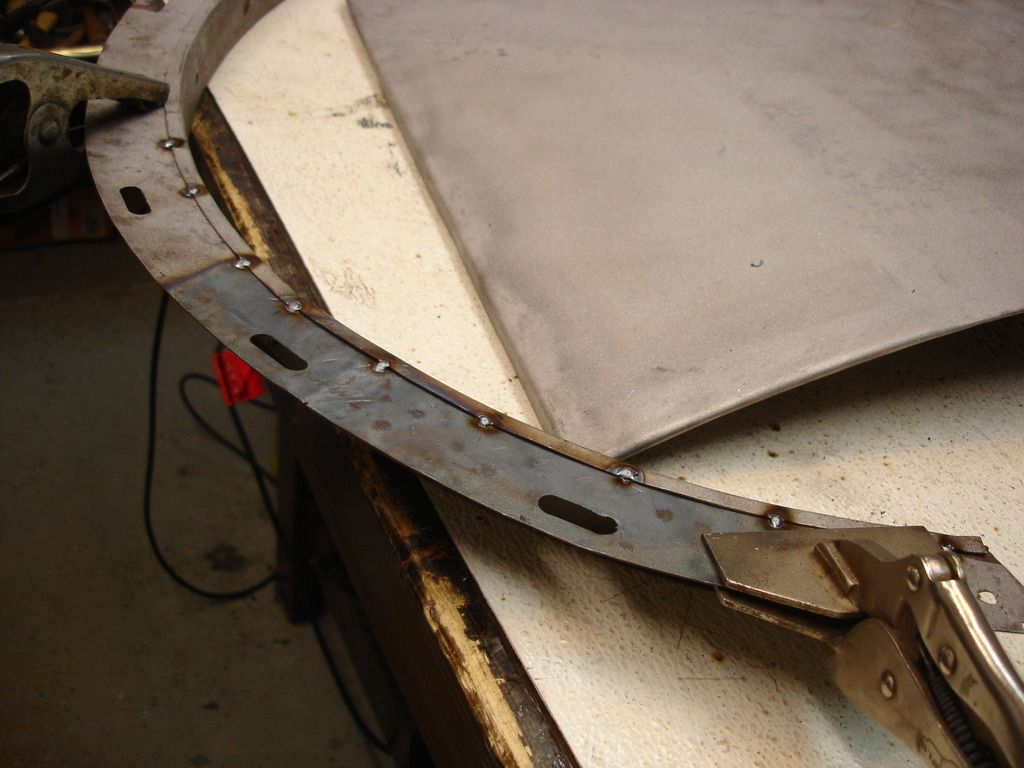
So, here the vertical and horizontal frame parts are being tacked together. These were originally spot welded, but the tacks go inside the wing and would only be seen if someone took a mirror under the wing to look.
Here I am doing some final rounding with a cup-shaped dolly before tacking the skin back onto the frame.
For areas that need greater rounding than the cupp dolly can do, I revert to the open centered dolly I showed you above. Note that I could not get the large hammer head into the tight corner, so I am using a chisel shaped hammer to reach into the tight edge.
Farther from the edge of the skin, I had to use another technique. The panel has a gentle compound curve (curves in both directions, so I am using a rounded dolly AS a hammer. I still use another dolly as a backer. This mainly shows that you have many options available to work the many curves you are confronted with.
I'll be spreading this weeks update over a few days. Still focused on the left wing. I've made progress, but then got kicked in the @$$ at the end. Working on a hand built car has no limit to the issues that present themselves. But, here goes the start...

As I left off, the left wing has been patched, but is still just a bare skin with no framework. I started by sand blasting the skin. It looks decent in the pic above, but I still have a whole lotta hammer work to do. Like I said earlier, the more you work on a panel, the more you find to work on. It's close at this point, though.

This is the inner framework. I also separated it into the basic components, and then chose the best of the 2 wings to re-assemble. If you remember, this frame was badly mangled in a prior accident, so this is after working out the wrinkles.

Quick tip, if you need to add bow, or lift a section of a flat panel, use the hammer and dolly like shown. the dolly allows you to use relatively light taps to gradually work the metal upward.

Likewise, reverse the sides of the hammer and dolly, and you can remove some of the bow gradually. Of course, the question comes up as to how to know what bow is needed in this frame...


For that, I had to pull the front apron out of the shed to match it to the front of the wing. I worked to get both the skin and the frame to the correct shape. Effort now will pay off when it comes time for the final fitting.


After a few hours I got the frames to not only match the skin and apron, but also to match each other.

Here I ran into some issues with the vertical frame. It could not be bowed enough to match the apron and wing, so I had to use both heat to stretch some areas, and ultimately had to slice part of it to blend the correct curve. I assume this is due to the fact it was so mangled, some areas stretched out of shape. Later this will come back to bite me...

So, here the vertical and horizontal frame parts are being tacked together. These were originally spot welded, but the tacks go inside the wing and would only be seen if someone took a mirror under the wing to look.

Here I am doing some final rounding with a cup-shaped dolly before tacking the skin back onto the frame.


For areas that need greater rounding than the cupp dolly can do, I revert to the open centered dolly I showed you above. Note that I could not get the large hammer head into the tight corner, so I am using a chisel shaped hammer to reach into the tight edge.

Farther from the edge of the skin, I had to use another technique. The panel has a gentle compound curve (curves in both directions, so I am using a rounded dolly AS a hammer. I still use another dolly as a backer. This mainly shows that you have many options available to work the many curves you are confronted with.
OP
CJD
Yoda
Online

Time to put the frames back into the skin. Of course all the edges of both get a coat of primer ahead of time. I hate welding through this stuff, but it adds a lot to rust prevention, so it's gotta be done in my book.

Here I'm working my way along the skin, hole welding through the previously drilled out spot welds. This shows, so hole welding is the appropriate technique.


Here I once again fit the wing to the front apron to assure the fit is still true. This time I am using bolts. They all go in easily by hand...awesome compared to the way they came out!
Note that I am marking the end of the apron where it lines up on the wing. Later I will have to check the fit of the wing to the bonnet...so I will need to know where the bonnet starts. One of the many pains of trying to fit parts without actually mounting them on the car!?!

Now for the rear frame that holds the wing to the A-post. Once again, primed where needed.


I checked the rear frame to the a-post, to ensure it's the right shape to bolt into place later.

Here, the rear frame is in place, and I am flattening the lip of the wing skin back down to hold it.

And, tack welding in the same locations I cut the factory tacks off.


I also pulled the left door out of the shed to make sure the gaps between the door and wing, and the shapes, all match up. I had to spend a few hours getting them where I wanted them. But this job is MUCH easier on the bench than it was with the TR3 when working while sitting on the hard concrete! When my back isn't aching, I tend to spend more time to get it right. In this case the wing and door can fit closely enough that a feeler gage can't be passed between them. I think that may be in the definition of anal.

And, another fit-check to make sure the angles of the door and wing will be correct. I mentioned earlier that my upper wing frame came back to bite me. This is when that bite took its tole. I am still not 100% sure what is off, but the holes in the wing frame that hold the wing to the inner wing on the tub are off. That said, I at first thought it was that I had welded the frame on wrong...but I have checked and quadruple checked. On the outside, I may have missed the location of the frame to the wing skin by 1/4"...well within the slop allowed by the oversized bolt holes. The holes in reality are off over 1". Bummer!
After a week of contemplating the issue...I have to assume the wing and bonnet are "off" from the previous accident damage to that area of the car. The wing and apron fit beautifully, but the holes for the inner wing are just off. I even compared them to the right wing, and the holes match up at the back, but do not at the front.
This will have to be dealt with, but...I will ponder the best way to tackle it for a few more days. In the mean time...
...at this point I have taken care of all the original parts that compose the wing, at least those that were salvageable. If you remember, the lower frame is too far gone to salvage. So, the next step is to fabricate the lower wing frame bracket from scratch...
OP
CJD
Yoda
Online

I collected my tools to create a new lower wing frame bracket. The metal is from the upper part of the wing that I did not use becasue it had been patched and fiberglassed. The original bracket is on top. Here we go...

Cut to approximate shape.

Beveled at the front and notched where needed.

Here you can see there is a lip pressed into the metal where it meets the wing.

This gets duplicated with a $40 beveling tool from Northern. I presses bevels with one side, and punches holes with the other side. The holes will be needed later.

And this is where we are. Note that at the notch, the bevel changes from lower to upper. The front of the bracket fits UNDER the wing lip...the rear of the bracket fits ABOVE the wing lip.

Like so.

After a quick measurement off my TR3 for insurance, I used the vice to bend the angle into the bracket. The small holes are pilot holes for the mounting bolts and water drain holes.

The holes are drilled to size, and I used the cheapo tool from above to punch holes that I can hole weld through to attach the bracket to the wing skin.


Like so.


The wing is back together...for the time being, I'm afraid. I will have to break the upper frame back off to deal with the hole alignment issue. Since the holes vary with how far they are off, I will not be able to just break the frame off and re-weld it back in alignment. I may end up having to cut and piece the frame back on. TBD...
M_Pied_Lourd
Darth Vader
Offline
Hi john,
Excellent Job. Was just working on my passenger side front fender last night....it is in very bad shape and needs serious repairs as well. Thanks for the pics. They will help me tremendously.
Cheers
Tush
Excellent Job. Was just working on my passenger side front fender last night....it is in very bad shape and needs serious repairs as well. Thanks for the pics. They will help me tremendously.
Cheers
Tush
OP
CJD
Yoda
Online
Thanks, Mike!
Tush, I need to catch up on your Utube videos. I assume this is your second TR3 that you're working on?
I pulled the right wing out to compare and see where the mounting holes were off. The right wing is in just as bad shape as the 2 lefts I've been working on. I'm starting to think these cars were intended to vaporize into FeO at the end of their design life. Still waiting to catch a break on just a single panel...but I need to give up on that thought!
M_Pied_Lourd
Darth Vader
Offline
Hi John,
Yes, this is the 59 TR3A.
Word of the night was "Ugly"
https://www.youtube.com/watch?v=DQFAQsXo1Ug
Cheers
Tush
Yes, this is the 59 TR3A.
Word of the night was "Ugly"
https://www.youtube.com/watch?v=DQFAQsXo1Ug
Cheers
Tush
M_Pied_Lourd
Darth Vader
Offline
Your pictures are definitely going to help me rebuild mine especially your work on that bottom mounting flange. Both mine are non existent. There was just a piece of sheet metal bent down and then it was brazed to the sill...I had to grind it just to get the fender off the car. The apron had also been brazed to both fenders at the lowest bolt hole locations.....
I'm lucky I have the 60 in the garage to use as a bit of a template...
Cheers
Tush
I'm lucky I have the 60 in the garage to use as a bit of a template...
Cheers
Tush
Silverghost
Yoda
Online
OMG...your fender definitely wins the "ugly" prize this week! We have to be crazy trying to salvage these old girls...
Tush's YouTube channel is great. Regular viewer.
") Those Frankenfenders are going to be a handful.
Those Frankenfenders are going to be a handful.M_Pied_Lourd
Darth Vader
Offline
Frankenfenders
John, I have a question for you. I'm trying to remove that bracket on the rear of the fender that bolts it to the A post. I've ground of the tack welds on the edges. I'm having a heck of a time to bend that door skin back enough to release the bracket. Any tips to remove that? I've started at the bottom and am working my way to the top so far without much success so I thought I'd stop and ask.
Cheers
Tush
M_Pied_Lourd
Darth Vader
Offline
Well..I managed to get the bracket out using a small cold chisel and a small hammer and was able to go from the bottom up to about 3/4 of the way from the top without doing too much damage. I was able to wiggle the bracket out from underneath the top 1/4 piece ( just hope I can get it back in). I would still be interested though if there is an easier way.
Cheers
Tush
Cheers
Tush
OP
CJD
Yoda
Online
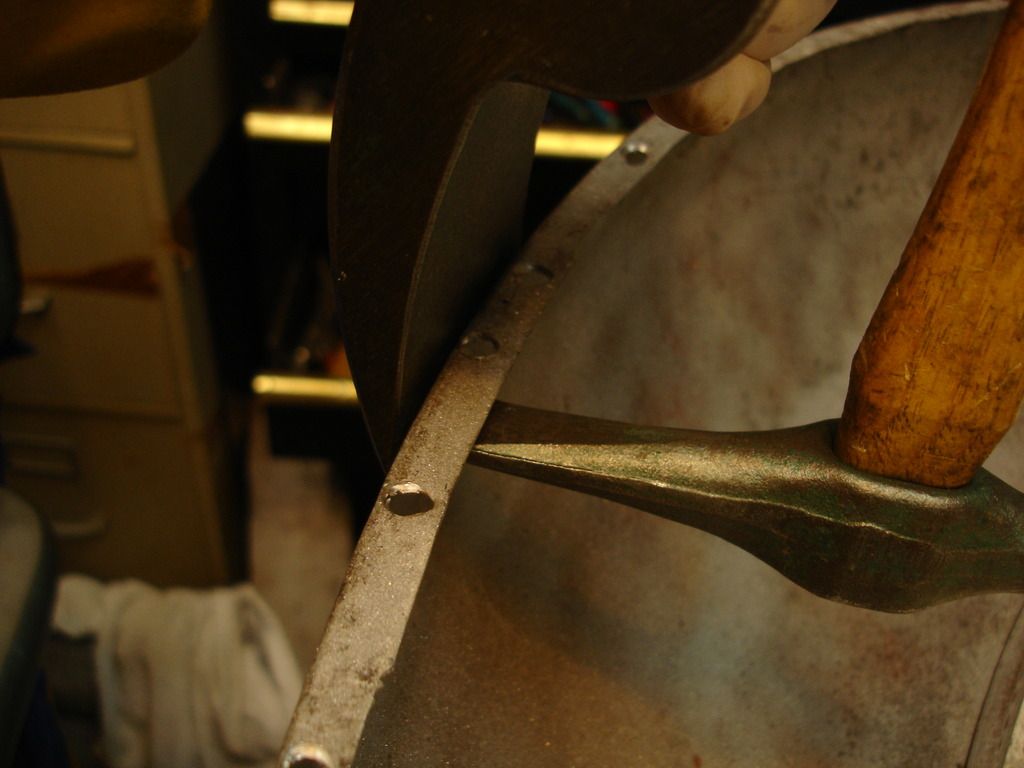
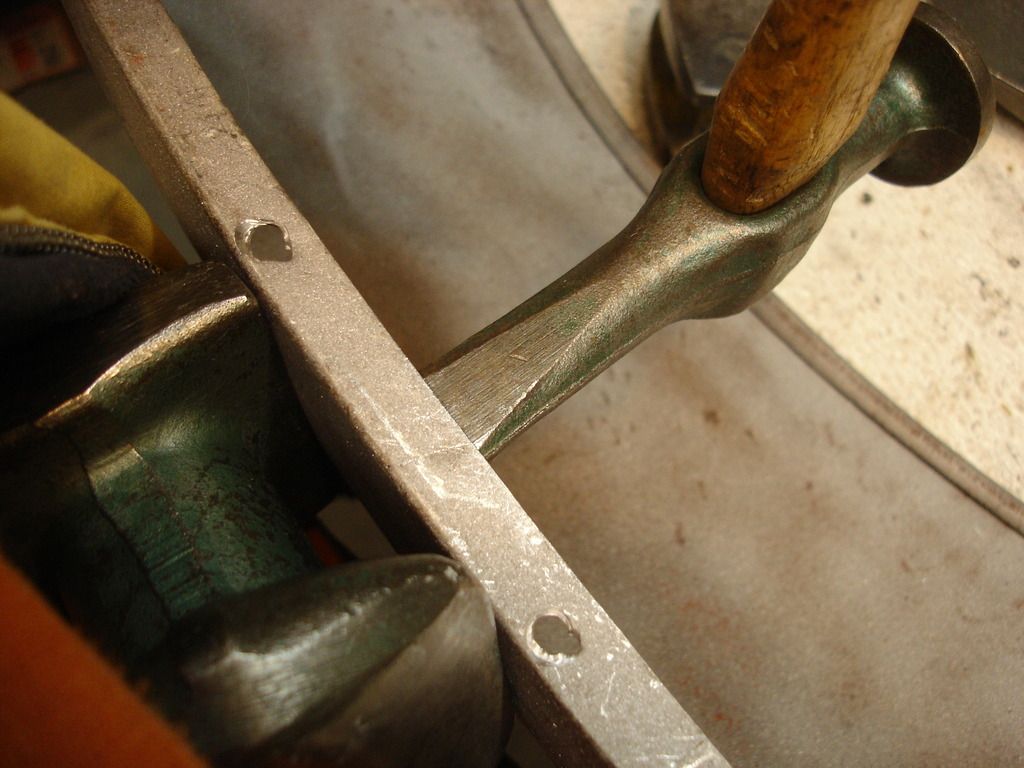
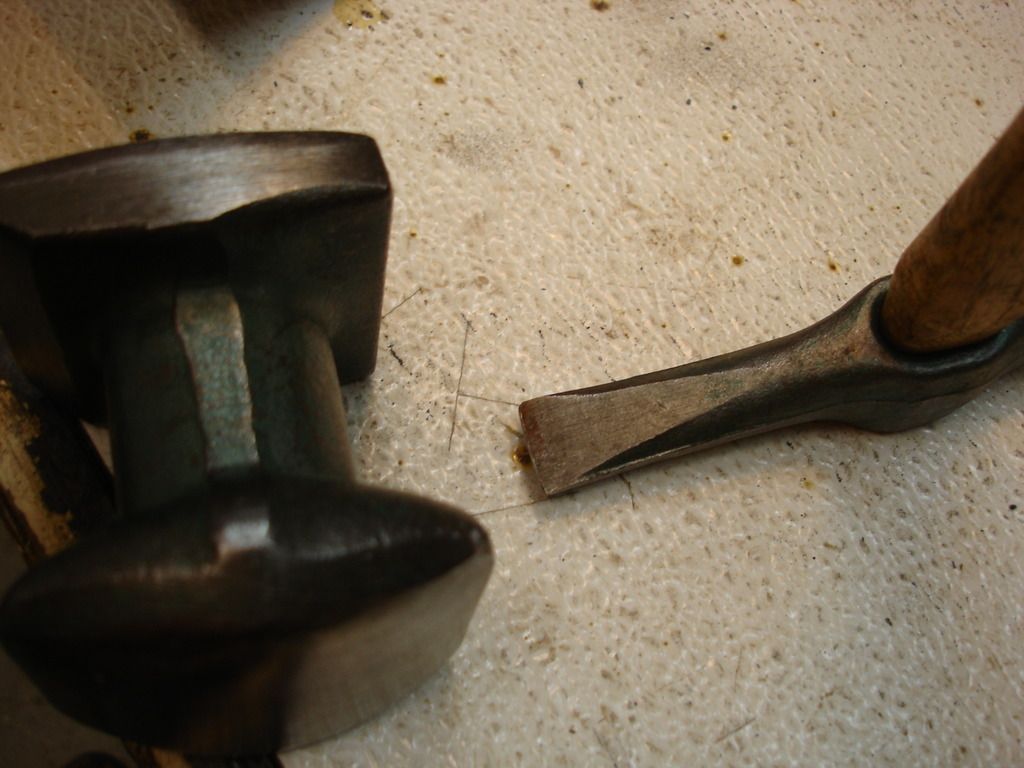
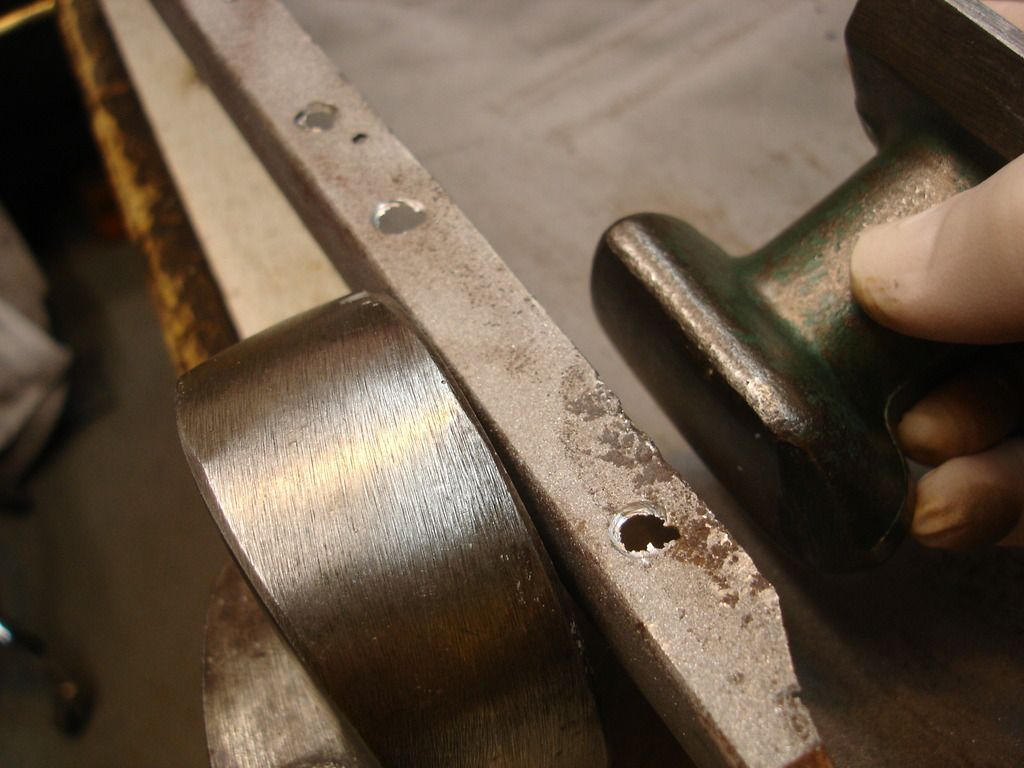
I simply tapped it backwards using the claw side of a claw hammer in the picture above. I did the tapping as close to the base of the bracket as I could to keep from bending it too much. I didn't have to tap too hard, and I just worked it off from one end to the other. It sounds like the chisel is accomplishing the same thing for you. I didn't even try to open up the crimped edge until after the bracket came out...as there isn't anything to pry against. The bracket is just too flimsy.
M_Pied_Lourd
Darth Vader
Offline
Thanks John,
You are right, the bracket is flimsy, you cant pry against it and it gets in the way so that you can't get a good angle on the rolled edge of the door skin. My bracket wouldn't budge until I peeled back the door skin.
Cheers
Tush
You are right, the bracket is flimsy, you cant pry against it and it gets in the way so that you can't get a good angle on the rolled edge of the door skin. My bracket wouldn't budge until I peeled back the door skin.
Cheers
Tush
OP
CJD
Yoda
Online
Week 17
This is week 3 of working on the left wing. Holidays and cold weather slowed me down, but I managed to get some done. Tush, I am in awe how you can work with the temp in the garage in 30's! I just go out and make an excuse for waiting until the temps come up. Can't bring myself to work on metal when it's that cold.
Anyway, when I left off, the left wing was finished...except I had an issue with the bolt holes not lining up with the corresponding holes in the inner wing. The wing seems about 1" shorter than it should be, yet it matches perfectly with the front apron. If I aligned the holes near the scuttle, then the holes at the front were off. If I aligned the holes at the front, then the scuttle holes were off.
I used the original tub AND the donor tub to compare, and the 2 tubs both said the fault was in the wing, not the tubs. It's highly unlikely that both tubs have the same damage from accidents, so I will have to alter the flange around the wing to match the inner wings.
OP
CJD
Yoda
Online

This is the wing sitting back on the work bench. The outside is down, and the mounting flange is comprised of 2 parts. The one that sits vertically is seen in the middle, and the upper flange is the horizontal flange that bolts to the inner wing. The middle, vertical flange sets the curvature of the upper edge of the outer wing, and it is perfect. I do not want to alter it. But, as you can see by the pen marks, the horizontal flange has the holes off, and each by a slightly different amount.
To fix this mess, I will have to break the horizontal flange off, cut it, splice in patches to lengthen the spacing between the holes, and then tack it back in place.

This is the result of the work to break the flange off. It sounds simple, but remember that the welds were towards the wing skin, so you are working in limited space and with a difficult angle of sight. It took a couple hours, but finally came off.

First, the flange gets cut where it is needed to increase the spacing between the holes.

By holding up the flange, I gradually cut and patch to get the holes to line up where they need to.

Near the front, the holes change to caged nuts. You can see the splice to the right of this cage where I had to weld in a 1/4" splice. It's a real pain dealing with patches that small.

Once extended and patched back up, it's time to put the flange back on. This pic shows the problem with that. To prevent the weld tacks from showing on the top when the bonnet is up, I have to do the tacks on the back/underside. My fat head doesn't fit in that tight space...especially with a welding helmet on.

Here is the solution. I had to hold a mirror with my left hand, the welder with my right, and tack the flange while looking at the mirror...like a dentist. Sound like fun? Not so much. But, I did get the flange tacked back on, and the welds are not at all noticeable.


Here the flange is back on, and the holes line up perfectly.


The next issue...the flange hangs down too far at the front. This is an easy one. I just trimmed the extra off.

This is a pic of the original flange that was on the wing skin I am using. You can see that the vertical flange part is stretched a whole lot compared to the horizontal flange. I have to assume that my alignment issue was caused by the body work that resulted in the flange stretching like this. No matter...it's fixed right this time.


And...once again...the left front wing is finished. Funny, much like the bonnet, I spent the last week on it, and it looks just like it did last week. The thankless job of body work! Everyone notices bad body work, but nobody can tell how many hours went into getting body work right. In the last pic you can see the 2 spots on the flange that took up all the time fixing.

My last project this week was to remove the usable cages and nuts from the spare wing flange before I tossed it. These will, no doubt, come in handy later...
M_Pied_Lourd
Darth Vader
Offline
I can certainly appreciate the amount of time and effort to make that right John. Excellent work and documentation.
Cheers
Tush
Cheers
Tush
SteveBones
Jedi Trainee
Offline
Very impressive work. I have done some body work…..mostly metal shaping on my 3A. At some point in the future I will need to take on the front fenders and will need to fix/repair many of the issues you are doing now. Thanks for the detailed documentation and detail. All the body work time and energy invested will very much pay off in the end. Though I have said it previously, I wanted to say again how much I appreciate and enjoy all the info you are sharing.
Thanks
Thanks