• Hi Guest!
    You can help ensure that British Car Forum (BCF) continues to provide a great place to engage in the British car hobby! If you find BCF a beneficial community, please consider supporting our efforts with a subscription.

    There are some perks with a member upgrade!
    **Upgrade Now**
    (PS: Subscribers don't see this gawd-aweful banner
Tips
Tips

TR2/3/3A 593A Ground Up - we will now join in progress

I have always installed these snaps the other way 'round, i.e. with the black ring on the outside and the silver piece on the inside -- no hole and nearly invisible that way.

Me too. But I also have had trouble with the snaps not holding and Geo's method of using a spacer under the male side is a great idea.
 
I have always installed these snaps the other way 'round, i.e. with the black ring on the outside and the silver piece on the inside -- no hole and nearly invisible that way.

Hmm...never thought of that. Oh well, they don't show but good to keep in mind for the next one...
 
Occasional seat....

8258942682_de96708ca4_z.jpg


Keep the old wood base until you make up a pattern with new plywood. Screw inserts available from Ace Hardware...

8257874431_36f1358642_z.jpg


8258942318_a044bae499_z.jpg


The Skinner kit for this piece was as easy as anything. Leather cover, all sewn, padding included. Basically lay on the plywood, staple and go....

8258942100_00b528626a_z.jpg


8257873919_d310bdeba2_z.jpg


8257873869_8c60267627_z.jpg


Next up - steering wheel and horn/signal head install....
 
I can't believe it's been 6 months since I've posted to this thread. A few new pix:

Obvious tip shown in this pic: Be sure you have the steering wheel on before completing the wiring threading - the nut does no good where it is at this stage. Ask me how I know :rolleye:.

9092716081_ede5ba71ed_b.jpg


9092715975_0164919d7a_b.jpg


Obvious tip here: If it doesn't all pull down through the stator tube, cut off a connector and try again. Thanks to Mark Macy on this one. Tip #2 - use heavier pull wire - mine broke.

9094937264_51d8a5fd26_b.jpg


Looking up into the inside of the rear fender. Note the small L bracket just to the right of the drain tube. There have been other posts on exactly where this piece goes.

9094949842_05a8ac1950_b.jpg


I lucked out a few years ago and found real NOS pieces for the fender guards. The fit was very good. I've read lots of posts that the repro's of these pieces are a problem to fit and require a lot of fiddling.

9092728495_d62dd46123_b.jpg


The fender trim strip clips are a pain to stay in place without a slight amount of persuasion.

9094948400_50be0c9251_b.jpg


I like the reflection in the background of my '65 911 in the chrome deflectors here. Totally accidental.

9094948680_1018d8ecdc_b.jpg


9094949354_05698fb52e_b.jpg


Some more NOS parts from the same clear out. I was in the right place at the right time. Thanks to former So Cal TR dealer from waaaay back - Albert Roth.

9092727413_2a6dd7af0a_b.jpg


Install the rubber trunk seal after bolting down the fenders. Otherwise to get the screwdriver on the pan heads in there you end up having to pull it out, spend tediouis amounts of time removing the glue, and then having to re-install it. Duuhh.

9094949592_af7dfe5a29_b.jpg
 
Bruce...

As usual, your posts are extremely helpful. I'm still indebted to you for sending a number of photos to me several months ago. On my TR-3A the body is back on the frame and in my shop where I can be "hands on" on a daily basis now. I find myself consulting your photos more often than any other resource as I get all these parts back in place.

Rick...
 
Thanks for the kind words Rick. Yes, getting the body back on the frame is a real psychological turning point - kind'a like the moment of conception - a car is born!
 
Bruce great job, but I have to question the tail light being all NOS. I know your car is later than mine but no Phillips screws on my car. Can you post a picture of how you installed the trunk seal in the corners? Thanks
 
Bruce great job, but I have to question the tail light being all NOS. I know your car is later than mine but no Phillips screws on my car. Can you post a picture of how you installed the trunk seal in the corners? Thanks

OK will grab a pic over the weekend on the trunk seal corners. They are glued back in but I know the detail you are looking for.

As for the tail lights - I actually had 2 of them in the box shown. They both came as shown and I actually kept and put the folded down box in the cars record book as I had a feeling this was unusual to see a genuine original box. But, were they made in the '60's, 70's, 80's? Who knows? I'm not building my car for concurs competition so I don't really care one way or the other, and it's easy enough to swap out a screw, but I felt the boxes were rare enough in their own right and had historic value.

I had 3 old tail light bases in my various parts boxes when I got the car. There were some subtle differences between the 3 of them themselves, and the tail lights in the Lucas boxes. I would be glad to take a photo to show this. But I am very sure the ones I used are very old new stock and they were from an original Triumph dealer - a guy named Albert Roth from CA who was active back in the day - '60's and '70's. He is elderly today and hadn't been active in the hobby for some time. He was clearing out his remaining few parts at the time. I grabbed a bunch of stuff from him - a lot of stuff packed in boxes similar to as shown.

My 2 cents is this shows that perhaps the factory and suppliers like Lucas may have made small design changes along the way, switched suppliers, changed screws, etc. I know when it came time to restore my 1/4 x 28 bolts for the front fenders I documented something like 8 different bolt head types/markings, so how can anyone, 50 years later, really say what the correct bolt are for say a front fender versus a transmission tunnel or wherever on the car? We will never really know for sure, because we weren't there - we can only piece back together as best we can with what we have. We only have 1 or 2 original cars with original owners as reference points, which are invaluable of course, but even with that who's to say TR didn't change a fitting or bolt 20 cars later on the line? It's an invaluable reference but still a single data point. All these years later these details become the basis of great debate amongst enthusiasts like us.

Which, is all part of the fun of the hobby isn't it? :friendly_wink:
 
Trunk seal corners as requested. I cut a bit of the inside away to turn the corner.

9121813242_e49e38f8d1_c.jpg


9119586035_615f3a74b1_c.jpg


Also the tail light lenses I had. The one on the right is that new one that was in the lucas box - I cannot see any difference to the used ones that came in my parts boxes. Markings are identical but slightly different size (can't see in photo due to flash).

9121841966_a262b7da48_c.jpg
 
Bruce thank you for the trunk seal pictures. As for the lights I'm sure there were some variations because they went on so many different cars and years produced.
 
Bruce...

This is a reply to your post #72 in your "ground up" thread. The second photo down shows your dash and the cap rail. I've been browsing the photos you sent me and came up with several in that sequence. I'm trying to decide what type of vinyl to use in covering my dash, the door panels, all of the cap rails, etc. I've got some samples from a shop down in Asheville that sells the material by the yard but haven't yet made up my mind. One of them is quite pliable and would be easy to work around all of the compound curves.

It also looks like you used some padding on the quarter panels and doors. What thickness did you use? I've seen some that are really "puffy" and that didn't appeal to me. Yours look good though. Did you pad under the vinyl over the wheel wells?

My question to you is, what source did you use for the material on the dash and the cap rail. Are they the same material? From the stitching around the gap for the steering column I'm wondering if that piece came from Moss or one of the other suppliers as a kit. I planned on going all black without the piping, but after looking at your photos again I'm having second thoughts about maybe going the white on black route.

Decisions... decisions... <G>

Rick...
 
Hi Rick - glad the pix are helping.

My particular car was noted on the British Heritage sheet as having come from the factory with black "leather interior" when built in '59 and so I decided to take extra care to match the original as close as possible for this step. I researched this a fair bit. My conclusion was what that basically meant was the seats were leather, as well as the cap rail all around the cockpit, not anything else. (of course one can do what one wants, and there is always debate about stuff like this - I was only trying to get this part of my restoration done as original, according to my research.)

The dash board and the rest of the interior is vinyl. I really feel the interior trim is a critical part of the restoration, and I was not going to buy on price, but rather research it to get it as close to original as possible. After consulting with Mark Macy , who is a national concurs judge (good enough for me) I decided to use Jonathon Skinner in the UK, and bought all the interior components from them. Not to start a battle here, as I know there is a low cost eBay seller a lot of guys use, but Mark was really against seat kits that use "foam" (see para 2) instead of the correct springs and the horsehair). I also was persuaded to have Mark trim out my seats for a grand total of $800 including blasting, repairing, and painting the original steel shells, trimming out the seats, and return freight. Glad I did - the results are spectacular (no creases or folds), and my total time involved was an hour or so taking the old seats to a "We-Pack-It" store. Anyway... the entire interior - the correct wool carpets (also original to a s/n 31xxx car - later ones switched to nylon), and all interior pieces, arrived in 2 very large boxes after I wrote Skinner a check for $2000.00 which included shipping.

The stitching around the steering column pocket was pre-sewn into the dash piece by Skinner - it fit perfect - just lay it on the dash and glue it down. The cockpit trim pieces were supplied as pre-cut sheets of leather that had to be fitted and glued to the steel u-shaped pieces (the elbow-rest pieces on top of the door are especially tricky because the leather is heavier than the vinyl, making the chrome button that goes in the end a tight fit).

The door panels came pre-trimmed from Skinner and include the very light foam padding as well as the backer board. I guess your reference to them was from this posting here. I've only test fitted them at this time, and still haven't finished mounting them yet - this will come after I get the front fenders and nose completed shortly. But yes, Skinner, as well as Lou Metalko (post #3 in the door panel posting) and Mark Macy all talk about the downside of having too thick of an under pad. I'm quite certain the Skinner pads are correct in this regard.

Other pieces like the wool carpet and the vinyl for the dash and rear inner wheel wells had to be fitted (I followed Mark's great guide for that rear inner fenders and it turned out well).

So that's it. Again, no knock on the domestic suppliers. It's just the route I chose -(I guess I do kinda' believe in "old world craftsmanship"). I found Skinner to be very friendly and knowledgeable if not a bit long on lead time - I get the sense they "make to order" and patience is to be expected. Anyway, when I added it all up, in the end it didn't seem to be any extra cost. And as it turned out the components arrived long before I was ready for them.

Hope this helps, B
 
Last edited:
Bruce...

First, I'm curious about how you found out about the history of your particular TR? I recall seeing something about "Heritage" for finding out some basic information. Are there other resources as well?

>> I really feel the interior trim is a critical part of the restoration <<

That's obvious from the series of photos and dialog that you've posted. I've been through your scenario a couple of times in preparation for my installation. I already have a carpet kit that was purchased from Moss by the first guy that was working on my car. He was good at finding good deals when the sales popped up. It's in good shape so I'm going to go with it. The seats are also in excellent shape. They were replaced by my brother in law when he had the car for awhile. They are not the same as the originals, but they will work fine and since my goal now is to get the car on the road asap. I'll save any upgrades for a future winter project. The links to Mark Macy were quite helpful. I might just consider going that route should I decide to upgrade.

>> The cockpit trim pieces were supplied as pre-cut sheets of leather that had to be fitted and glued to the steel u-shaped pieces <<

That brings up another question. I will be doing the covering of the caps around the rails. In preparation I've been trying to remove as much of the old glue as possible. 3M Adhesive Remover has worked pretty good on the light layers of glue on the exterior surfaces after the old vinyl was removed. However, it's been a real struggle attacking the heavier layers on the inside of the pieces where the tag ends were glued. That old glue just doesn't want to give in easily. I know I need to get all the glue off the exterior surfaces so they will be perfectly smooth, but I've considered leaving some of the hard to remove glue on the inside of the caps. I'm going to do some testing, but I'm thinking that a new layer of contact glue over the old ought to work fine. Any thoughts on this?

>> Hope this helps, B <<

I was spending so much time rooting through your photos and printing copies when I got home from my shop I loaded them up on a laptop and started carrying them with me. Yah, I'd say they have helped. <G>

Rick...
 
Hi Rick - the history came from various sources. The BMH Heritage sheet provided part of it (see below) confirming the color, the leather interior, the wire wheels, and overdrive. The TRF carpet offerings made note that 3A's prior to 35351 had the wool carpet. (That hurt $$ a bit, as the wool was pretty much double the price of the nylon, ouch). That was also confirmed in Bill Piggott's book page 42 "Original Triumph TR2, 3, 3A which used the same cutoff point. Finally, I spoke with Skinner to find out what "leather interior" meant and he confirmed it was just the seats and the cappings, not the rest, although some customers do order it to trim out the entire interior in leather.

10649018595_190d161869_z.jpg


I guess if like you I had usable parts provided by the previous owner I would have gone with them, but I had nothing in this area, so it was just as easy to source the parts to match the original car as anything else. As for the old glue, yes I recall it was a bear. I spent some time with a wire brush on a drill to remove the worst of it, and some on the underside I just left in place as it didn't affect the fit. The leather is also a bit heavier and I think it may hide a few surface irregularities better than the vinyl. The downside was it was also a bit more difficult to work with on the real tight turns.

A few closeup pix of the caps...

10649826806_6f8596bed5_c.jpg


10649796575_50548bb587_c.jpg


10649826286_15b0dd167c_c.jpg


10649795415_220a74ee5c_c.jpg


10649794495_43b072b86c_c.jpg
 
While I'm at it posting pix, a few of the front fenders and nose (finally) going on the car...and of course as luck would have it in spite of all the care I took I dented one of the chrome fender bead strips, so the RF fender has to be loosened up and install a new bead strip. 2 steps forward, 1 back....

10649819464_3d493ba68f_b.jpg


10649820164_565d7596e8_b.jpg


10649798675_e527385dec_b.jpg


10649821274_ddee840070_b.jpg
 
Bruce the car is looking fantastic, your doing a great job.
 
Bruce...

>> As for the old glue, yes I recall it was a bear. I spent some time with a wire brush on a drill to remove the worst of it, and some on the underside I just left in place as it didn't affect the fit. The leather is also a bit heavier and I think it may hide a few surface irregularities better than the vinyl. <<

I've tried everything I can think of on the old glue on mine. On the steel parts I even gave it a shot with a sand blaster using the coal slag grit. Didn't seem to phase the glue at all. It just bounced off, but it did clean off the bare spots on the steel very nicely. Like you, I think I'm going to just let it be on the inner surfaces and glue over it.

Once again, excellent photos. I can easily see the difference in the thickness of the leather on the caps. The last photo under the corner of the dash cap rail illustrates the problem of the thicker material gathering up on the inside. The leather on the quarter rail cap came out very nice. Must have been a challenge with those compound curves.

At the moment, since I'm really anxious to get this car back on the road asap, and since I have seats that are in good shape, I think I'm going to opt for the vinyl on the caps, dash and wheel wells. My local guy has a product with a very good grain and that is flexible enough to make the job fairly easy. Besides that it's a very good match to the new top I have here.

Rick...
 
Pat,
Mine was binding a little to start, I kept working it with lithium spray and it worked loose. I think all the paint made it tight. I also sealed the box from the footwell side so the box does not leak into the inside.
Jerry
 
The best solvent I've found for old glue is laquer thinner, but it still takes a whole lotta elbow grease and most paint comes off with it too.
 
John...

I spent some more time on mine with 3M Adhesive Remover and that seems to be working the best for me. But your right, it does take a bunch of effort. Give me an excuse for not going to the gym. <G>

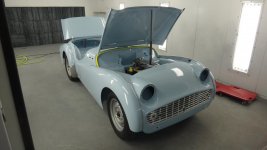
BTW, from your thumbnail it looks like yours is blue. Is it powder blue or the darker color? I opted to go with the original power blue.

DSC00641a.jpg

Rick...
 
Back
Top