• Hey Guest!
    British Car Forum has been supporting enthusiasts for over 25 years by providing a great place to share our love for British cars. You can support our efforts by upgrading your membership for less than the dues of most car clubs. There are some perks with a member upgrade!

    **Upgrade Now**
    (PS: Upgraded members don't see this banner, nor will you see the Google ads that appear on the site.)
Tips
Tips

1940 Stearman restoration (moved from Triumph forum so all can enjoy)

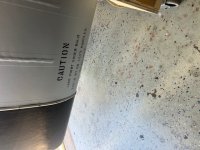
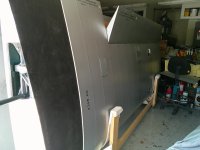
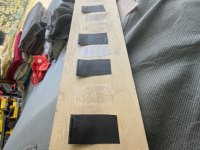
One little side project was the wing walk. The OEM spec is for a "rubberized canvas", which is not available any more. Not to mention, rubber does not survive direct sunlight very long. After sweating this for many months, I stumbled on a blanket of silicone rubber coated fiberglass cloth that welders use. It is impervious to UV light, has the exact texture pattern of rubberized canvas, and will not burn in temps up to 1800 degrees...perfect! Well, almost. Silicone is tricky to glue. So, I set up a test board using all the glues sold at Home Depot. I glued down patches, threw the board down on the garage floor and walked over it for a week. The winner? Loctite PL Marine. Best of all, it comes in a large tube, so one tube was enough for both wings. Bonus!

I apologize for the pictures being at the end of the posts. I forgot how to imbed them, but I'll work on remembering for the next posts?!?l
 

Attachments

  • image4.jpeg
    image4.jpeg
    127.7 KB · Views: 43
  • DSCF0001.JPG
    DSCF0001.JPG
    1.8 MB · Views: 43
  • image0.jpeg
    image0.jpeg
    206.7 KB · Views: 55
It is really coming along now! As always your work and attention to detail are excellent.
 
Thanks. I apologize for the pictures. I got distracted with the wrong button, so they all went at the end of the post, and in the reverse order?!? I'll do better next update.
 
We are moving right along. I started covering the fuselage 2 months ago, but the wind and cold were working against me. It finally all came together, though, and the fuselage covering is finished.
DSCF0079.JPG


DSCF0091.JPG


With that big job down...as you can tell...there is a lot of reassembly to be done. So she went back into the greenhouse for the last time. Oh, some good news. We have a hangar that already has a plane in it, and I have been squeezing the wings, tail, rudder and all the other parts into it. There is one spot that the fuselage might fit, but I had to measure it. It turns out it will fit...Bonus!! That will get the big thing out of my way when I move on to the engine work next month.

With the fuselage in the greenhouse, I started pulling all the metal panels out for installation. Now, that presented a problem. As you see, the covering in its original form is semi-gloss at best. The metal parts do not hold the Polybrush well, so they must be sprayed with a polybrush urethane 2-part paint, called Aerothane. Two years ago I had a long discussion with the polybrush folks about trying to match the aerothane (highly glossy) with the polytone (semi-glossy). They sold me a flattening agent. In theory, this was a good idea. In reality...the flattener sucks. It is not only dependent on the amount you use, but also the temperature. So...some panels were semi-gloss...nice! But...others were high gloss and still others were so flat they were rough to the touch, and every shade in between!

I bit the bullet and decided I had to re-spray all the metal panels. This hurt, but for those of you into painting, you realize it is also a blessing. Whenever you sand a part and re-spray, you reduce blemishes, and the part comes out looking even better. The only down side is that they will be glossy compared to the covering, but to some degree this is how it was back in the day...and at least all the panels will match each other!
 
One interesting part is the fire extinguisher. Normally it is mounted inside the fuselage, so the rear pilot can easily reach it in case of an in-flight flire.

DSCF0104.JPG


The cool part is that it is mounted to a door that allows it to be accessed outside the plane too, in case the ground crew needs to douse an engine fire or fuel spill.

DSCF0103.JPG


DSCF0105.JPG


Yeah...my hinges scratch when you open the door, but some things can't be helped?! The original extinguisher was a brass canister full of soda water that you pumped to spray on the fire. I had to find a modern replacement that fit the door.
 
I did a couple side projects while waiting for the weather last month. The first was the wooden spreaders, that hold the flying wires going to the wings. They are round, but must split down the middle to place them around the wires, and then they clamp back together with screws.

I started by finding some scrap spruce, and bolted them together according to the blueprints.

DSCF0081.JPG


I then worked them on the lathe to 1" diameter round.

Next, they come back apart and I used a table saw to carefully cut the slots that will take the streamlined flying wires.

DSCF0083.JPG


DSCF0084.JPG


I don't have a picture, but they finally were sprayed with silver aerothane...and were sent to the hangar for final assembly.
 
The second side project concerned the brakes. 3 years ago I restored and installed the OEM master cylinders and drum brakes. They looked great, but I could not get them to hold fluid...they would gradually leak down, even when not being used...and considering I re-sleeved the cylinders and used OEM seals. I used the OEM brakes due to my anal compulsion to "restore to factory original" on everything I fix. Even worse, when 5606 hydraulic fluid sits for a long time, it turns into a nasty, glue-like paste that sticks to everything I spent so much time cleaning.

You will remember that my Father crop dusted in these planes in the 1950's. He had a lot of stories, but none of them mentioned any problem with the brakes...until last year. I told him I had a concern that while pushing the plane around, the drums would occasionally grab unpredictably. I would have to push the plane the opposite direction to release the grab...and this concerned me. "Grabbing" could be very bad on landing a tailwheel plane!!

Dad's response was..."Son, those brakes never were any good." Oooo Kkkkk. Time to rethink these OEM brakes! He continued by telling me all the planes he flew had swapped out the master cylinders for packard auto masters, because the originals leaked so badly. Even then, the wheel cylinders leaked constantly. He would top off the brakes right before the first take-off of the morning. During the dusting, they would land on the roads, where they would re-load the hoppers from trucks and take off again. That is...until the 3rd flight, when the brakes would go flat from leaking all the fluid out! So the next re-fill would require them to go back to home field, where the runway had a steep uphill to stop the planes with no brakes.

Anyway, I bit the bullet...listened to reason (and every other Stearman owner who kept telling me), and bought a Redline brake conversion to disc brakes. This mod has been around for 40 years, and is almost considered standard practice. Your plane either has Redlines...or you will eventually learn why it should!?!
DSCF0100.JPG
 
Thanks for the update. Every time I see new posts here it makes my day. I love seeing your progress.
 
amazing! thanks for the updates. Just out of curiousity, is there any issues with using the US Navy markings? Obviously not likely to confused with current navy planes but, a more modern plane potentially could be.
 
Every time you add an update, I am just 100% impressed by the top quality work you are putting into this plane. No question (at least in my mind) this will be one of the nicest Stearman's flying. WOW.
 
amazing! thanks for the updates. Just out of curiousity, is there any issues with using the US Navy markings? Obviously not likely to confused with current navy planes but, a more modern plane potentially could be.
When you get it flying, you should take it to an airshow where the Blue Angels are flying. Maybe they will trade rides with you.
 
Every time I see that open cockpit i'm reminded of a flight my family gave me in a Tiger Moth some years ago and even though it was only 30 minutes over the City of Perth on a clear summers day, it gets very cold out there and it looks like it won't be long before you are calling for , All clear Prop.

Graham
 

Attachments

  • P1000386.JPG
    P1000386.JPG
    680.1 KB · Views: 22
Thank you all for the support! You guys made my day, as my A&P supervisor hammered me the other day. Gary is a gruff old gentleman, and I think he is hard on me so I feel like I'm getting my money's-worth from him. I sent the same pictures above, and he said the "door openings look like I used a carpet knife and the square access door dzeus fastener is cocked...plus the hinge wire is not safetied properly". If you zoom ALLLL TTHHHEEE WAYYY INN like Gary does...you'll see he is 100% right. Of course all those items are still being worked on. The worst was he commented that he can, "see I am in a hurry, getting tired and rushing the job as I get near the end." Of course, not true. He has been on chemo the last few months, and I have to remember he is often in a bad mood and means nothing personal.

John-Peter, the services have never had an issue with markings on items they auctioned off. The FAA can be a bit pickier, though. For example, the tail numbers on this plane in the navy were, "3193 N2S-1". The 3193 being the serial number for the plane, the N2 is navy talk for primary trainer, and the S-1 is the variant, namely Stearman first order. Where the FAA takes issue is the leading "N"...their position being that it will be confused with the FAA registration, which always has the leading "N" for USA registration (X for Mexico, C for Canada, G for England, etc.) Some owners simply add a "V" in front of the "N2S-1", just to make the FAA happy while retaining as close to original markings as possible. "V" is navy talk for a plane that is in the fleet.

John, that'd be a nice swap...for me!

Well, hope you guys are taking advantage of the spring weather with your Triumphs! I'll update when I get the fuselage finished and stored in a week or two...
 
This is the finished fuselage. I think the TR2 and 3 restorations prepared me for this project, as it has the same difficulties you have with any hand-built vehicle. The order you put it together makes a difference, and you often have to back up by removing some panels to make others fit!?! This weekend I will move the fuselage to the hangar for storage...and then I get to dig into the engine...woohoo!

DSCF0119.JPG


DSCF0125.JPG


DSCF0138.JPG


DSCF0134.JPG


Yes...the compasses are missing. I am using vintage compasses from 1937. I had them rebuilt, but they still leak fluid, so I am working on seals to get them air-tight. I'll keep them out until final assembly...just to make sure they are sealed before I install them again.

And, a reminder of where it started...

Stearman crash 2.jpg


b168f4bc-843c-40f5-a27f-90bf7ace11c0.jpg
 
Are you booking rides yet?
Count me in if you are.
 
Back
Top