• Hi Guest!
    You can help ensure that British Car Forum (BCF) continues to provide a great place to engage in the British car hobby! If you find BCF a beneficial community, please consider supporting our efforts with a subscription.

    There are some perks with a member upgrade!
    **Upgrade Now**
    (PS: Subscribers don't see this gawd-aweful banner
Tips
Tips

TR4/4A Your thoughts/value of this TR4

I agree -- you've done very well in getting this one.

A curious thing you may not have yet noticed is that the rubber buffer on the torque reaction gadget is the same part as the two buffers at the rear corners of the bonnet. STC weren't ones to invent new parts unnecessarily.
 
I didn't see the signs of a ground strap from the engine to the frame on the drivers side down near the engine mount. If you don't have one, it's important to get one.


Wayne

Well, it was there. It's the one thing I missed disconnecting and pulled it apart when I lifted the engine! I've put a new one on my shopping list. :stupid:
 
yes, engine pulls are a popular time to test the tensile strength of key components. ground straps, clutch lines and oil lines being among the most enjoyed.
 
A curious thing you may not have yet noticed is that the rubber buffer on the torque reaction gadget is the same part as the two buffers at the rear corners of the bonnet. STC weren't ones to invent new parts unnecessarily.

Actually, the entire arm and buffer appear to be missing from my car. I can see the bolts where I assume it was mounted. I looked in the Moss catalog but the image isn't great. Plus they don't sell the arm anyway. I guess it's one more item for the shopping list.
 
Hi all. I've started working on the engine compartment and I need some help. As you can see, a previous owner was quite drill-happy. I've done a bunch of research and I think I've figured out which ones stay and which need to be filled. I need some feedback on the following three images. I've circled the holes that I think need to stay in green and circled the ones that need to be filled in red. If you could let me know if I'm on the right track, that would really help. Thanks!

QZ6fpAp.jpg

y9w1TUd.jpg

yDCEZt7.jpg
 
Last edited:
Don't see any of the green ones that need to stay.

marv

Correct me if I'm wrong, but:

Pic 1, L to R:

- Main wiring harness
- Hood release (?)
- Brake line hold down
- Choke cable (?)
- Starter solenoid (2 vertical ones)

Pic 2:

- Fuse block

Pic 3:

- On left, 2 holes for body number tag (currently missing)
- On Right, brake line hold down


No?
 
I made an executive decision to go with my assumptions above. I'll either have to drill holes when I'm done or live with extras! :D

xCiiWNl.jpg
 
Last edited:
Very nice...I like your work
 
Just checking in. Not much to report as all I've done the last couple of weeks is sand and sand and sand and sand and sand. I am getting close to being able to lay down the first coat of primer/surfacer.

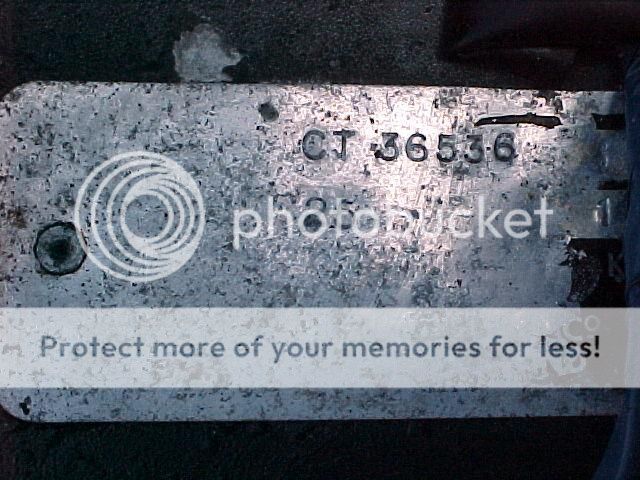
I got bored with all the sanding and took a crack at cleaning up the VIN tag. It's not perfect, but much better than what I started with. I'll do a few touchups before I reinstall it.

kTzHmij.jpg

QwL2RUH.jpg

1B3wJRA.jpg
 
Last edited:
Nice work on the tag. I'm thinking the early TR4 tags had slightly raised letters (like the TR3s) that make restoration possible.

Later tags (like mine) were just flat but for the stamping... not leaving much for a restorer to work with:

CommissionOriginal.jpg
 
Looking good! You're saving me a lot of money, because I can watch your's instead of having to buy another one to do myself. Love seeing them coming back to life. Keep em coming. Are you going back powder blue? Ya know powder blue adds about 10% more horse power!
 
Looking good! You're saving me a lot of money, because I can watch your's instead of having to buy another one to do myself. Love seeing them coming back to life. Keep em coming. Are you going back powder blue? Ya know powder blue adds about 10% more horse power!

Yes, going back to Powder Blue.

Still plugging away at it. The paint on the hood was pretty thick/cracked/nasty so I decided to take it to bare metal, no fun. In spite of all of the paint, there was not an ounce of filler on it. Bonus!

Afterward, I shot it with 2K epoxy primer.

tQjNHi4.jpg

pUU7btl.jpg
 
Last edited:
I actually painted something! I'm getting closer to actually painting the body but first I wanted to paint the dash and glovebox. You'll have to forgive me for not using the correct Triumph white paint code (whatever it is). I had some VW L82 Silver White on the shelf so I used that. It's the color used on split-window VW Bus bumpers and wheels. Close enough for the girls I date.

oAeYC97.jpg

xvwU9Vo.jpg
 
Last edited:
Set up my garage "paint booth" and painted the shell! Now we're getting somewhere!

R7uqSFx.jpg

NeluTgD.jpg

kCE1Clm.jpg
 
Last edited:
I do my own body/paint/welding/mechanical work so that's not an issue.

Very awesome restoration. Just great to see a 4 coming back like that. I really wish I knew anything about body work.

Where did you acquire the skill for paint and body work?

Years back a body man at the local dealer was explaining to me how to use filler and glazing. He said something like,"You can't learn this stuff except on the job with an expert over a period of at least 5 years--so don't start dabbling or you'll ruin your car."

Was his advice sound, now that it's 40 years later and I actually might want to learn?

I wouldn't say you have to learn from a pro (especially these days when there's a YouTube vid for anything) but it's all about experience. I have dabbled in bodywork off and on for 30 years but I'm honestly still a hack compared to a pro. But in the end, after I cut and buff this thing, I'll have a 9/10ths paint job at a 1/20th price.

The key is all the work leading up to the paint. A paint job is 95% preparation and 5% application.
 
Back
Top